Hybrid Flower Experiment in Animal Crossing
Animal Crossing: New Horizons is a video game playable on the Nintendo Switch console (or Switch Lite). It has become incredibly popular during the pandemic and I am very much late to the game (pun intended). Even though I only recently started to play (via the console plus my “large enough to make it comfortable” television screen), I found that some of the most enjoyable features for me center around growing things (e.g., flowers, fruit trees) and curating the museum. Let’s be honest, the “museum” is more of an art gallery/nature center/aquarium with fossils. I love the aquarium the most…although it’s pretty cool to see the fossils come together as well.
Crazy idea loading
After a couple weeks of playing, I had this crazy idea to try doing a science experiment with students making hybrid flowers in Animal Crossing. Then I actually put together information so we could facilitate said experiment a short while later. Since I wanted to use the minimal amount of class time, and focus on gathering data through observations in photos to create a written lab report, this was a very controlled experiment.
With my classes all taking place in the distance learning format online this year, I am always looking for a balance of engagement and content/skill practice. I am sure there are many ways you can adapt these ideas and get the students involved in more ways…including having them run their own experiments if they have a copy of the game. You can run everything as a class activity, but I would make sure parents are on board to avoid any potential issues at home.
Overview
Since I was having fun with the challenge of creating these hybrid color flowers on my own island, I figured I could gather information from the students and then plant according to their completed diagrams just using my own island - no need for them to have the game. In this version, I captured photos before class each morning and added them to a shared Google Drive folder. Spoiler alert: this also allows the kids to practice with the technology skills that I want them to apply to their own work with greater confidence and independence. In this case that means replacing a placeholder image in the slides template with their photo and identifying the day that photo was taken. For the final results they also needed to figure out an image to use and add the written response (paragraph) to the results slide.
Activity overview
Here’s what I created:
Google slides template
Included directions and placeholder images/text boxes
Slides with images for each flower type and available combinations to test…even though there are additional combinations I avoided ones that required several steps using flowers produced in a second level breeding and/or extremely low percentages (note that color is not an accurate way to breed flowers, but the genotype - the actual coded genetic makeup - is not something that can be easily determined - see the full guide by Aiteru for all the information you could possibly want on this topic!)
Added probability for creating a specified color from this simple flower guide
Students were tasked with:
selecting the flower type
choosing a hybrid color that they wanted to create
choosing one of two options for the configuration model used for planting
copying and pasting flower images into the diagram to show their model for planting in the appropriate configuration
listing all of these components in a brief data table
The initial steps took less than 15 minutes with the small class (five students) and that includes the time to introduce the project overall. Writing the lab report (on the final day), using the sentence starters and 1:1 discussions with me to check for understanding, took roughly 25 minutes (10 minutes of independent input and 15 minutes to check in and run final Grammarly checks together).
Once I had that initial information from the students, it was time to plant over the weekend. It took approximately 10 minutes to do the planting since I had all of the seeds thanks to my own stock and some help from a friend. The time lapse below shows the planting and our initial watering. I placed an object by each planted area to represent the student. This made it easy for them to identify which photos belong to them in the shared drive folder.
Data collection
Each day I checked the area in the morning and used the in-game camera feature to photograph the planted areas one by one, making sure that the unique object for each student was visible. I was able to move my character out of the way for photos. Getting the photos from the switch to my phone was a quick process after checking off all five images in the album from the Switch home screen and selecting the option to send it to a smart phone. Once the images were saved to my phone I cropped them slightly and then added them to the appropriate folder (Day 1, Day 2 etc.) on Drive using the Google Drive app. Twice during the week I gave students the last few minutes before a break to update their slides with the photos including the text box that identified which day each photo was captured. If you want to see how everything turned out, please scroll down below the “try it yourself” section to see the compilation video that includes everything from the time-lapse of planting through the photos captured on each day.
Final Logistics
This project was introduced on Friday and by the following Friday we had enough information for students to do a guided lab report. Using specific prompts and sentence starters in a Google doc (attached to the same assignment with the slides in Google classroom), students wrote up the results and conclusion in a brief paragraph. I used our individual afternoon meetings to review the lab report paragraph and do a final Grammarly check with the students to model using Grammarly premium with fidelity. They don’t always stop and think about all of the corrections that Grammarly suggests, so this is a work in progress.
Exceptions
Two students (mums and tulips) chose to continue through the weekend to see their flowers bloom, so they have eight days of photos compared to the five days for the other three planted areas. In one case, we could not officially confirm the flower color until it bloomed, although we were pretty sure it would be the color that student was going for, and there had been absolutely no new flower growth for that planted area during the first four days. The other student had a lot of growth and actually used each configuration type to try for two different colors. The second of the two colors that they were trying for appeared on the fifth day, but again they wanted to wait for it to bloom to get a final photo for their slides even though that color could be confirmed before it bloomed due to the flower type (mum).
For the sake of seeing the project through and capturing all growth for them, I took additional photos on Saturday, Sunday, and Monday morning. In our Monday afternoon session we reviewed the final three photos and their finished lab reports. The other planted areas were dug up and moved so further growth was not tracked for the remaining three planted areas past the original five day window.
Resources and credit
Many thanks to Aiteru (@aiterusawato on Twitter) for the outstanding and accessible resources on the websites linked in this section. Data used for probability comes from the Simple Flower Guide by Aiteru at this link: https://aiterusawato.github.io/satogu/acnh/flowers/simple.html
Images for the flowers also come from the same guide.
Please check out the full guide for the flower resources (https://aiterusawato.github.io/satogu/acnh/flowers/) if interested in the details of the subject.
try it yourself
Please feel free to make copies of the slides and or lab report files right from Google Drive using the force copy links below. Credit should remain for the guide and resources so Aiteru receives credit with links to the research/resources created. Please share and tag us (@aiterusawato and @msgilbertrocks on Twitter or Instagram) online if you create your own version or try this as-is with your family or class!
Make your own copy of the slides for the teacher version here and the student version here. Make your own copy of the guided lab report here.
Video compilation below includes the time lapse of planting the flowers and the progression each day (organized by individual planted area). Shoutout to the Animal Crossing group for all of your help in getting this going with a special thanks to my good buddy, Maggie (aka Mar of MarGilly) for all of her assistance with planning and daily watering.
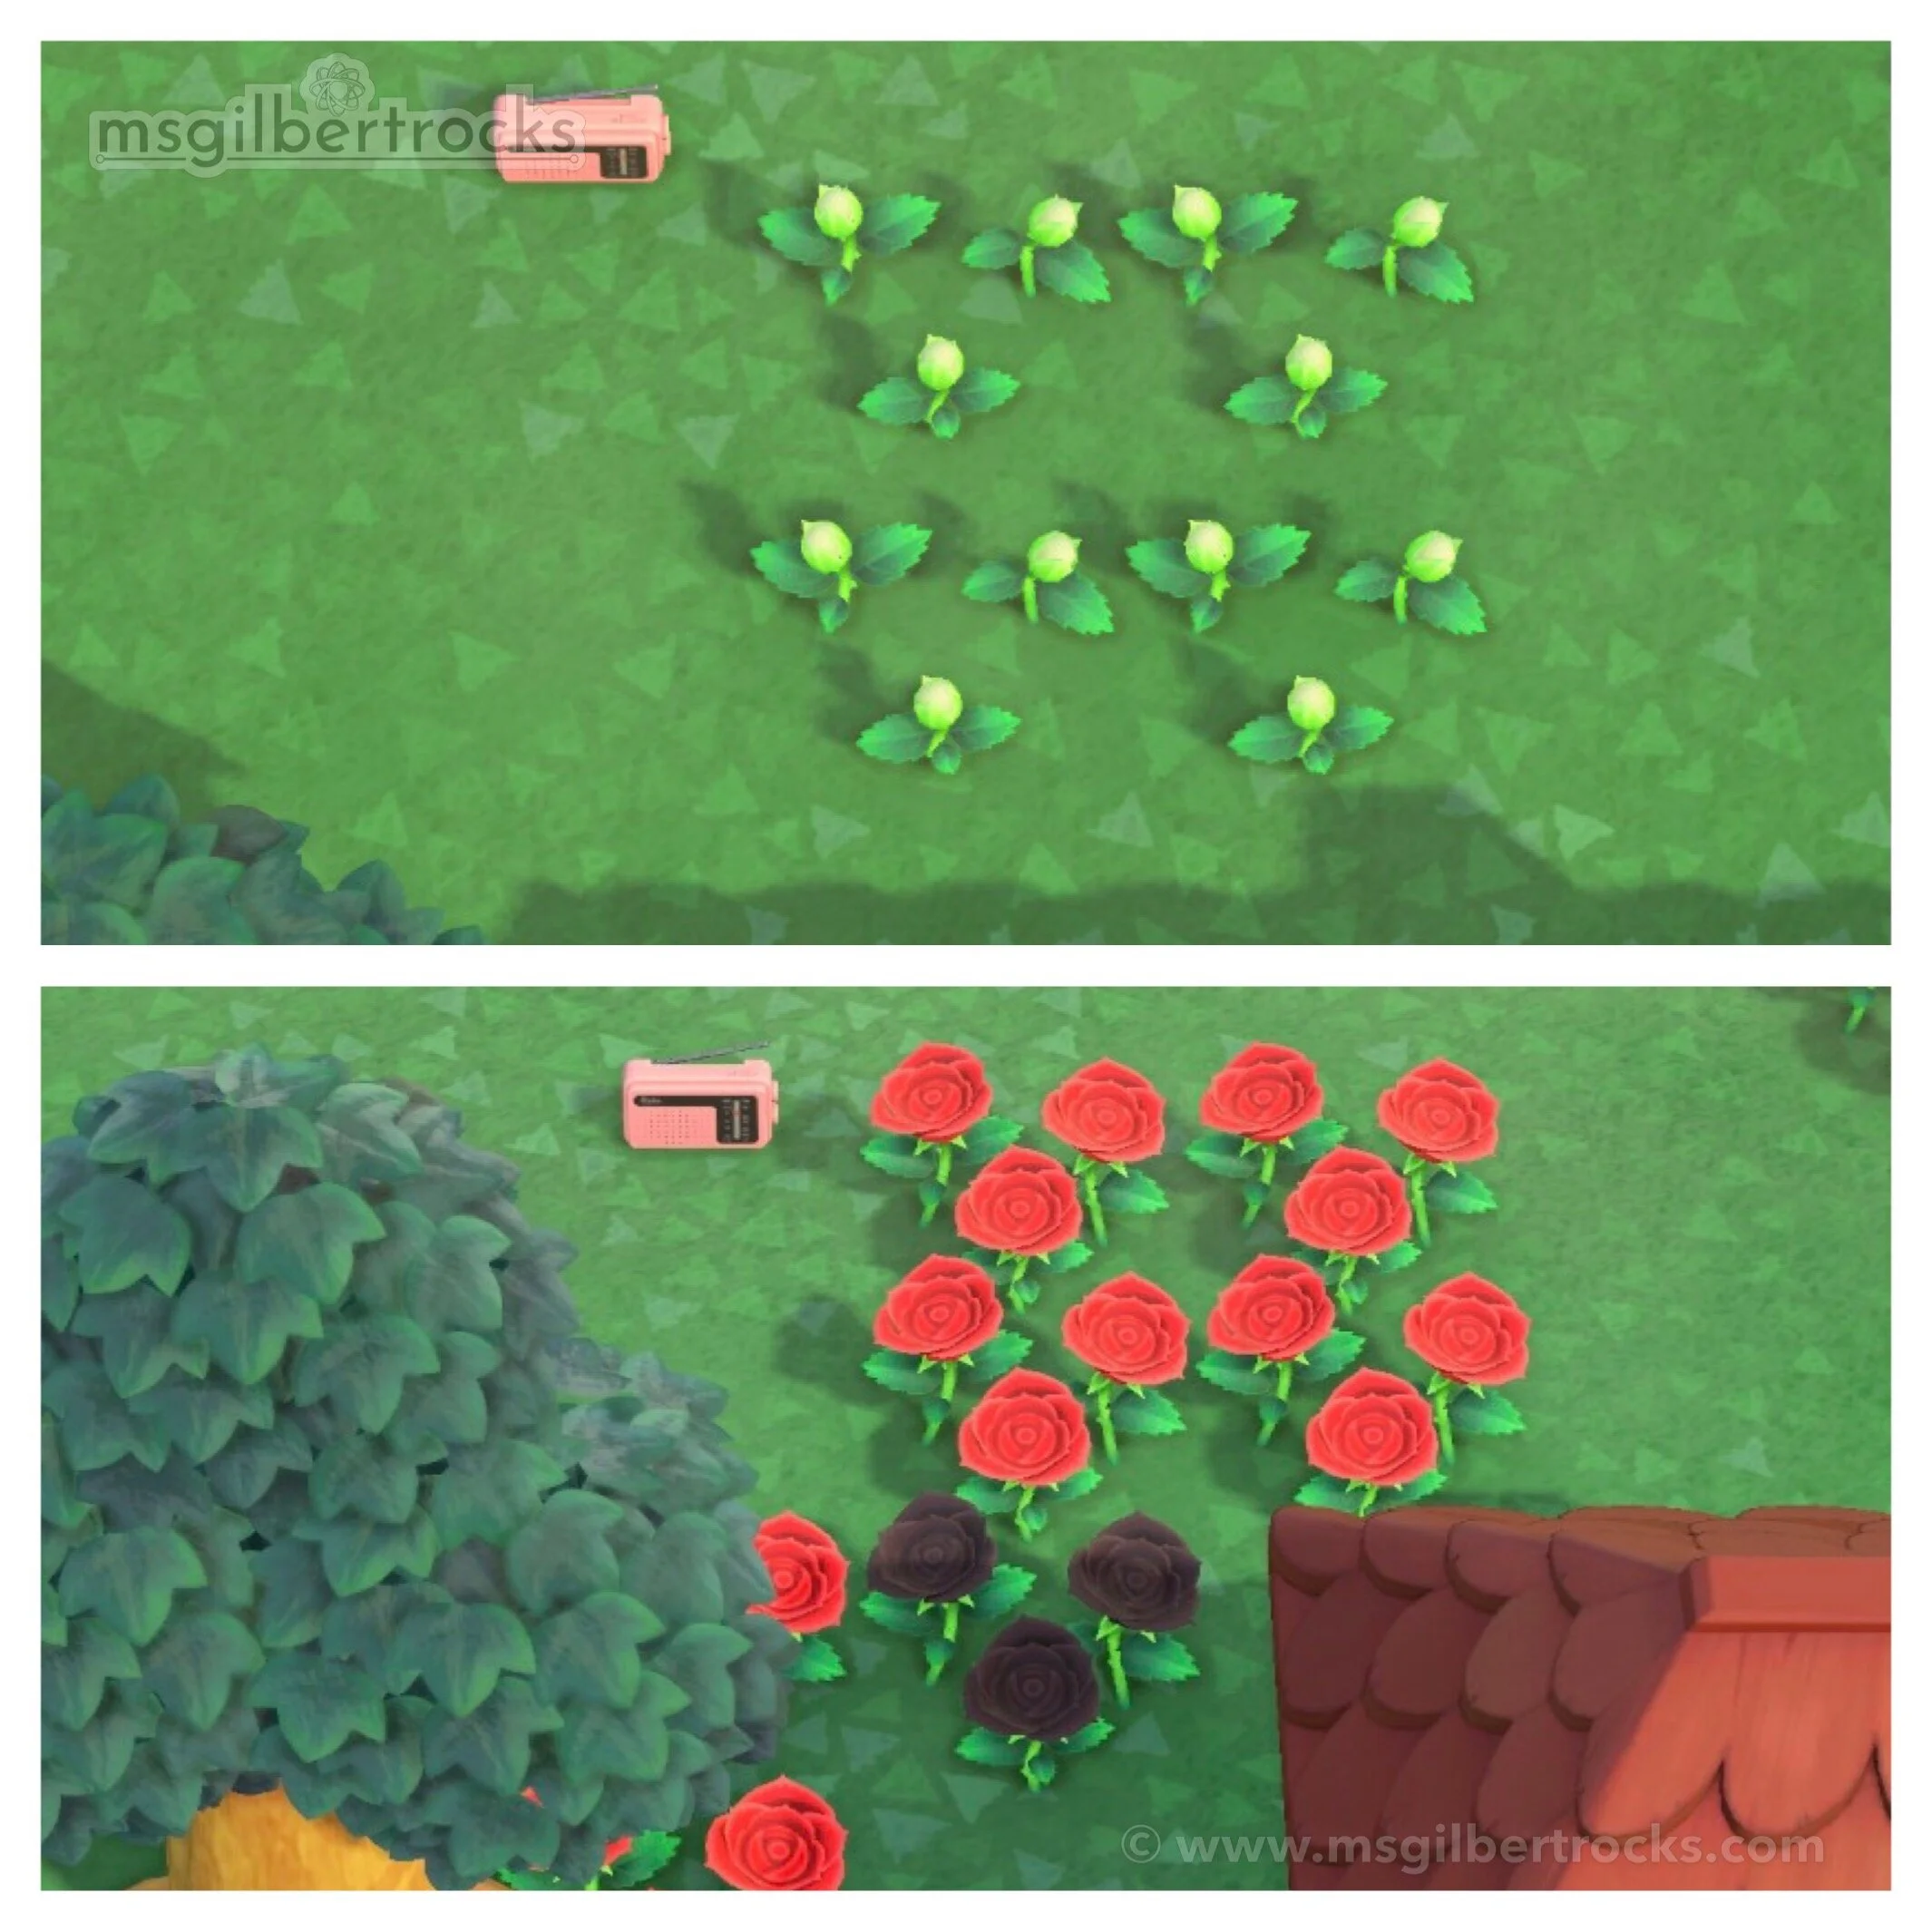
Our glow up for student flower plots: How it started (top half of image) and how it’s going/how it went (bottom half of image)


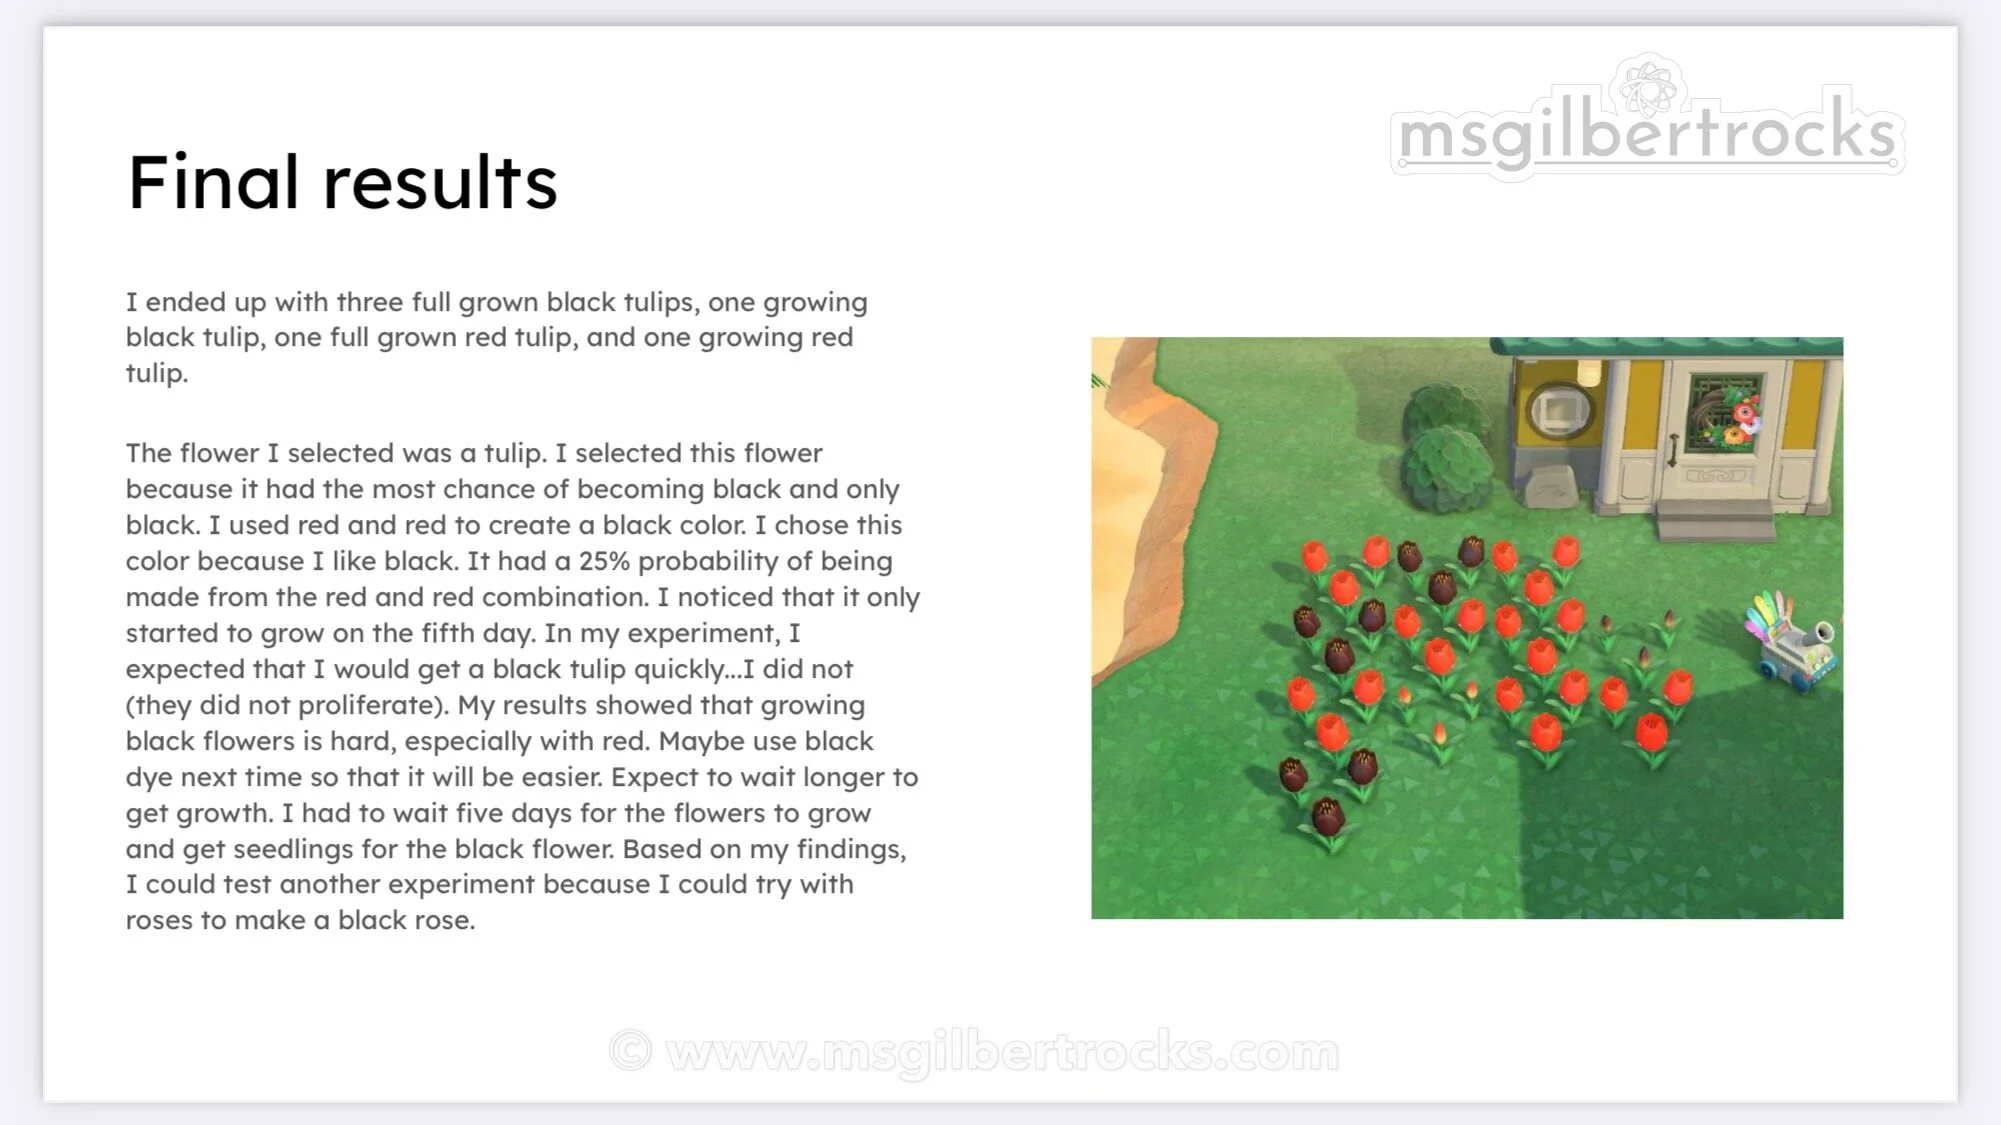
Example of the final results slide:
Other ideas to consider
Evaluate and record the probabilities for all flower types/colors (data table)
Graph probabilities (all colors or by flower type/color)
Compare colors (with probabilities?)
Compare and contrast color combinations for different flower types
Here’s a link to make a teacher copy of the spreadsheet that can give you ideas to get started. You can make a new version to share with students based on whatever data you decide to have them check, but you can also use the example just for a visual analysis done as a whole class.
Fun fact
I am in the midst of creating all available hybrid colors myself (from seeds) in the game. I am not working on any variations that come from other sources (e.g., mystery islands), but at least a single color of each available for the various flower types. The plan is to clone the colors once I have them, but I have focused on breeding first by containing all other flowers on the island with fencing/natural barriers to force a preference for the breeding pairs to produce offspring each day. This is a work in progress…but my progress as of publishing this post is shown in the spreadsheet below, and it will be auto-updated as I continue. Stay tuned for more!!
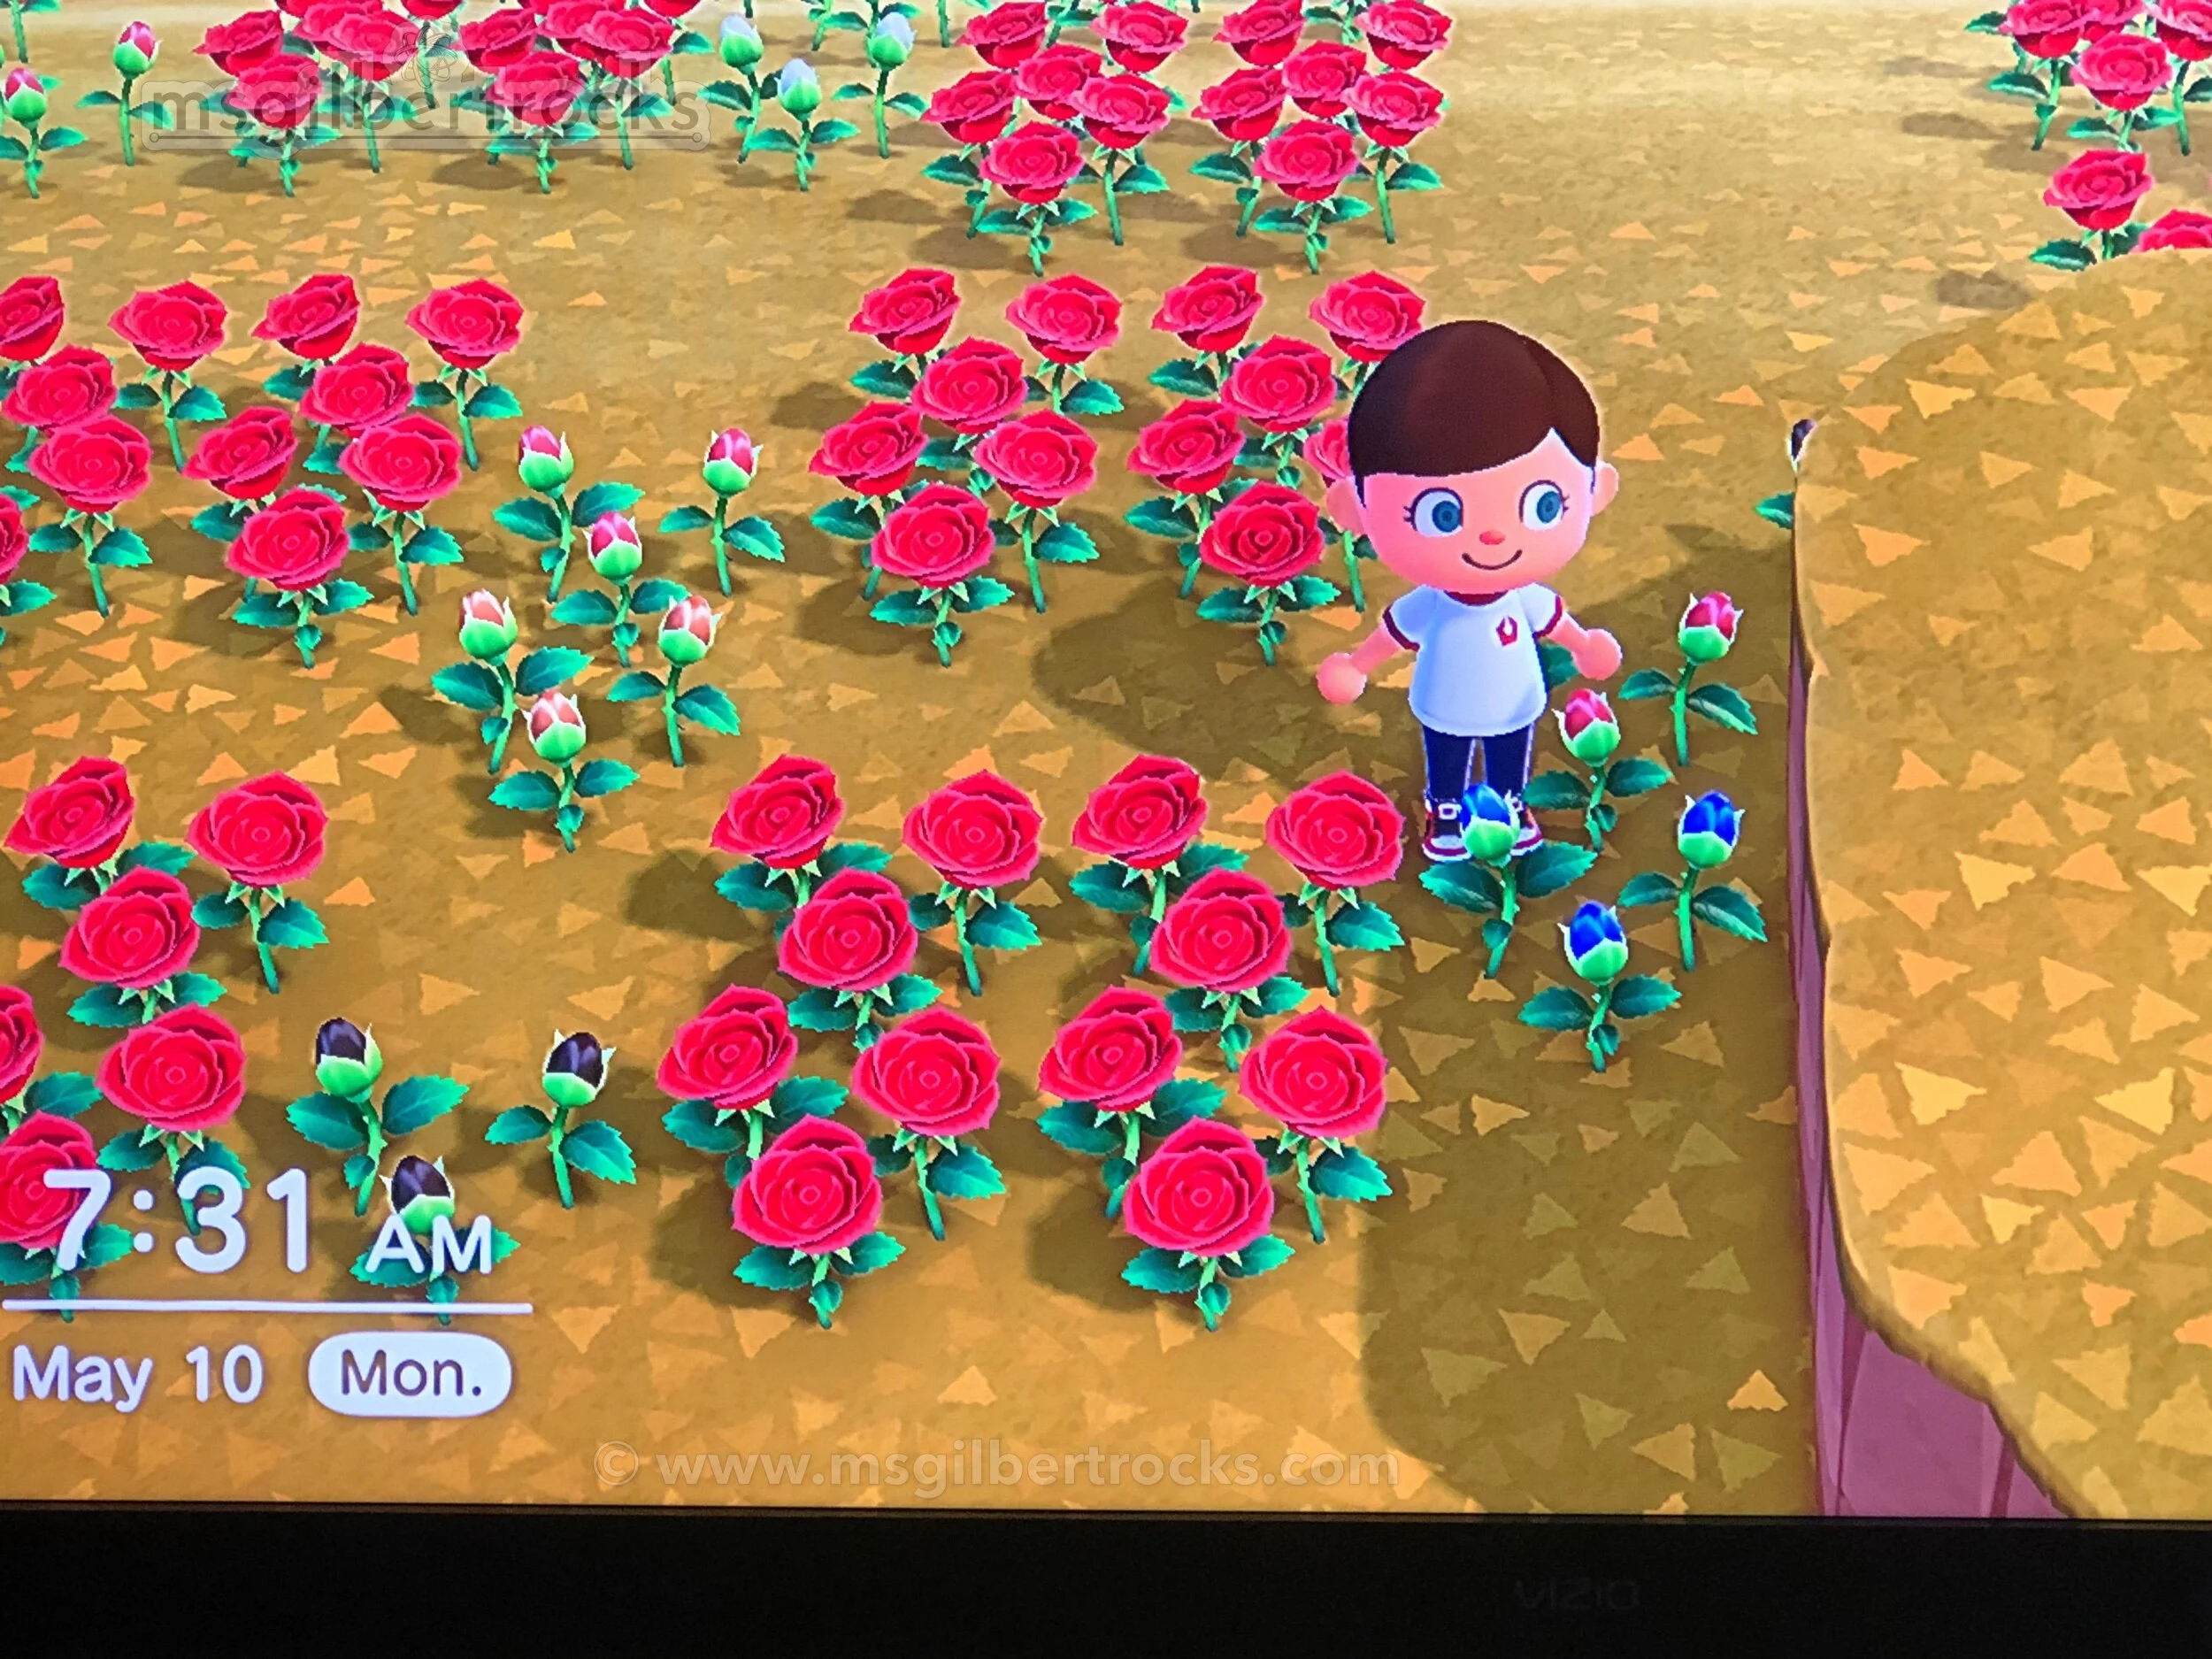
May 10, 2021 update:
All flowers are now available as of today. The final two (purple windflower and blue rose) took the longest. Once the purple windflower was ready and cloned, I focused solely on the blue rose. It took about 6 weeks, start to finish, but a single blue rose is now set aside for cloning as of today. Happy blue rose day!