Making Makers: Global Programming Challenge Wall
Hello everyone!
There was a request on Twitter for more information about this project. We are able to do amazing activities on a weekly basis, but there is rarely time to write out details to share. Short tidbits are always shared on Twitter (@msgilbertrocks) and please feel free to reach out (via Tweets or DMs) for more information on any project!
Side note: You can hire me to come in and present at your school or collaborate with a team that needs training in the area of making/robotics/coding/innovation integration in schools. I also work with public libraries, summer programs and professional development providers. I am in the suburbs of Chicago during the school year and on the east coast during the summer/some school breaks.
I have developed a model for our Coding Kids program based on maker education principles and the constructionism approach. Basically: people learn through making and doing. My model that has evolved in the past four years of the program is based upon the following mission to: Foster a learning community that will explore, dream and create with tools related to computer programming, robotics and maker education using the engineering design process. I wholeheartedly believe in the Explore Dream Create (EDC) mission and I get to live the brand, so to speak, with the work that I do with the kids.
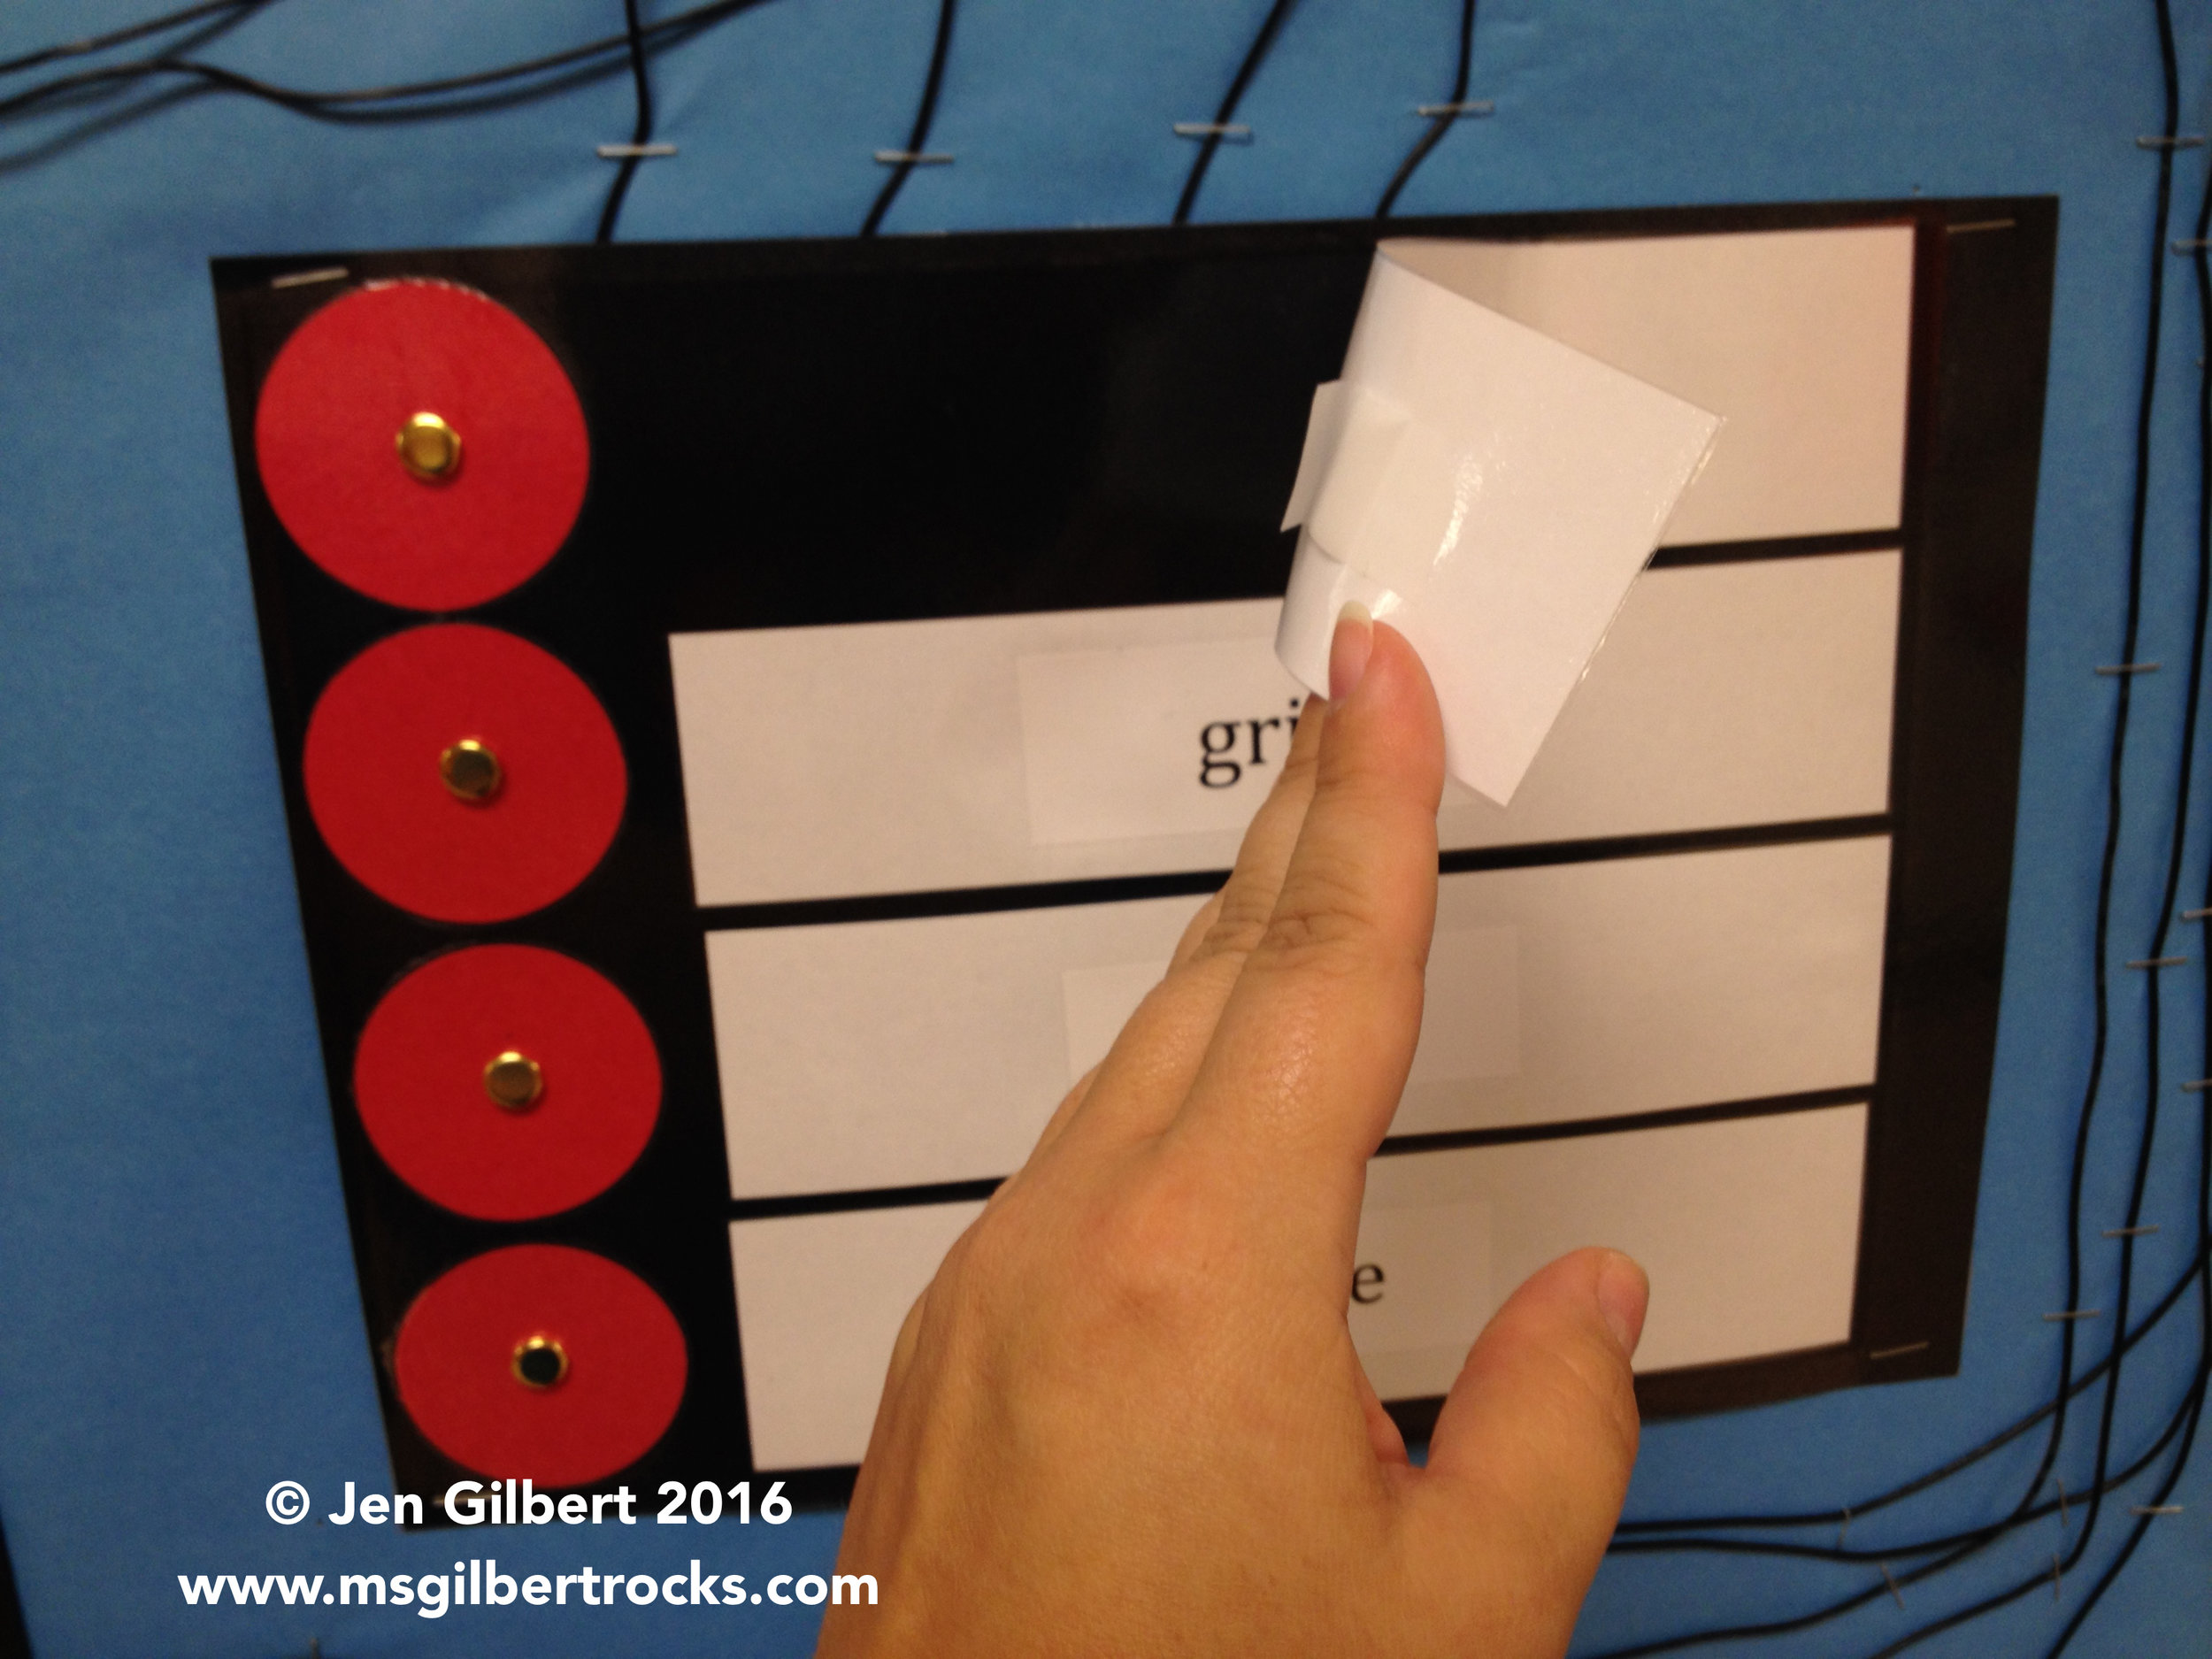
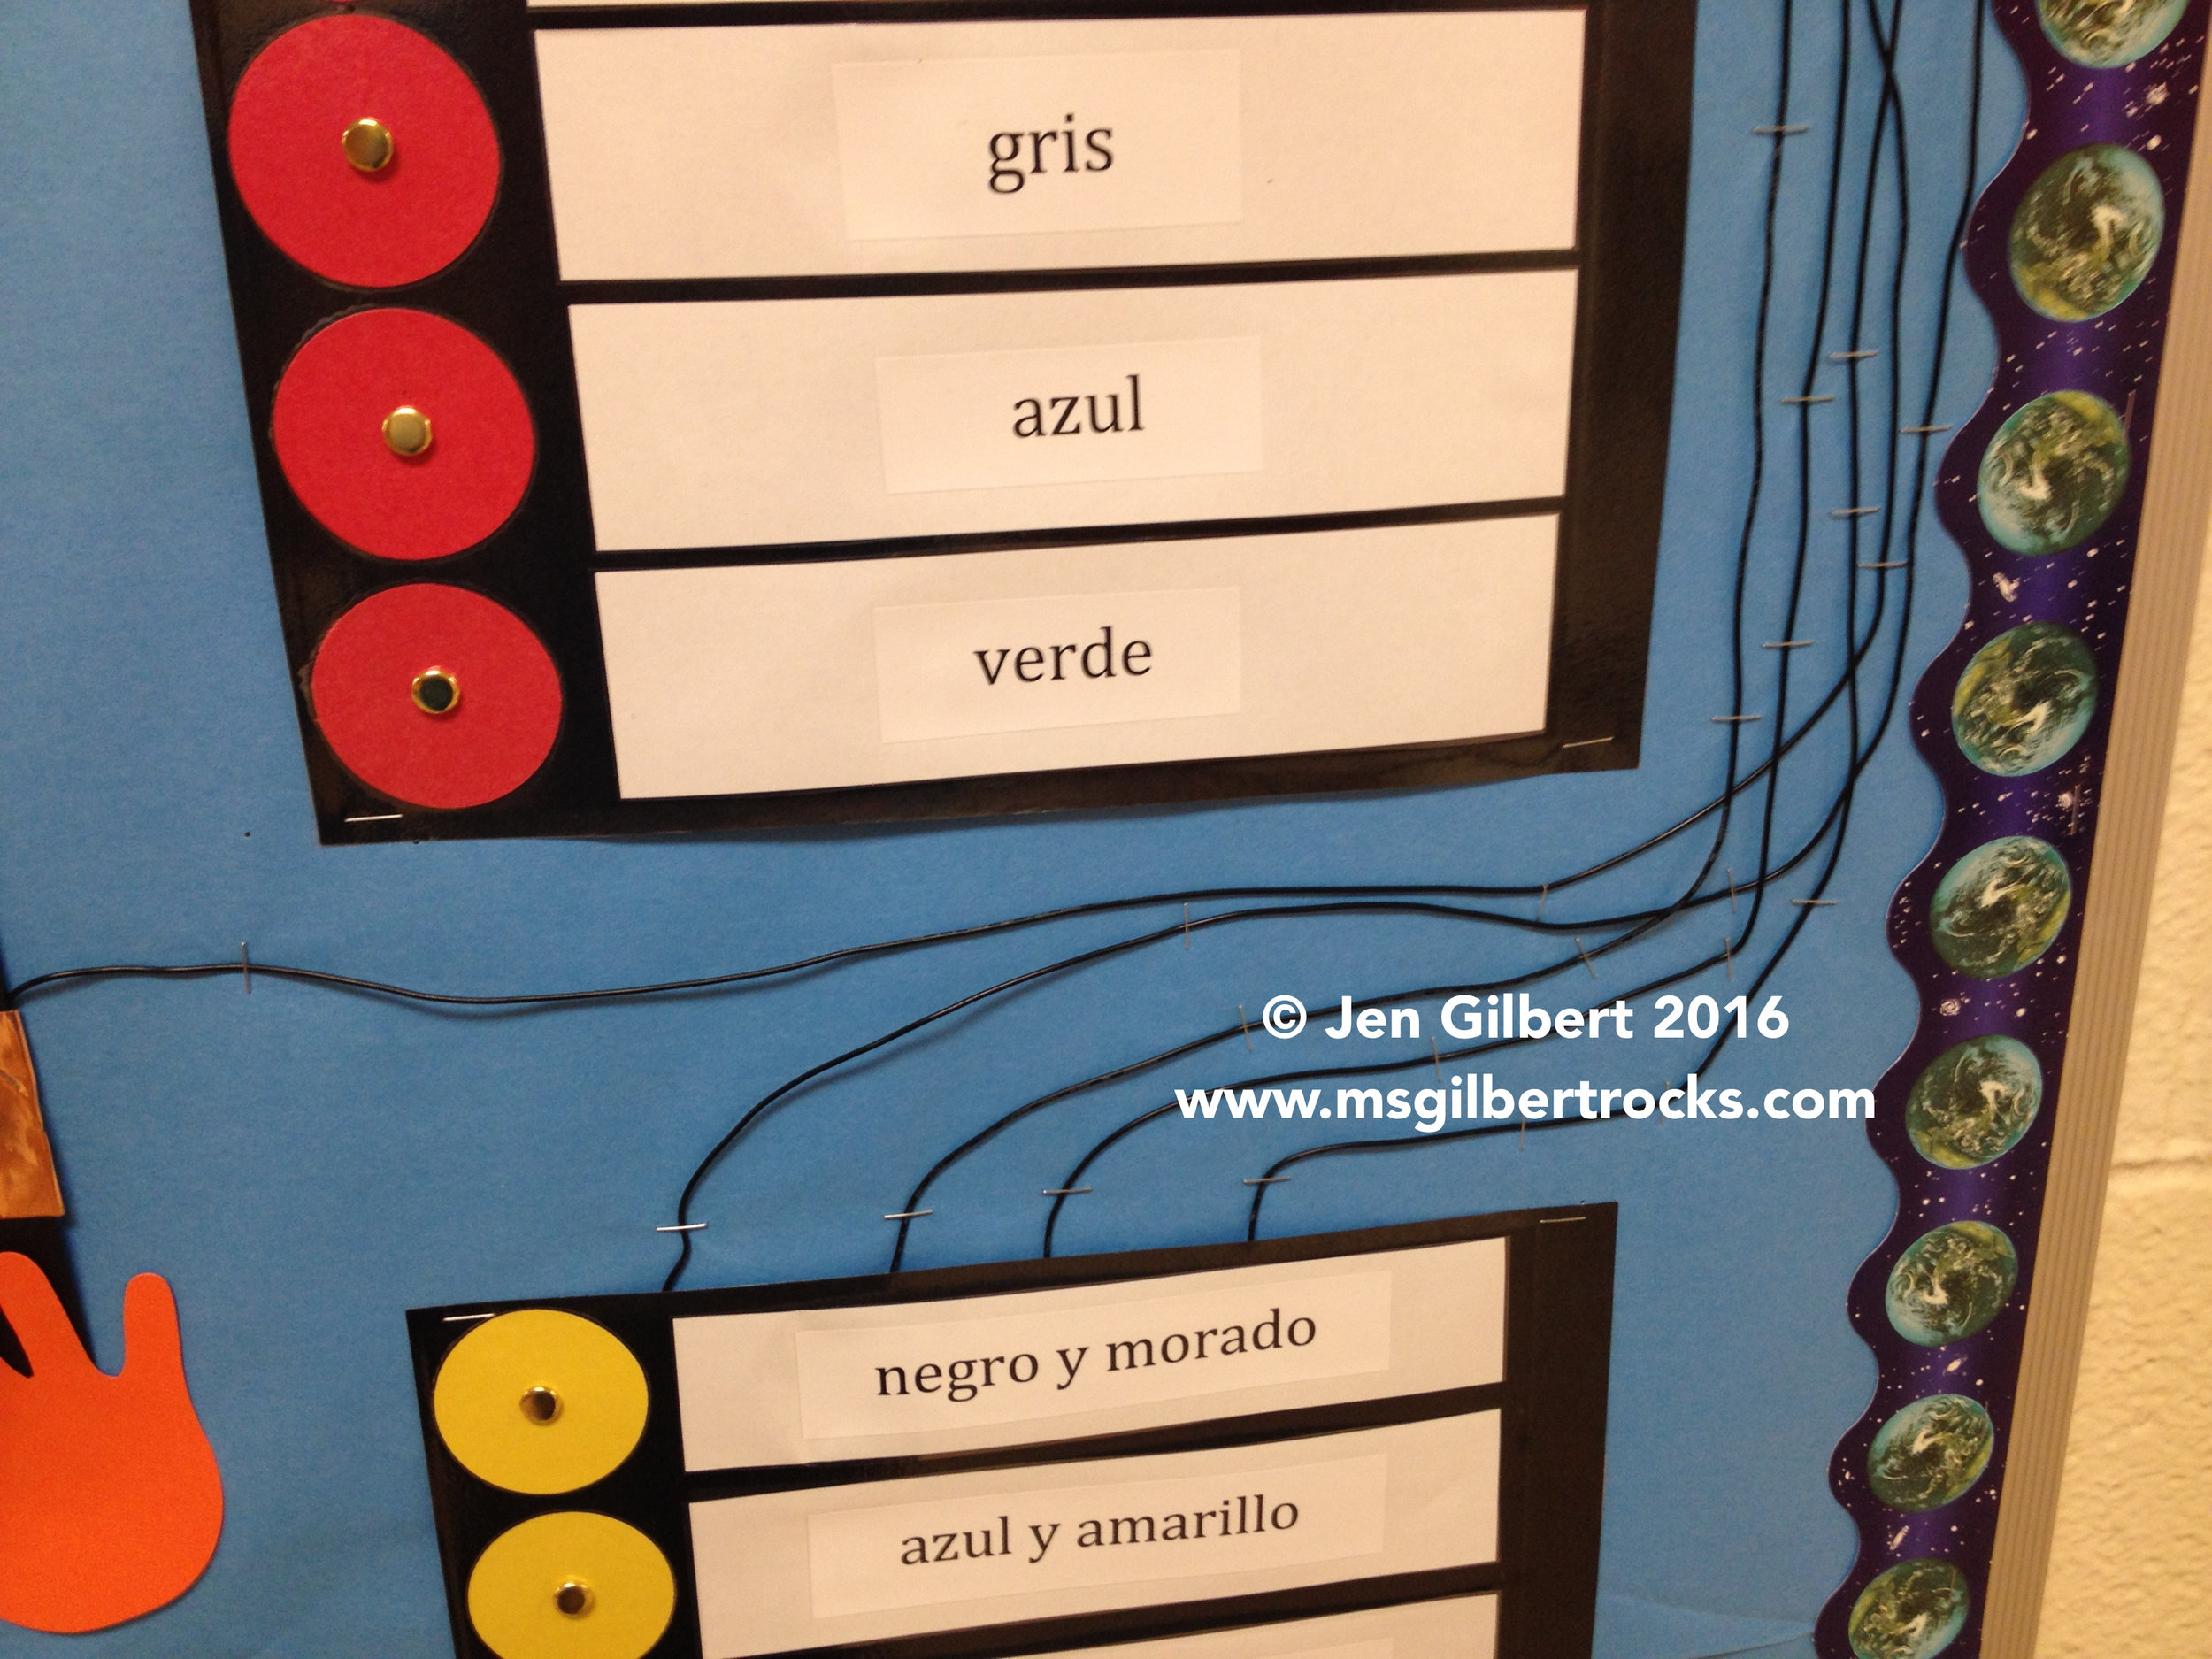
Last year we had a highly successful museum-quality interactive art gallery (partnering with our phenomenal art teacher) exhibit with Makey Makey's wired up to "buttons" on paper guitars. We used Soundplant to program student-selected music or their voices. (I can post on that project some time later on) The dilemma? I did the wiring myself...very late at night...and we could not get the kids involved in that part of the setup. This year I wanted to get the kids more involved behind the scenes...you know, the whole "learn through making and doing" part. When our Spanish teacher suggested using a small display in the hall for coding, it was the perfect time to get back to our interactive Makey Makey designs, picking back up where we left off last year. When I ran the idea by her, she was open to letting me set up the "Global Programming Challenge" and recorded her own voice for our sample project.
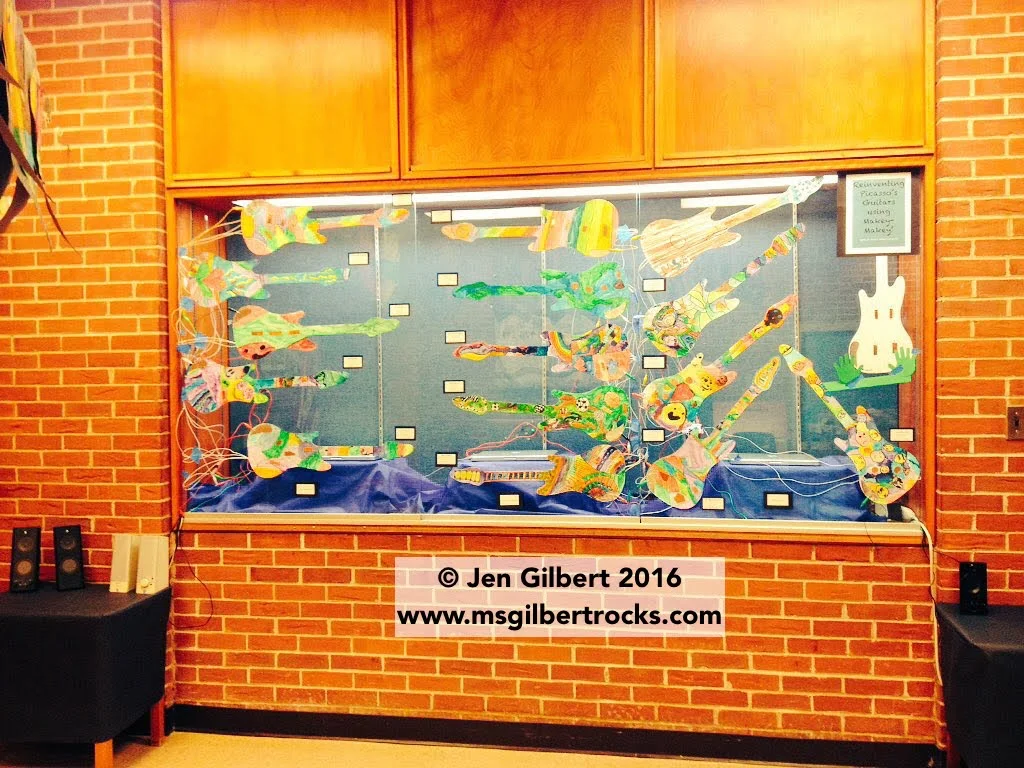
Picasso's Guitar Remix with Makey Makey (Spring 2016)
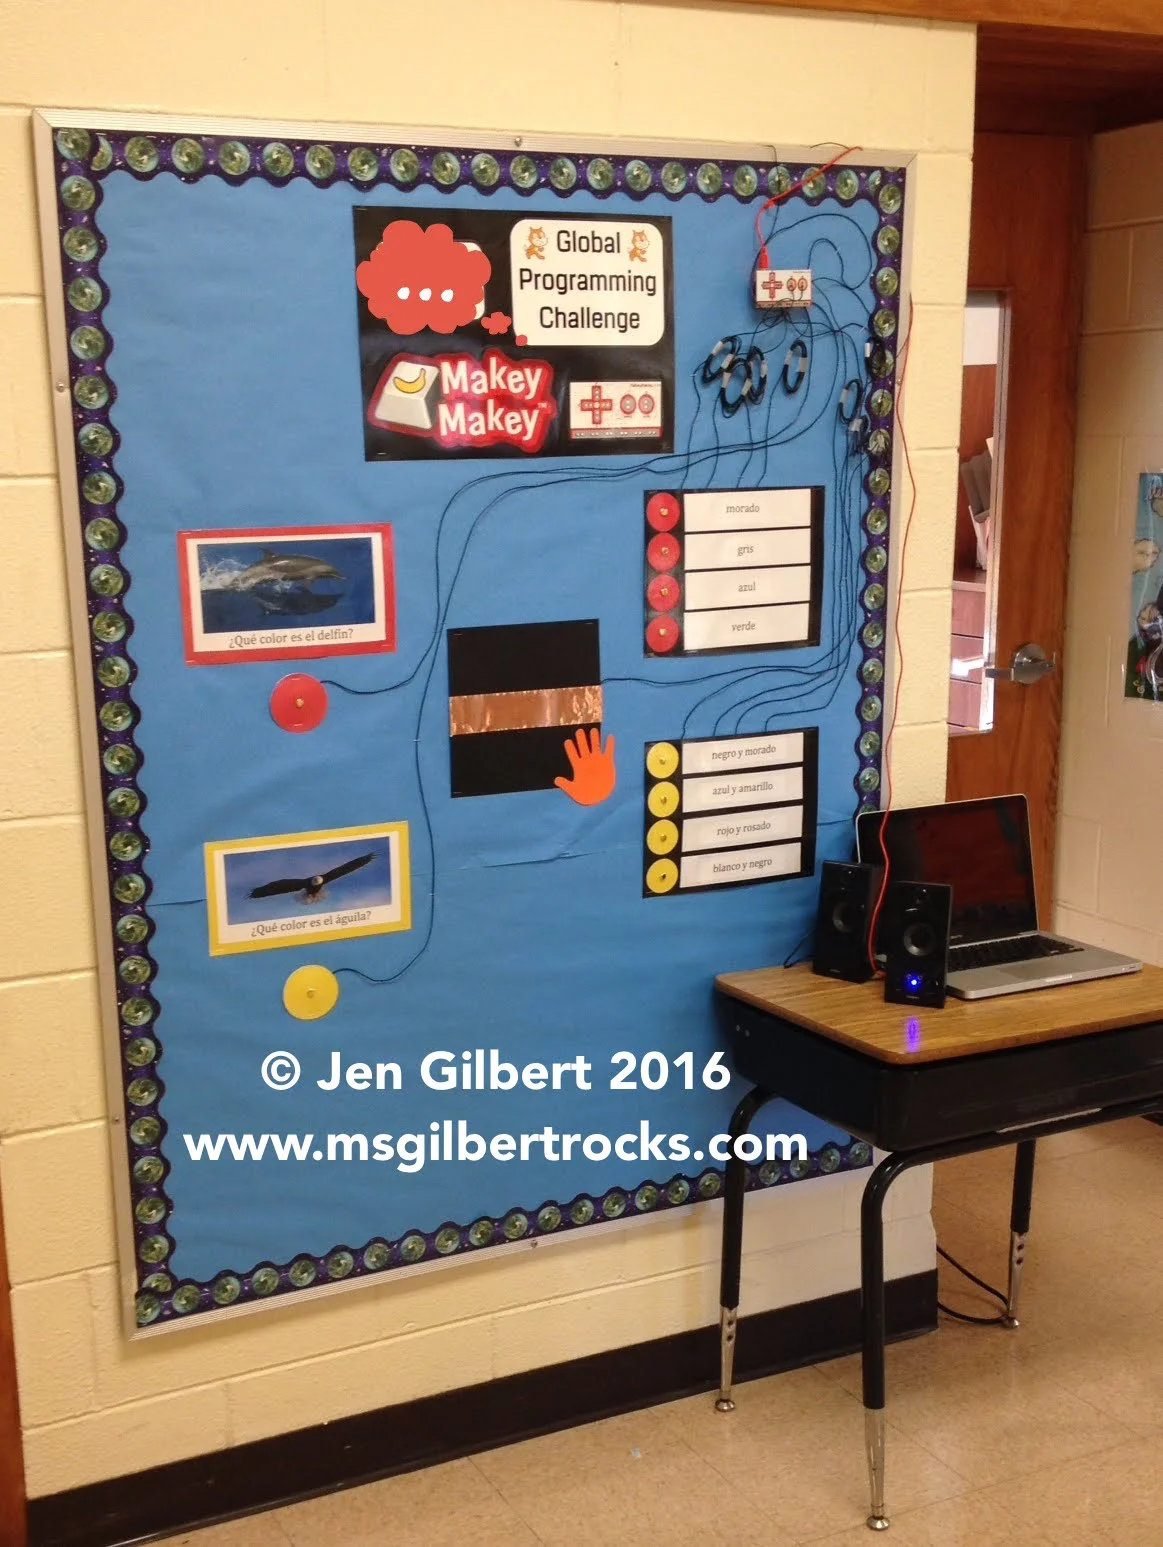
Global Programming Challenge wall with Makey Makey (Fall 2016)
Big picture:
Students will create games, Q&A and other content for this interactive display. They will build and maintain Scratch projects that are programmed to trigger sound, animations and other actions through touch-sensitive areas connected to the Makey Makey. If the initial wiring/conductive items are not the best option, they will create better solutions to bring their ideas to life. One idea is to actually have sections open and determine if something is conductive or not by completing the circuit (e.g., does touching this metal fork and the ground point make an action trigger in the Scratch program?). You'll notice that the wiring is left long intentionally...could we splice it and put objects to test between one piece and the other connected to the Makey?? Sure, we have options!
I did not want to build out the shell of an idea that was not flexible enough to grow with student (and teacher) feedback. Initially students can focus on the programming to create a game that animates "correct" or "incorrect" for the two sample multiple choice questions on the board...This is the Explore. We will ask for their ideas...Dream. Then we will get a rotation of various student-created interactivity components and Scratch projects going as the dreams develop into full-fledged actionable ideas...Create!
What you will need:
a display area (can be a wall, easel, or even a poster - work with what you have!)
a Makey Makey (one unit can have 18 connections...isn't that cool?!)
conductive material (copper tape and brads used) (check length of brads - at least 1")
wires (just about any wire will do, we have 22 AWG solid core wire from SparkFun and Radio Shack)
a monitor/display (optional to be visible, can be hidden if not using visuals in Scratch etc.)
speakers or another sound source (connected to your computer)
For bonus points the brilliant Chris Rogers suggested a Raspberry Pi Zero (or regular Pi) instead of a computer to run Scratch (find it in the programming menu or load manually). With a monitor that has integrated speakers, you could have a complete interactive display set up permanently! The issue of power (and mounting the monitor) are still challenges, but I am sure it is a worthwhile task if you have the support to bring such a project to life with your students.
Explore, Dream and Create! (and please share about it!)