Catapults: Ball Over The Wall Challenge
Popsicle stick catapults? Yes, popsicle stick catapults. In middle school. This was an intentional choice because even though they may seem simplistic in nature, there is plenty of learning that can take place with basic materials and an easy build such as this one. The theme of this year for me back teaching in person is: safety. Teaching in person during a pandemic with my own health issues means that I am setting us all up for as much success as possible while keeping everyone safe. This challenge allowed for individual supplies and social distancing. Your mileage may vary within your own classrooms, but please feel free to adapt to suit your own needs. My students had a lot of fun because come on…they got to launch projectiles with catapults!

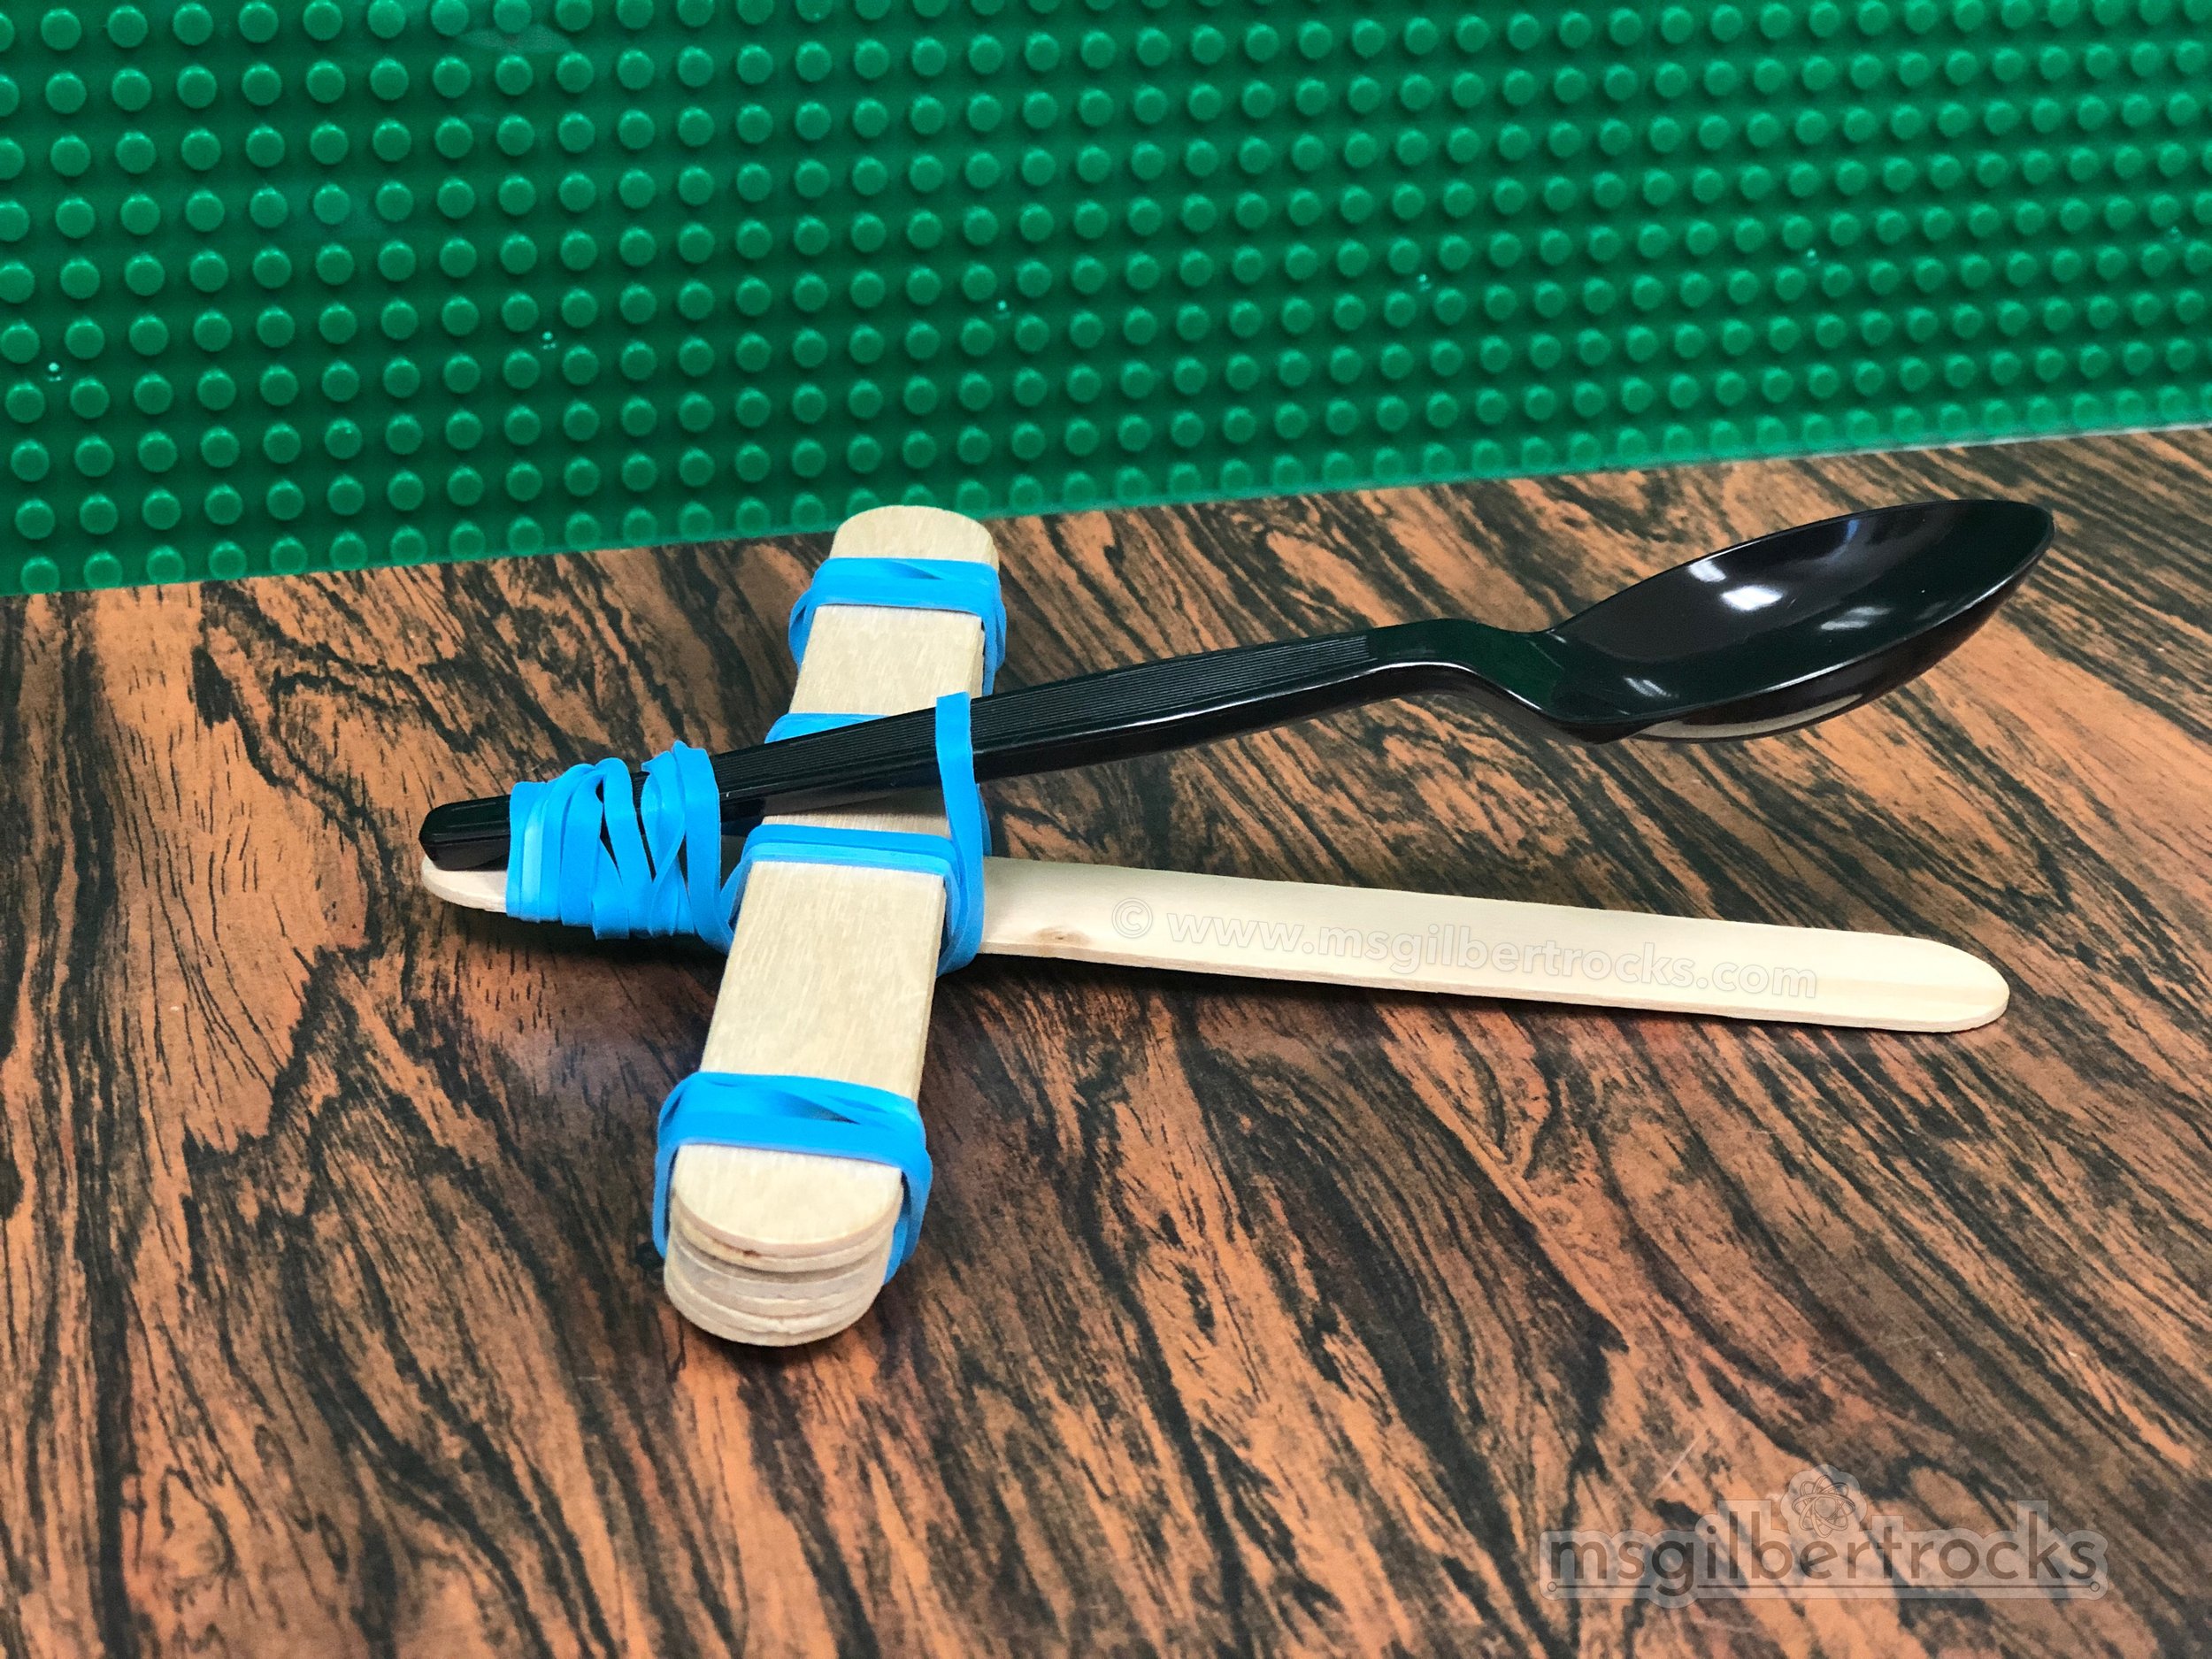

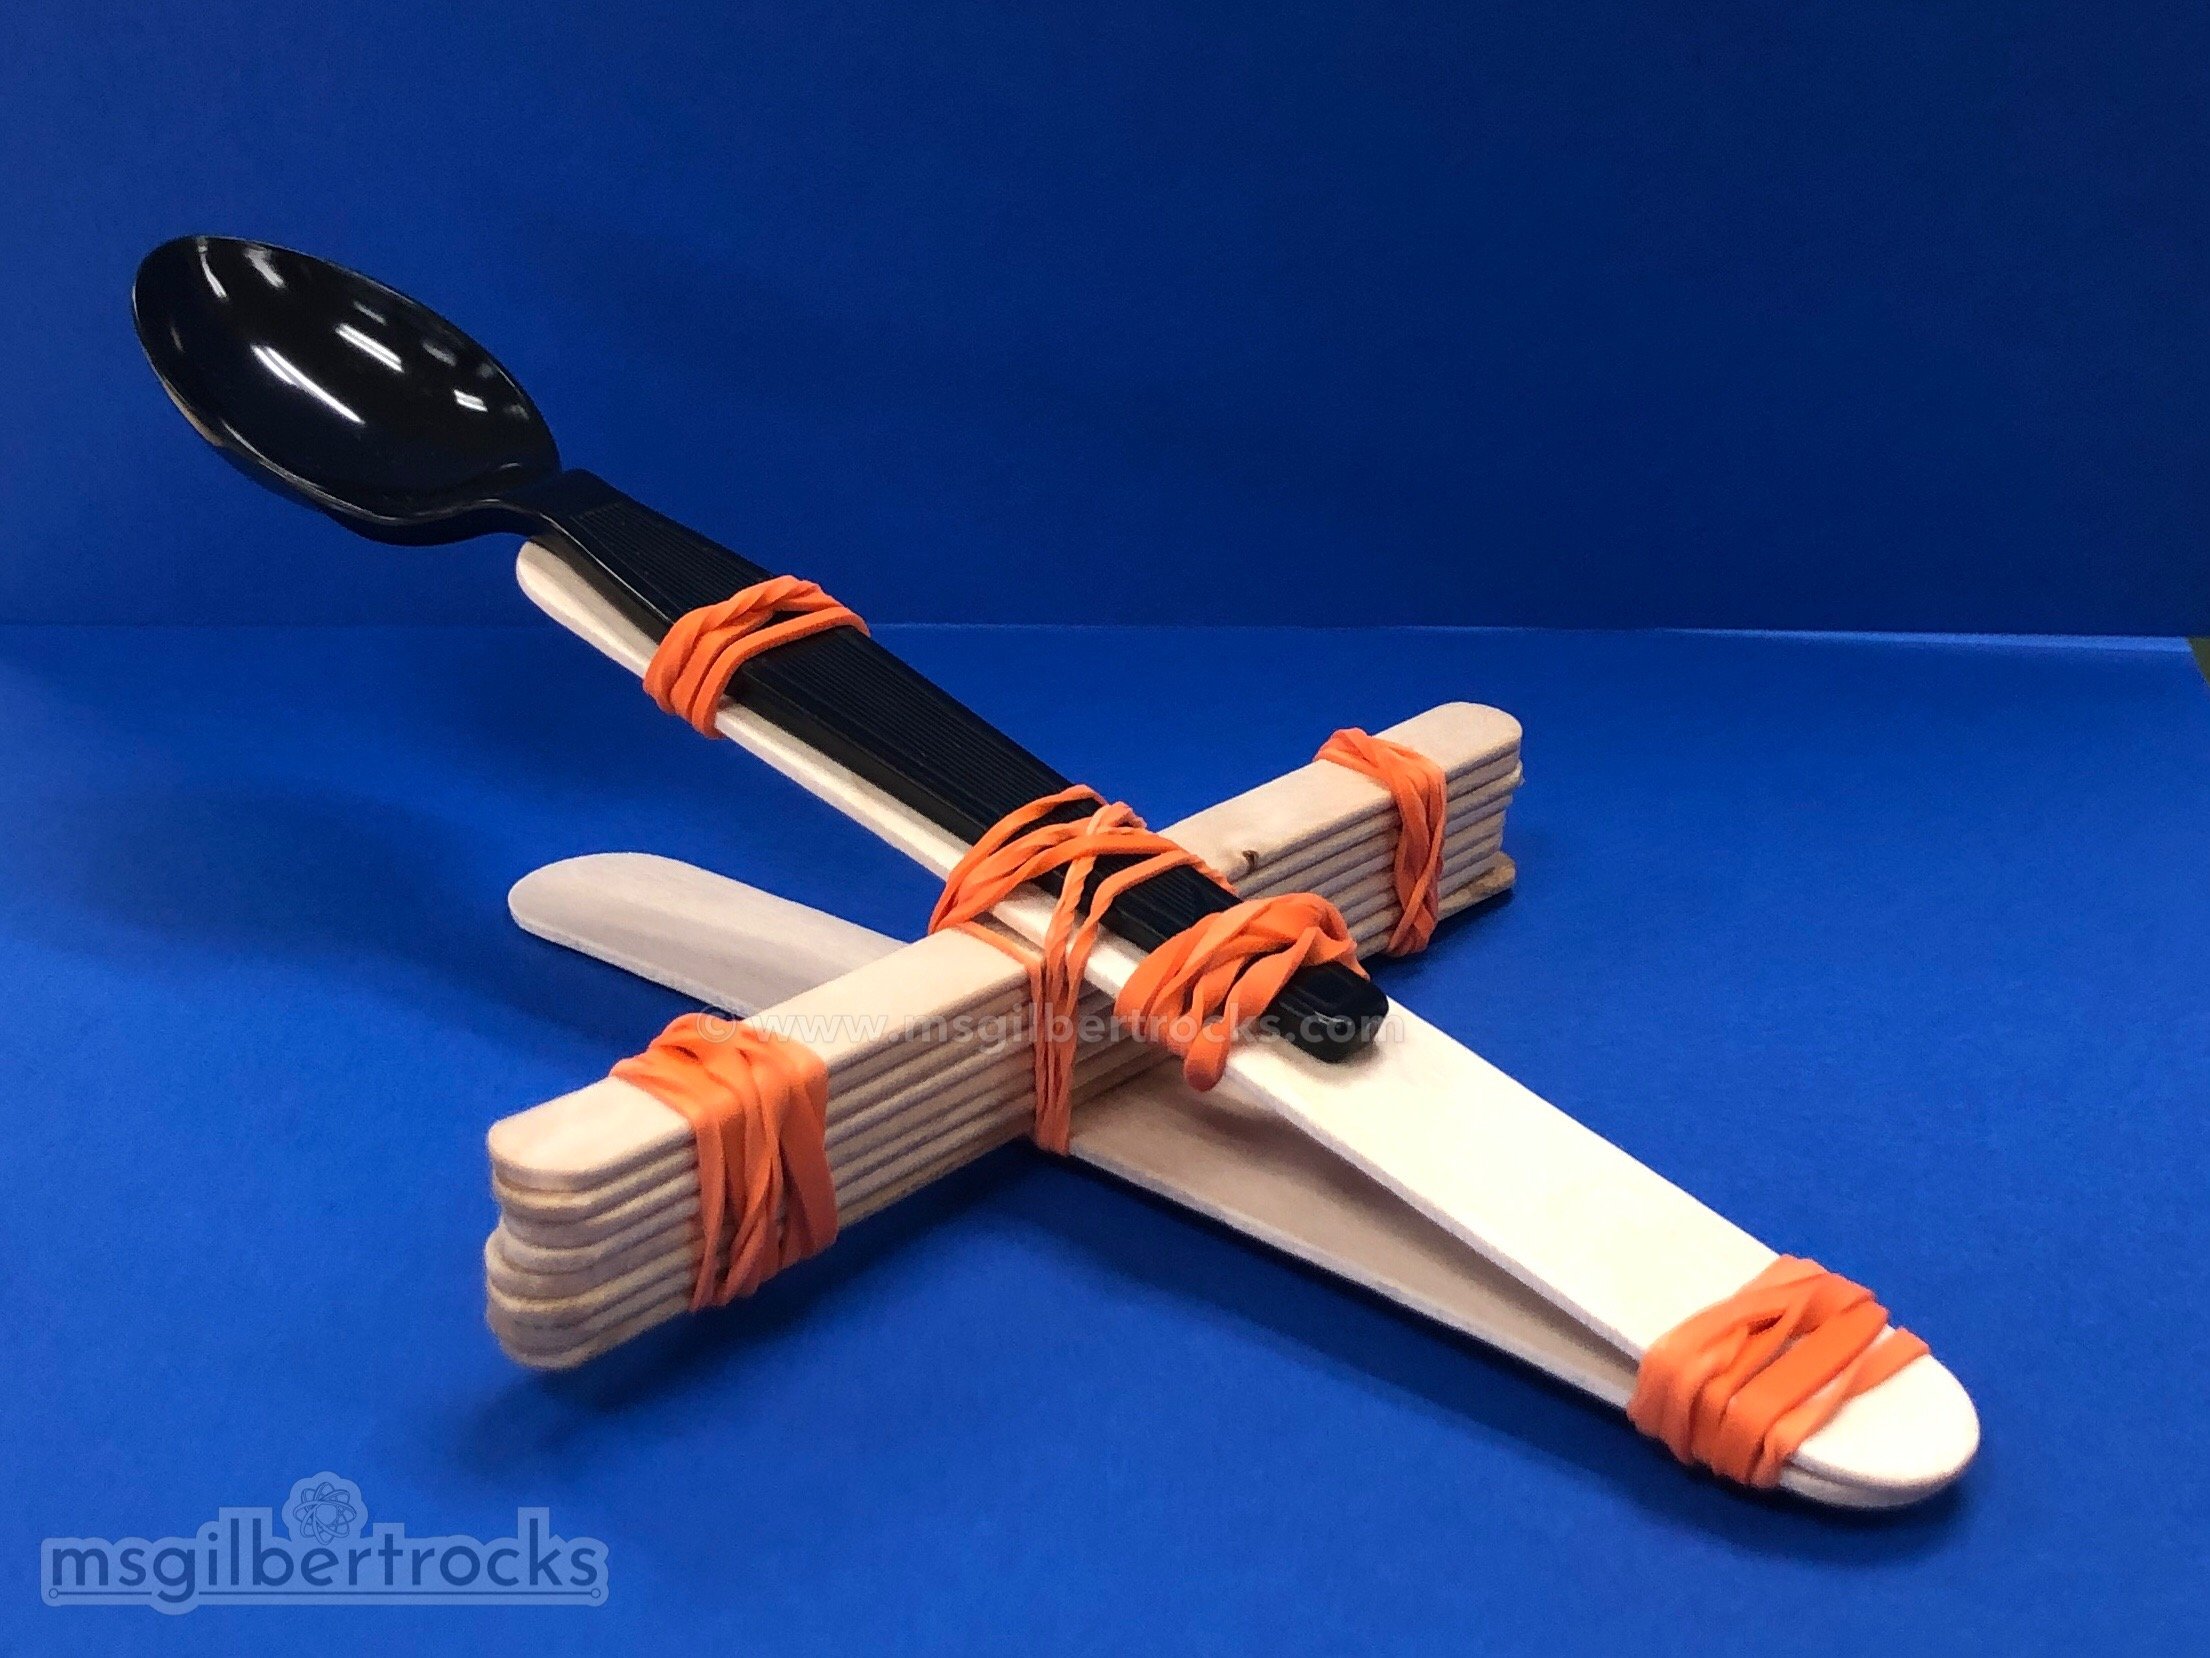
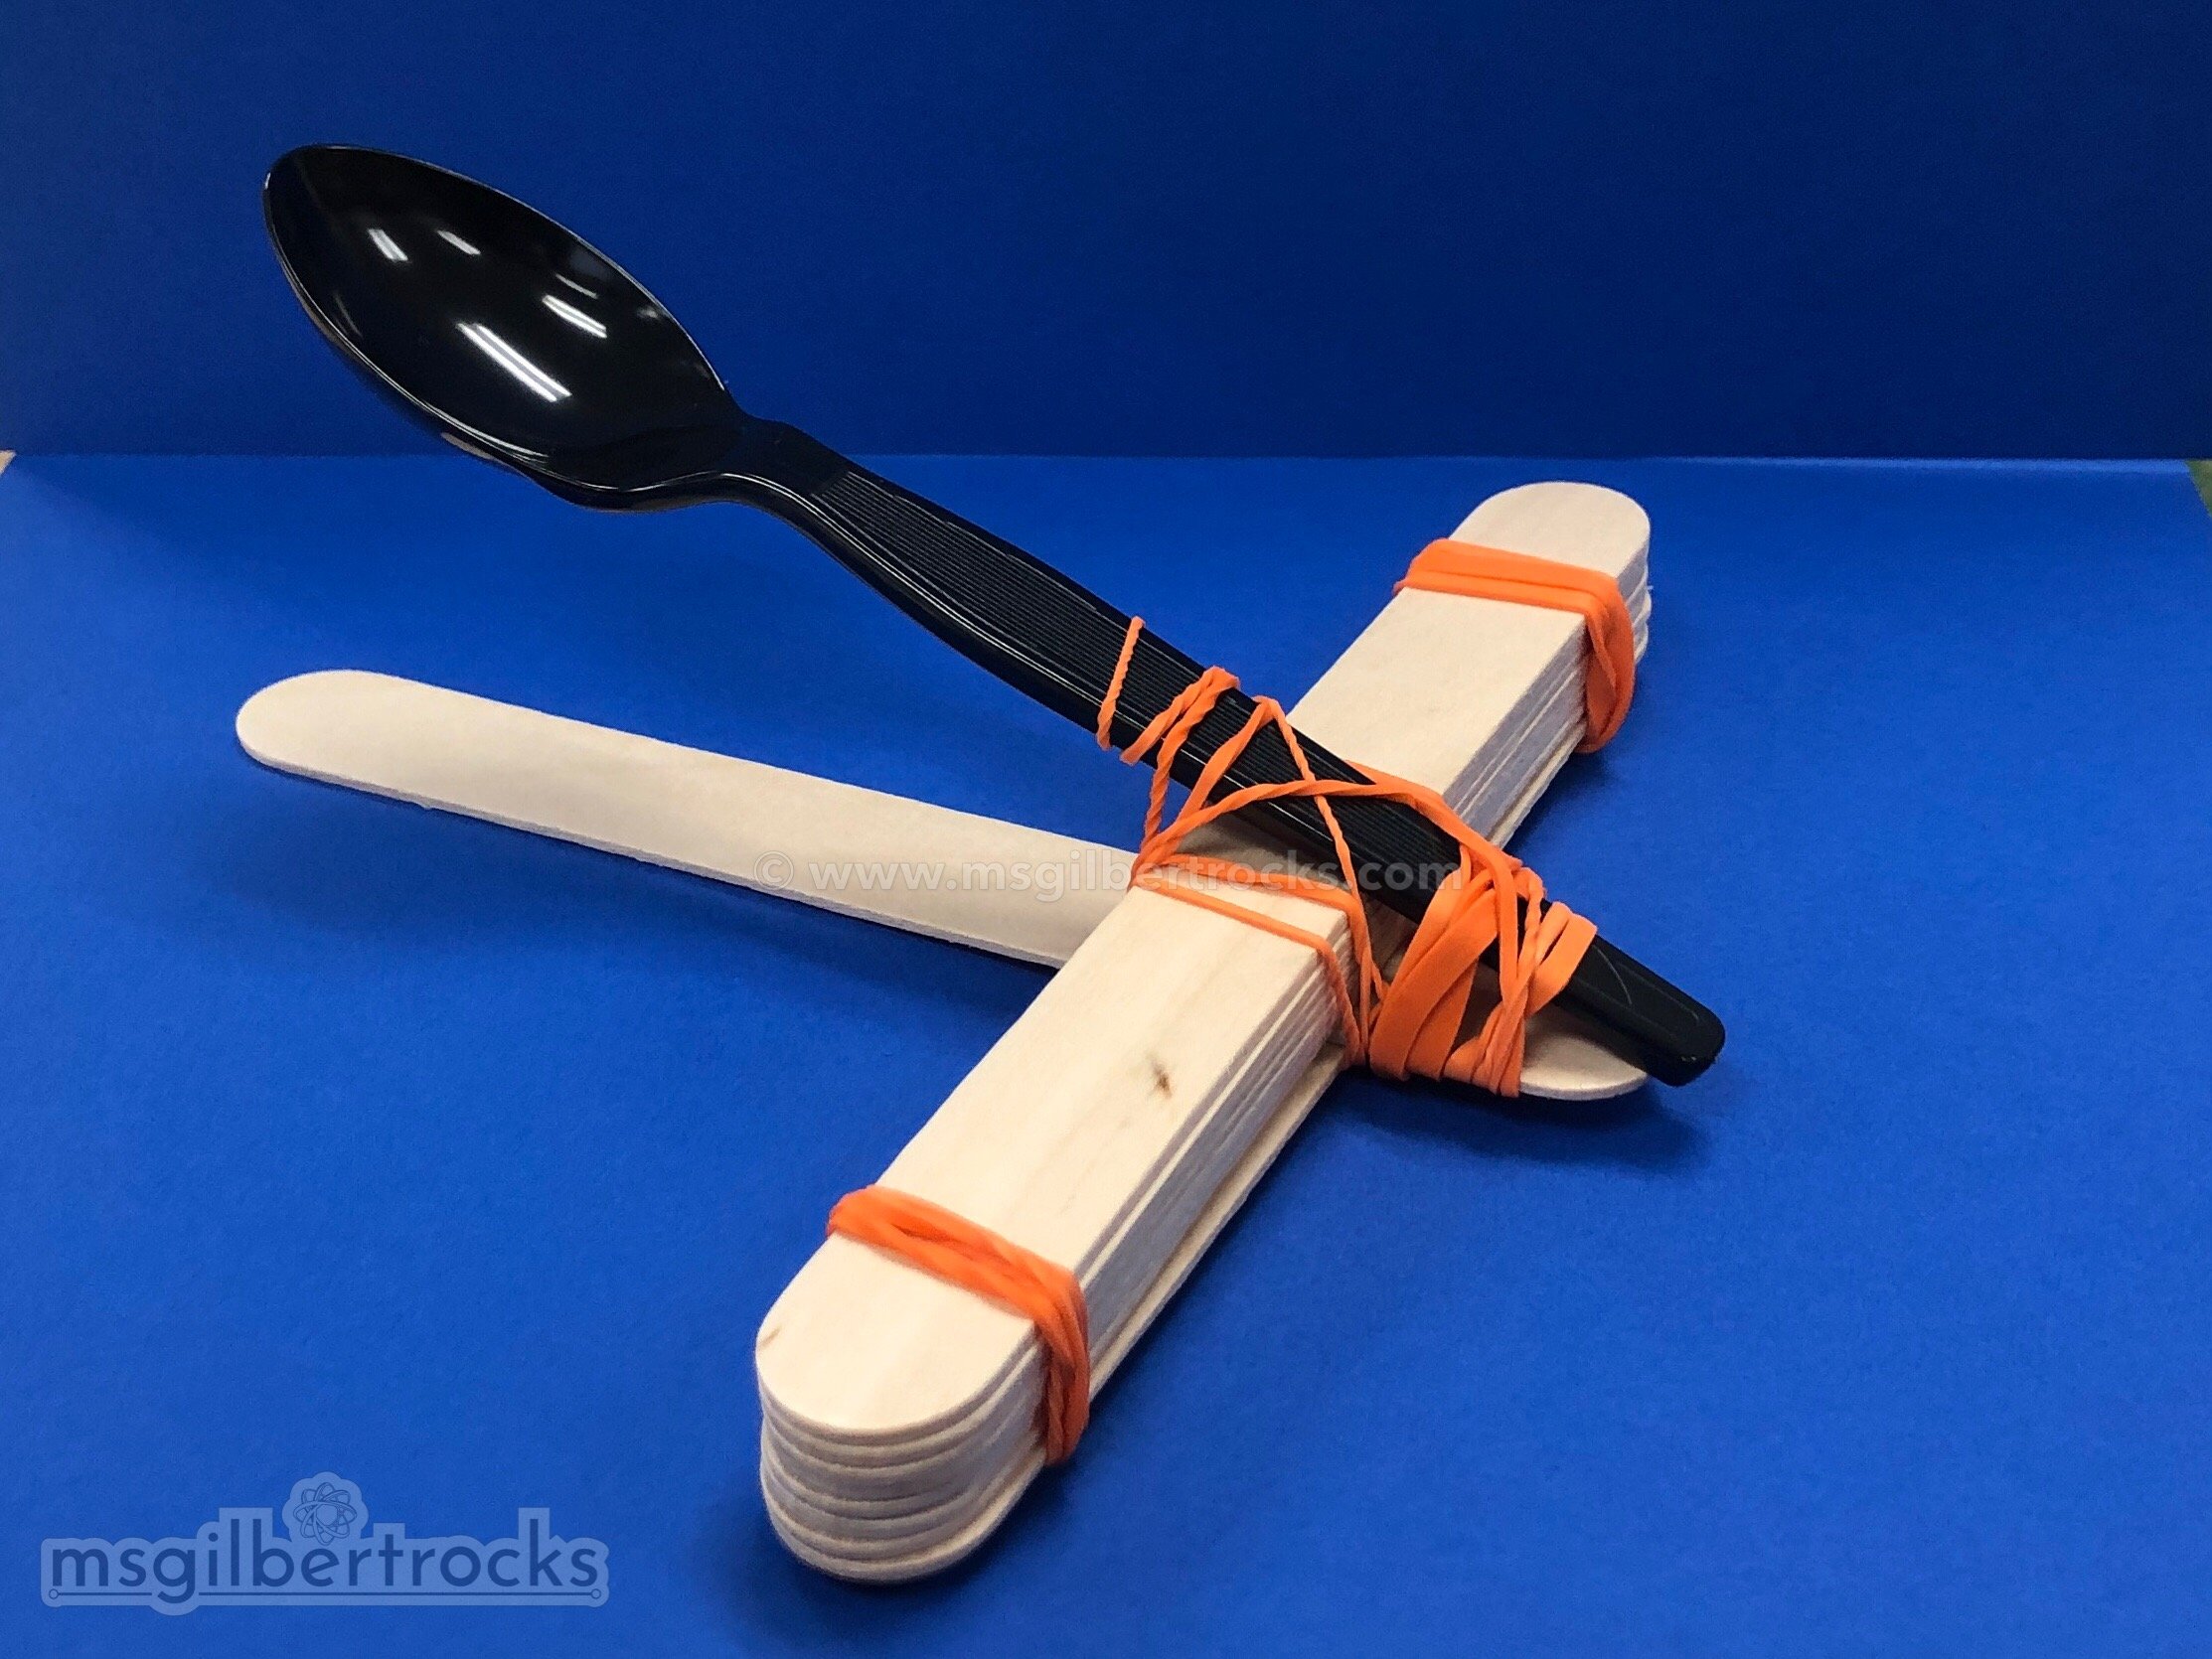
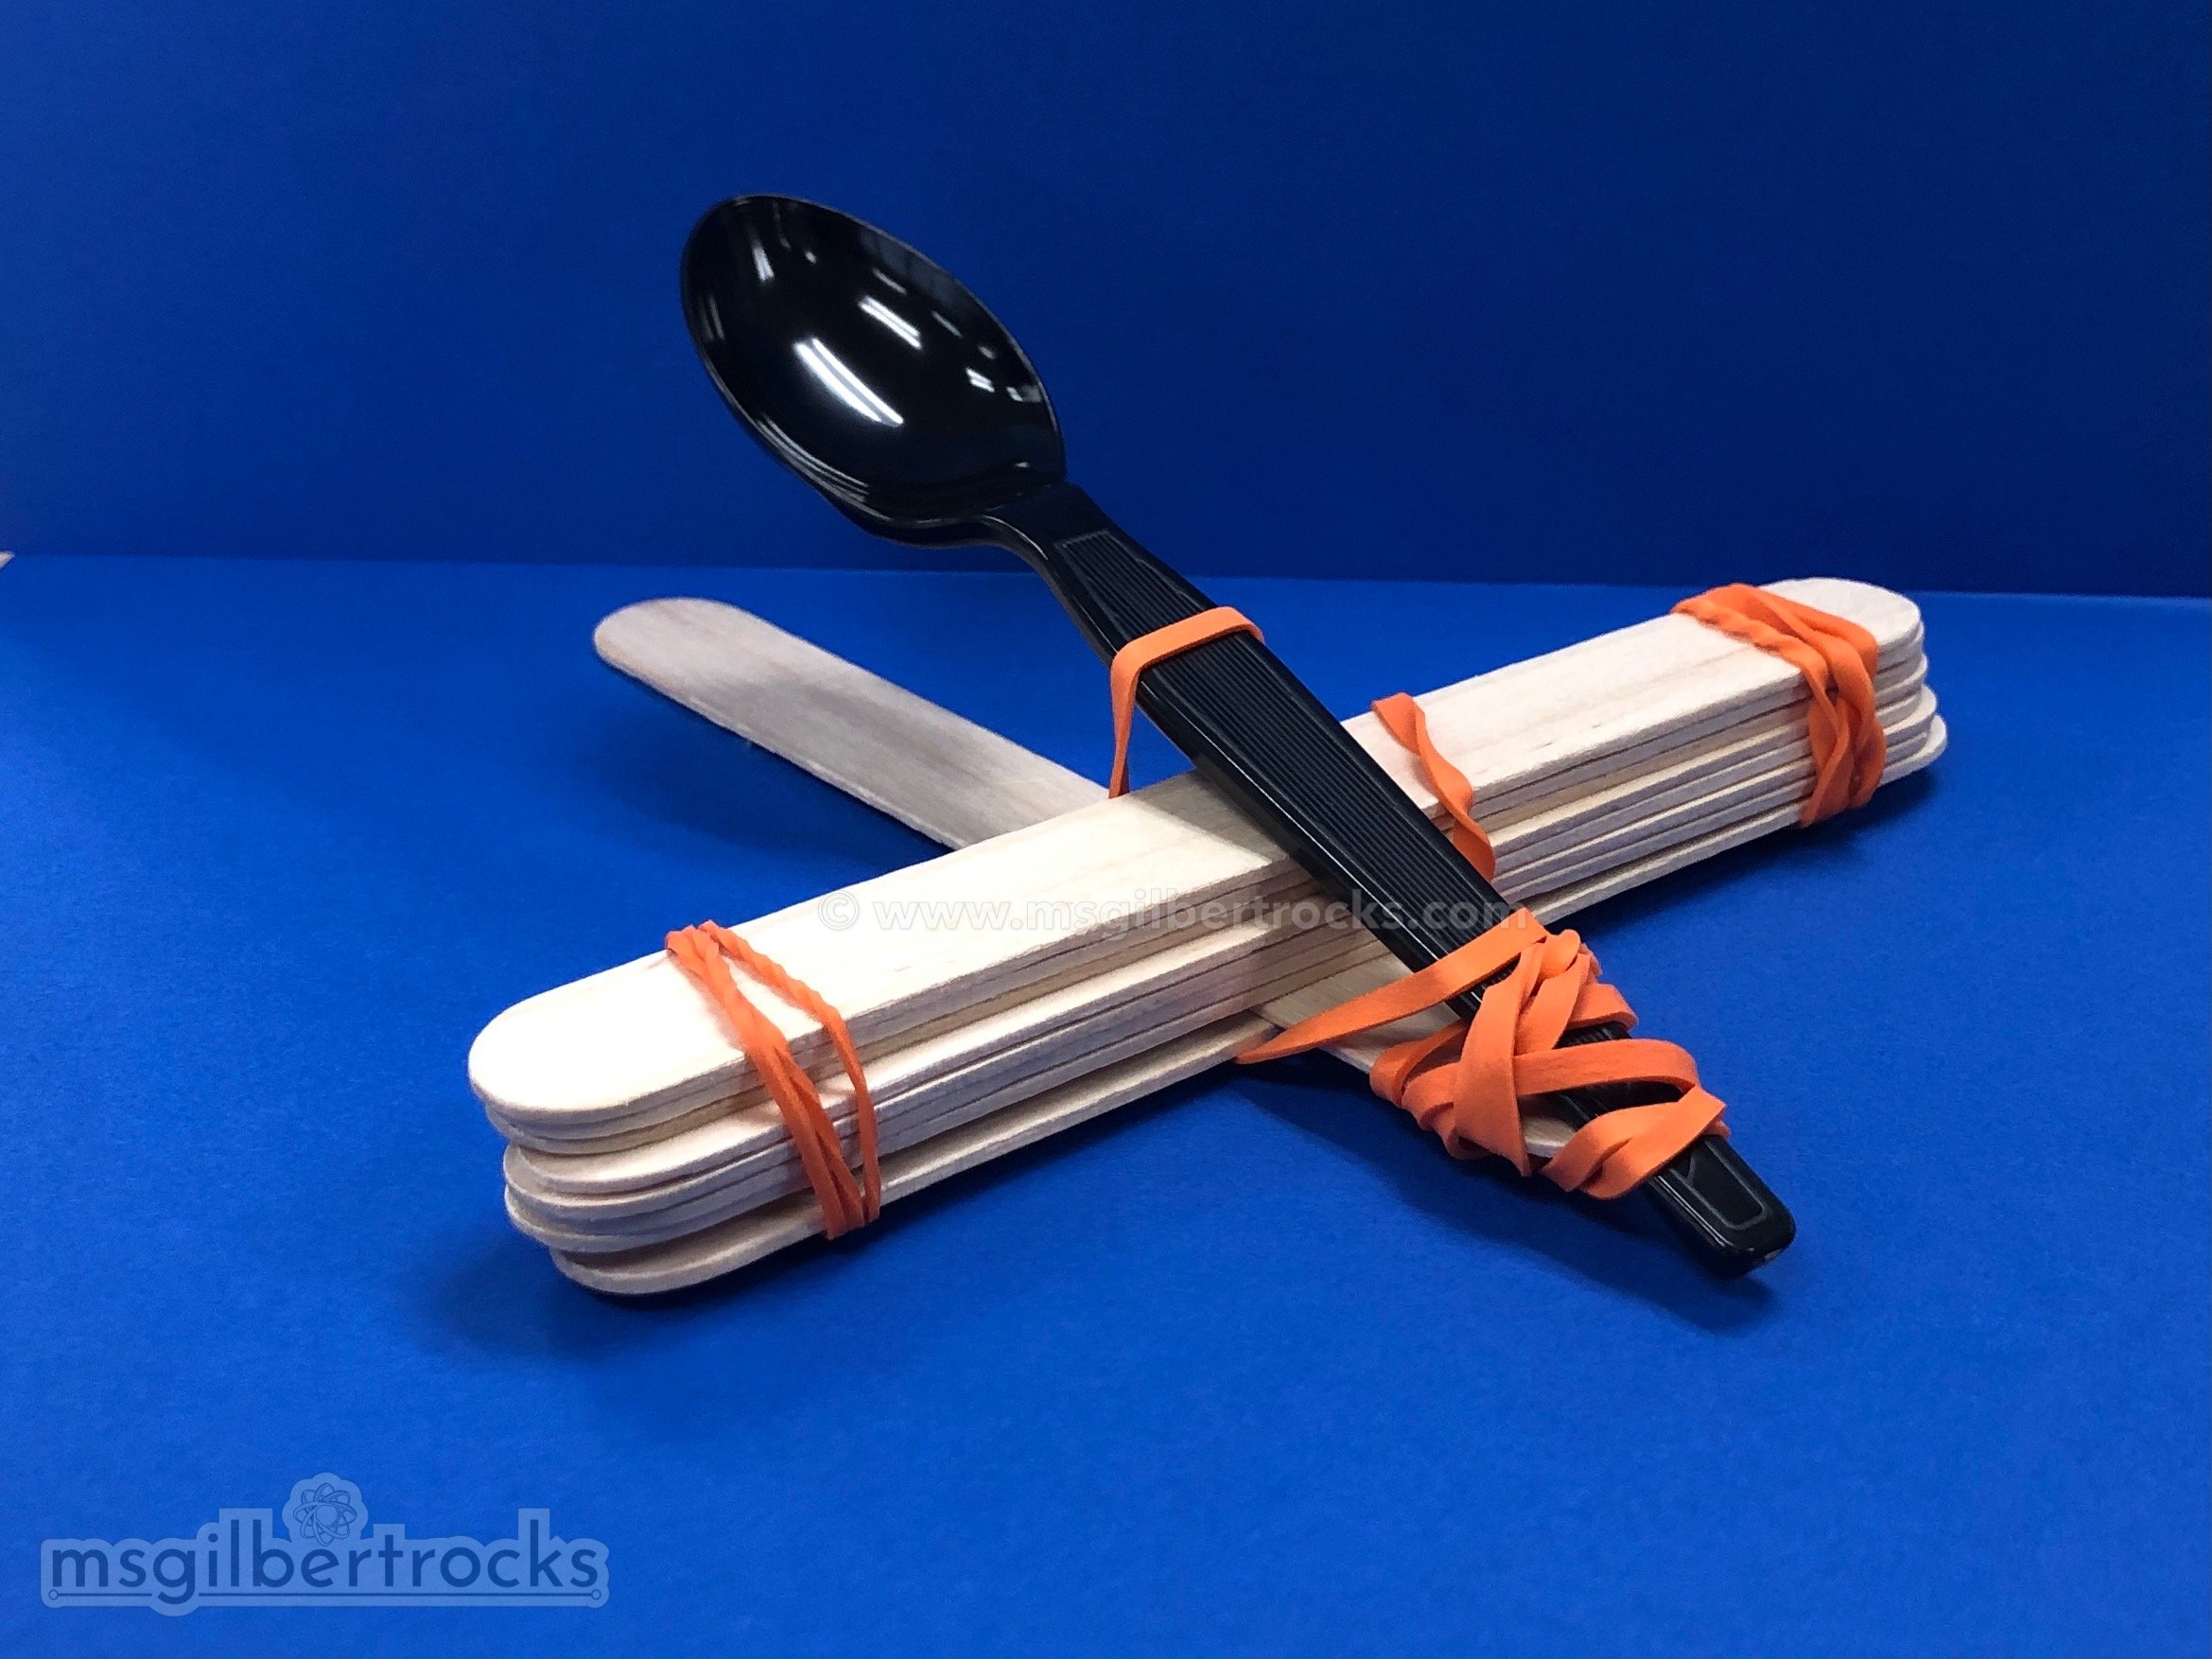
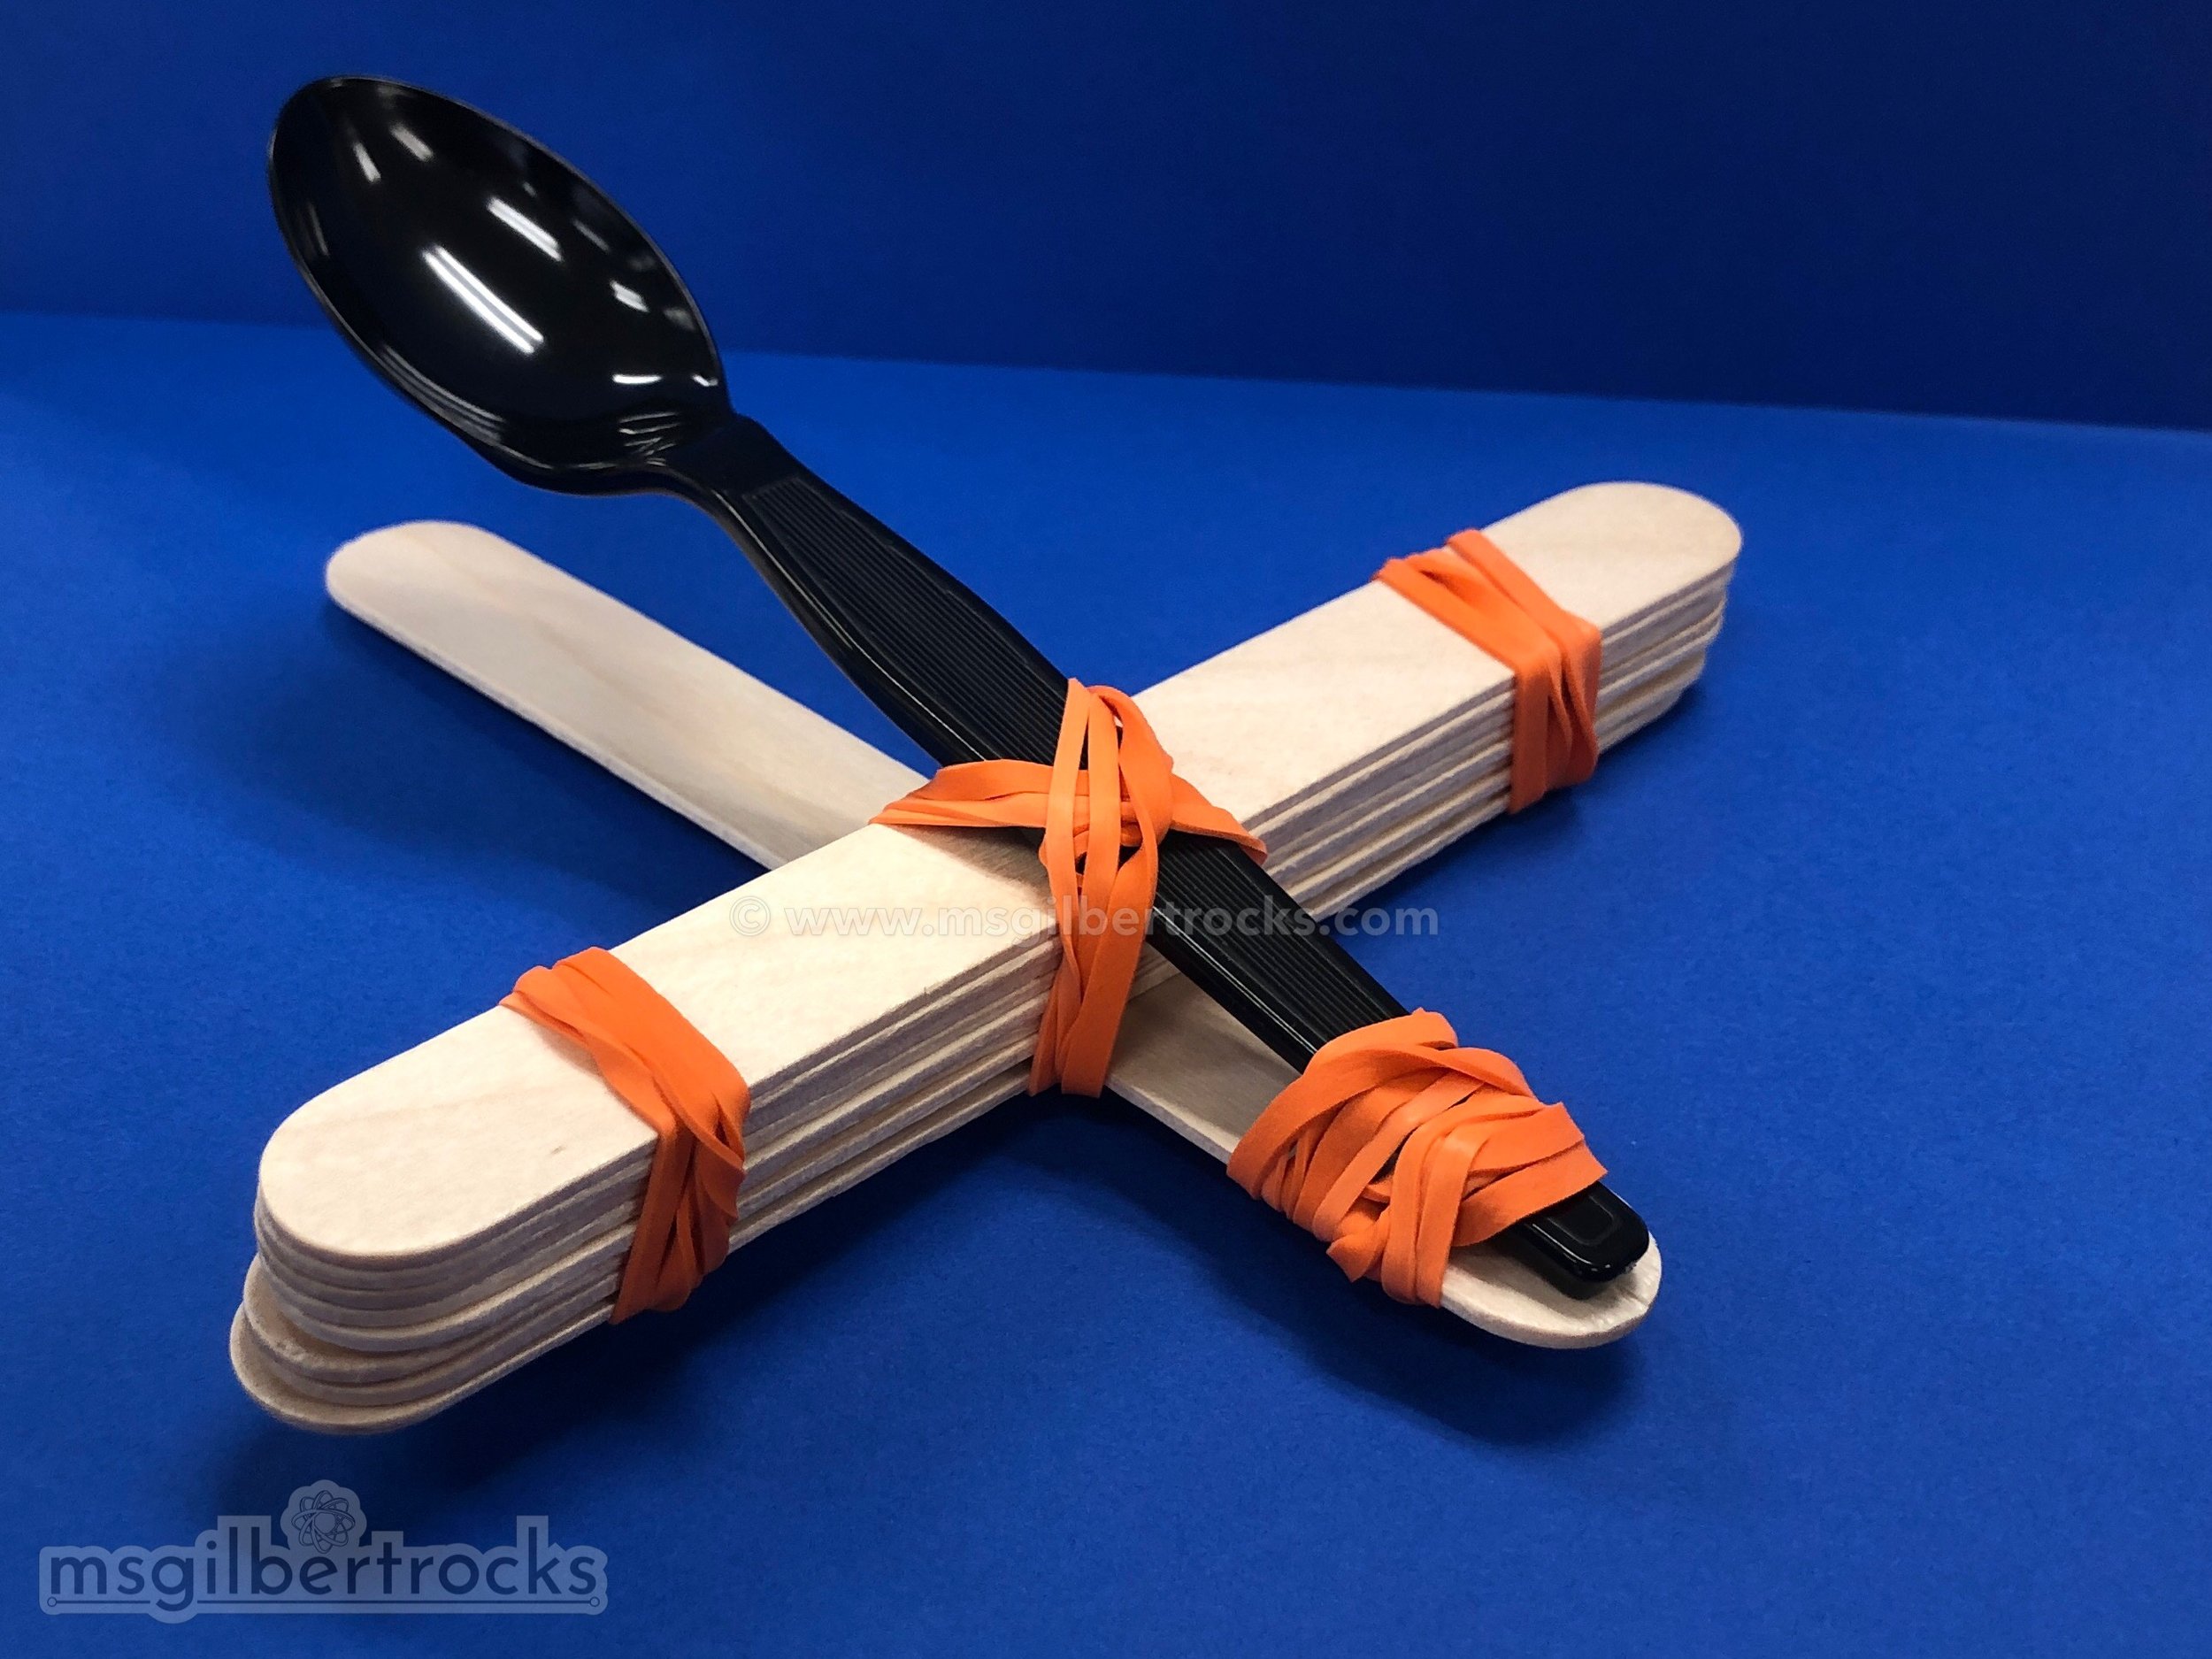
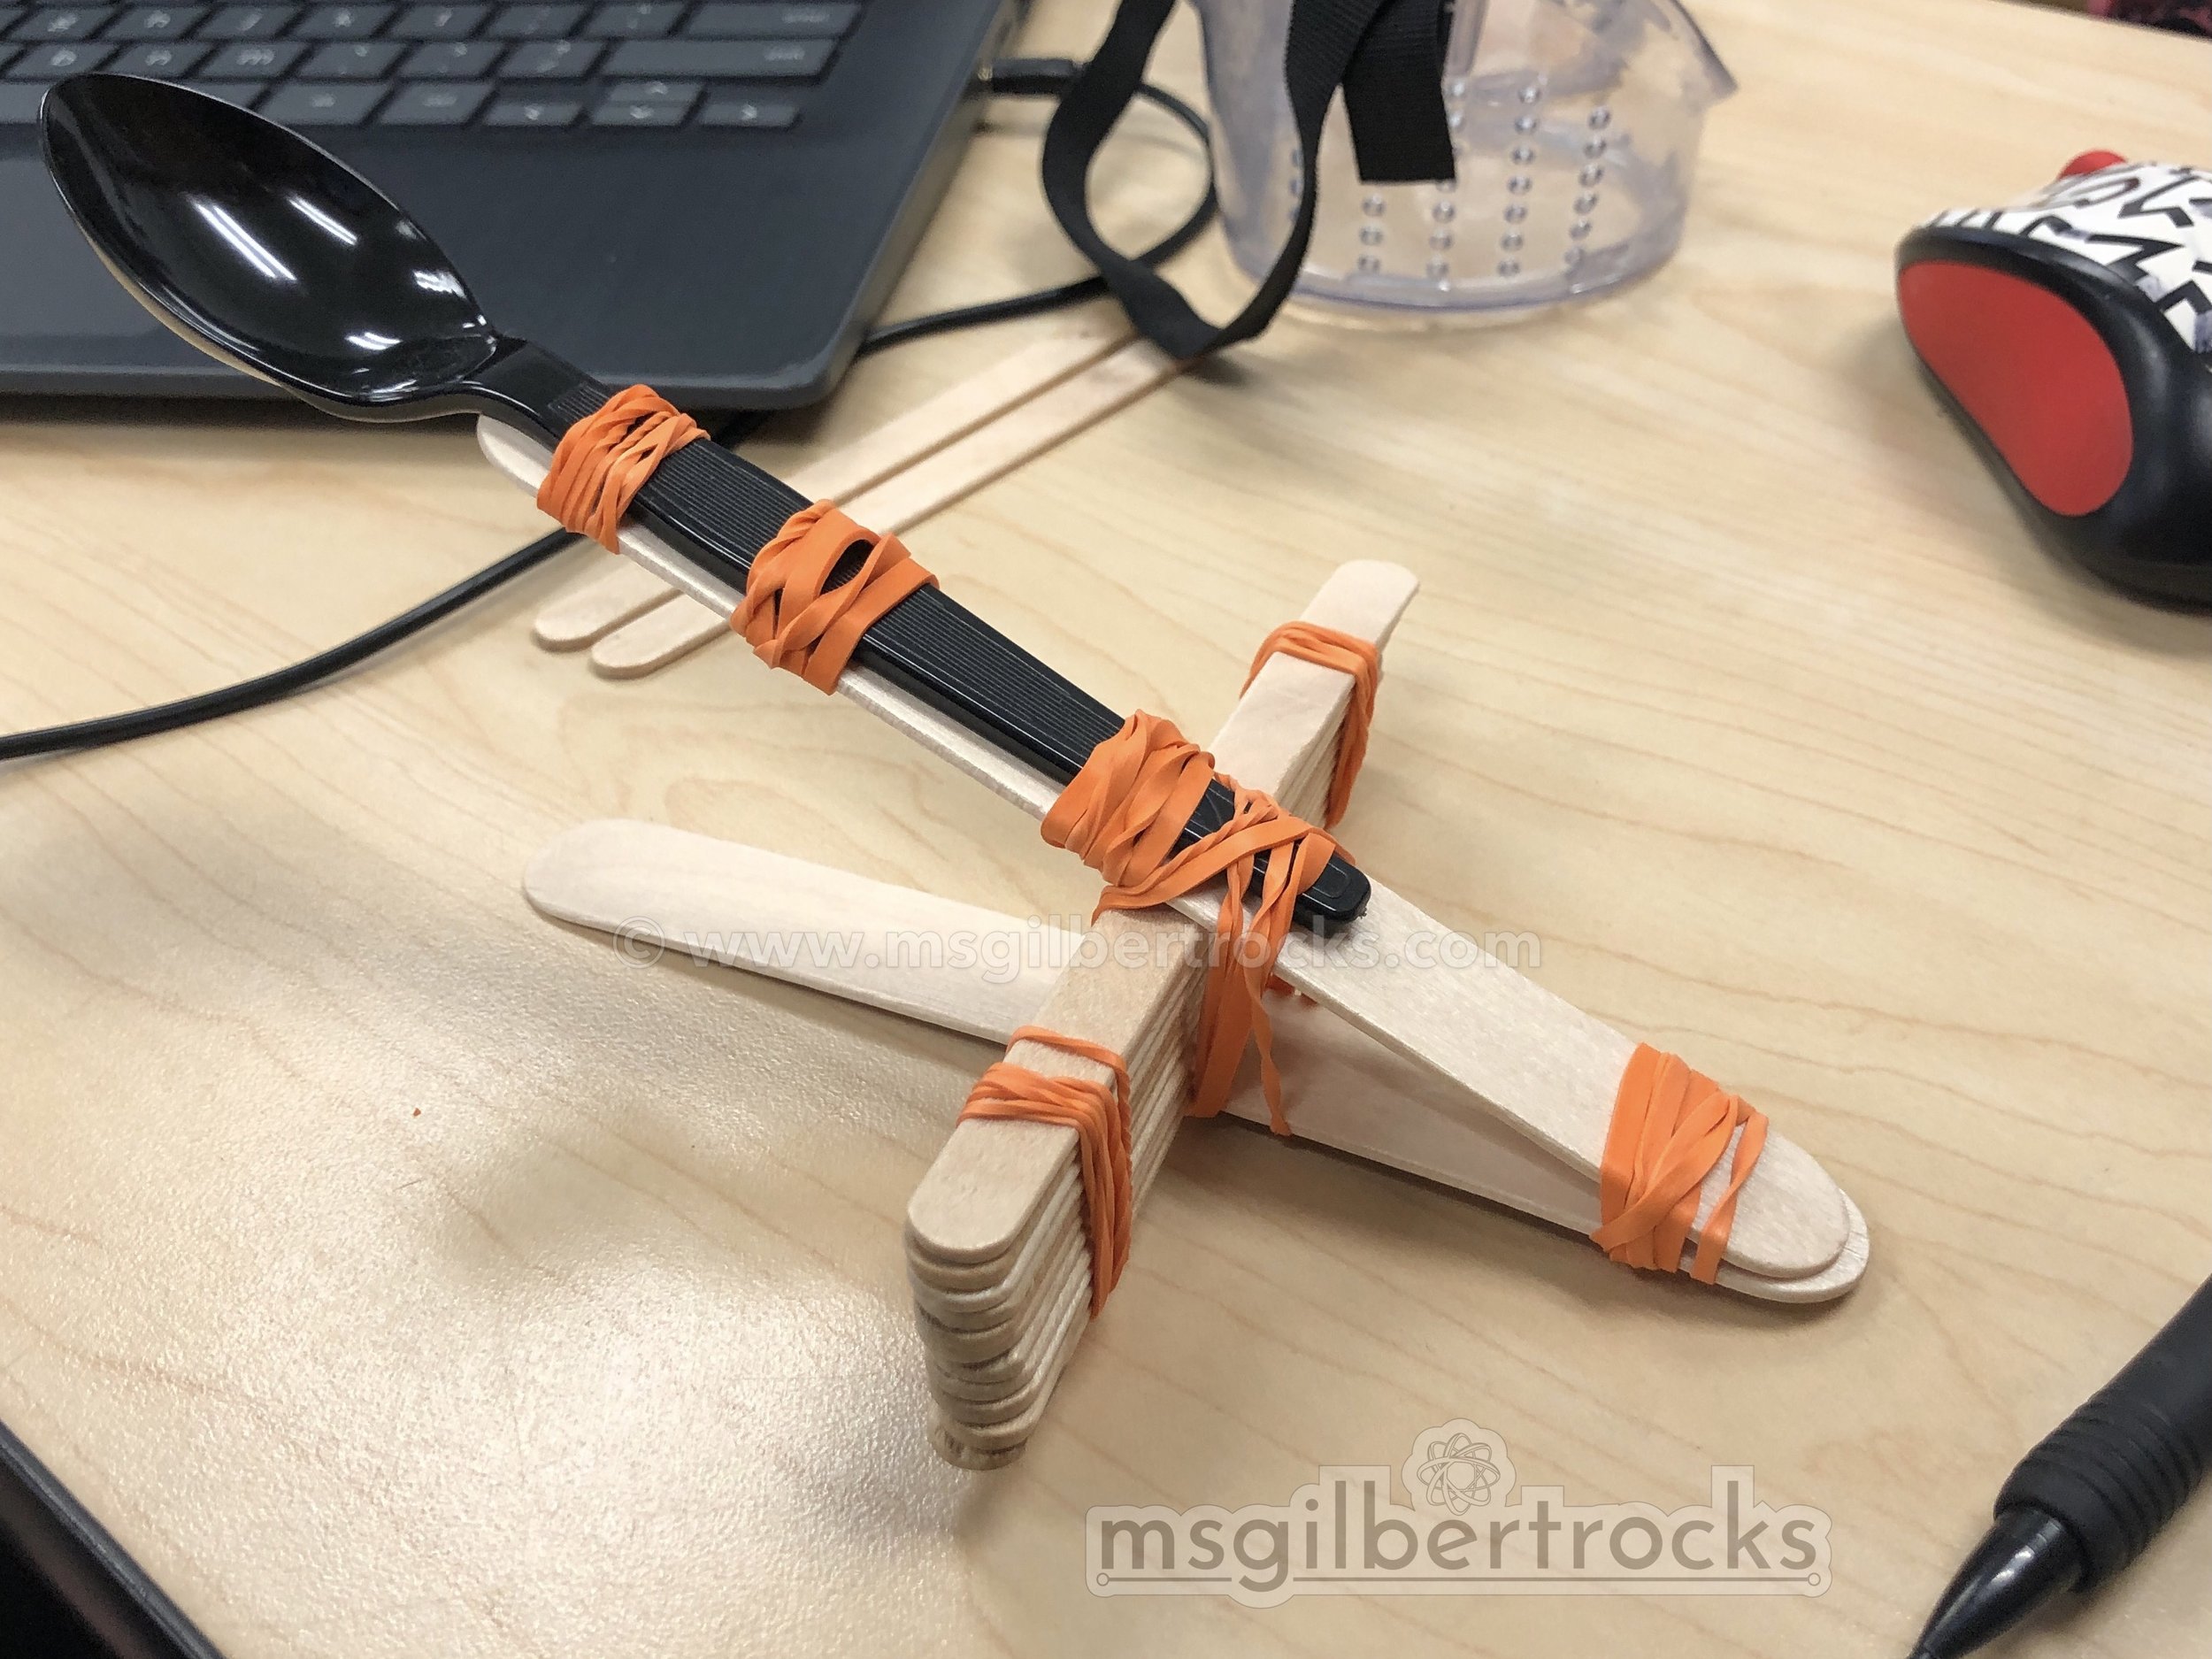
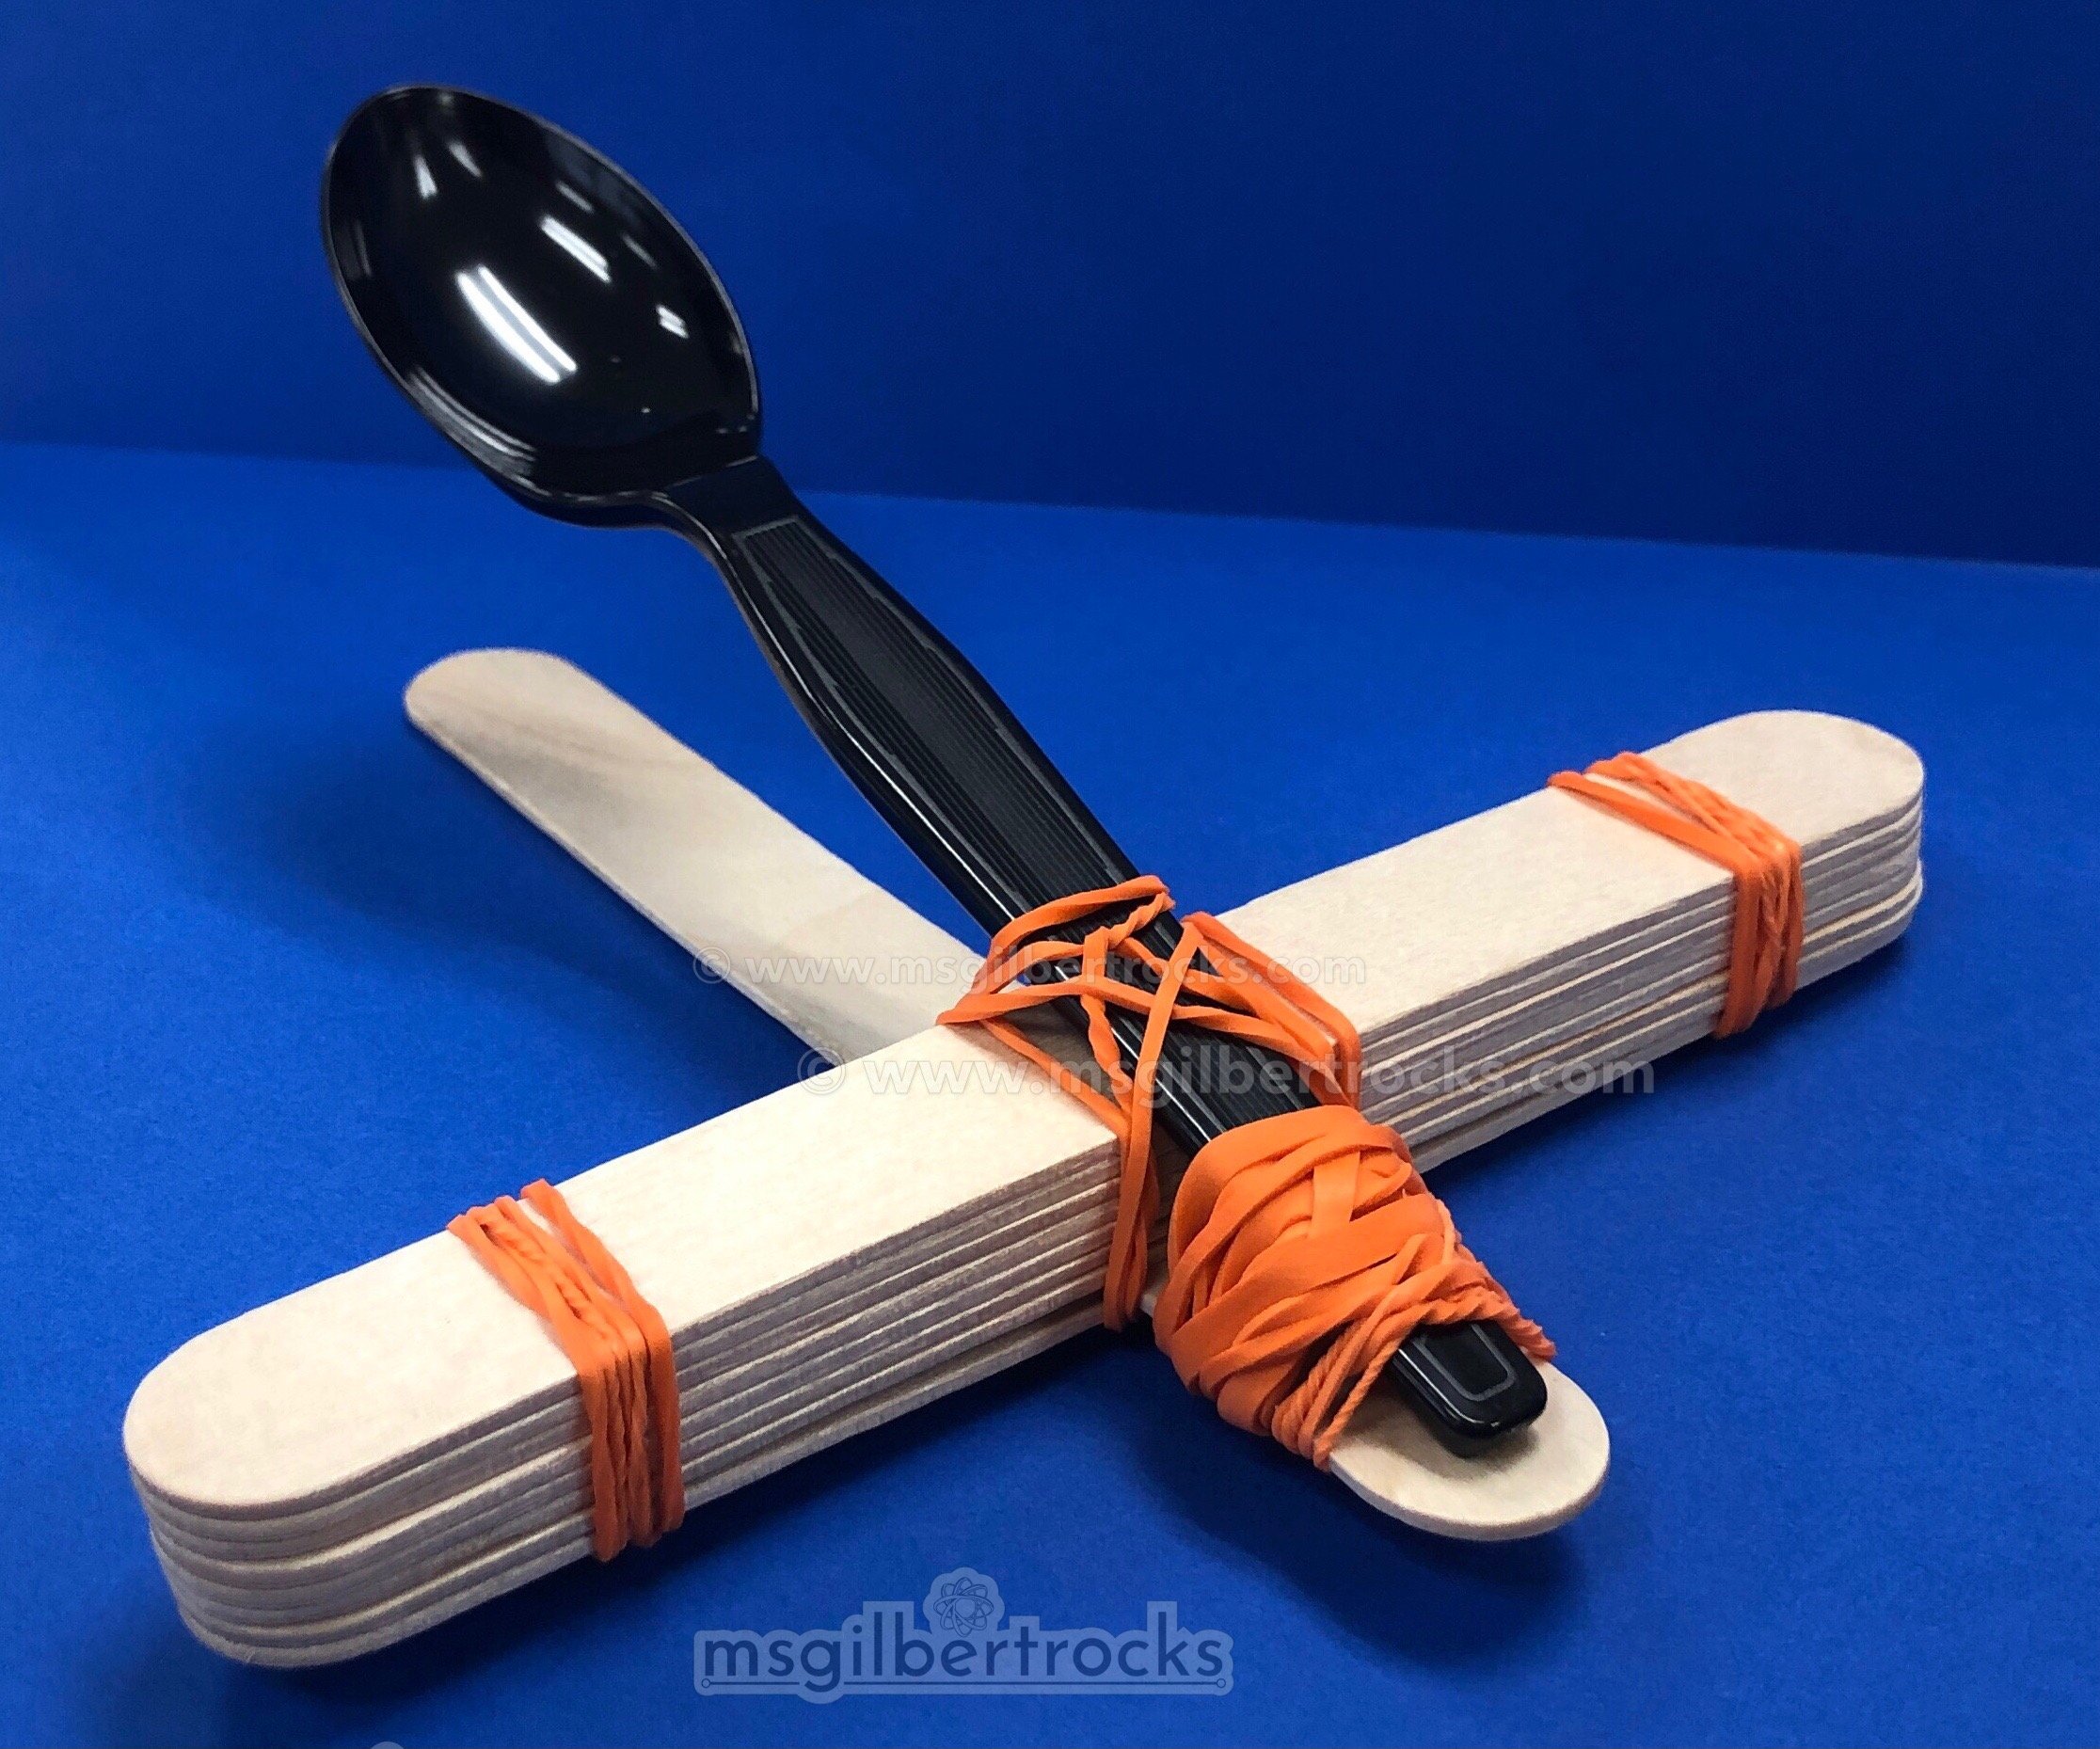
There was no real solution diversity to speak of overall, but there are two student designs that I chose to give them something to compare and discuss. I took time to record the step-by-step process to build each design so I could push it out with the lab report document. This served to let students know which of the two designs they were building and gave them some independence to follow the video versus watching me build them in real time. The videos allow students to pause as needed or even have students who were absent catch up without needing direct intervention from the teacher. Please note that the students still required support, but it was a lot easier for me to circulate through the room and answer questions as needed rather than trying to keep everyone on the same page with an in-person demonstration. See the videos I created for students (A and B designs) at the end of this post. Please note that the “B” design video has some issues with audio quality. Even though I was aware of it after recording I did not have the energy to re-record with all steps. Pandemic teaching in person means conserving energy and after a few takes I just took what I had to try to make it work - the students did just fine using it since I prepped them that the audio had issues in that video. The third model shown in the pictures (above, far right) was created to demonstrate a different pivot point with the cork and it allowed me to launch the same projectiles pretty far (into the hallway!), so I knew that would be a fun reveal prior to sending the catapults home for any further re-designs the kids might do on their own.
Goggles, goggles, goggles!
Safety first. I talk a lot about safety in science class and this year has been no exception. This activity allowed me to separate out individual supplies and a pair of lab safety goggles. Separate plastic baggies (gallon and quart) labeled with the name of each student were set up so the supplies (quart sized baggie) could reside in the larger (gallon sized baggie) with the goggles and the paper copy of the lab report. This made materials management very easy after the initial work putting it all together. As an added bonus the catapults were ready to go home in the smaller baggie once we wrapped everything up and goggles are still separated out in case they are needed for another activity. The kids (and my colleagues) like to tease me about my excessive safety practices, but no one has lost an eye yet ;) Since I spent an entire class period introducing the activity with the bulk of the lecture around use of goggles and I mentioned it quite a few times in my instructional videos, my colleague coined the phrase “goggles, goggles, goggles!” that you hear on the edited version of the videos below. The students appreciate the humor, but also received the message so well that I was completely shamed by one class when I forgot to put my own goggles on when walking around capturing photos and videos of the catapults in action. I can take it because it means they internalized the safety practice of using goggles with all of those projectiles flying around!

Setup and Implementation
Adjustments can be made to suit your space and materials. The “wall” I used was created using two standard sized LEGO baseplates (extras from our LEGO Wall). For us the launch line should be 70 cm from the wall. The wall can be any material that can be placed free standing or secured to the ground easily. It should be roughly 20 inches wide and 10 inches tall. Add a tape line for launch line and wall placement. These should not move/change throughout the activity. Take pictures and leave tape down to keep the setup consistent. One meter stick and ruler at each station.

Remember to photograph the setup and put it in the same place for subsequent testing days. For sanitizing purposes, one red lid container of wipes should be at each station. Add all materials to clear quart size baggies with each student's name. Add safety goggles to the baggie or use additional clear gallon sized baggies labeled for each student to contain goggles and catapult supplies. Completed catapults will continue to be stored in a bag to keep items separated in the classroom.
The overall snapshot of the activity is broken down below. We did not end up with as robust as a final discussion as I was planning just due to the timing spreading out to both before and after winter break combined with absences from the surge during the pandemic. Also, we took a number of days to get everyone through the testing but it does not need to take as long with more stations or class time (ours is incredibly limited this year). It was a great activity to get hands-on experience building, testing, and measuring.
Day 1:
Watch video: https://www.brainpop.com/technology/simplemachines/levers/
Teach measurement with meter stick and ruler (cm side) using the document camera (show example of measuring distance, clarify that it is not just closest big whole number), need to count lines
Day 2:
Reminder about meter stick/ruler for cm
Distribute supplies, explain safety procedure, wipe down ruler/meter stick, do not touch wall, entire catapult behind launch line, will stop if safety/distance not happening
Establish testing station routine (some sketch first while waiting turns)
Start building - use live demonstration of steps and push out videos to each group (A and B designs)
Teacher to take pictures of sketches and final design to add on Google Doc
Students test and/or sketch, measure distance to track on data table
Continue process of testing and measuring for one or more class periods, if needed
Days 3 and 4:
Continue testing and measuring distance, when done they should work on entering information from paper copy to digital and answer questions for conclusion
Conclusion questions can be HW if needed (if rest in digital copy)
Once everyone is finished, demonstrate with the final design (teacher version with cork) and discuss the differences. This may need to be a day 4/wrap up activity
Materials
TEACHER Materials for testing or management:
Wall (2)
Meter stick (2)
Ruler (2)
Tape and sharpie to mark lines/write on tape
Gallon and quart baggies labeled with each student‘s name (by homeroom/class)
Video recording showing catapult build for each design (A and B)
Student Materials:
8 rubber bands
Projectiles (1 each): cotton ball, paper ball, aluminum foil ball
Plastic spoon
8 regular popsicle sticks and 2 jumbo popsicle sticks (A) OR 9 jumbo popsicle sticks (B)
1 pair of safety goggles
Paper copy of lab report and a pencil
Student designs and lab report
Photos included are a sampling of what the students created. Even though many are the same design, they came out with enough differences that their efficiency in completing the challenge (launching each projectile type over the wall) was varied. It was neat to see the perseverance in action as the students tried different ways to position/hold their catapult or modify the ways the rubber bands secured them. A video showing a couple launches is included below the photos (before the instructional videos for A and B designs). Please feel free to make a copy of the student lab report to use and/or modify to fit your own classroom. As always, I love to hear about any adaptations of classroom activities shared on my website, so please let me know if you do something cool with any of these ideas!