Pasta Fun in Math: Rovers and Bridges
Every year I look forward to two hands-on activities involving pasta and hot glue to bring math concepts to life. The activities give us a chance to pause a traditional class involving notes and skill reinforcement on computer/paper to applying concepts in real life using budgeting, data collection, formula calculation, and geometric spatial awareness for designing and building three dimensional objects.

Pasta Rovers
First up, the Planetary Pasta Rovers, based on the activity of the same name by the NASA Jet Propulsion Laboratory (JPL). You can read up about the activity in an unmodified state on their website. There are handouts, pictures showing examples of rovers, and extension activities. Much of the information was used in my modified version (make your own copy of the student handout I created). Over the years I have adjusted the timing to do the rovers first since it involves a budgeting component. The switch allows us to practice with materials management prior to the bridge-building activity. It can take anywhere from 3-5 days to complete the activity using the modified handout (make your own copy here as a Google Doc).

Data collection is nice if the group can handle it and the rovers survive sliding down the ramp a few times. After several iterations of the activity with different groups, I have learned to always record test runs, if possible. If a rover gets smashed beyond repair you can have something to track from the early test runs. Similarly, get pictures early and often to track the designs and iterations after testing. We also learned to add sides to the ramp (all cardboard) to help avoid the inevitable crash/smash of a rover flying off the side. Despite numerous reminders not to do so, expect that your students may try to add a push to the rover at the top of the ramp giving it an uncontrollable applied force as gravity takes over. We do not distinguish between rolling and sliding for this activity - we just want the rover to make it down the ramp and travel a bit further on the ground, if possible. Early test runs often reveal structural issues like single axle spaghetti noodles snapping in the transition from ramp to floor. Fortunately, a little perseverance and a generous amount of hot glue can fix most minor issues.
Logistics
Years ago I purchased each type of pasta listed in the Google Doc in addition to an assortment of miscellaneous options to add flair (like farfalle “bow tie” pasta). The same boxes of pasta have been used for five years and could likely be used for at least another five due to our small class sizes. The larger lasagna noodles (we have two types currently) will be the first to run out and those along with the manicotti are the most delicate/prone to breakage when stored. At the conclusion of all pasta-related activities, the open boxes are taped up, sealed in a gallon Ziploc bag and stored in a plastic tote bin with a locking lid. We have shared mini hot glue guns in the past, but currently have enough for each (4-5 in a class) student to use their own. Extra hot glue sticks are extremely important since you will use way more than you think students could possibly go through!

Last year, we added the plastic activity trays from Dollar Tree and they have been clutch for keeping materials from rolling away on the desks and being able to easily put works in progress on a back shelf at the end of class. I use a label maker to create labels for all students each year and I add them to things like the activity trays to help them quickly identify their project/materials. We decided to add this year’s class to the trays and keep adding each year to preserve the history of the student that came before and used the tray for the pasta activities. I hope it is a tradition that will continue even after I am gone!


Pasta Bridges
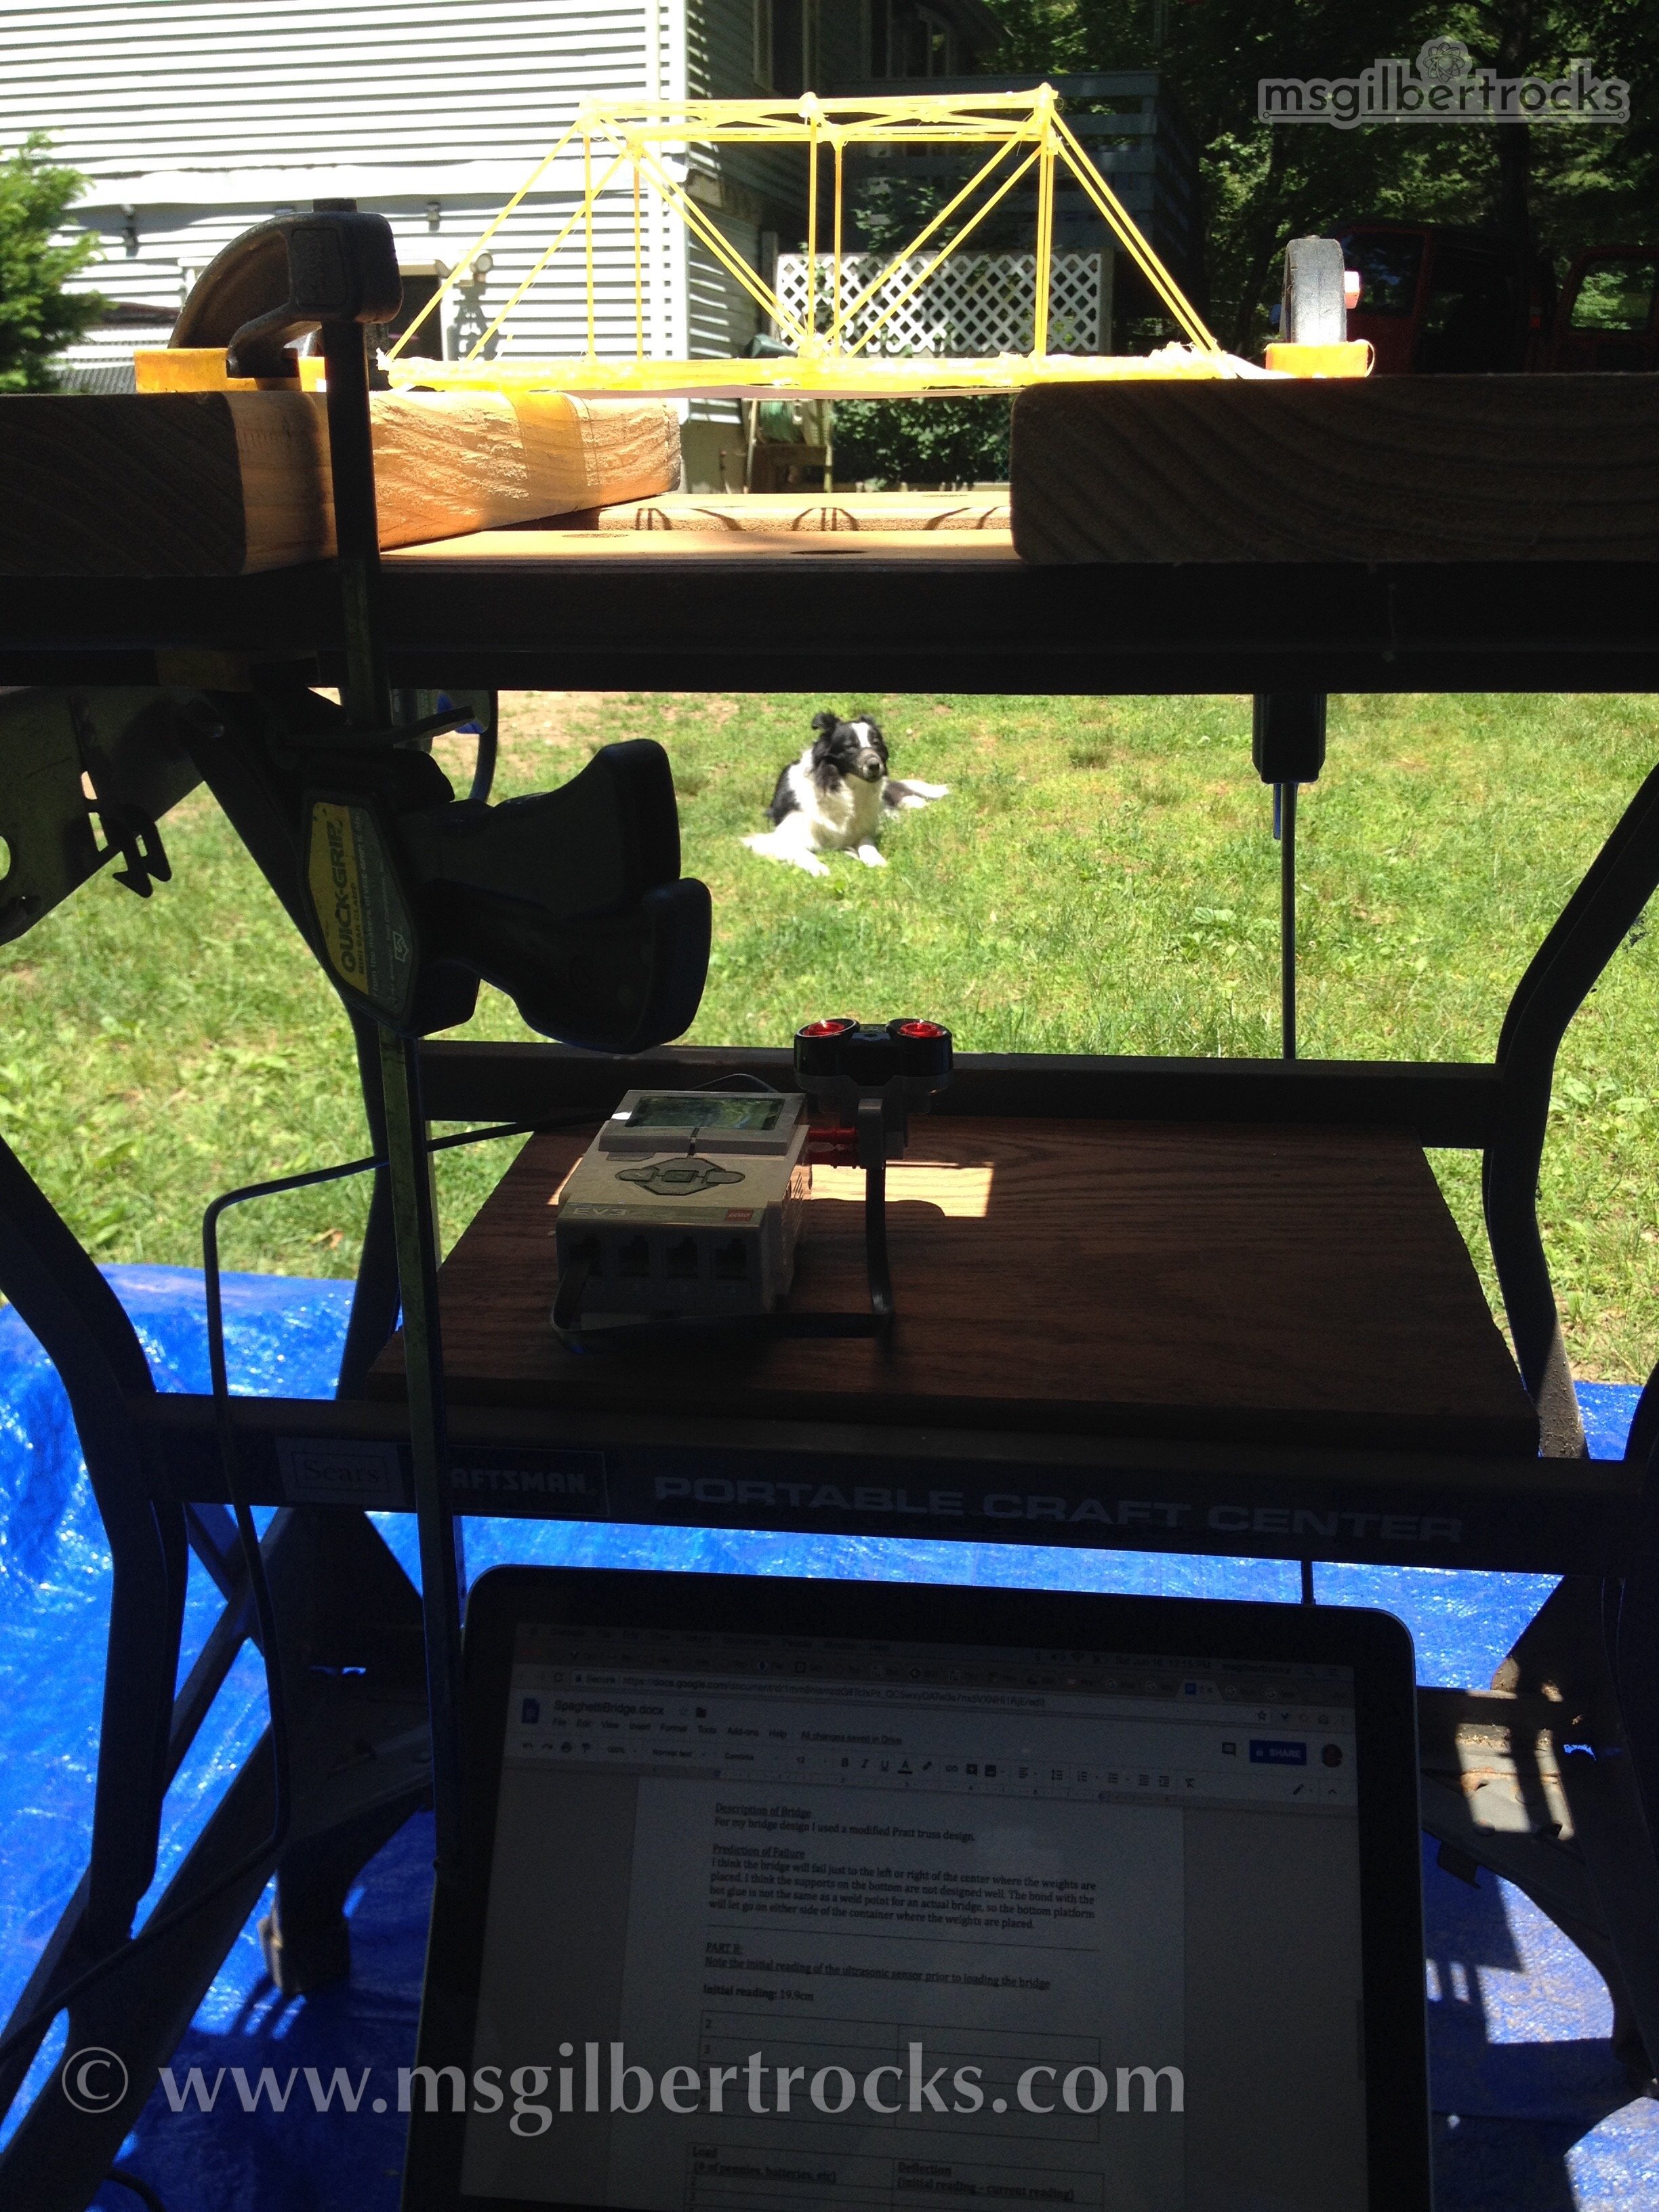
It has worked to roll (see what I did there?) right into pasta bridges after pasta rovers. There are fewer materials, no budget for pasta, and the students have learned how to manage materials as well as navigate setup/cleanup with more independence. I start with an introductory class period that has a goal of going over the expectations (safety, materials management). We watch snippets of a few videos to get some visuals of actual bridges and make connections with what a truss bridge design looks like in the real world. Here are some example videos you can pre-select snippets from for your class:
We watched this one to 4:47
This one is very long, but has chapters so you can skip around to select what is relevant for your class
This one is very short and has simple illustrations for the truss design
Depending on your group, you may want to search up some videos of actual pasta bridges as well. There are a number of videos on YouTube that can help provide visuals or ideas for students that may struggle to connect the actual designs in the real world to their pasta creation. After we wrap our bridges, we often find some videos online showing other pasta bridges breaking. These are often high school classes that have different rules (e.g., weight constraint for the bridge/materials) so it can be fun to see the differences in designs and watch them be tested to failure.

Learned Experience Through TEEP
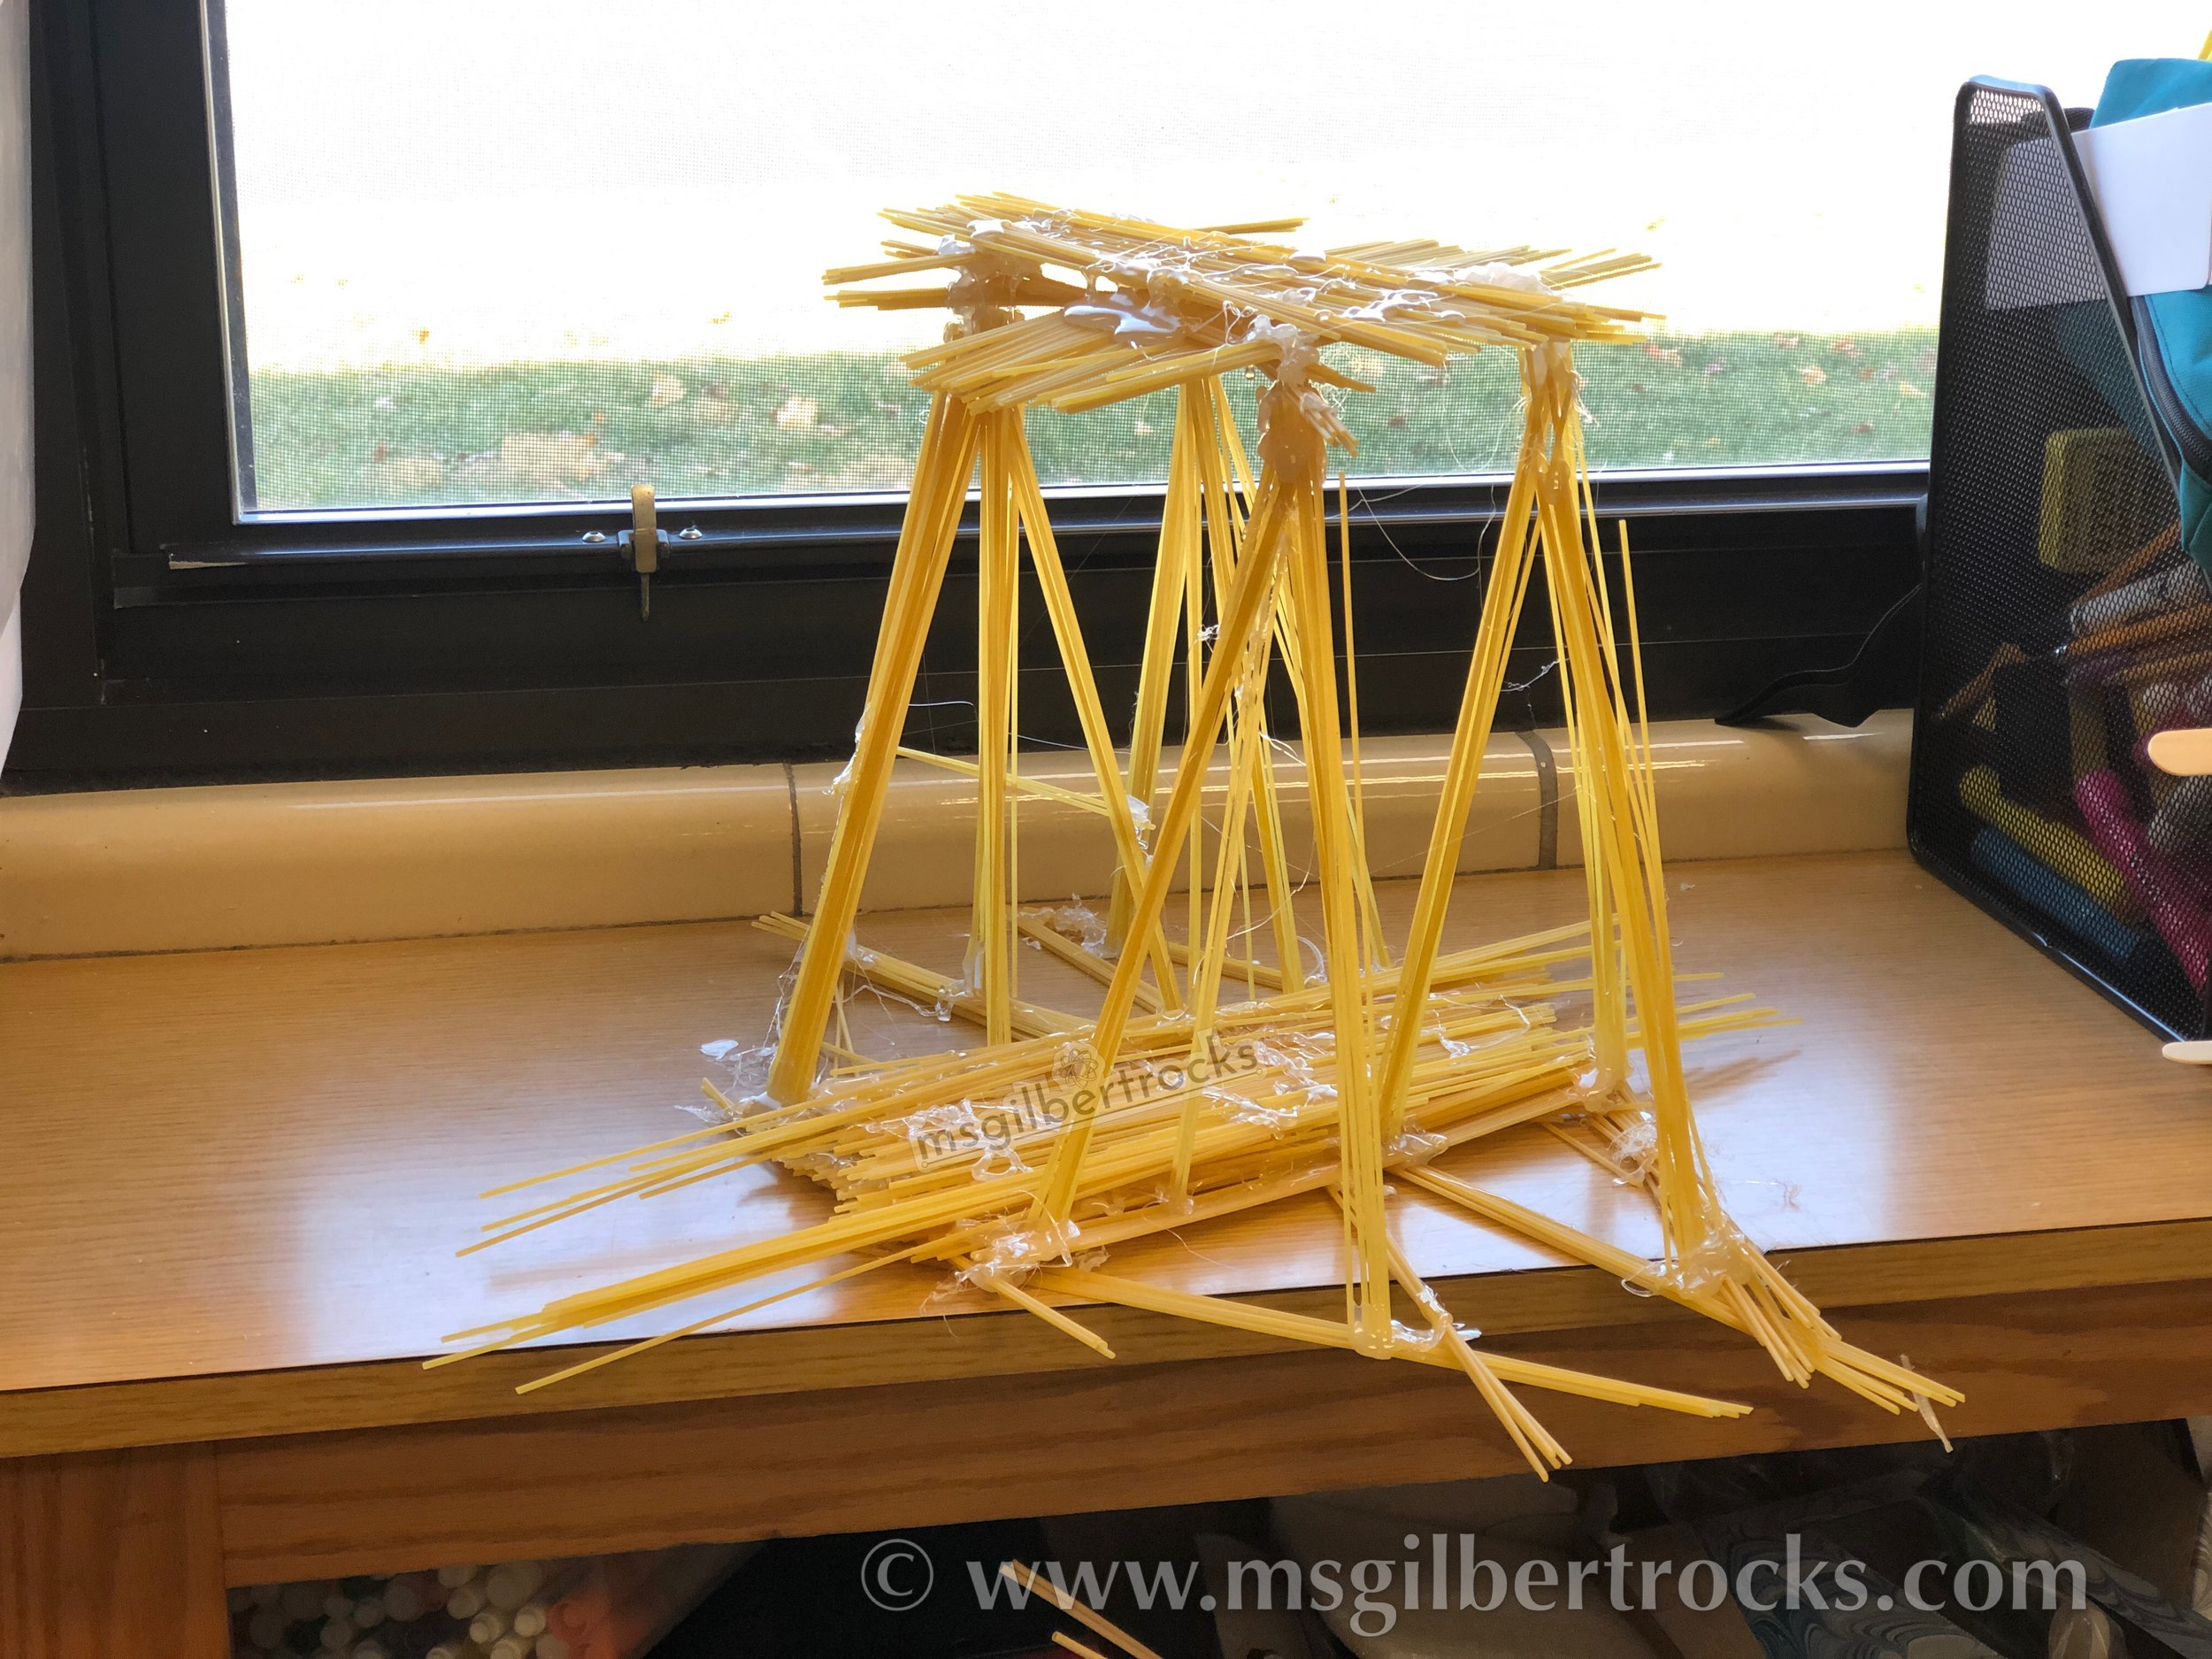
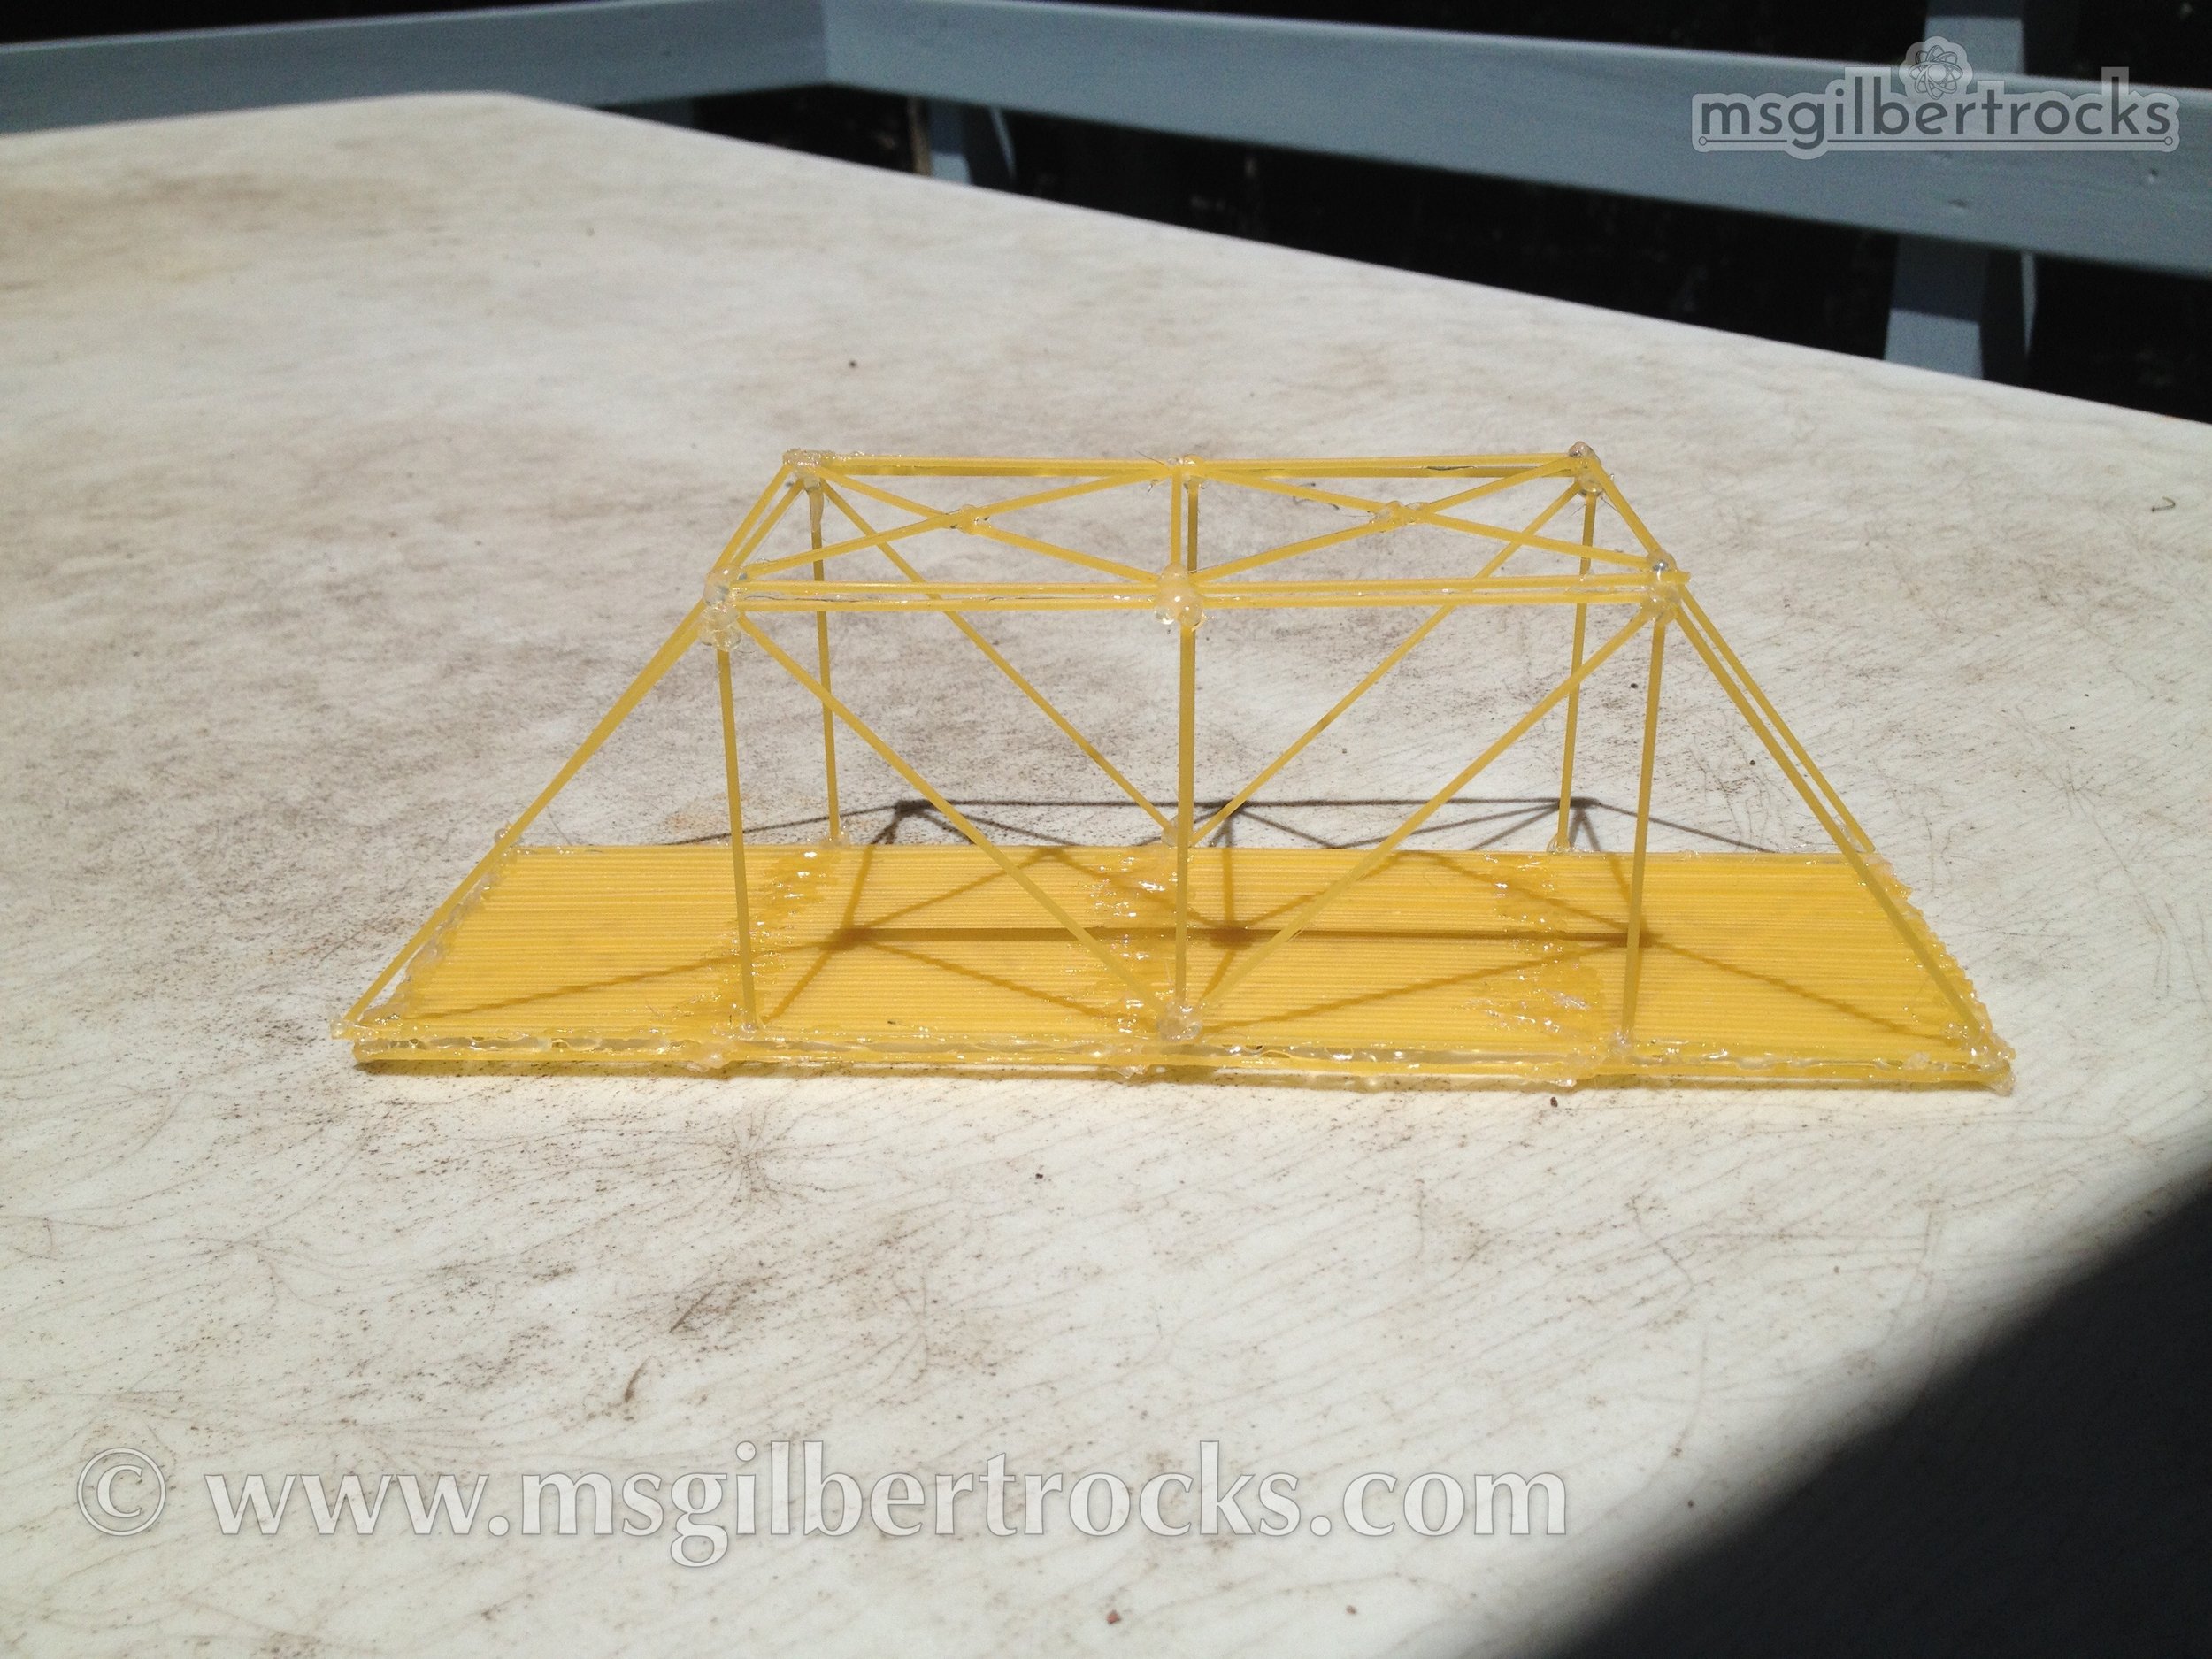
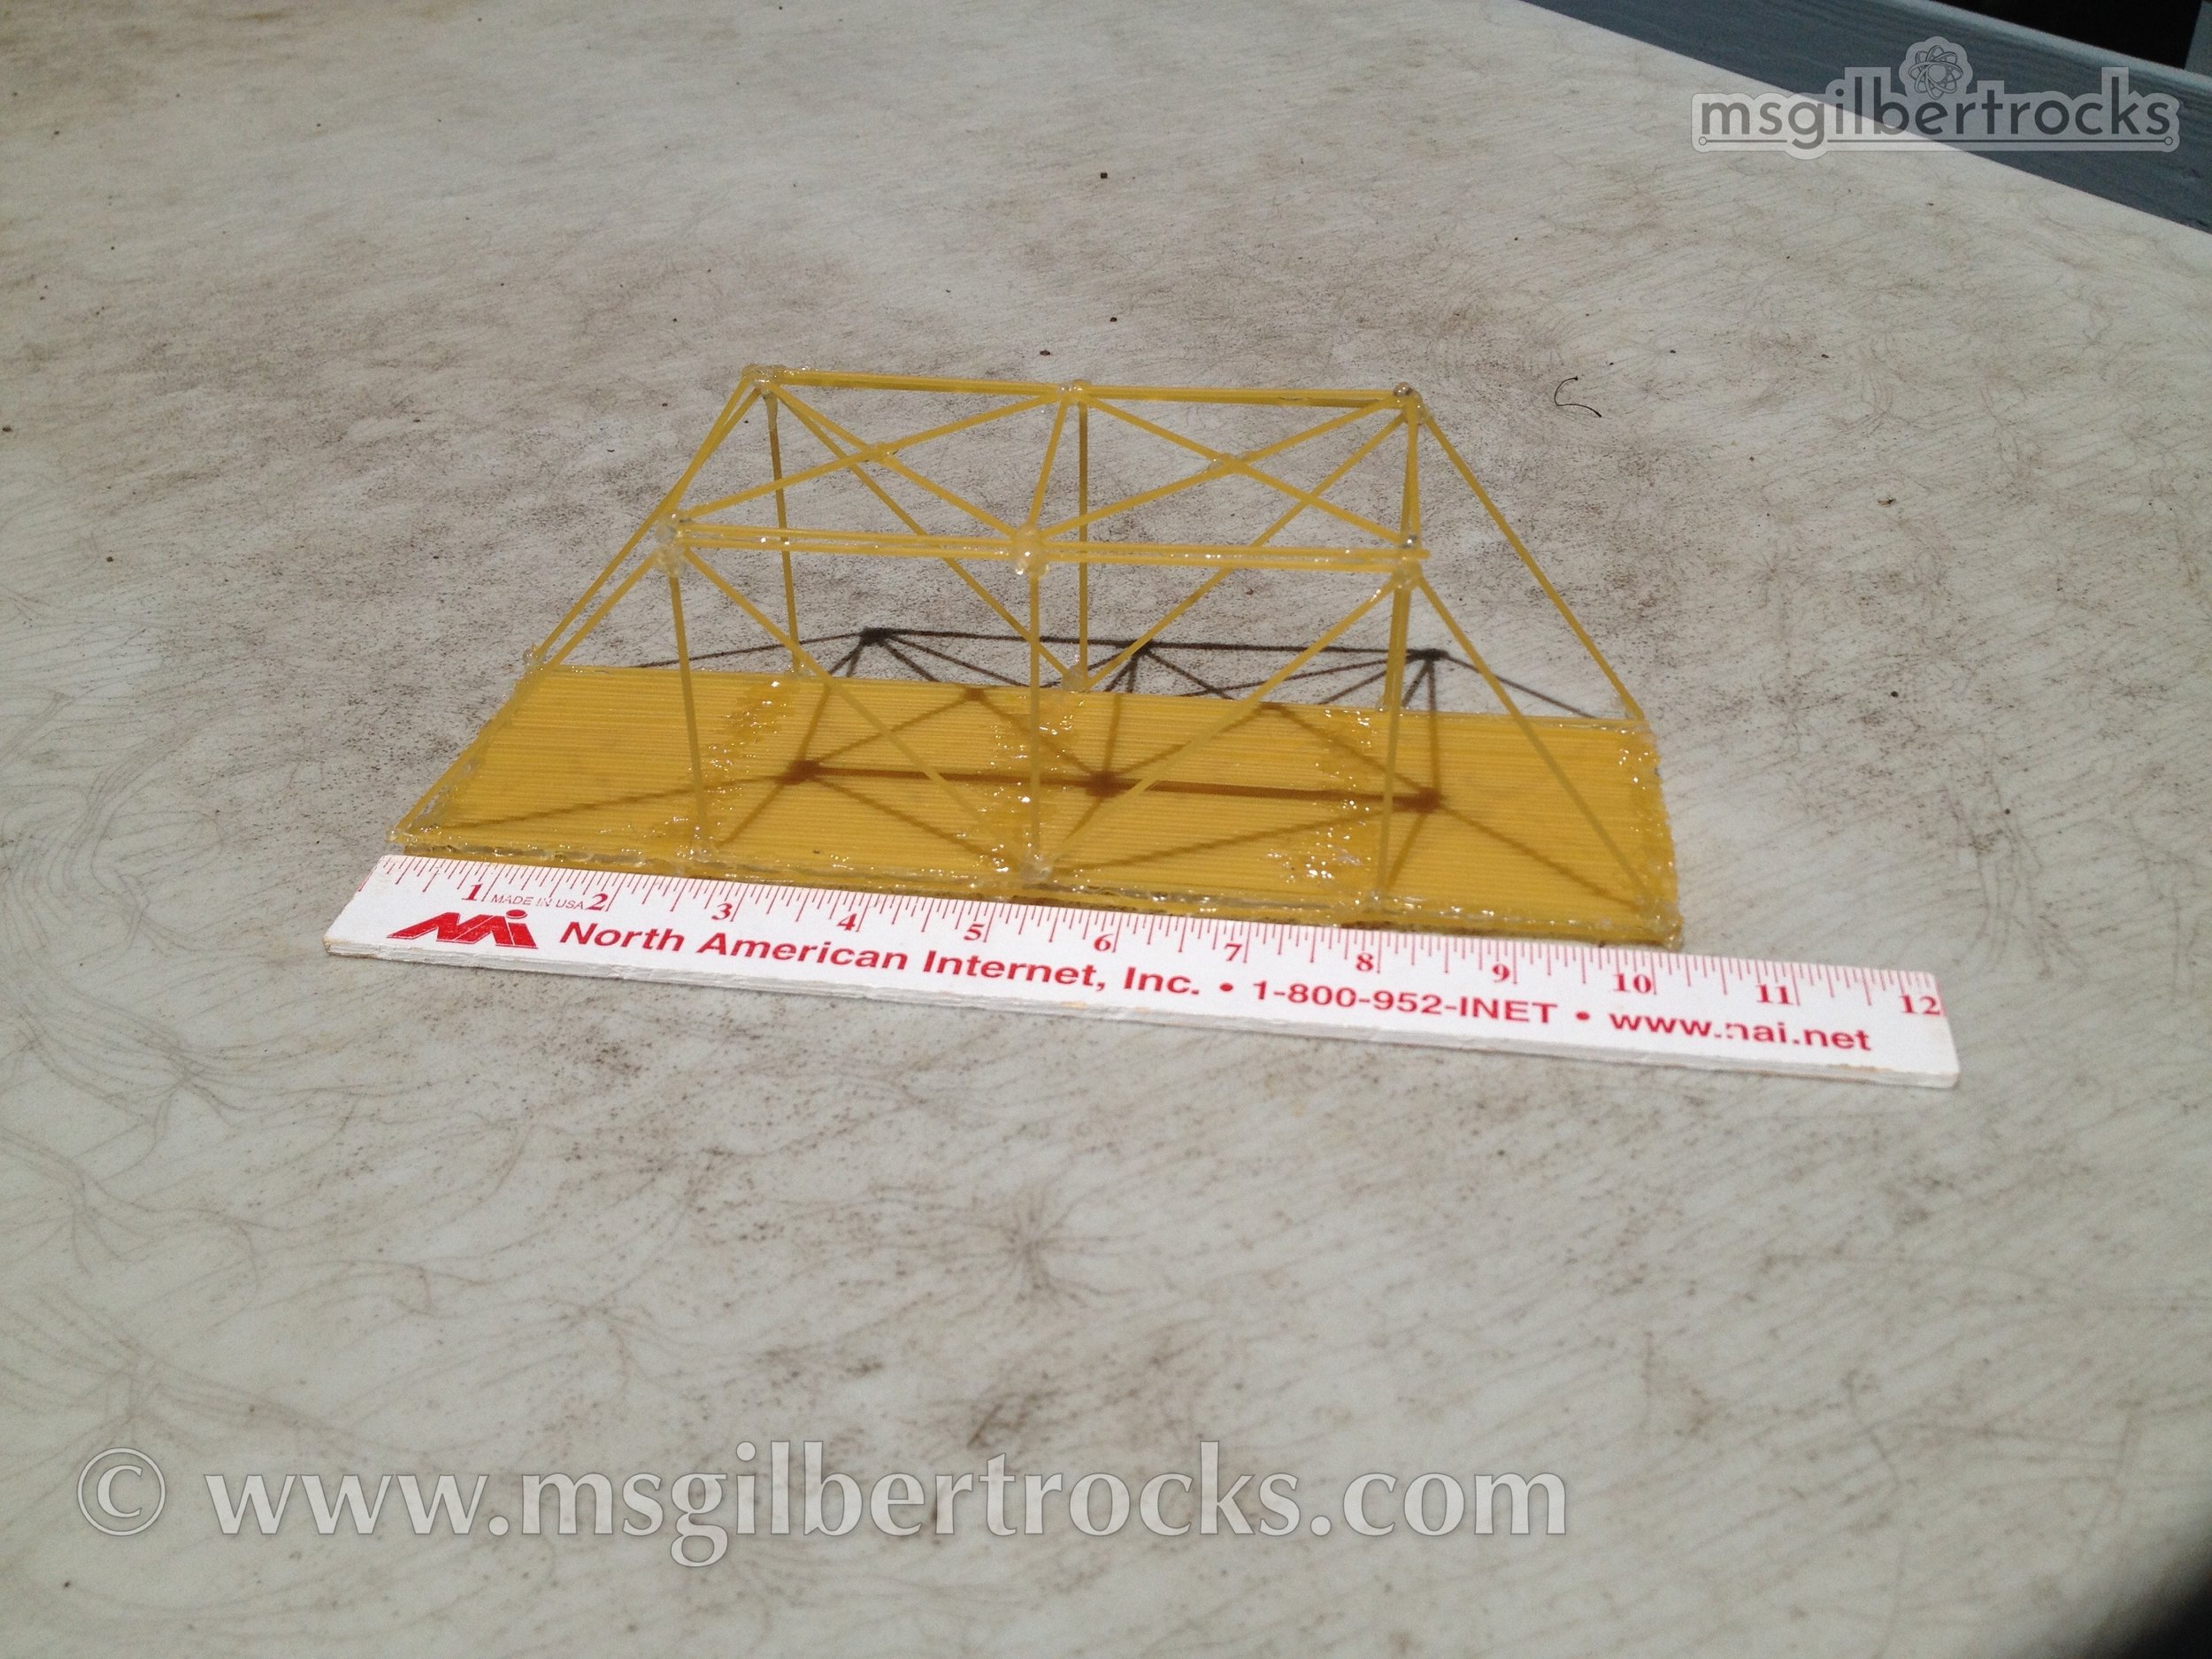
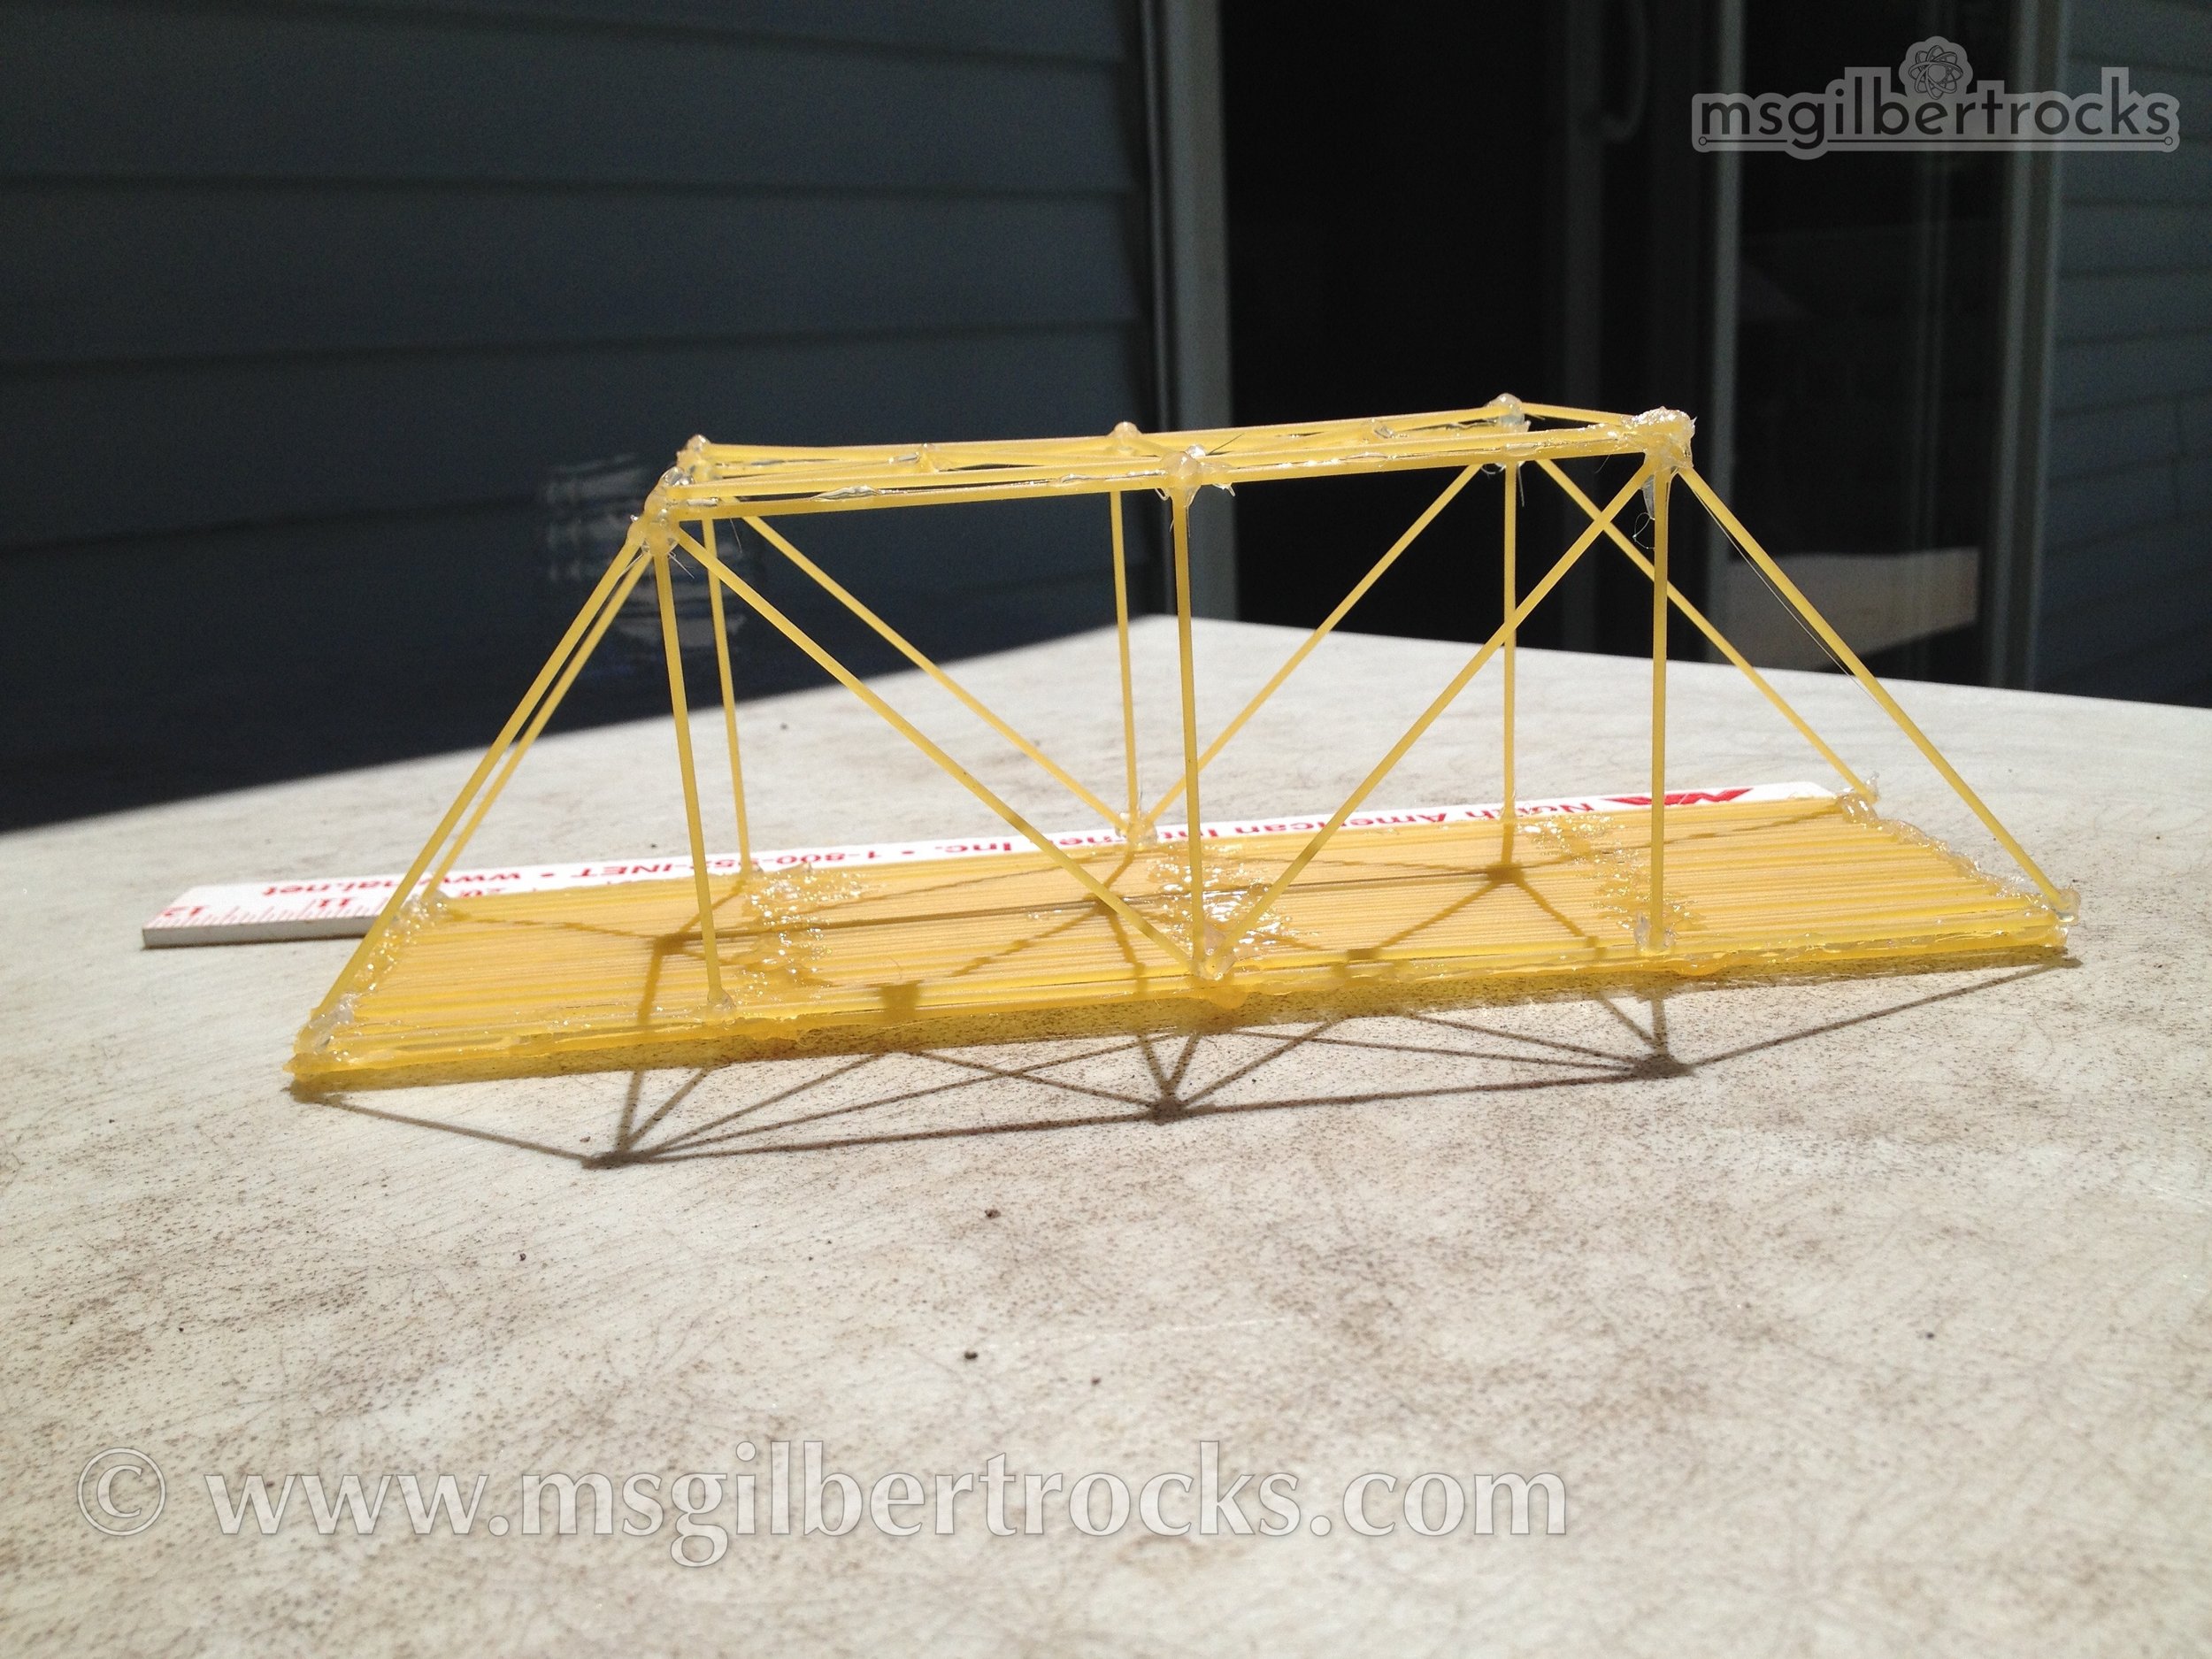
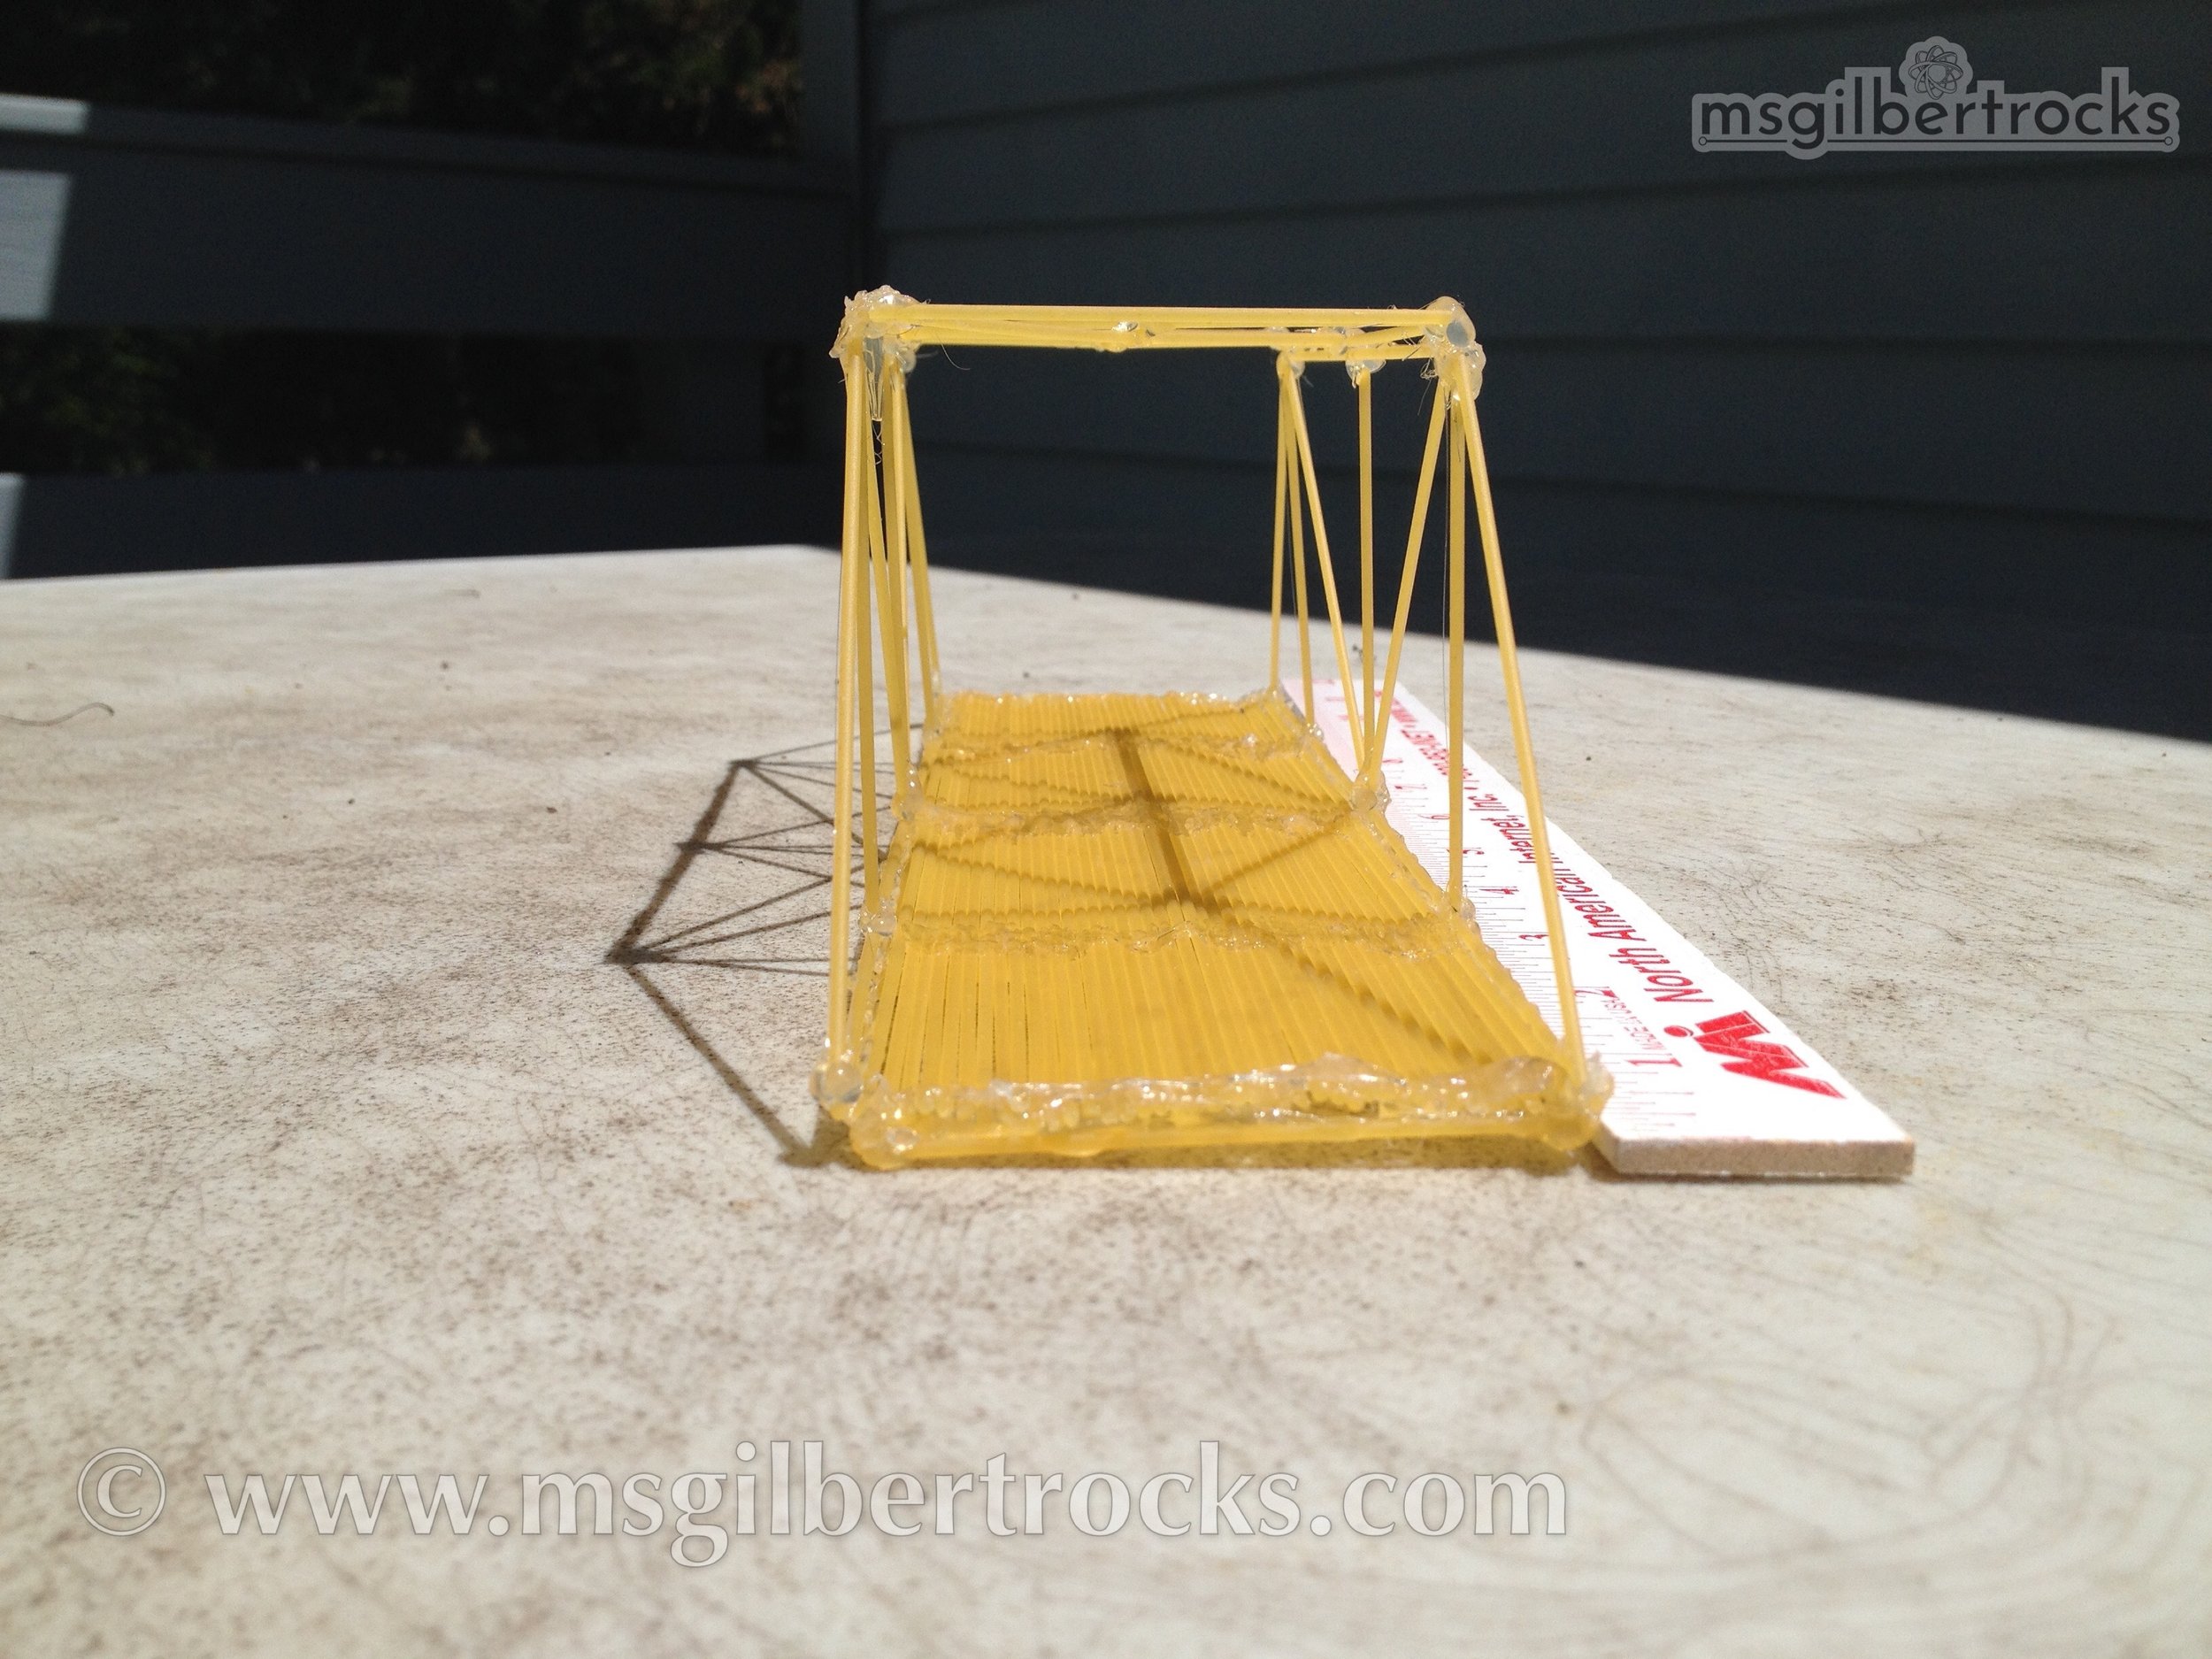
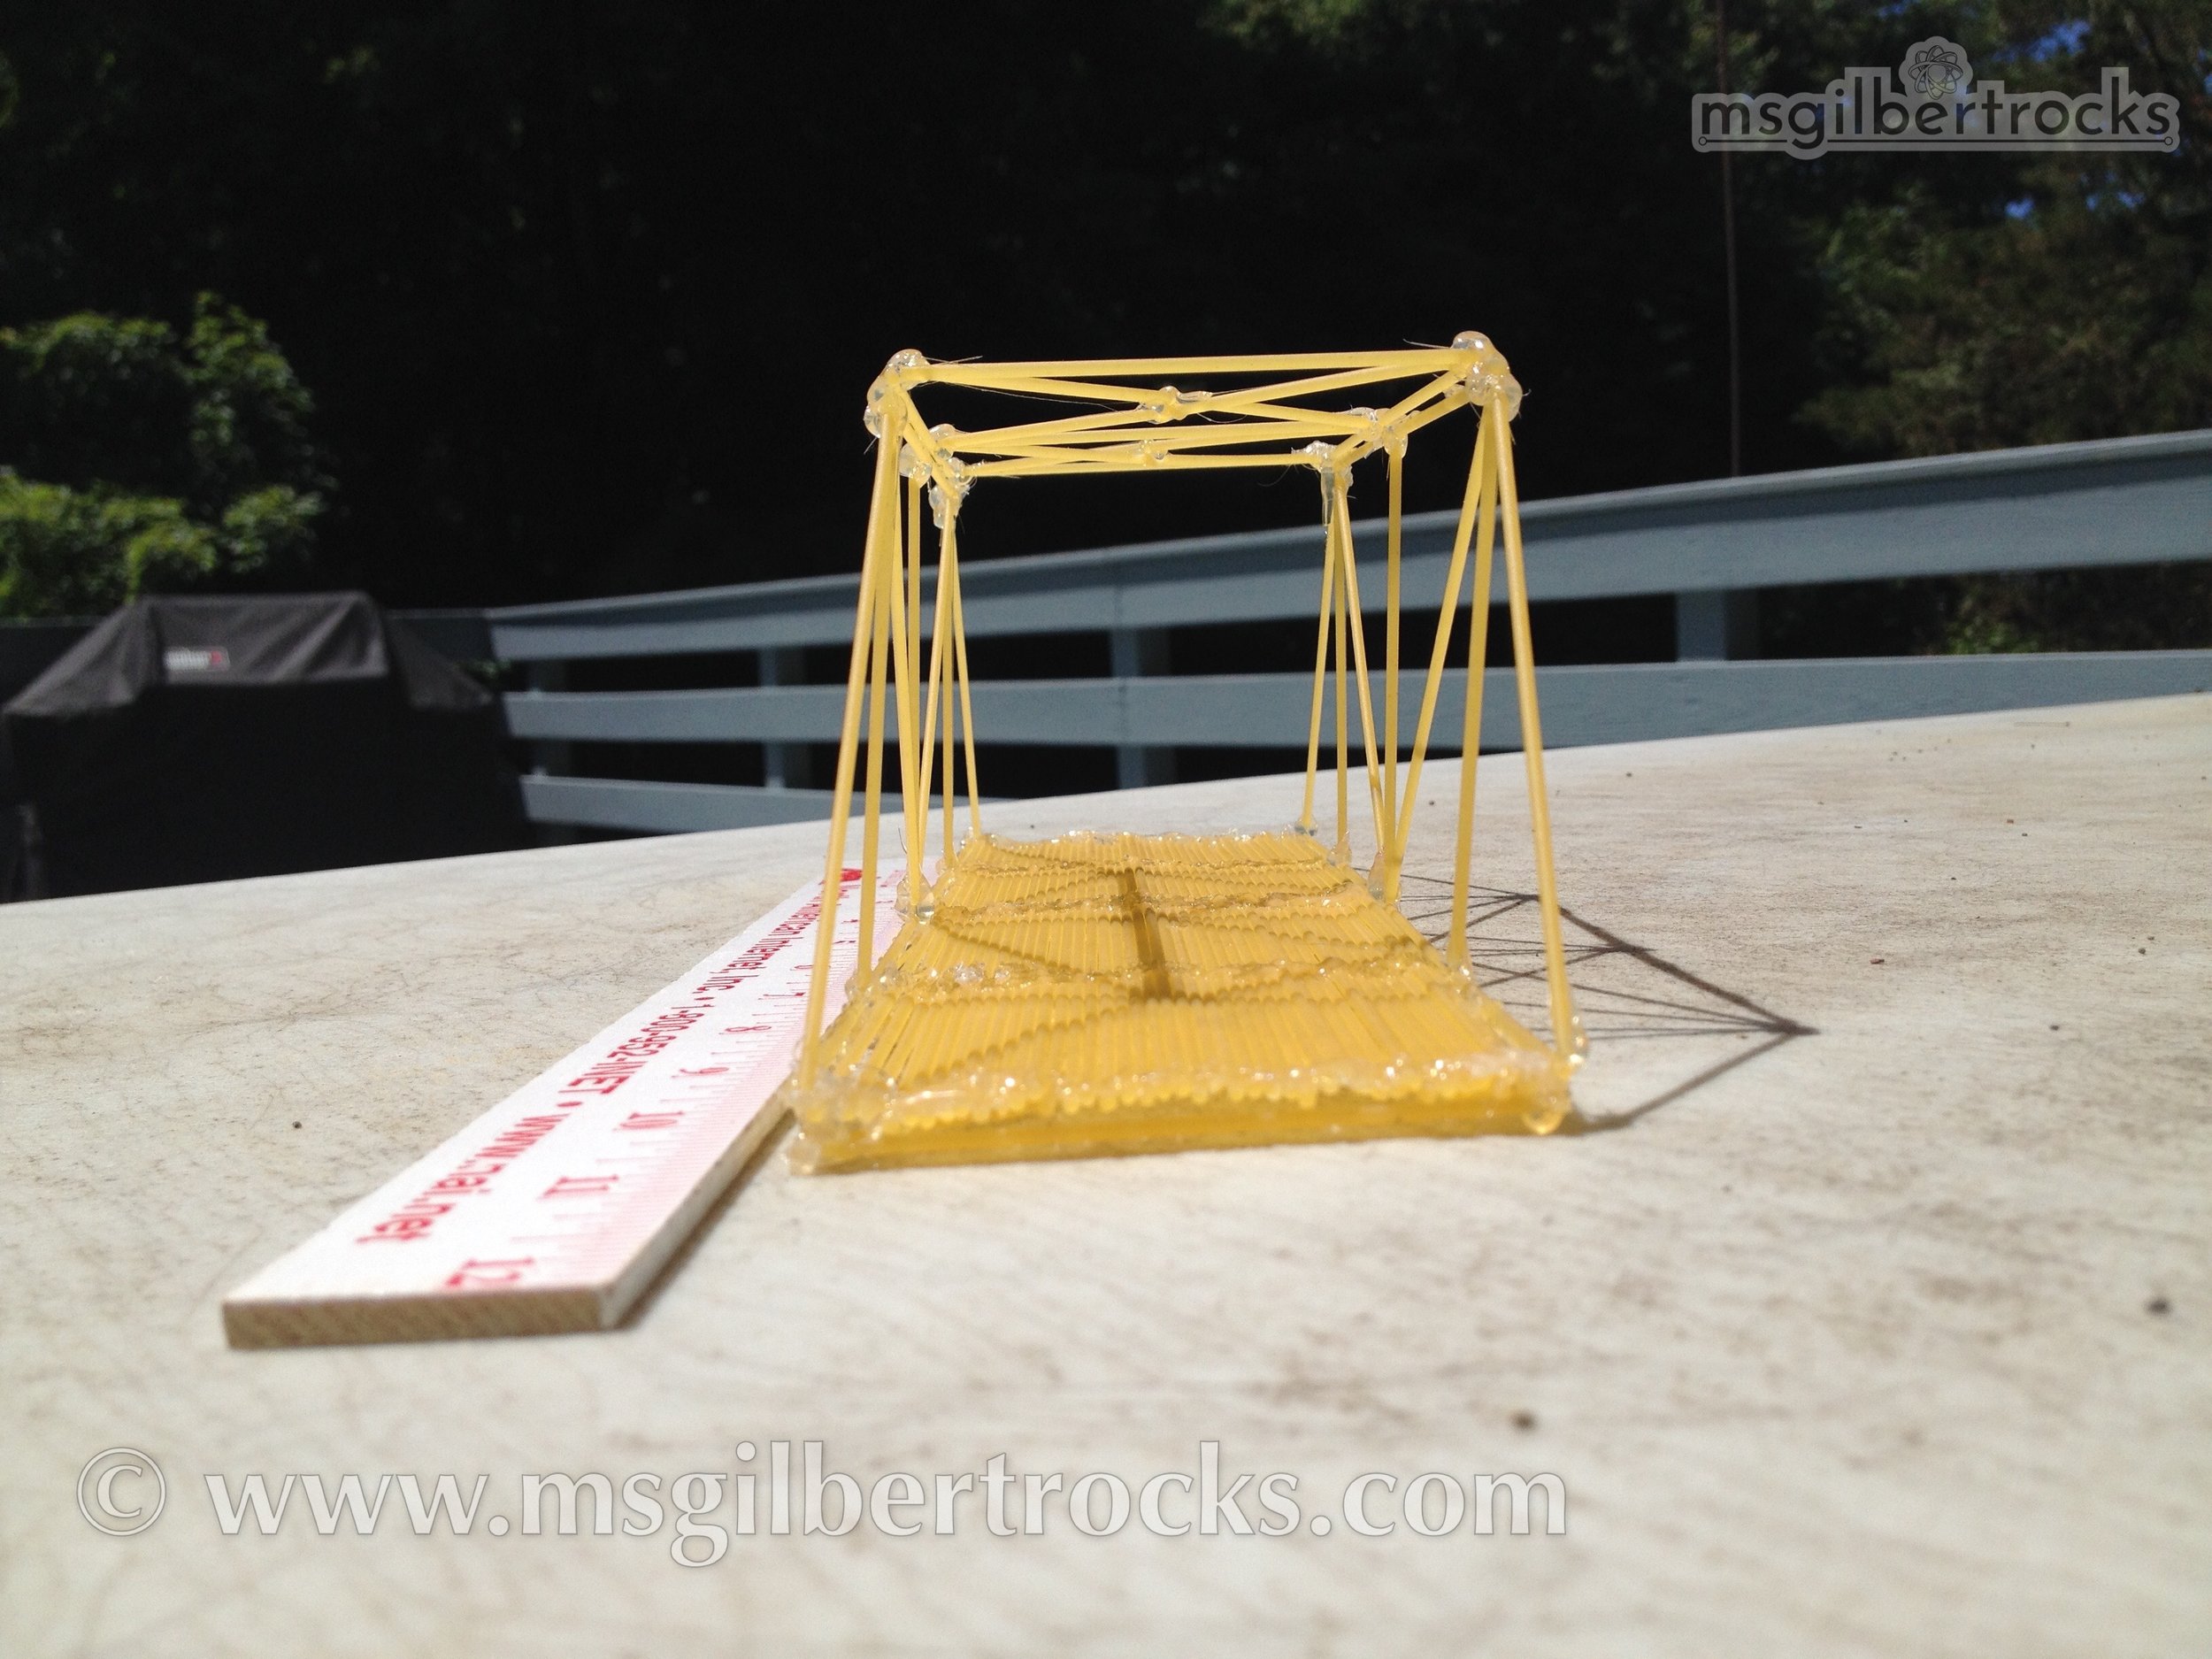
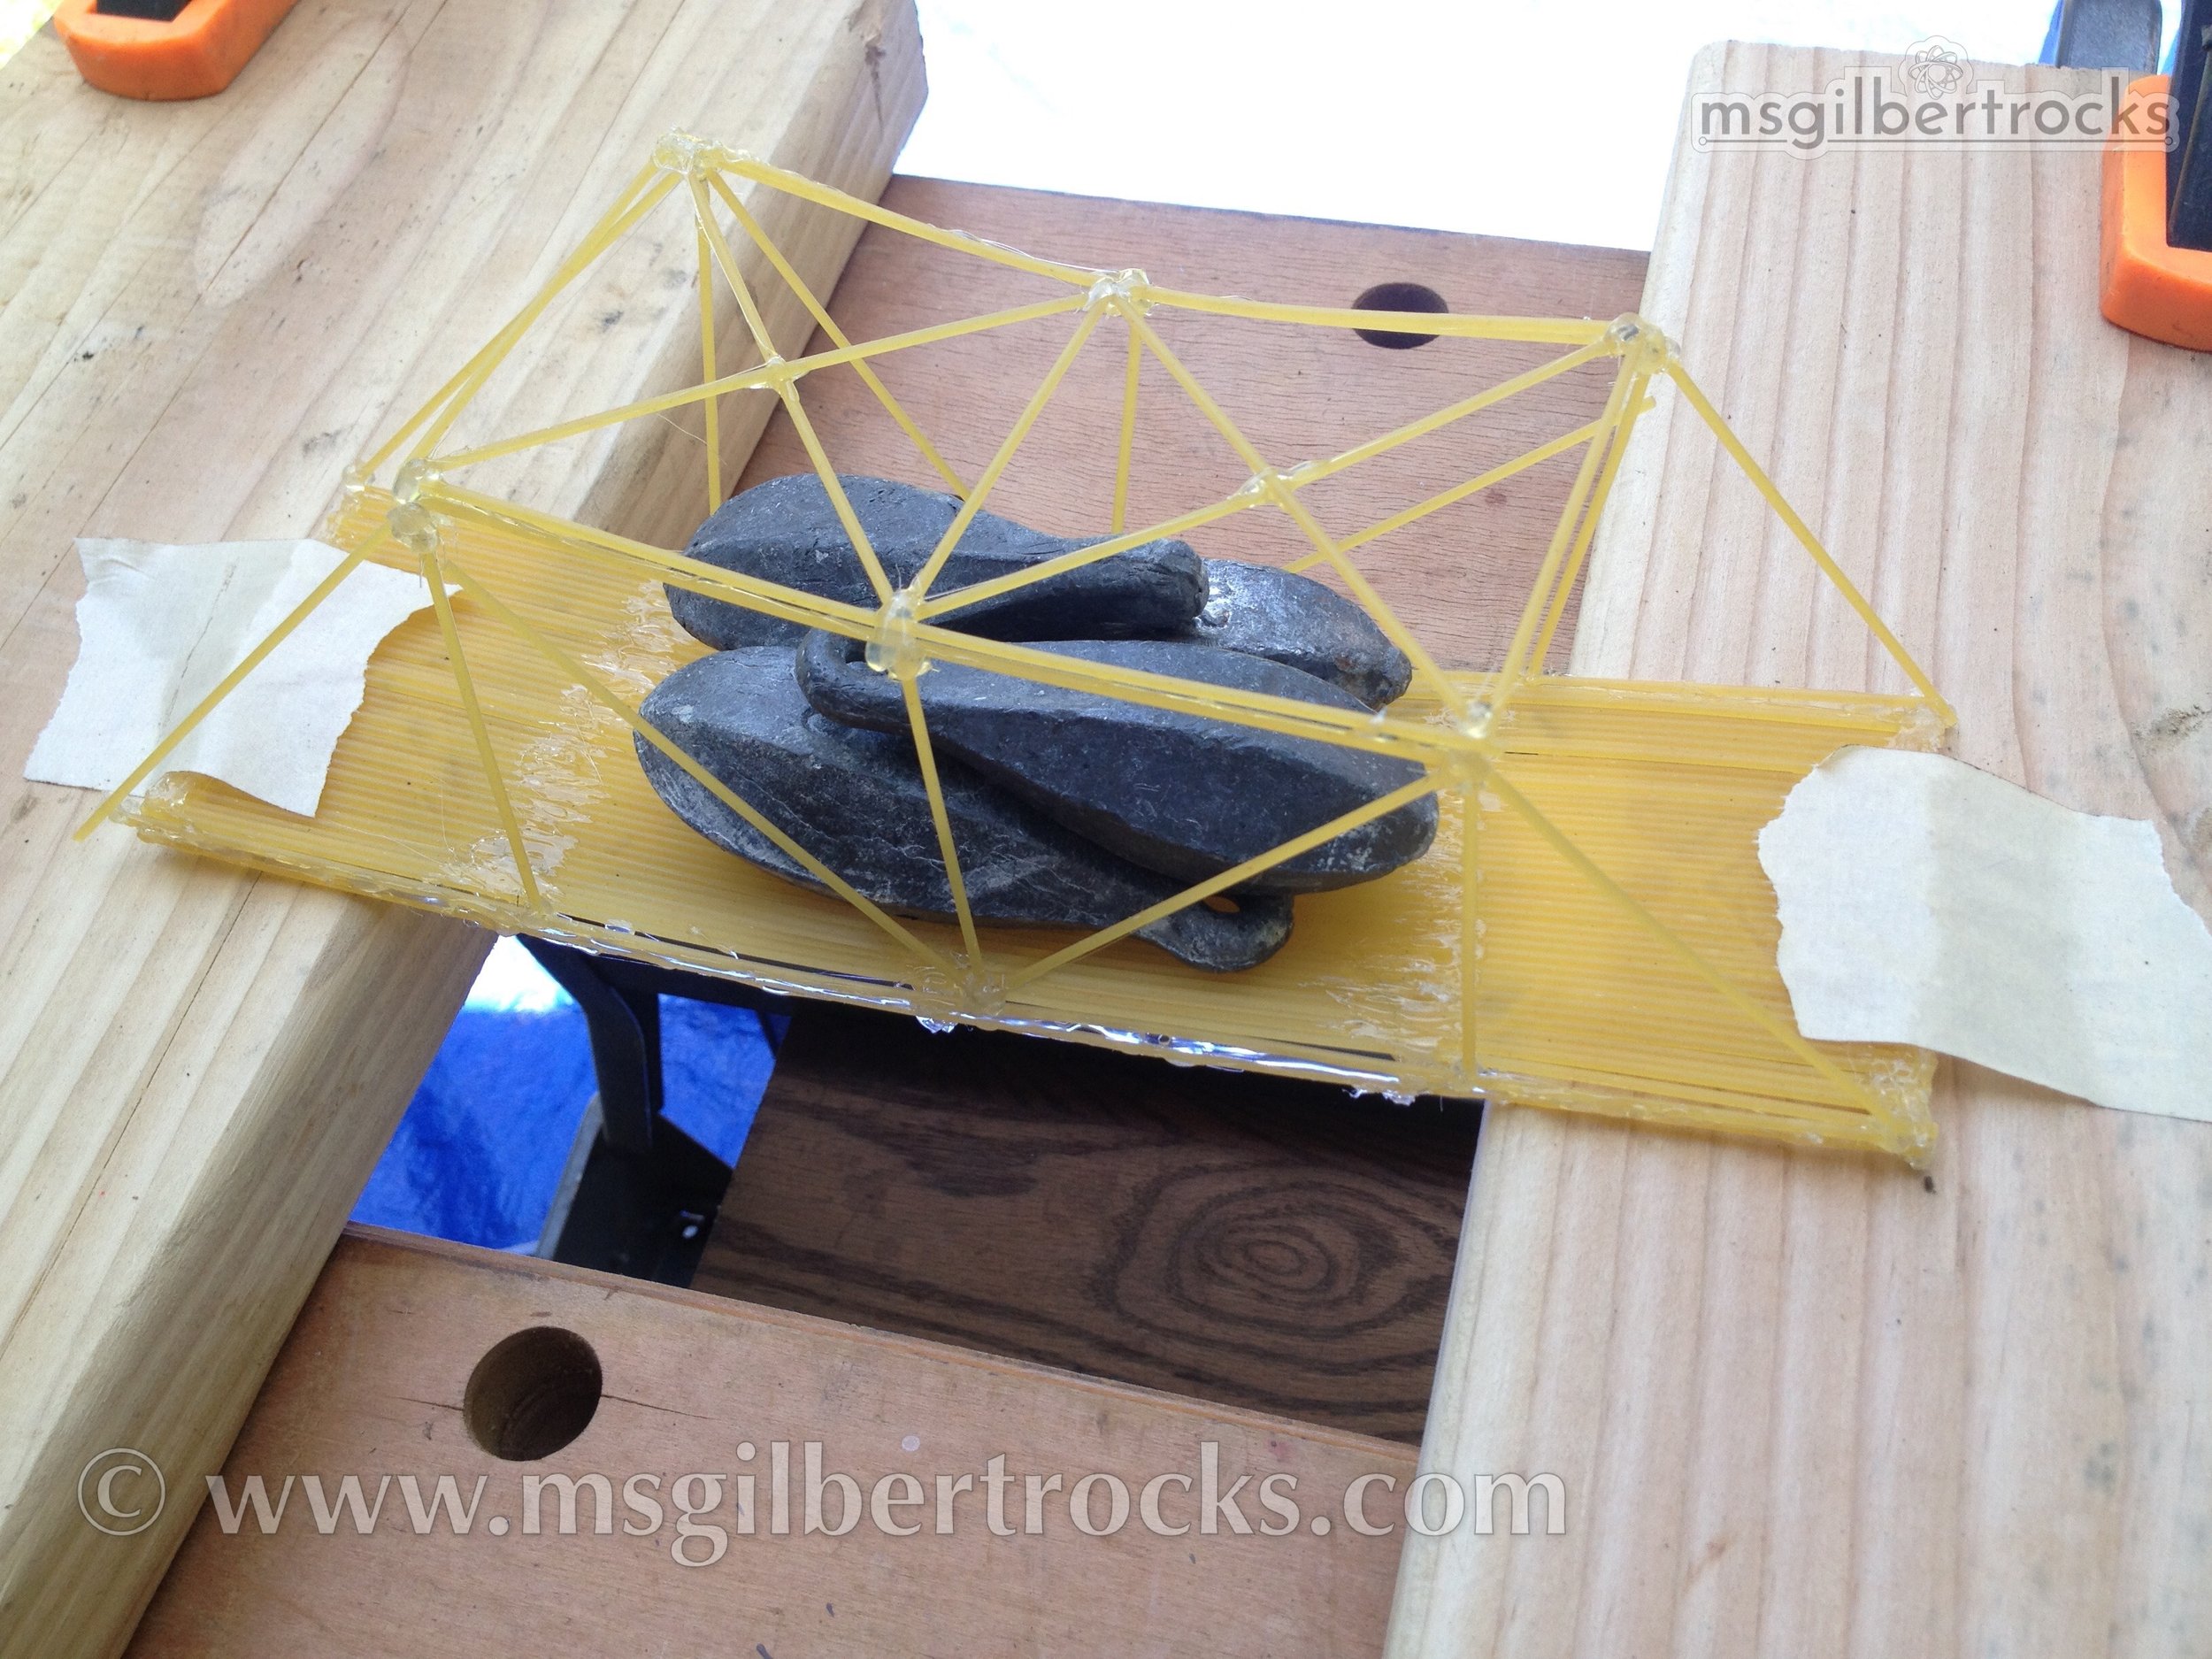
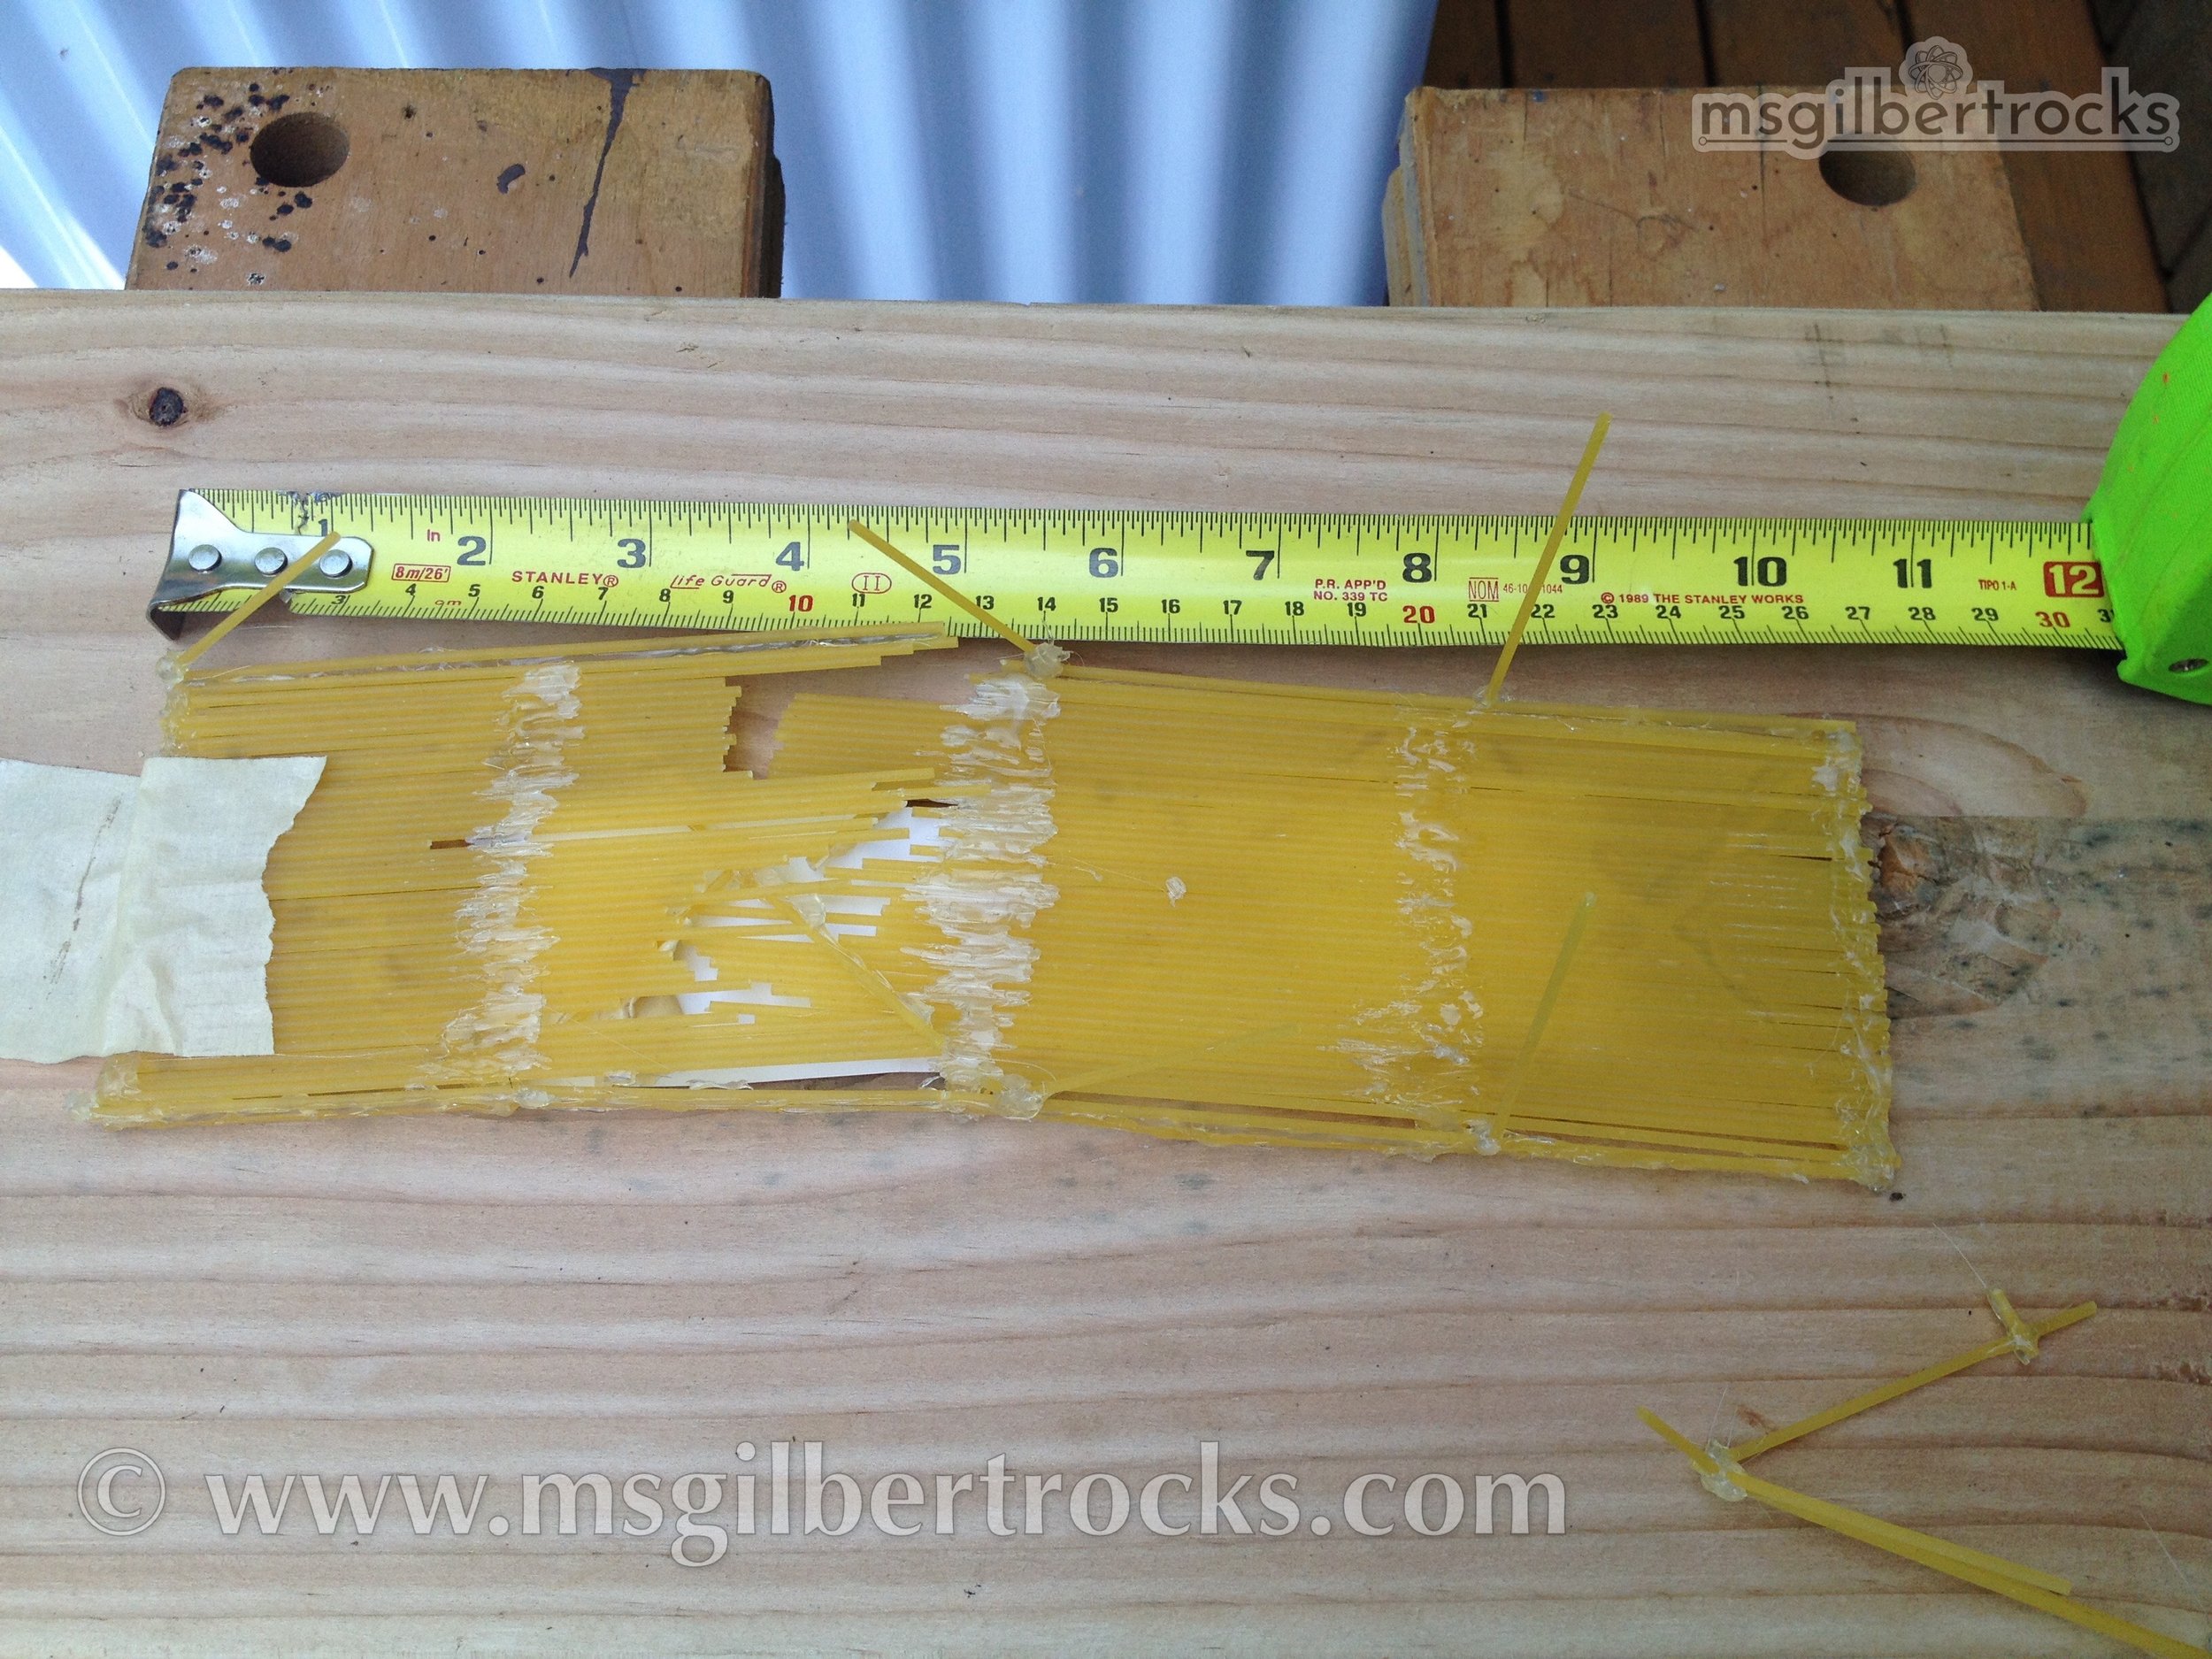
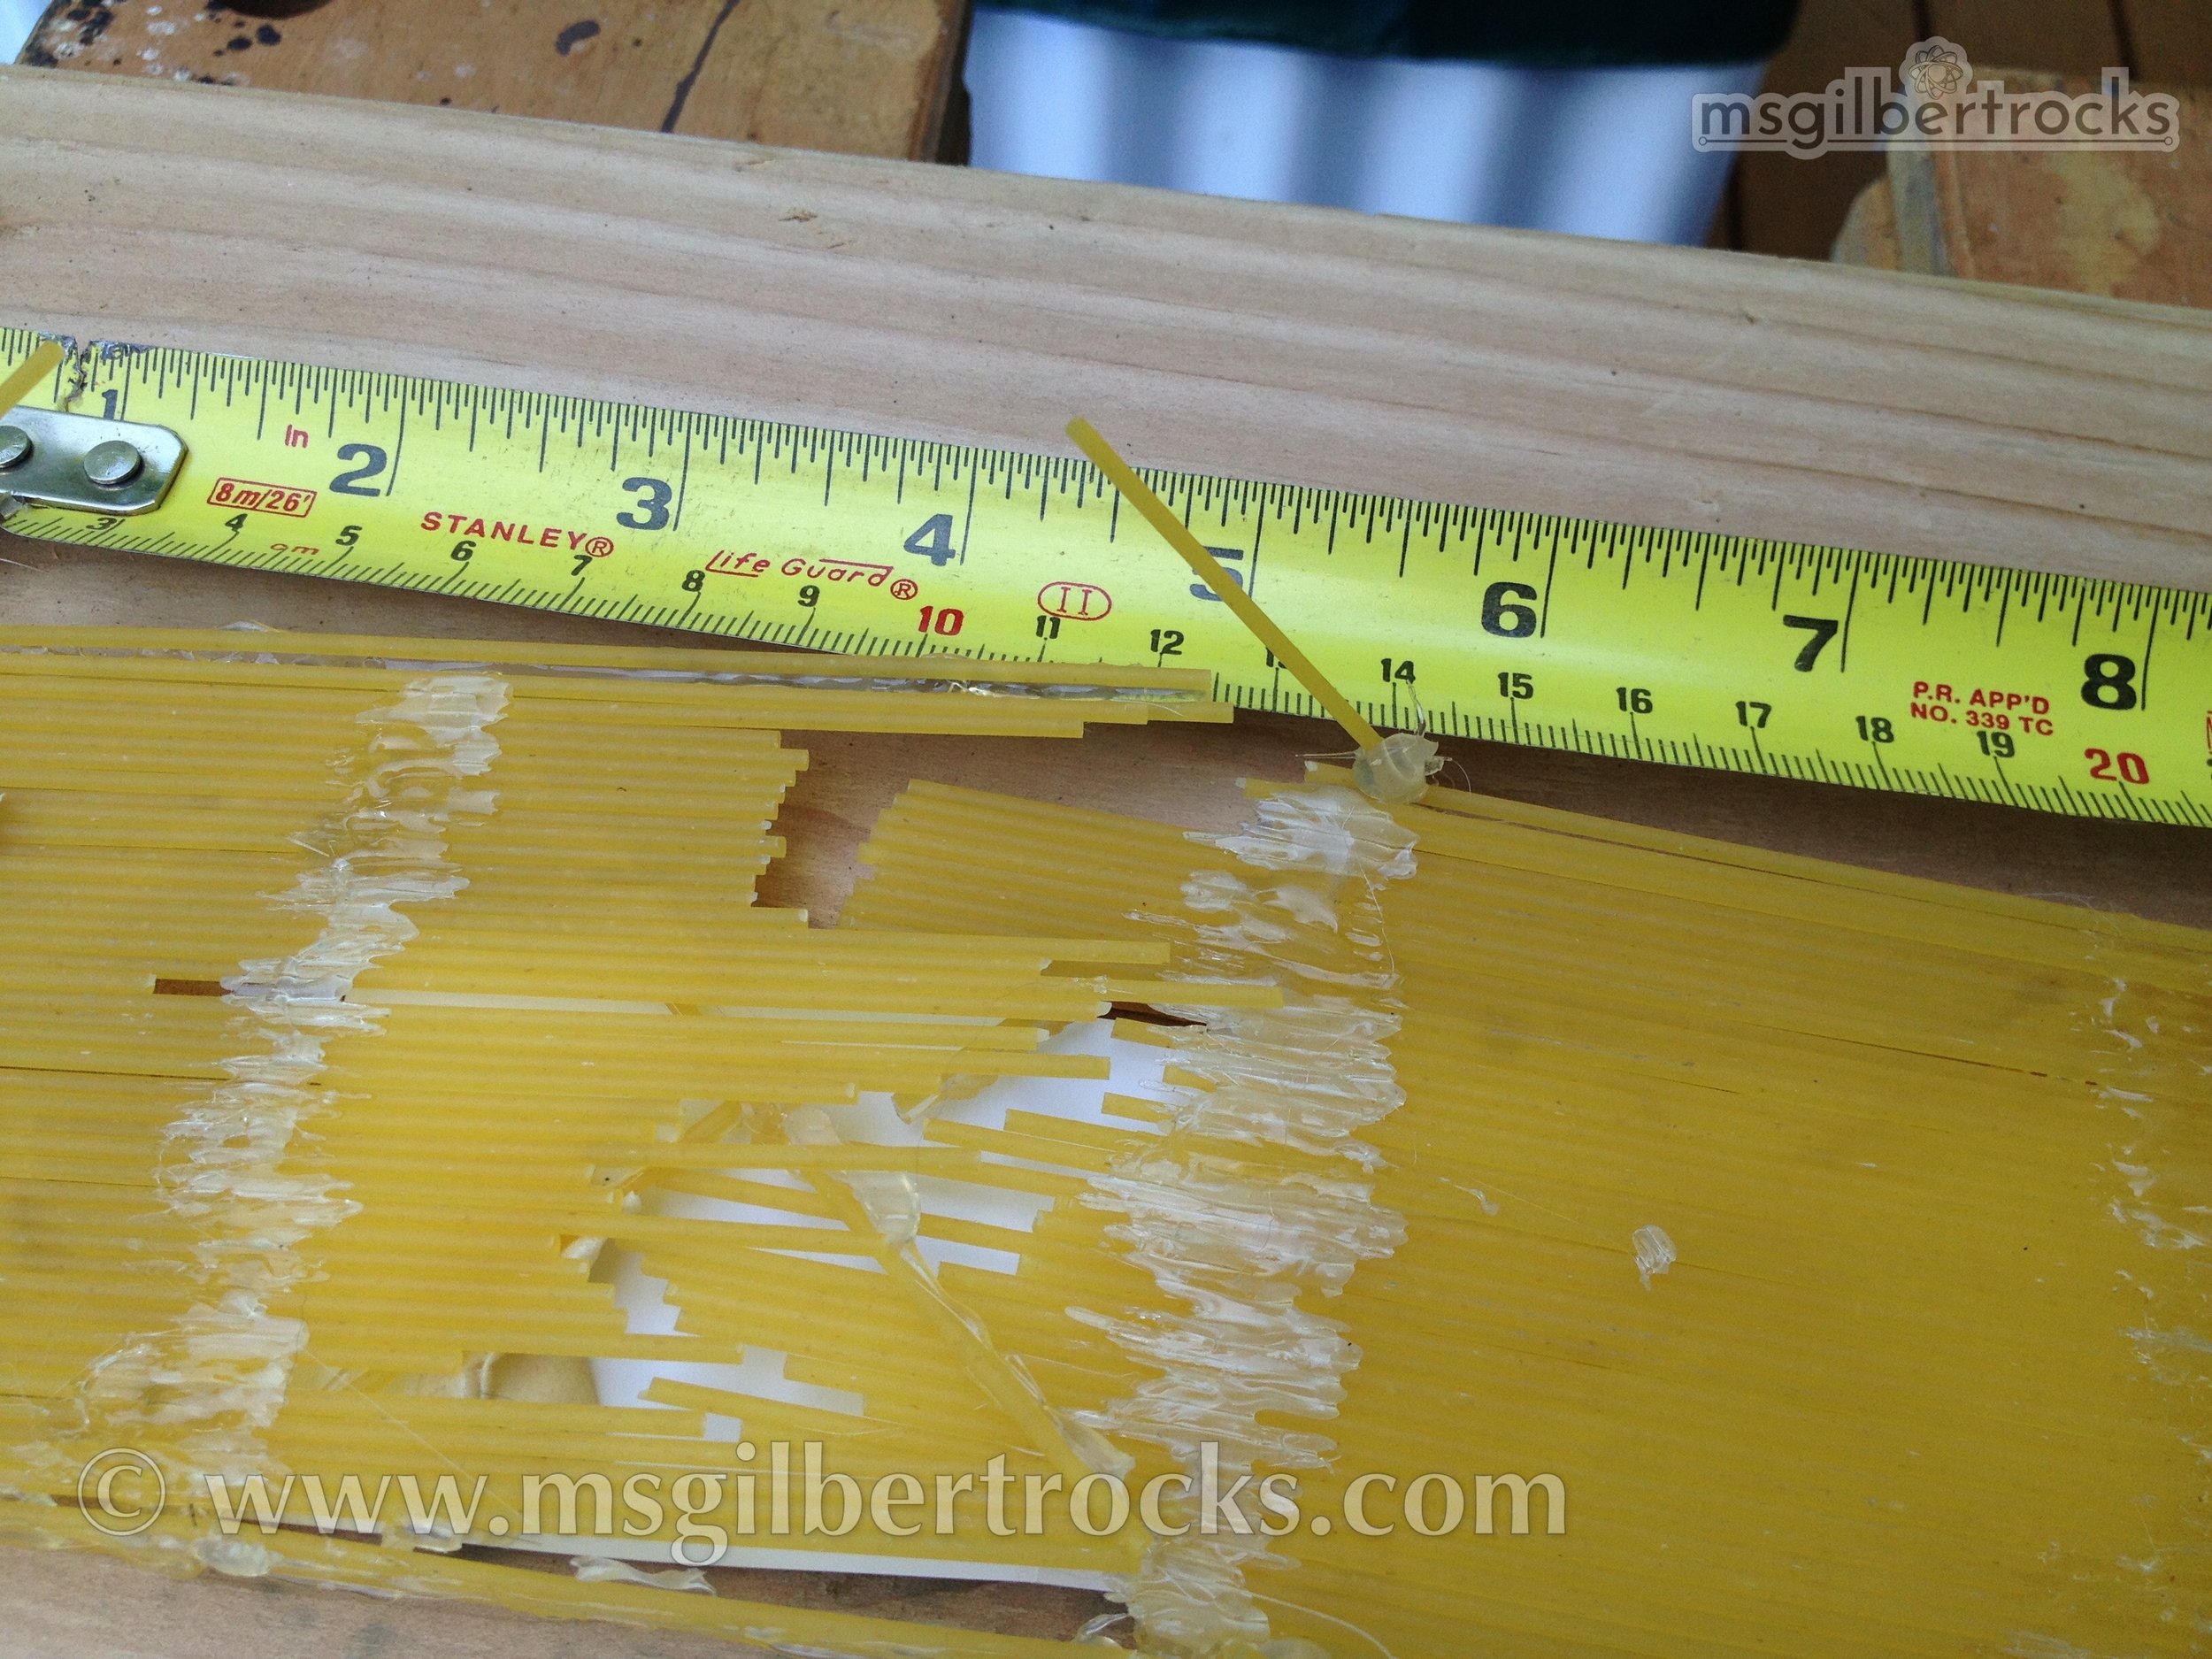
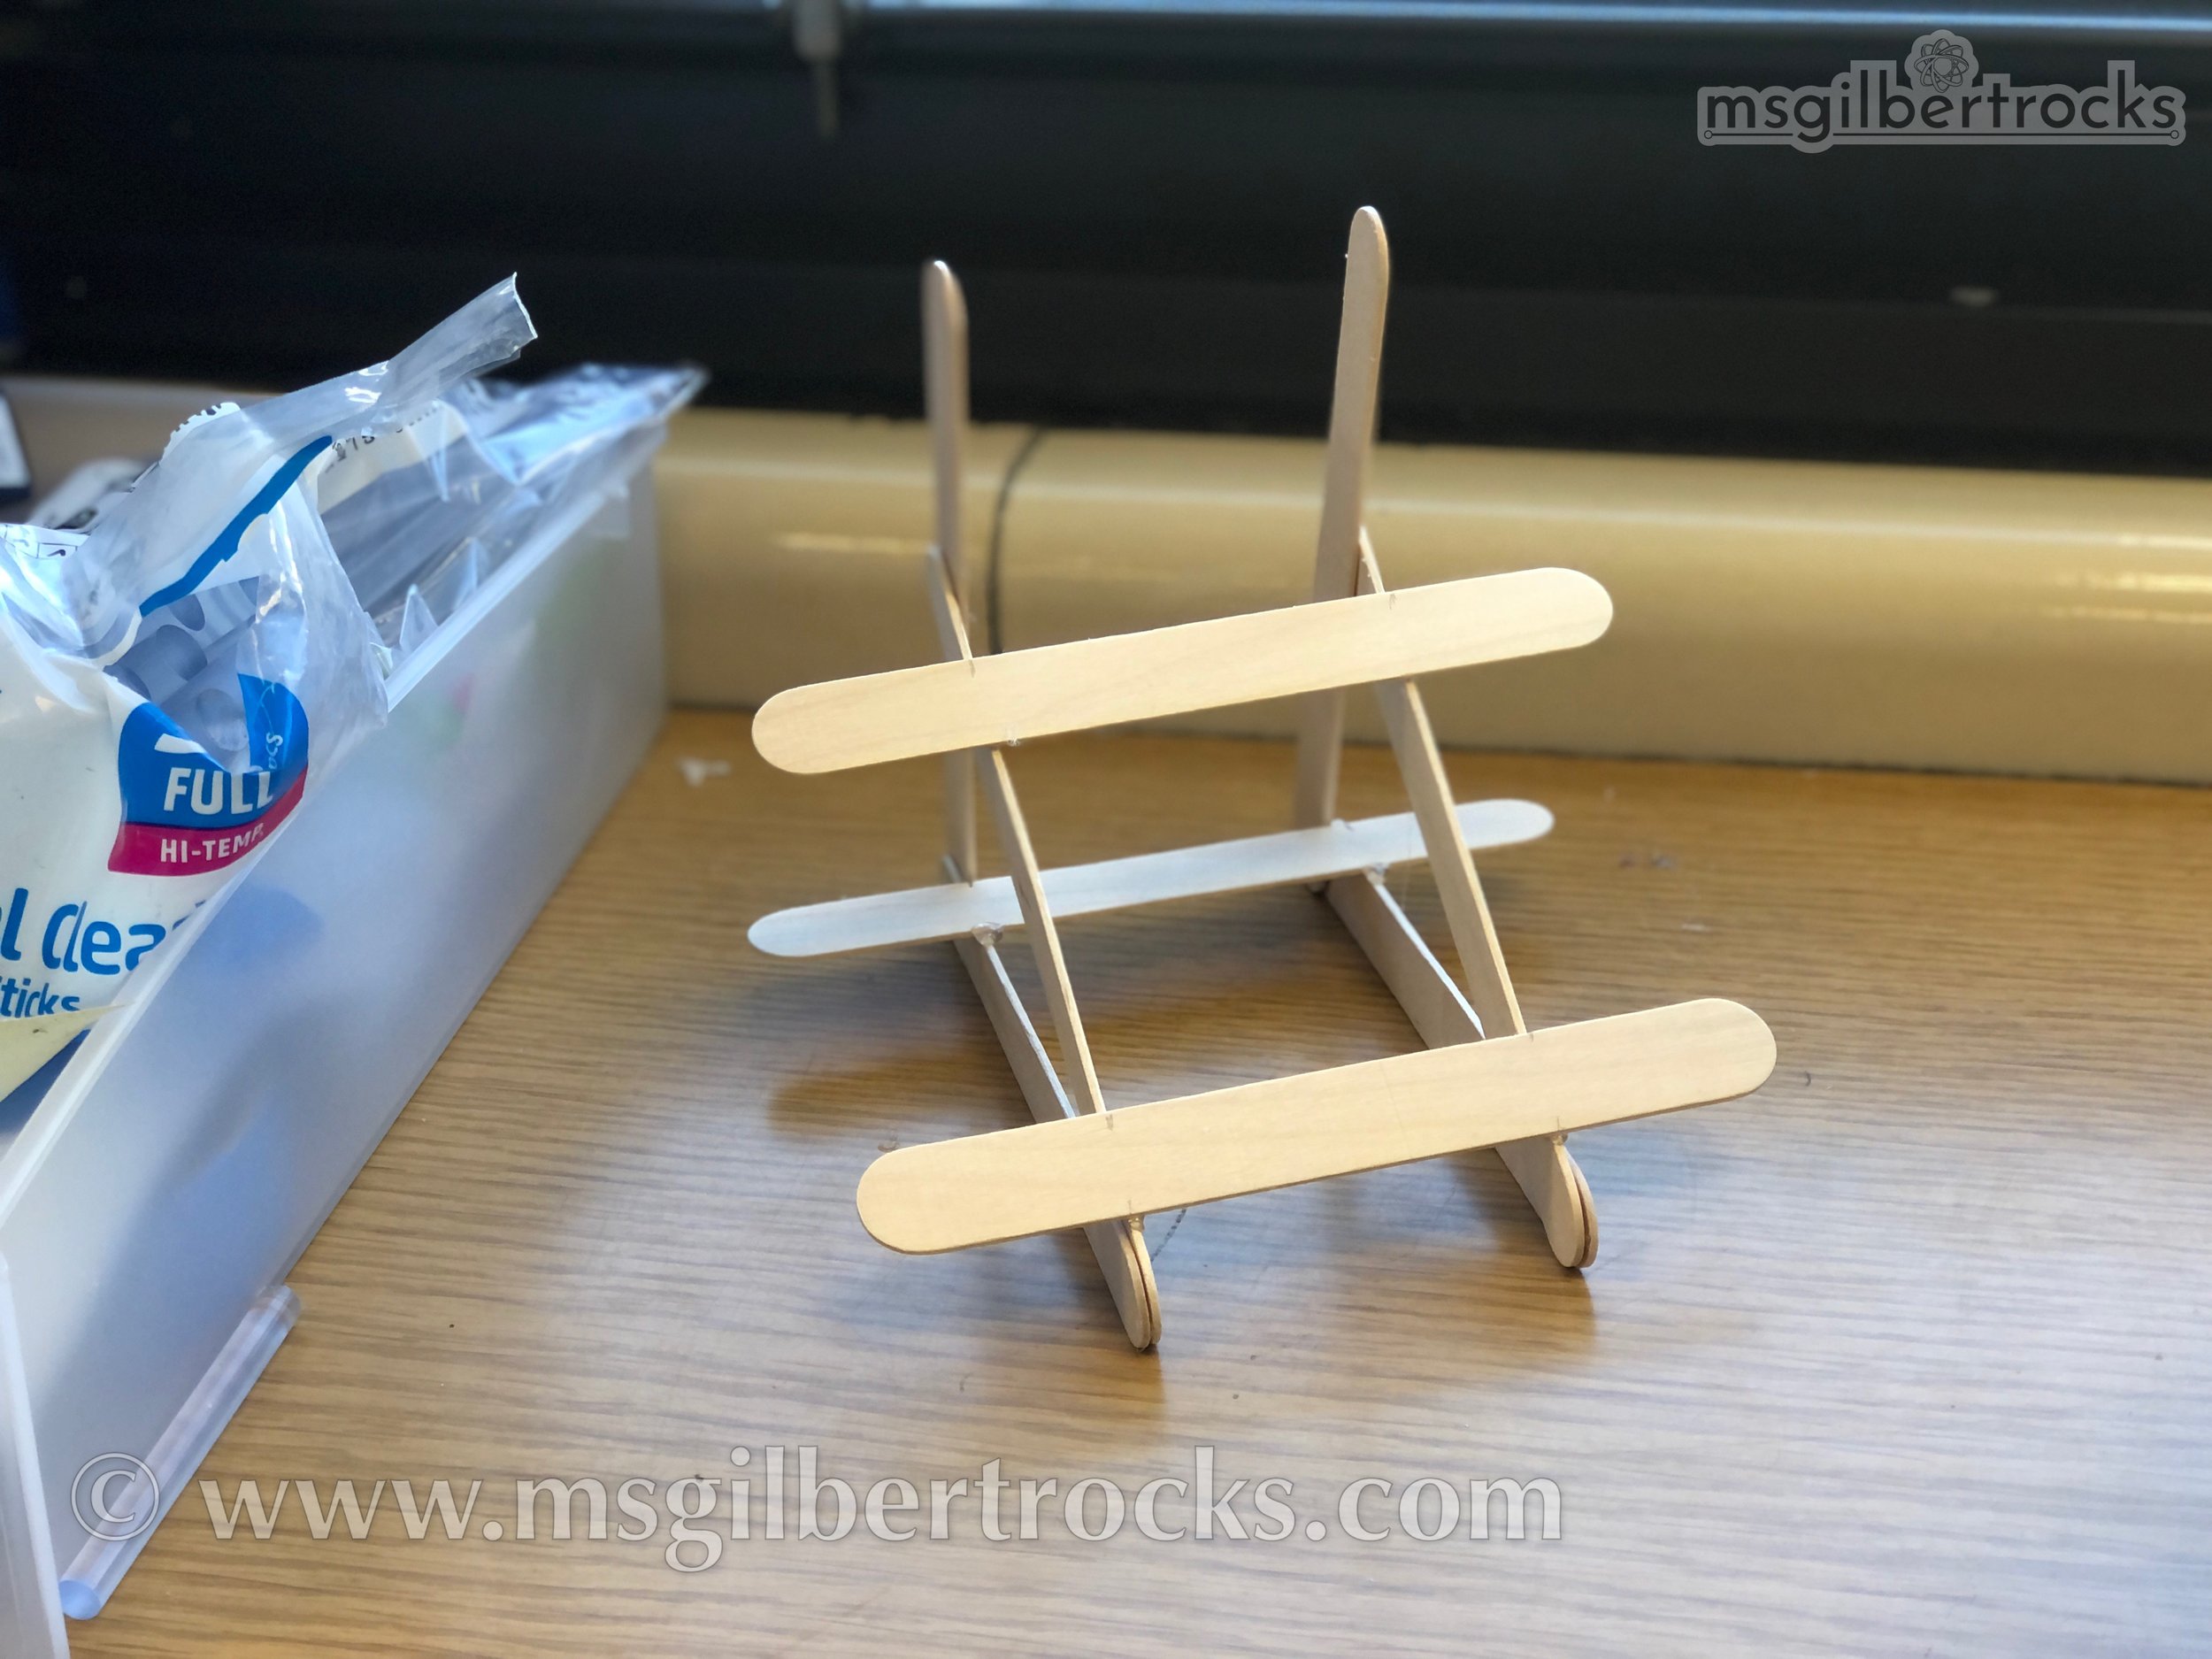
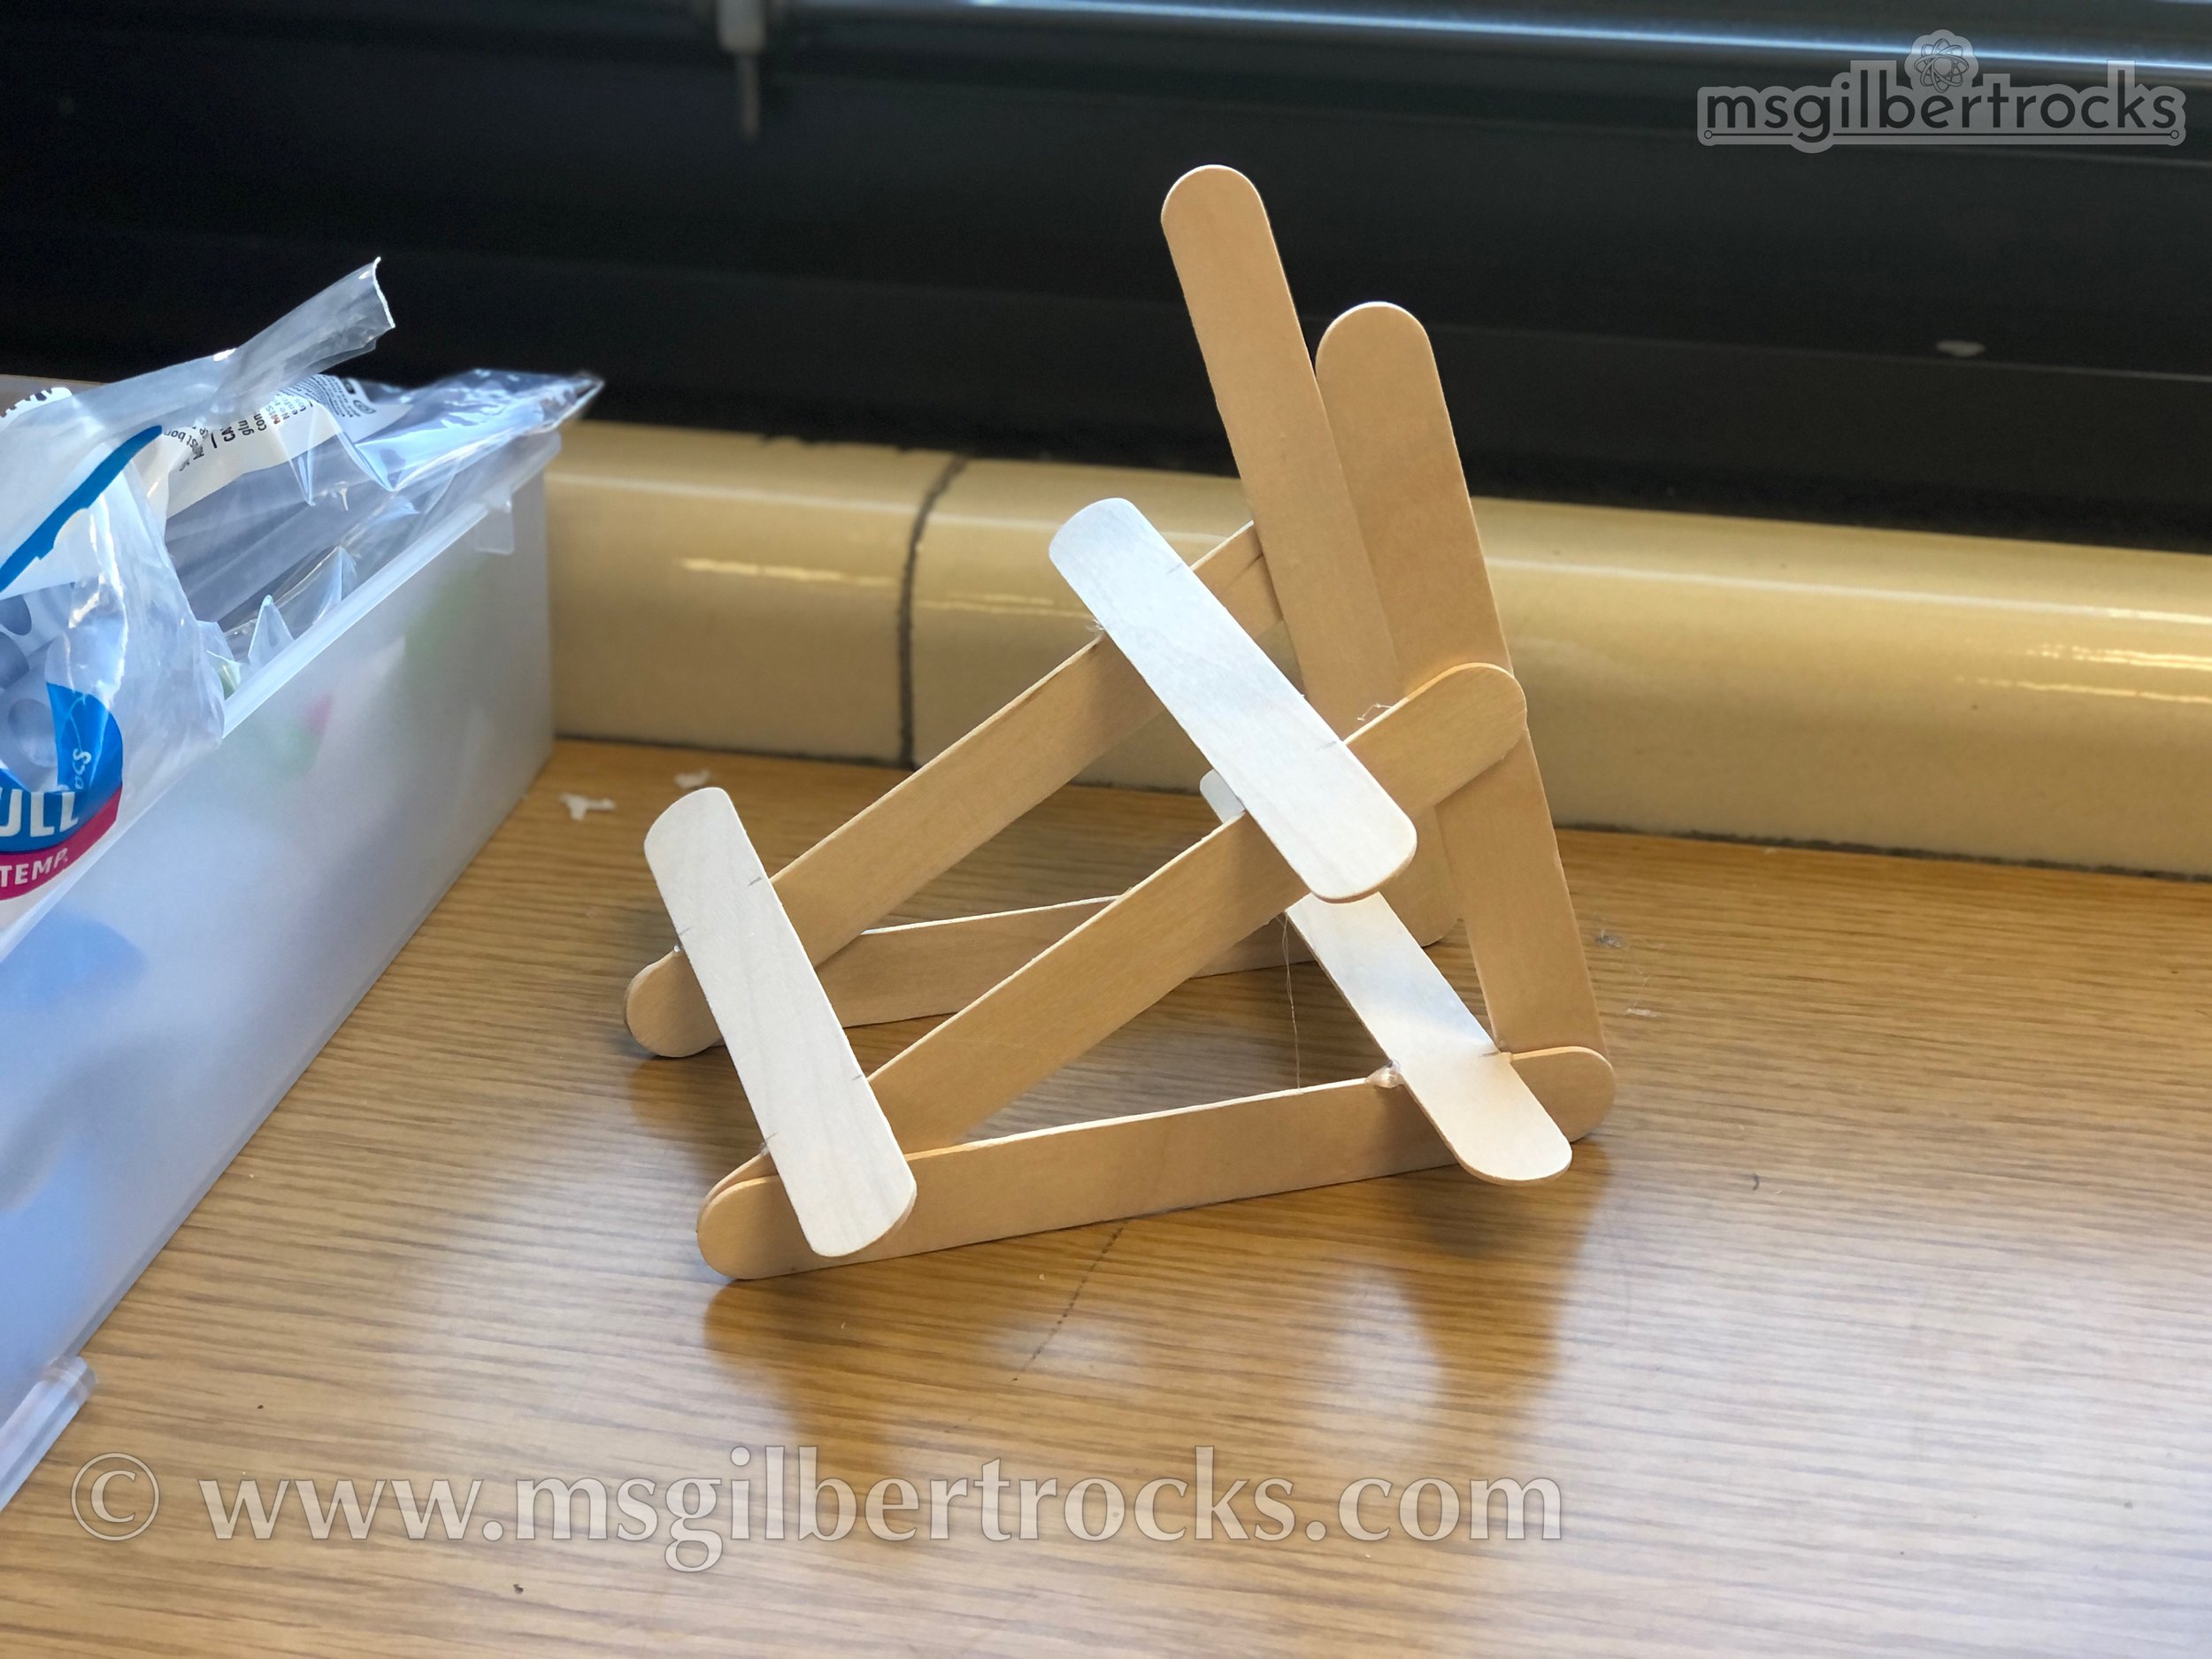
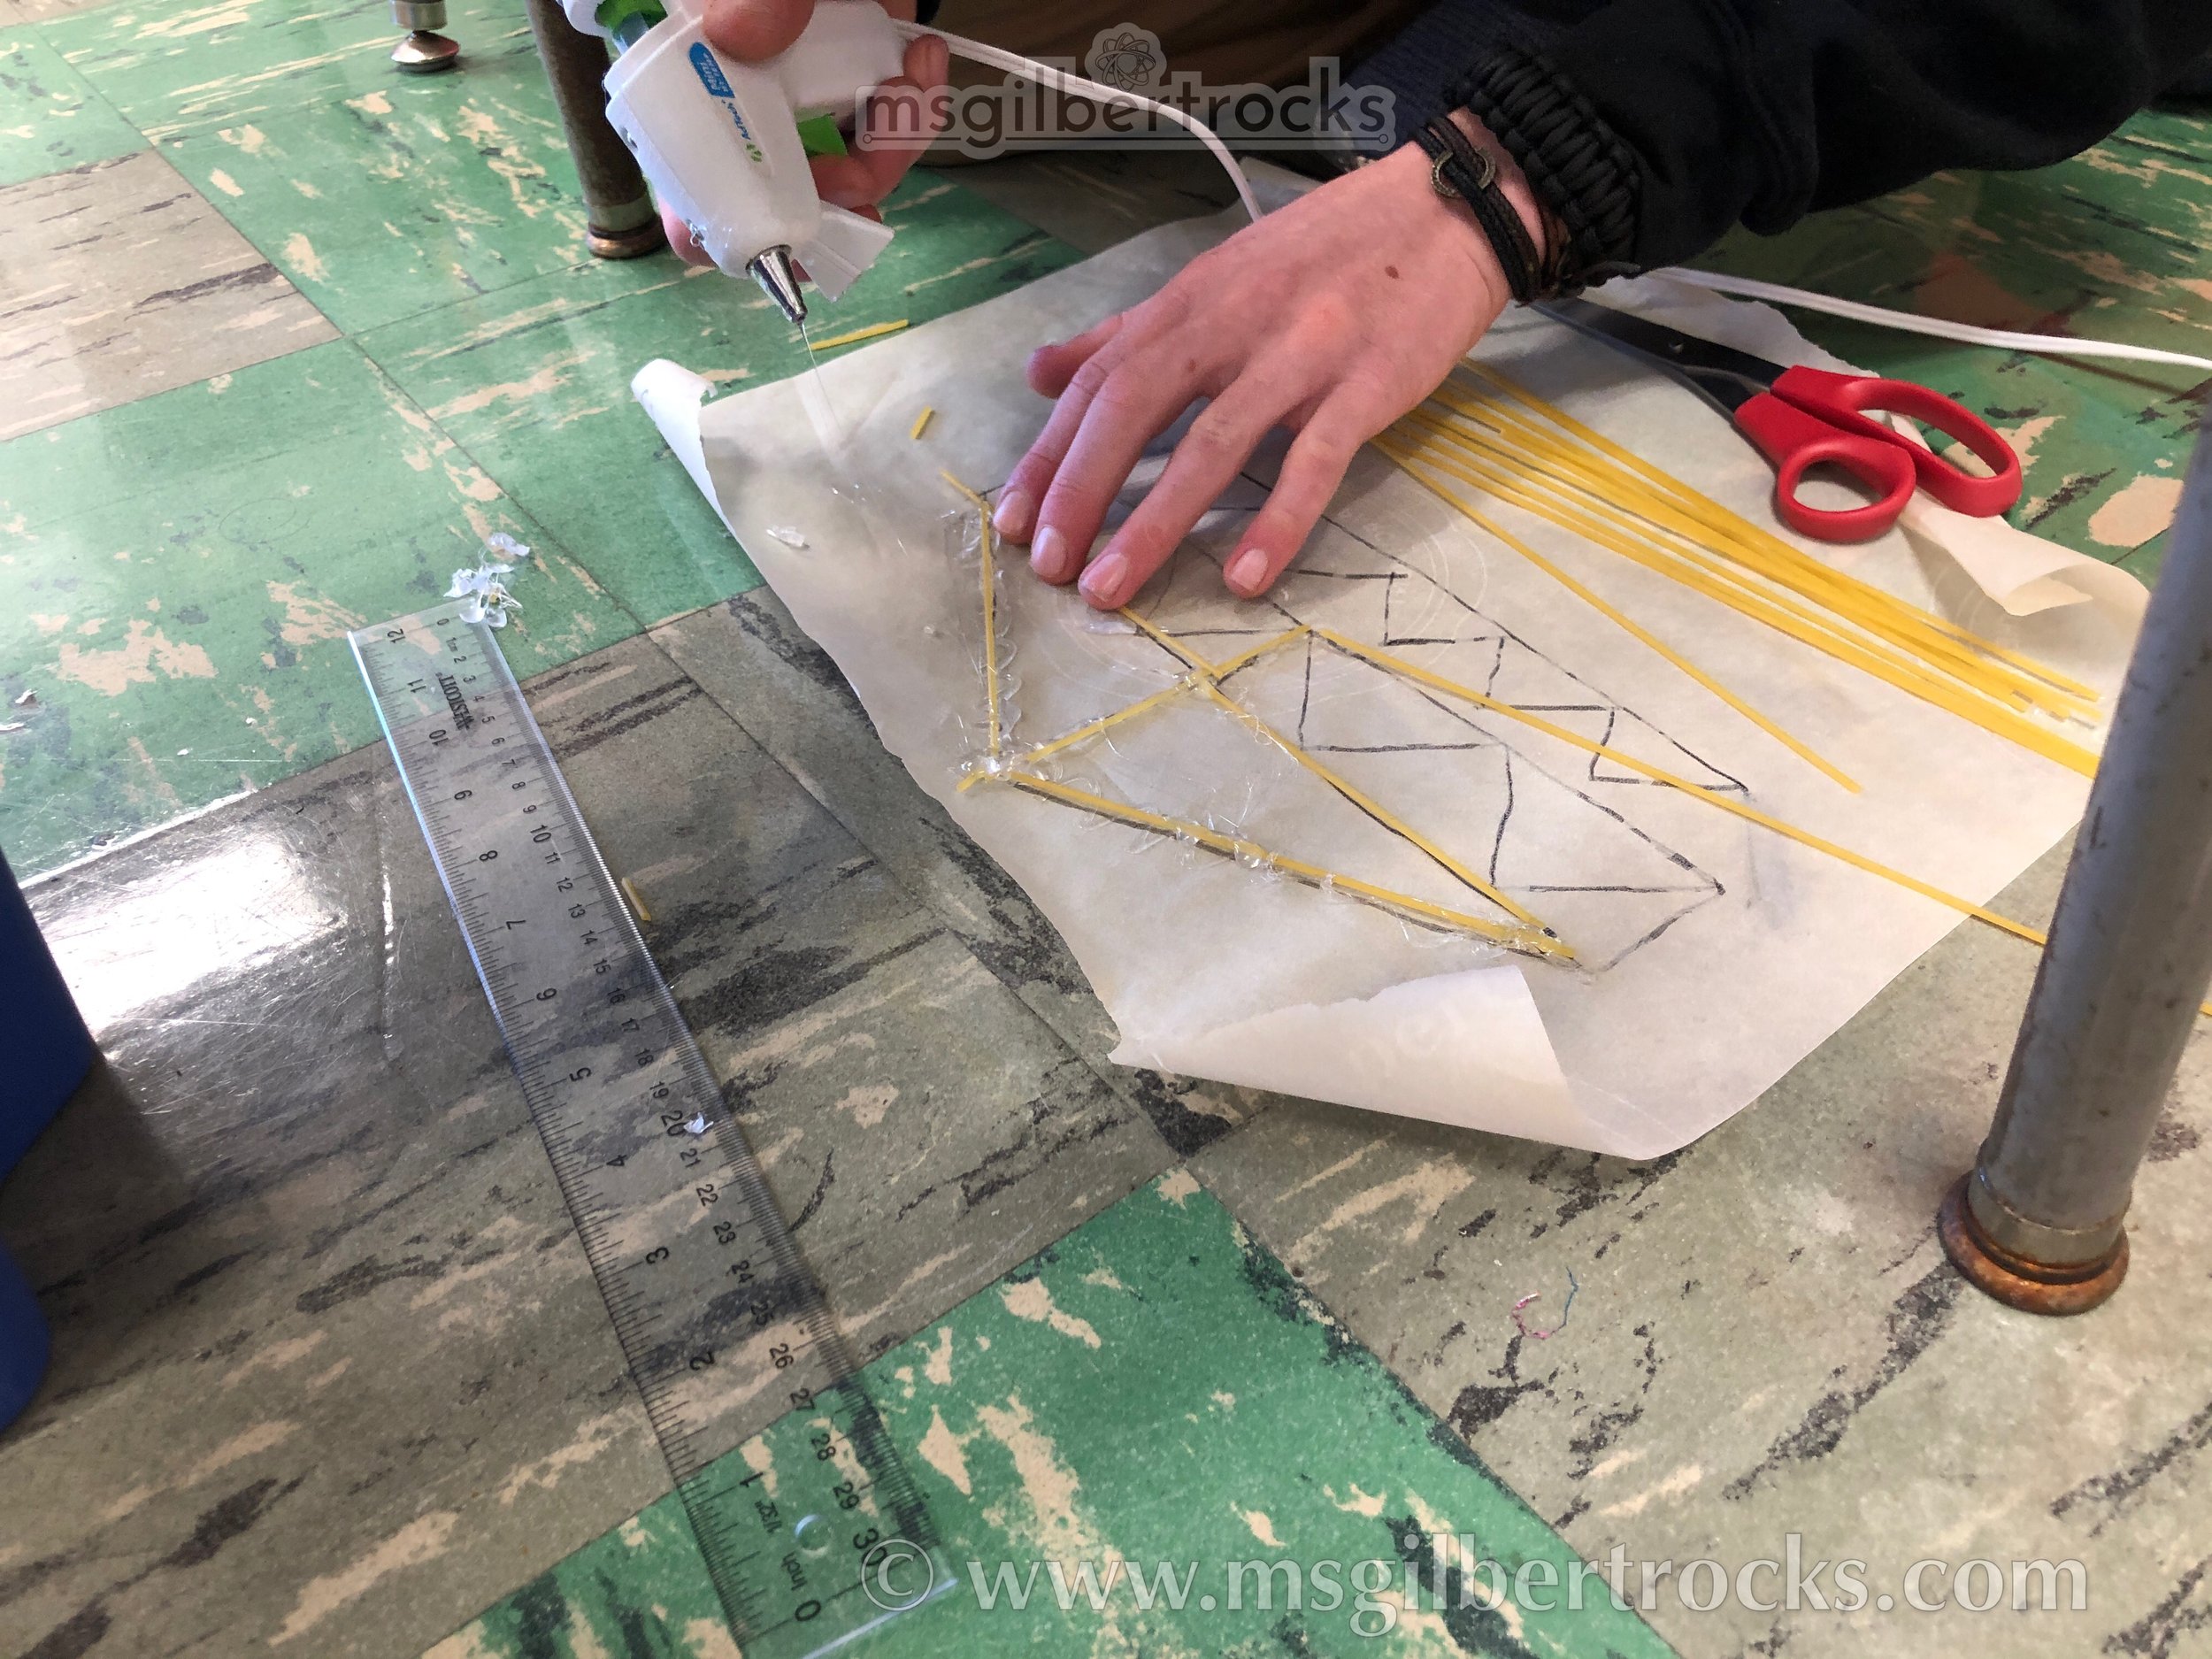
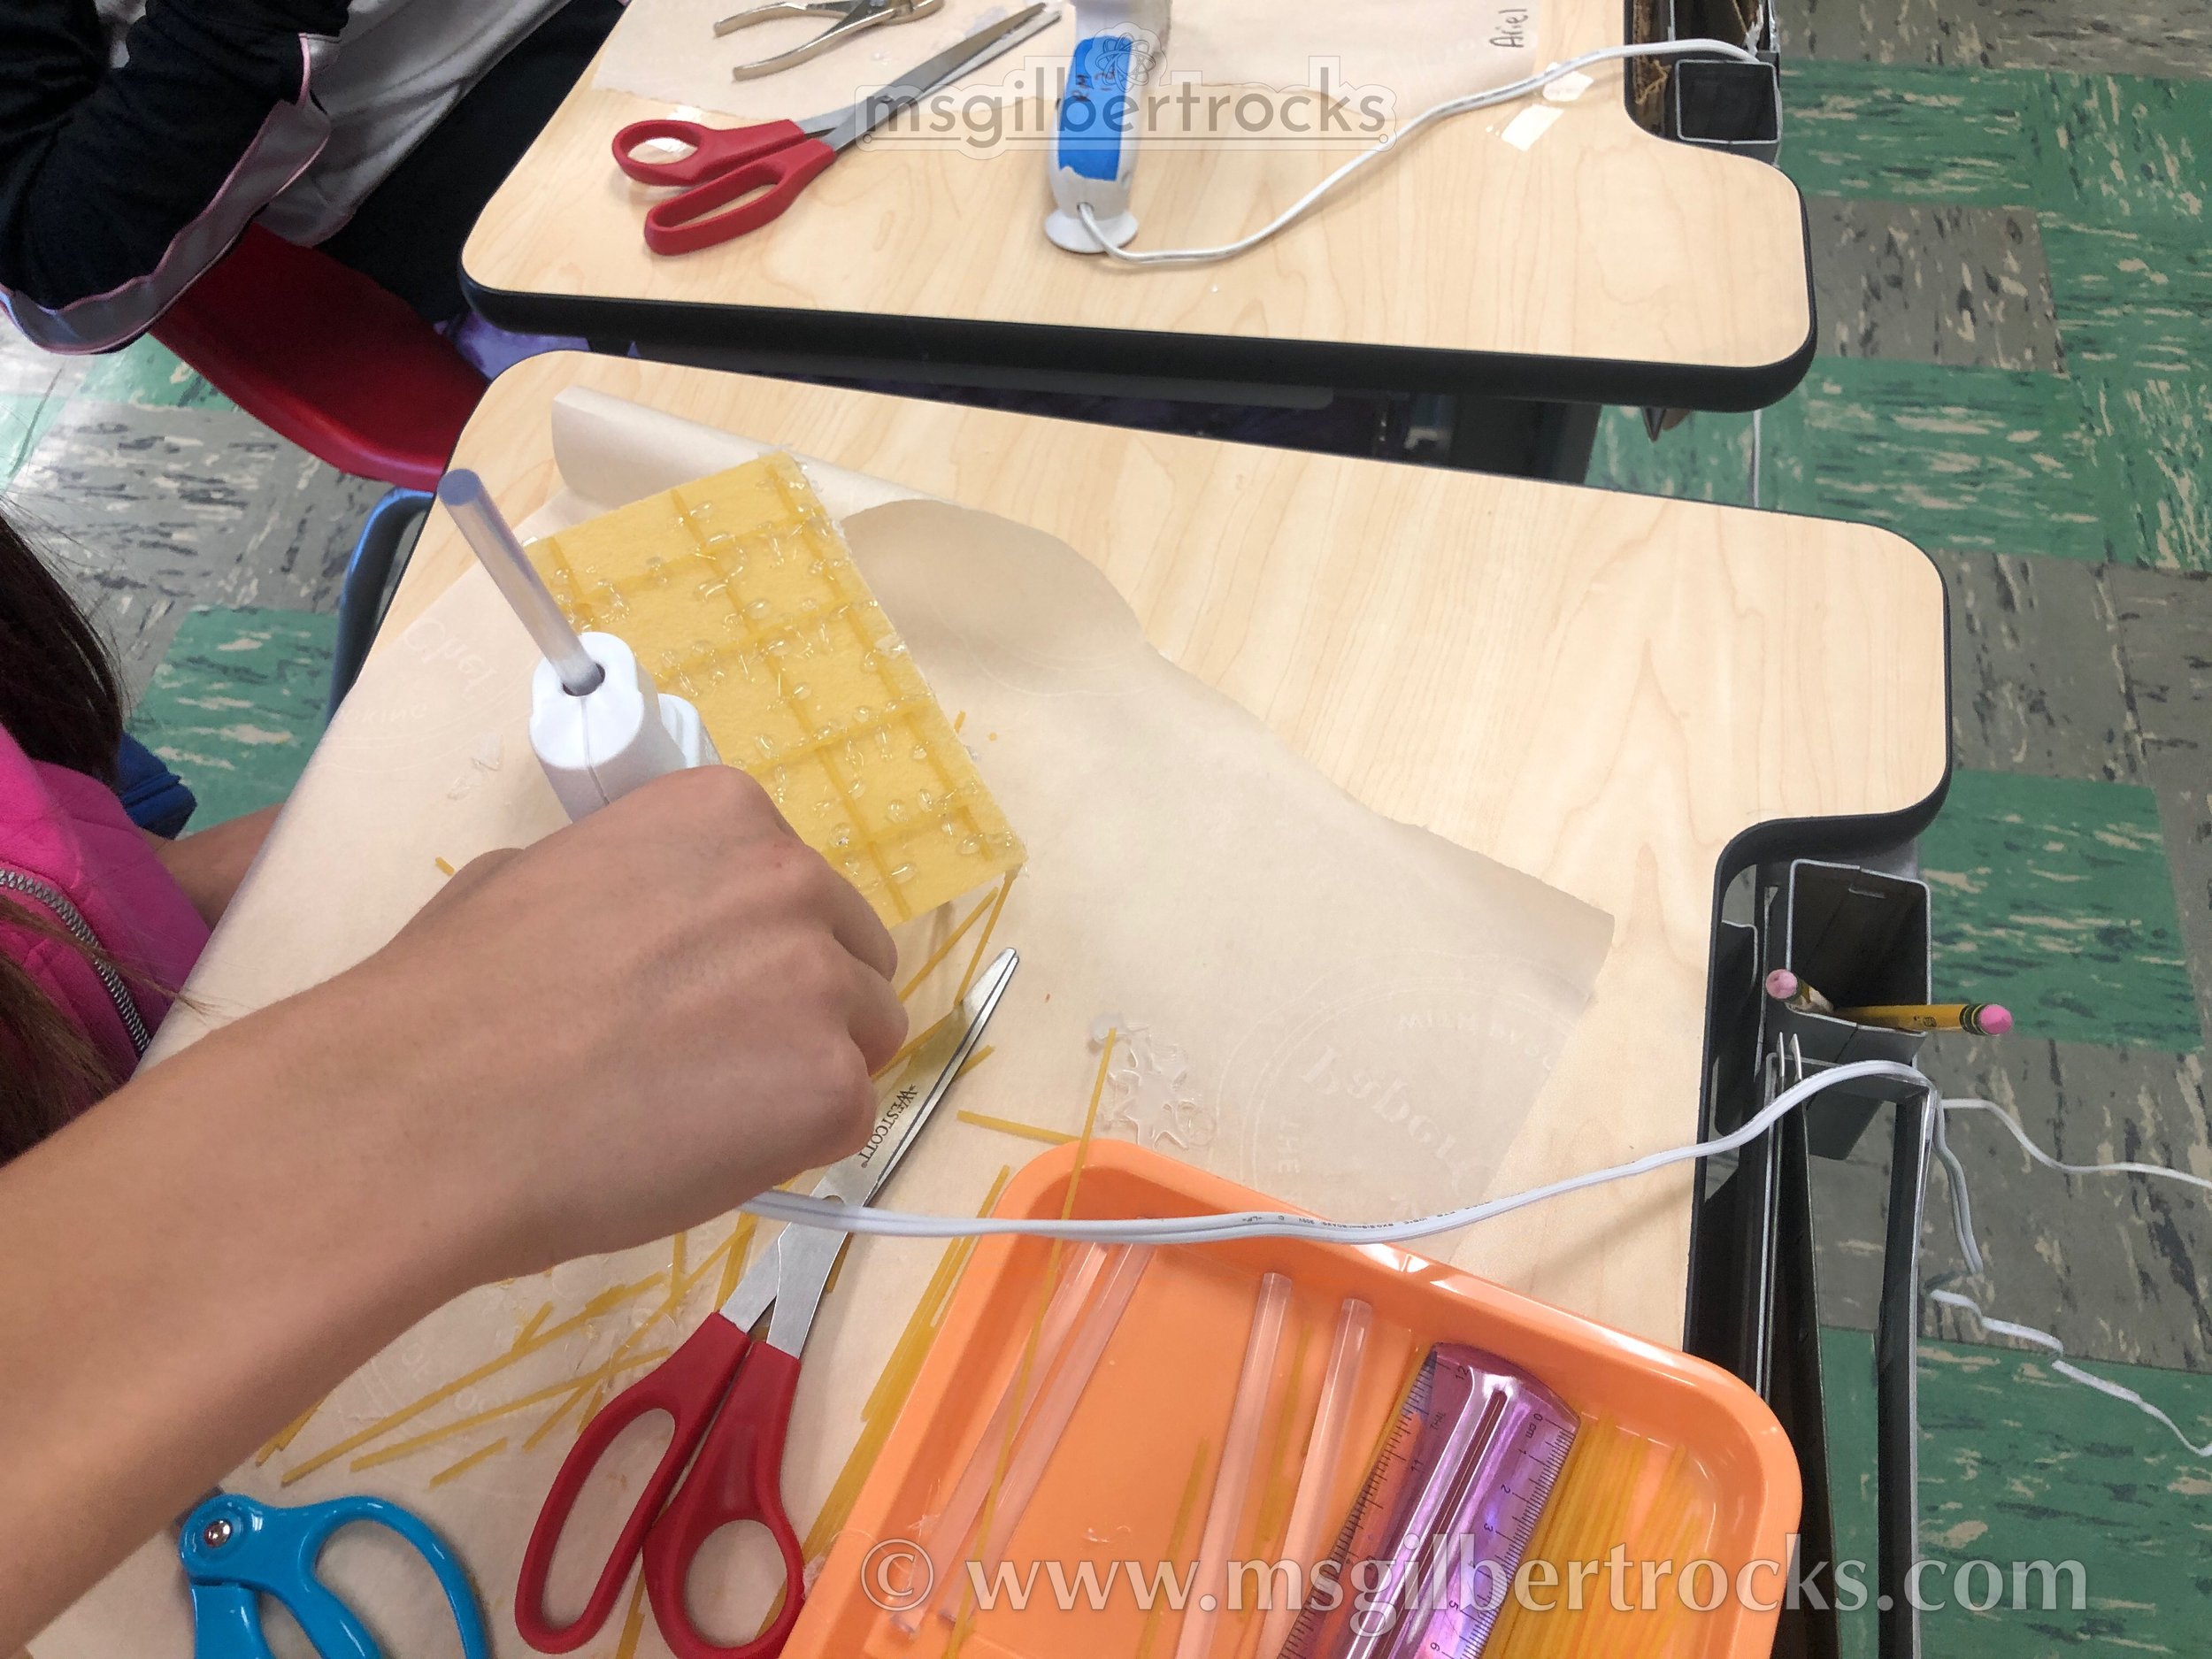
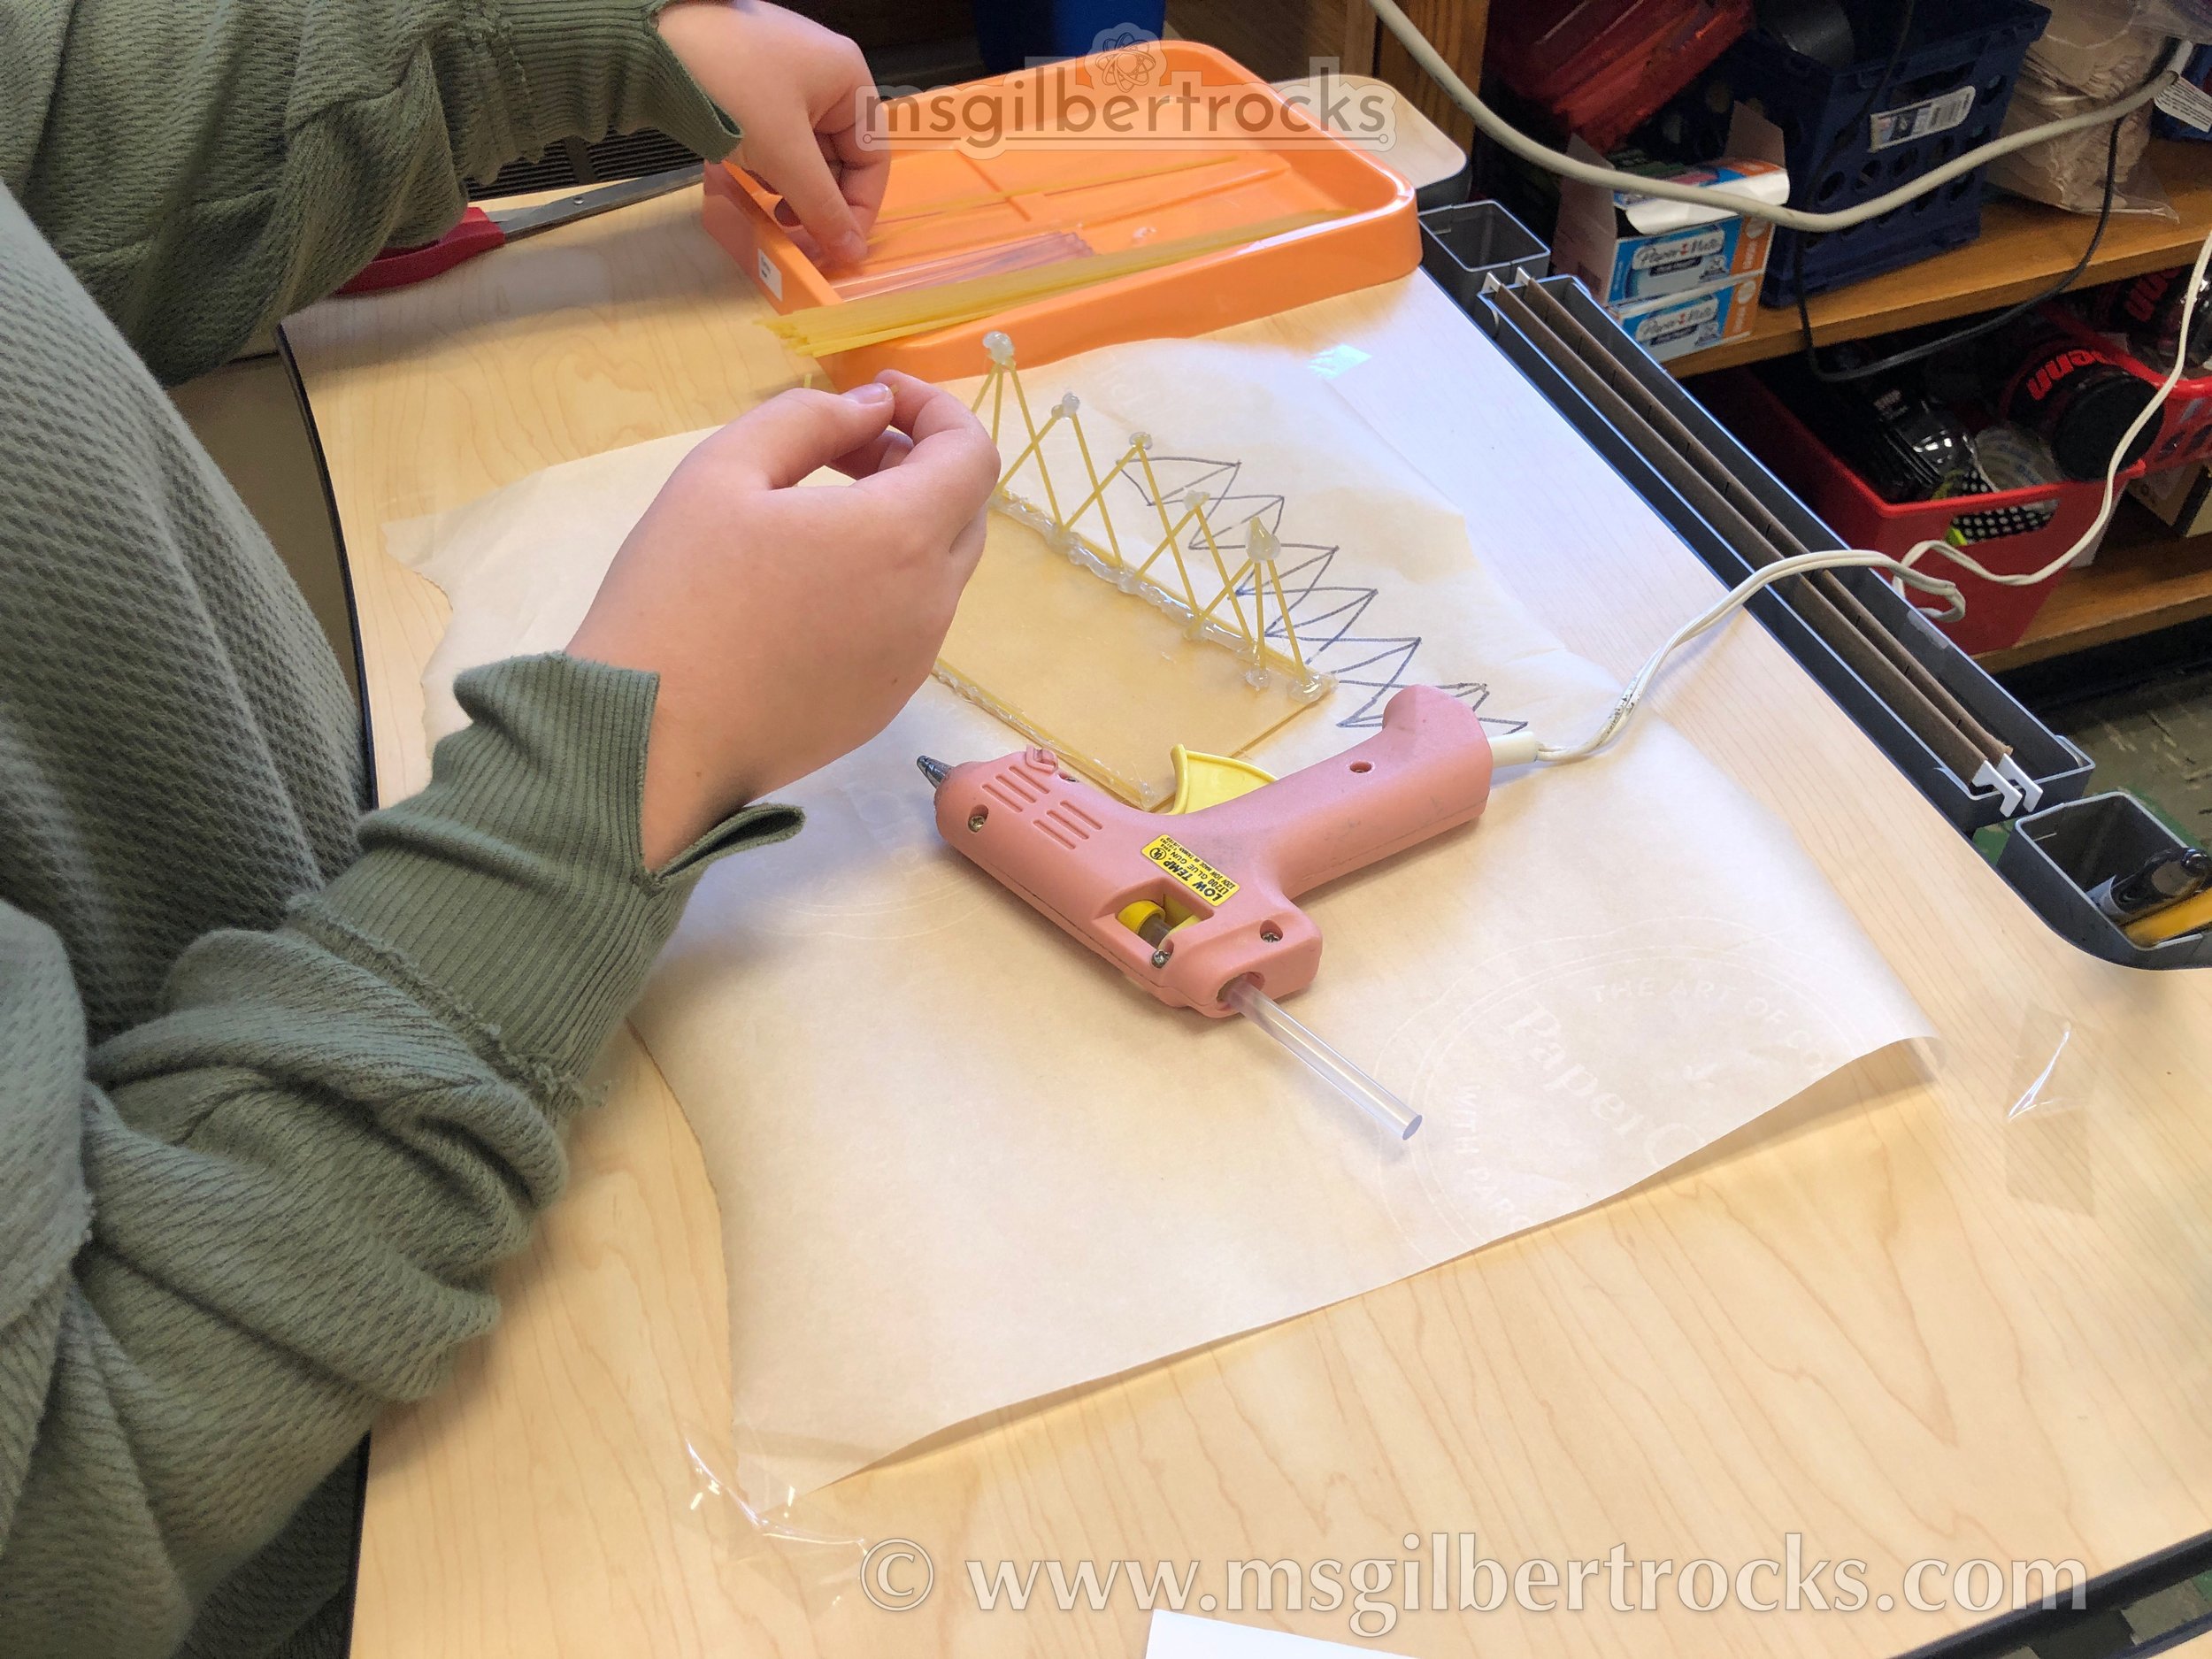
Speaking of testing to failure…when I completed this activity myself in a Tufts University TEEP course, I struggled. There were literal tears and I was fortunate to have the guidance from my very good friend, Ed, to help me navigate the project and learn a few tips. He helped me in many ways and taught me things, like to use parchment paper so my noodles could be assembled into triangles and then lifted right off of the parchment paper without sticking. This use of parchment paper has carried over to every class and hot glue activity, particularly the bridges which require so much small detail work/assembly of multiple pieces. In the introductory session for my classes, I show them a number of photos of my bridge created for the TEEP course as well as the videos of testing it to failure. This helps them picture the “done” for the project they are about to undertake. They see a completed pasta bridge and then see it get destroyed by weights placed on it until it fails. You can see the images of my TEEP bridge to the right of this text and the video snippets adding weights below. If you’re interested in learning more about TEEP at Tufts then I would love to chat with you at any time ;) You can also read more about the program online and check out what they share on social media. I am a huge fan of the program (highly recommend it) and all of the people at the CEEO that work with educators. I am thrilled to have all of the experience to refer back to in many aspects of my current position working with students in the classroom, from TEEP in general and the Novel Engineering coursework specifically.
Logistics
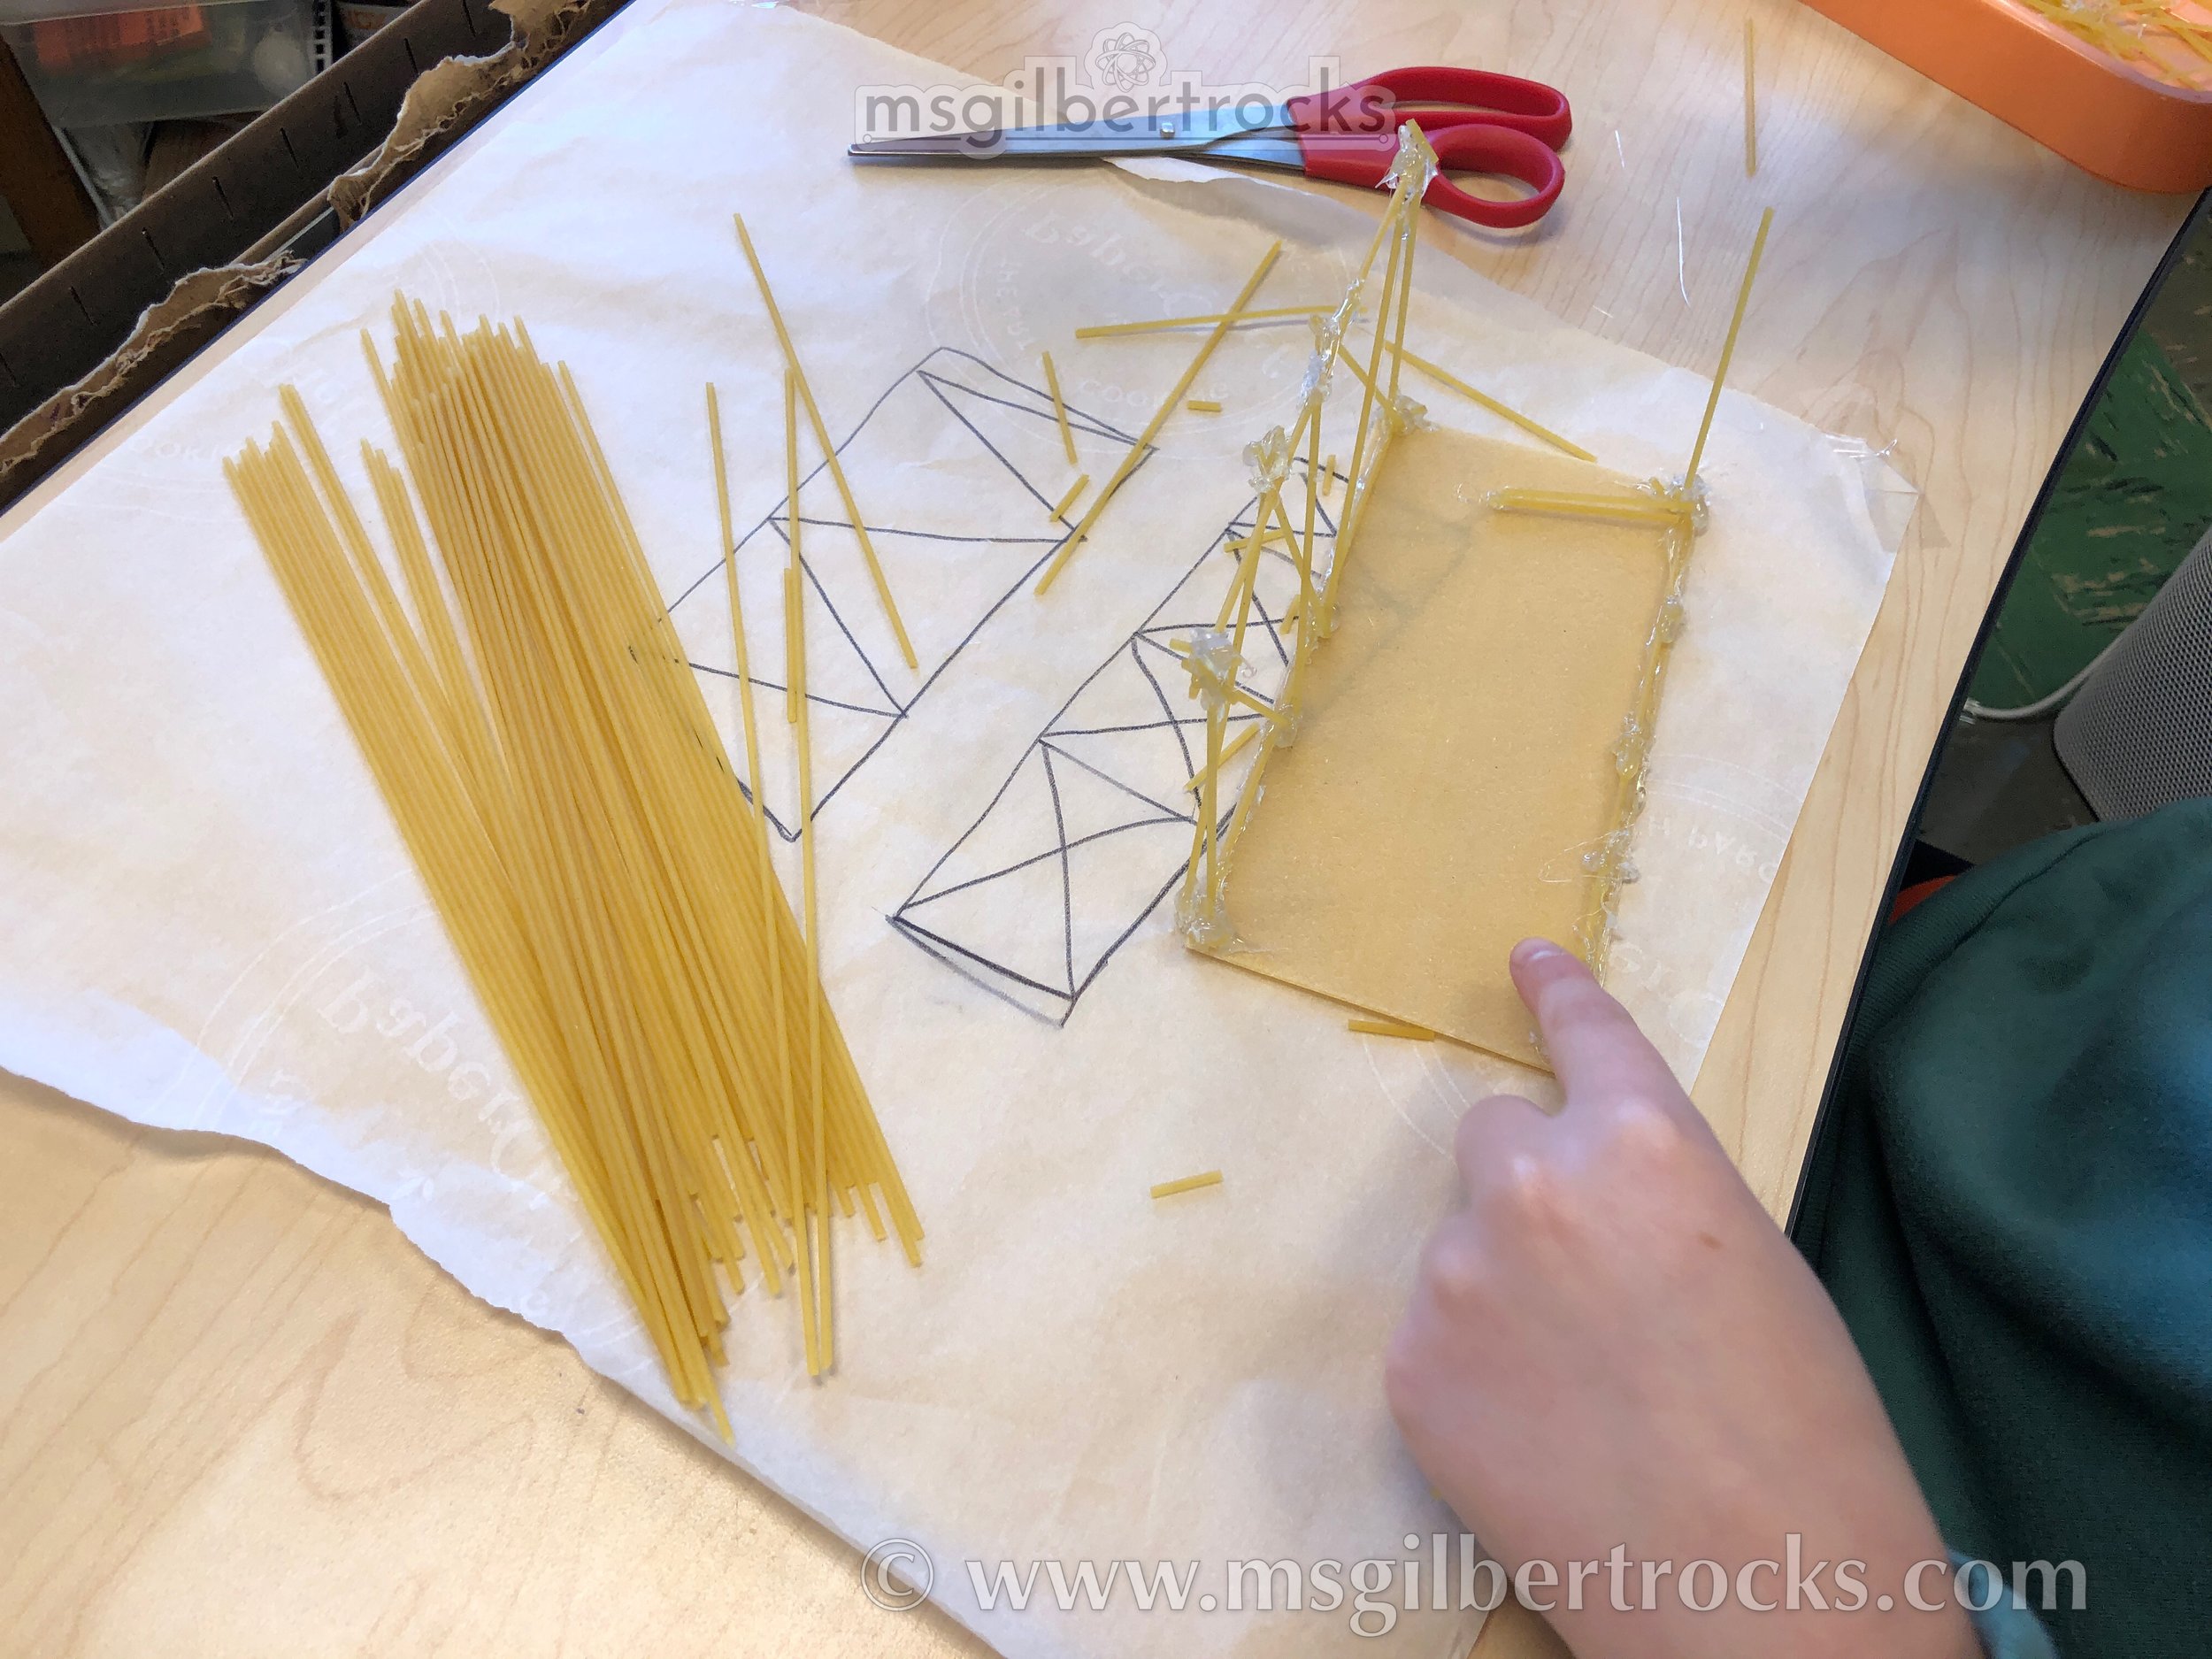
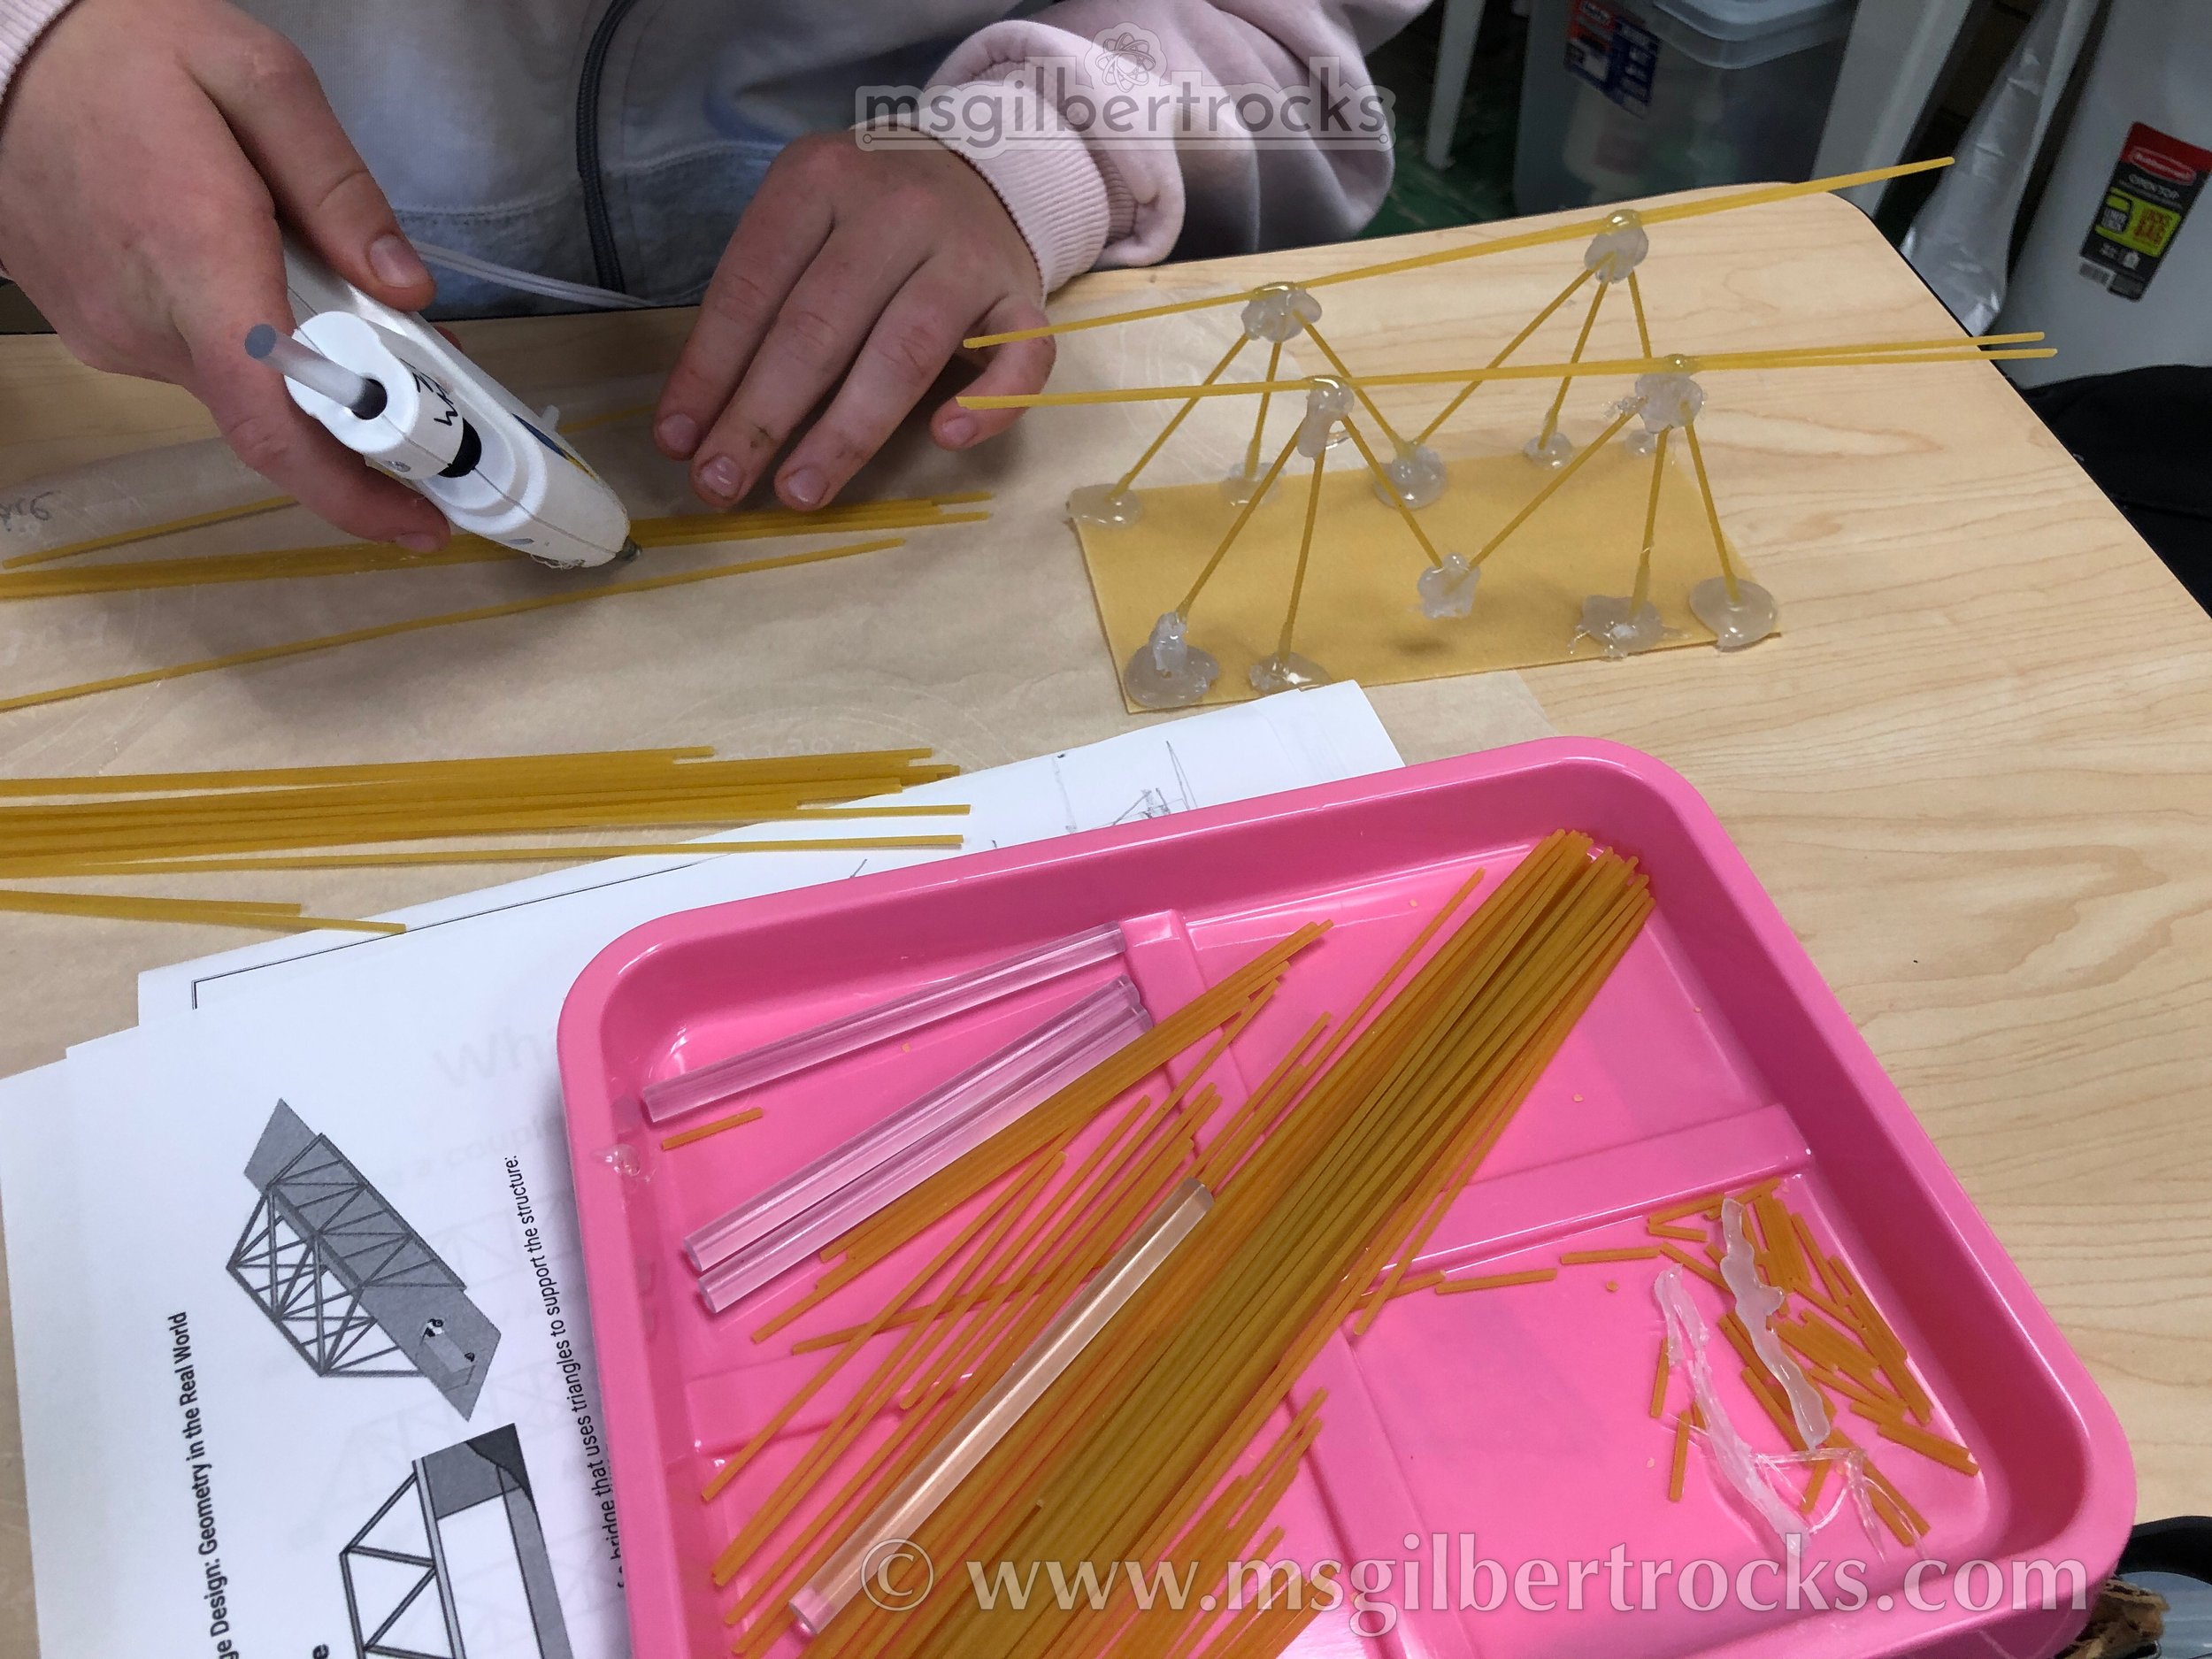
After the intro videos/discussion on expectations, I share the paper copies of materials with students. There is a handout for sketching an initial design idea and an 11 x 17 poster paper folded in half to create a folder and provide visuals for the truss designs. Over the years I have also provided other printed copies of truss bridge designs as needed. I typically search up some options and print what is needed. Otherwise, we go with the folded 11 x 17 as a folder holding their document to sketch initial ideas. You can make your own copy of the Google Doc for sketching ideas here. You can find and download the truss poster on this website. We have a copier that prints on 11 x 17 paper so I am able to just send the PDF to that copier and select the appropriate ledger paper size.
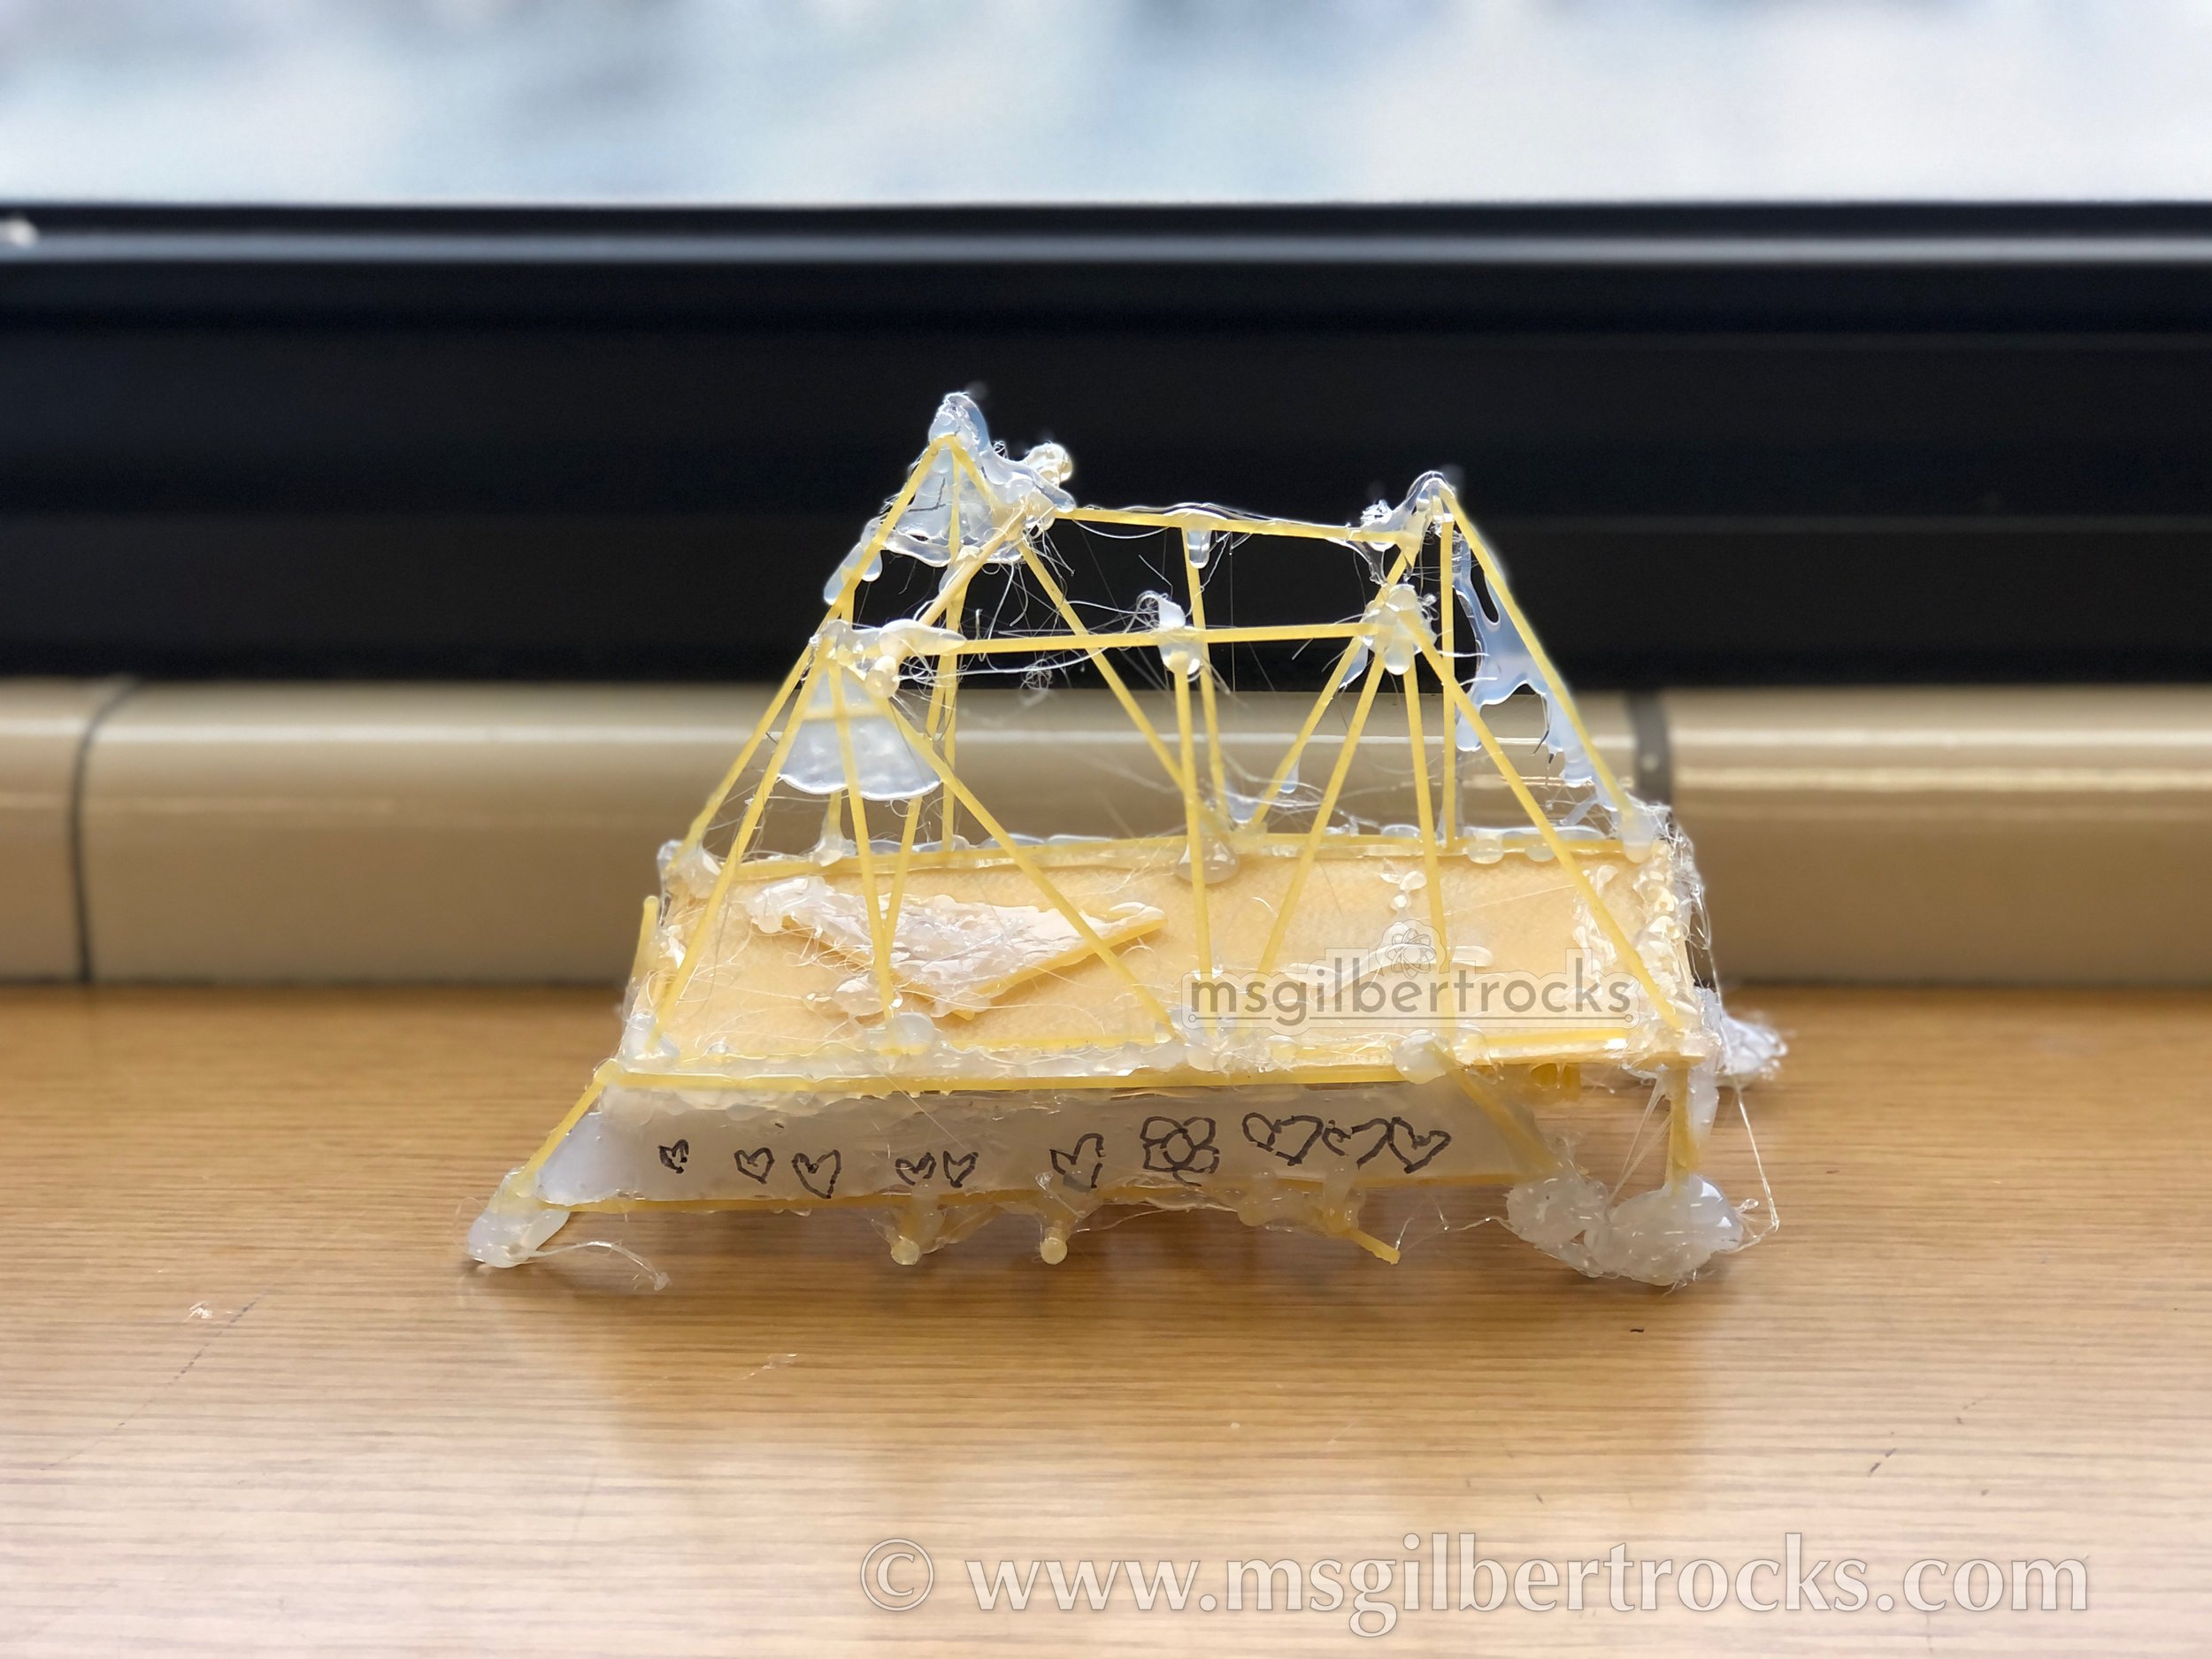
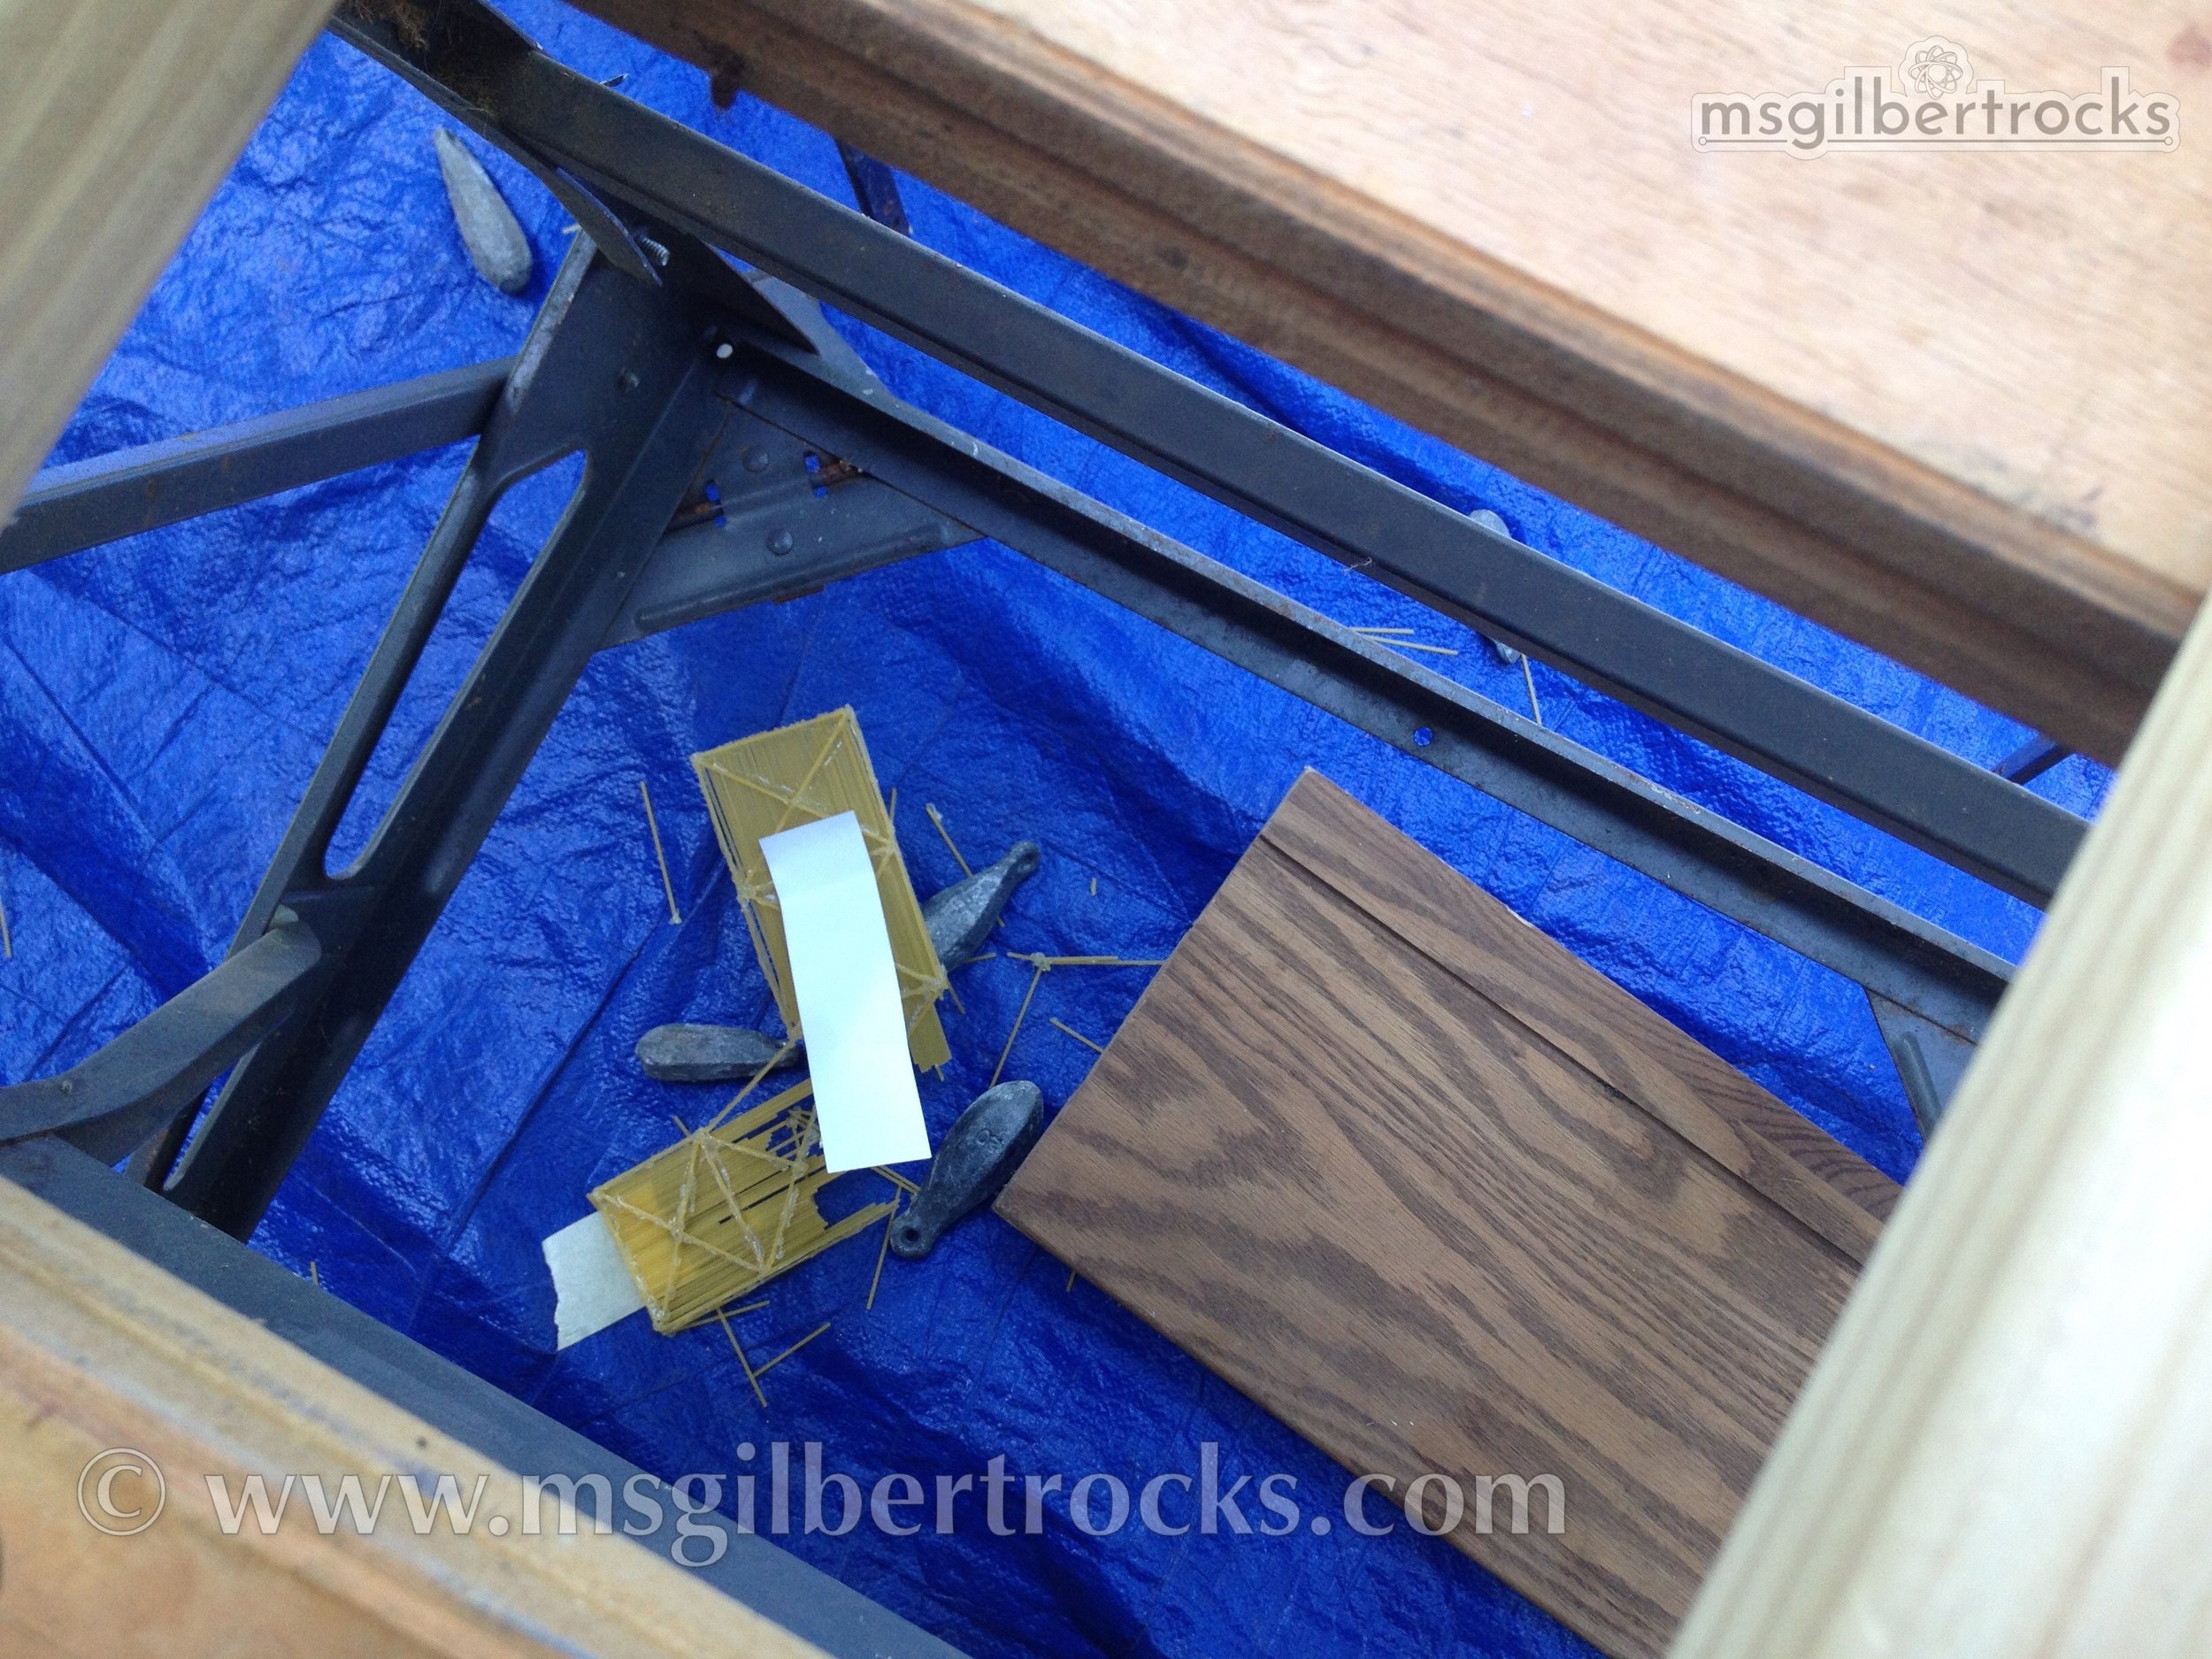
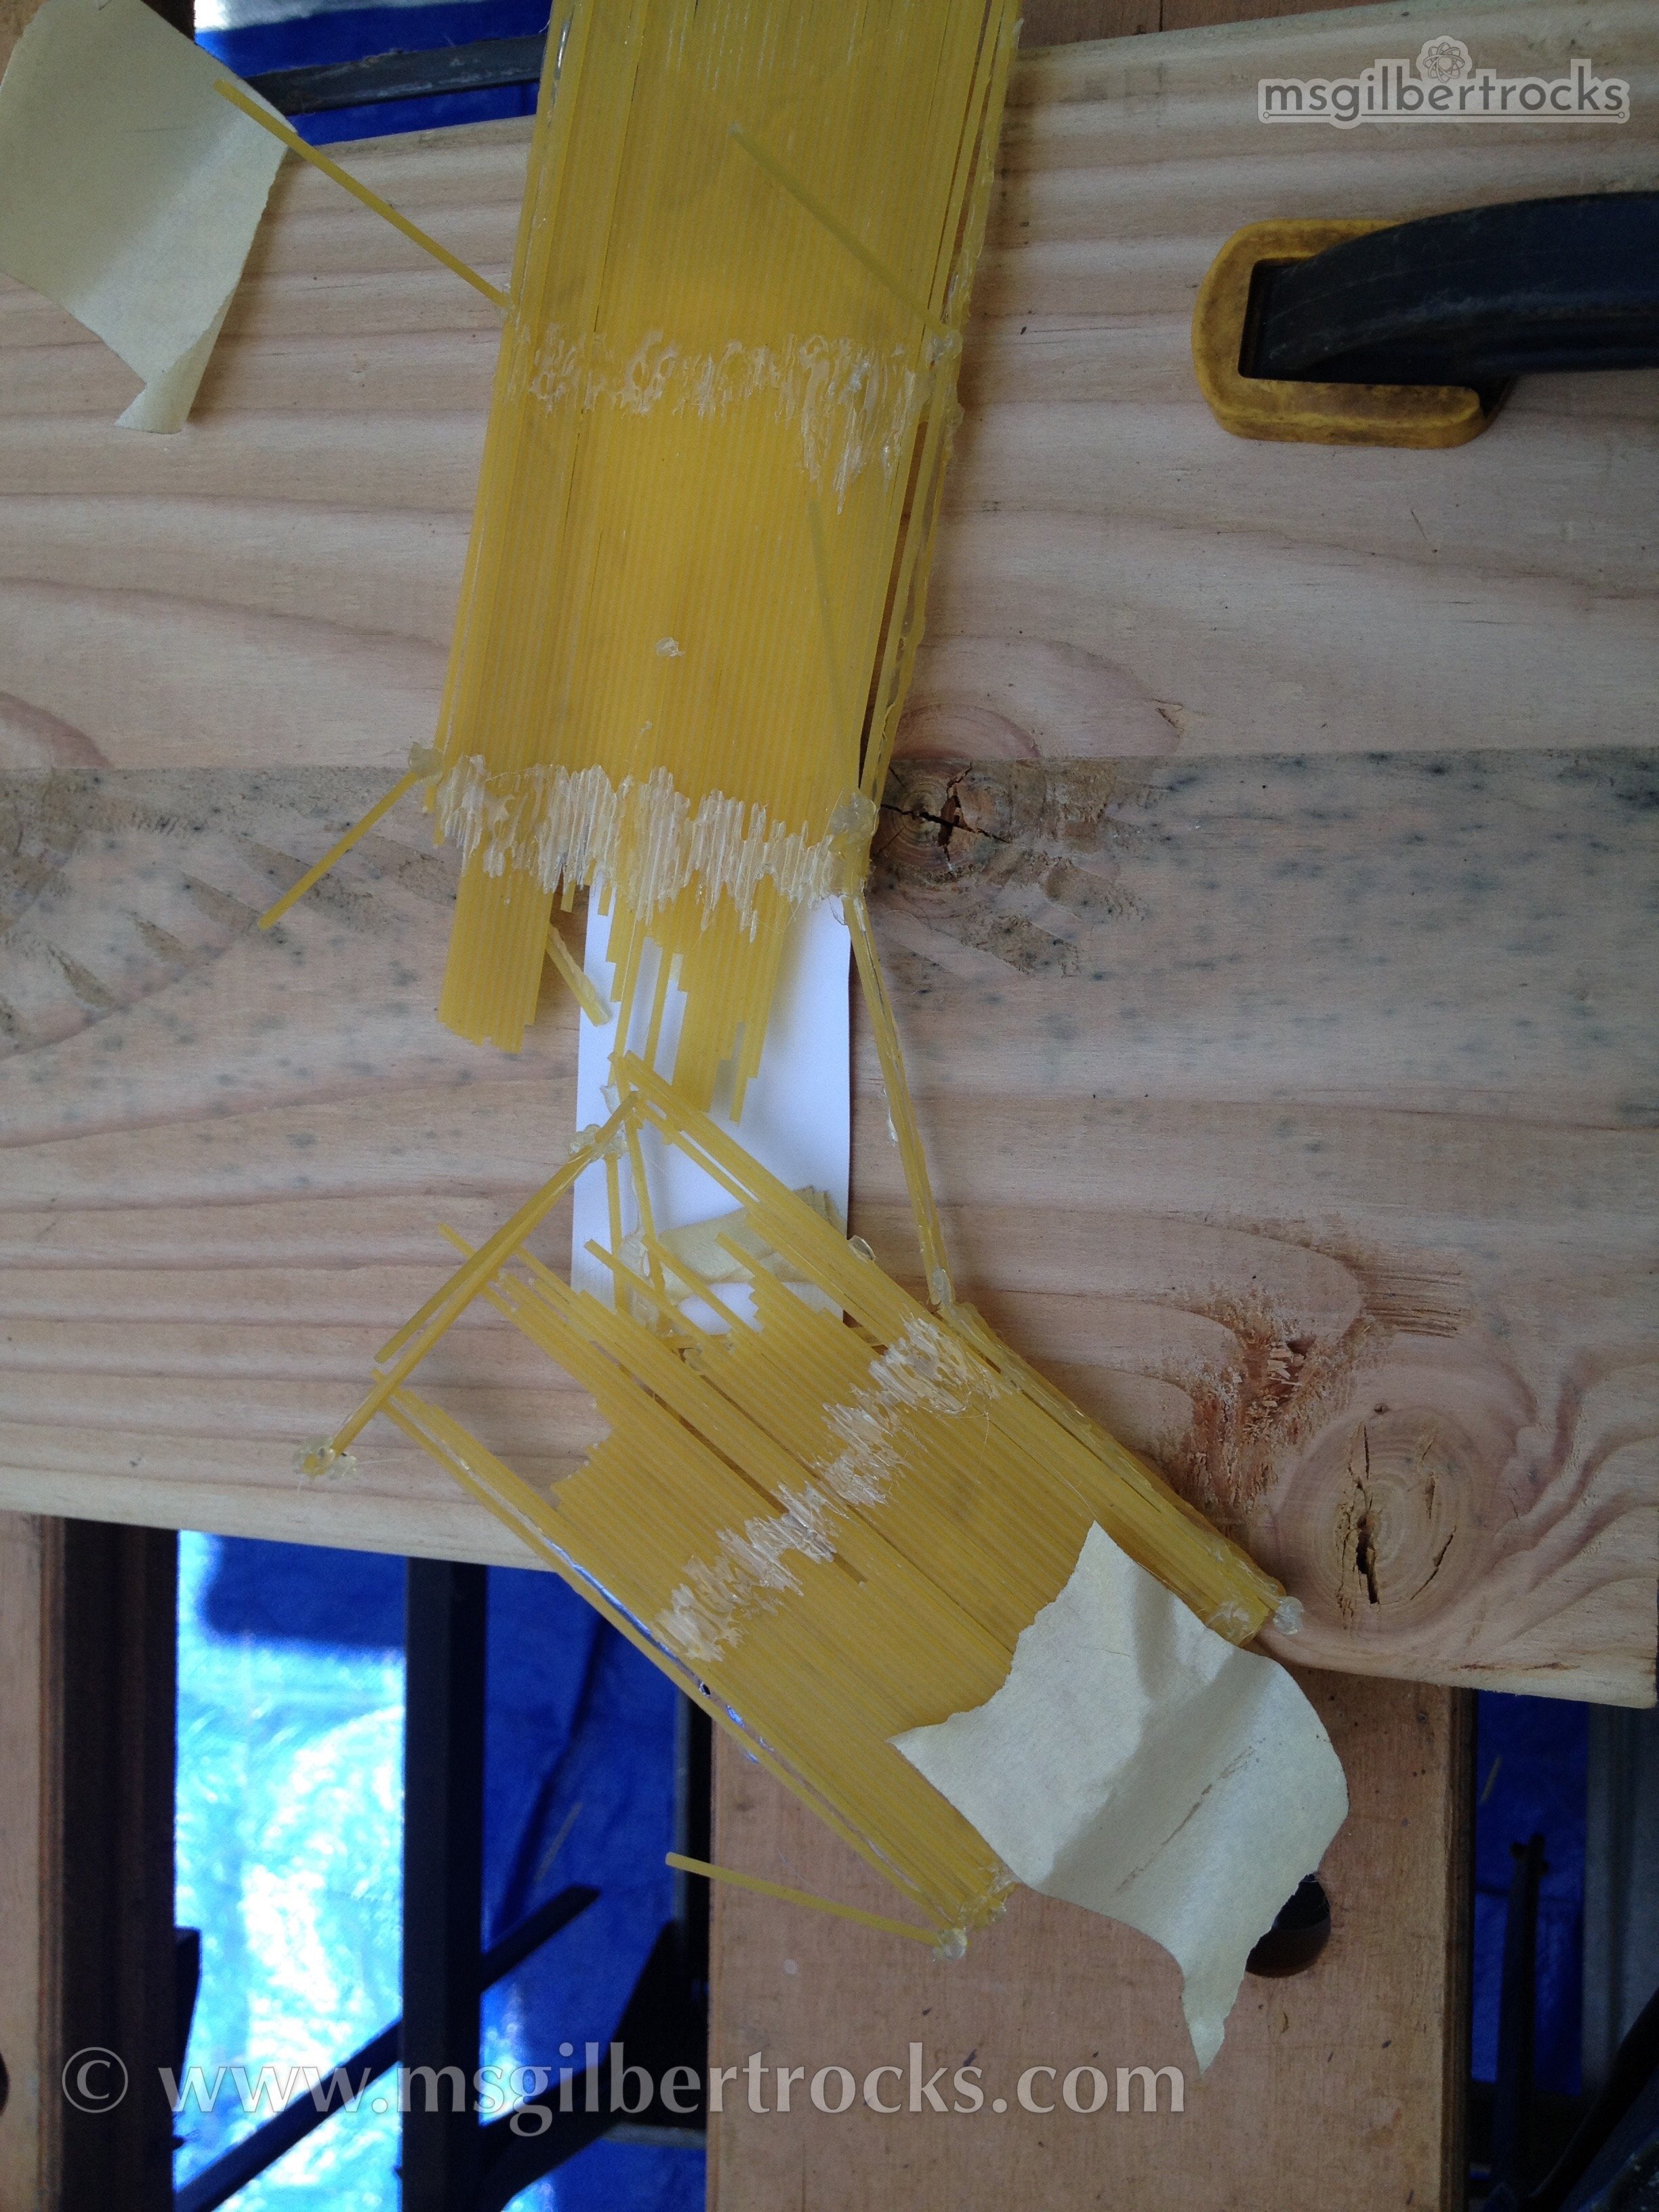
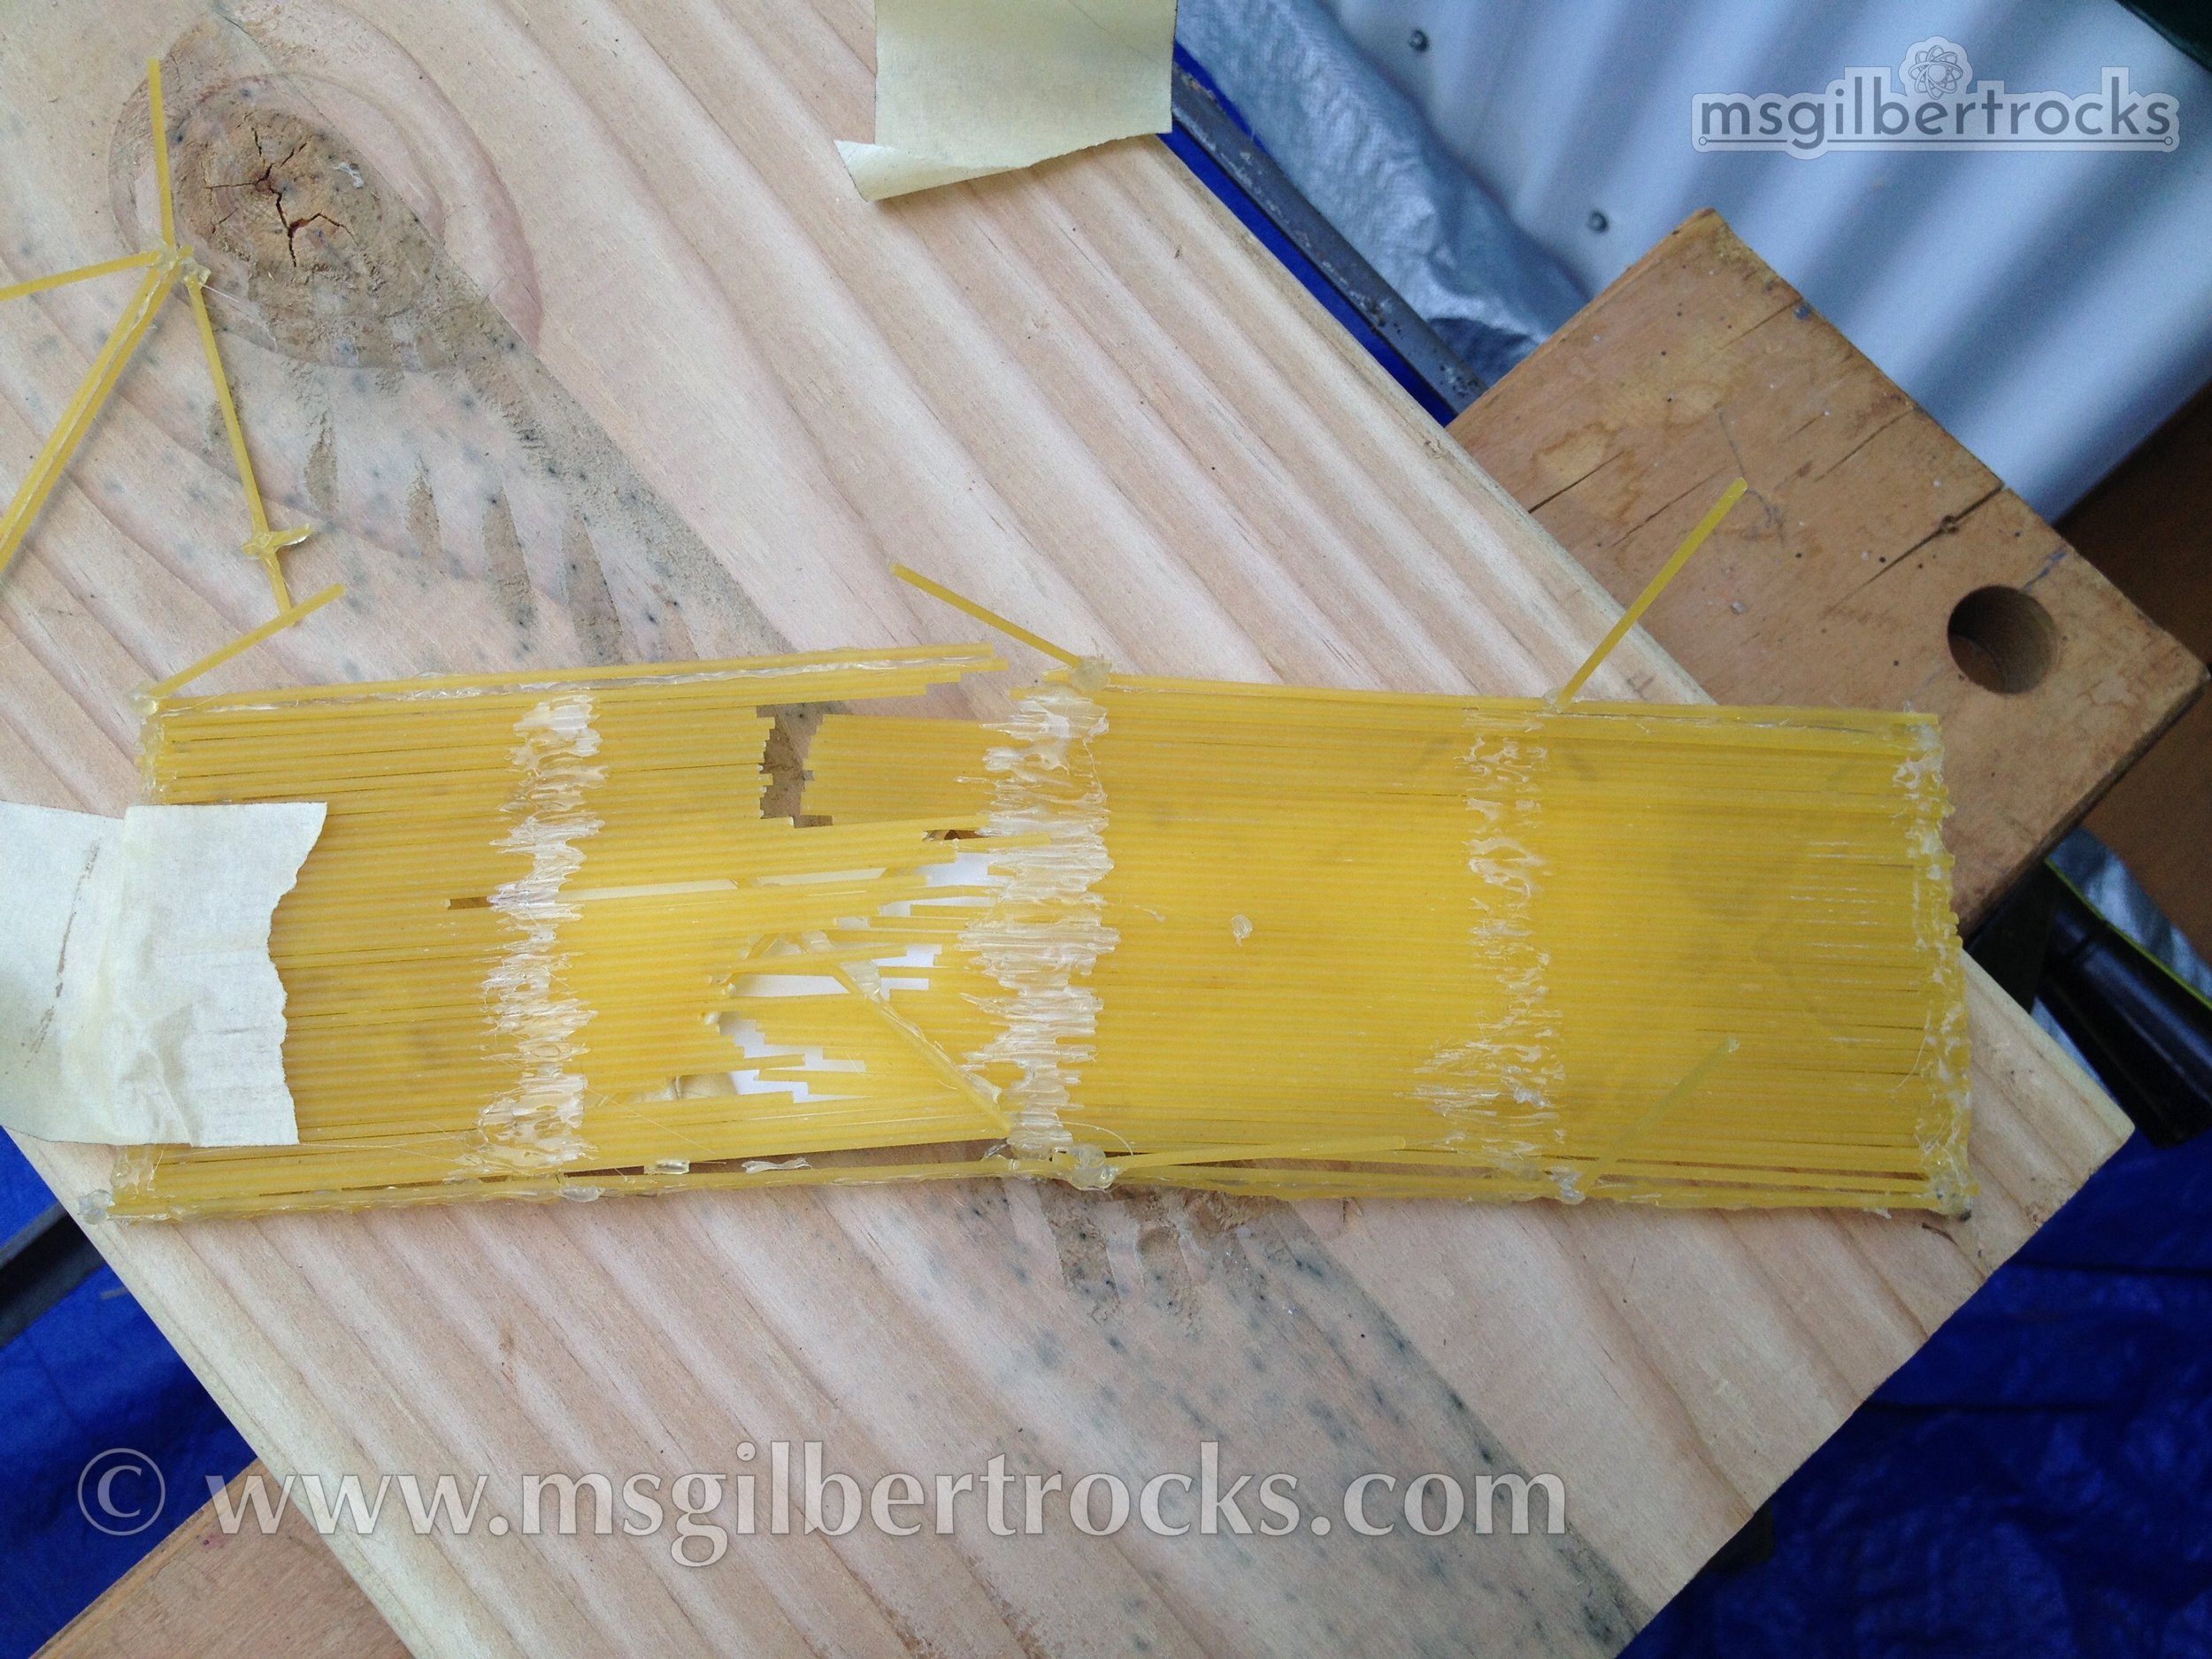
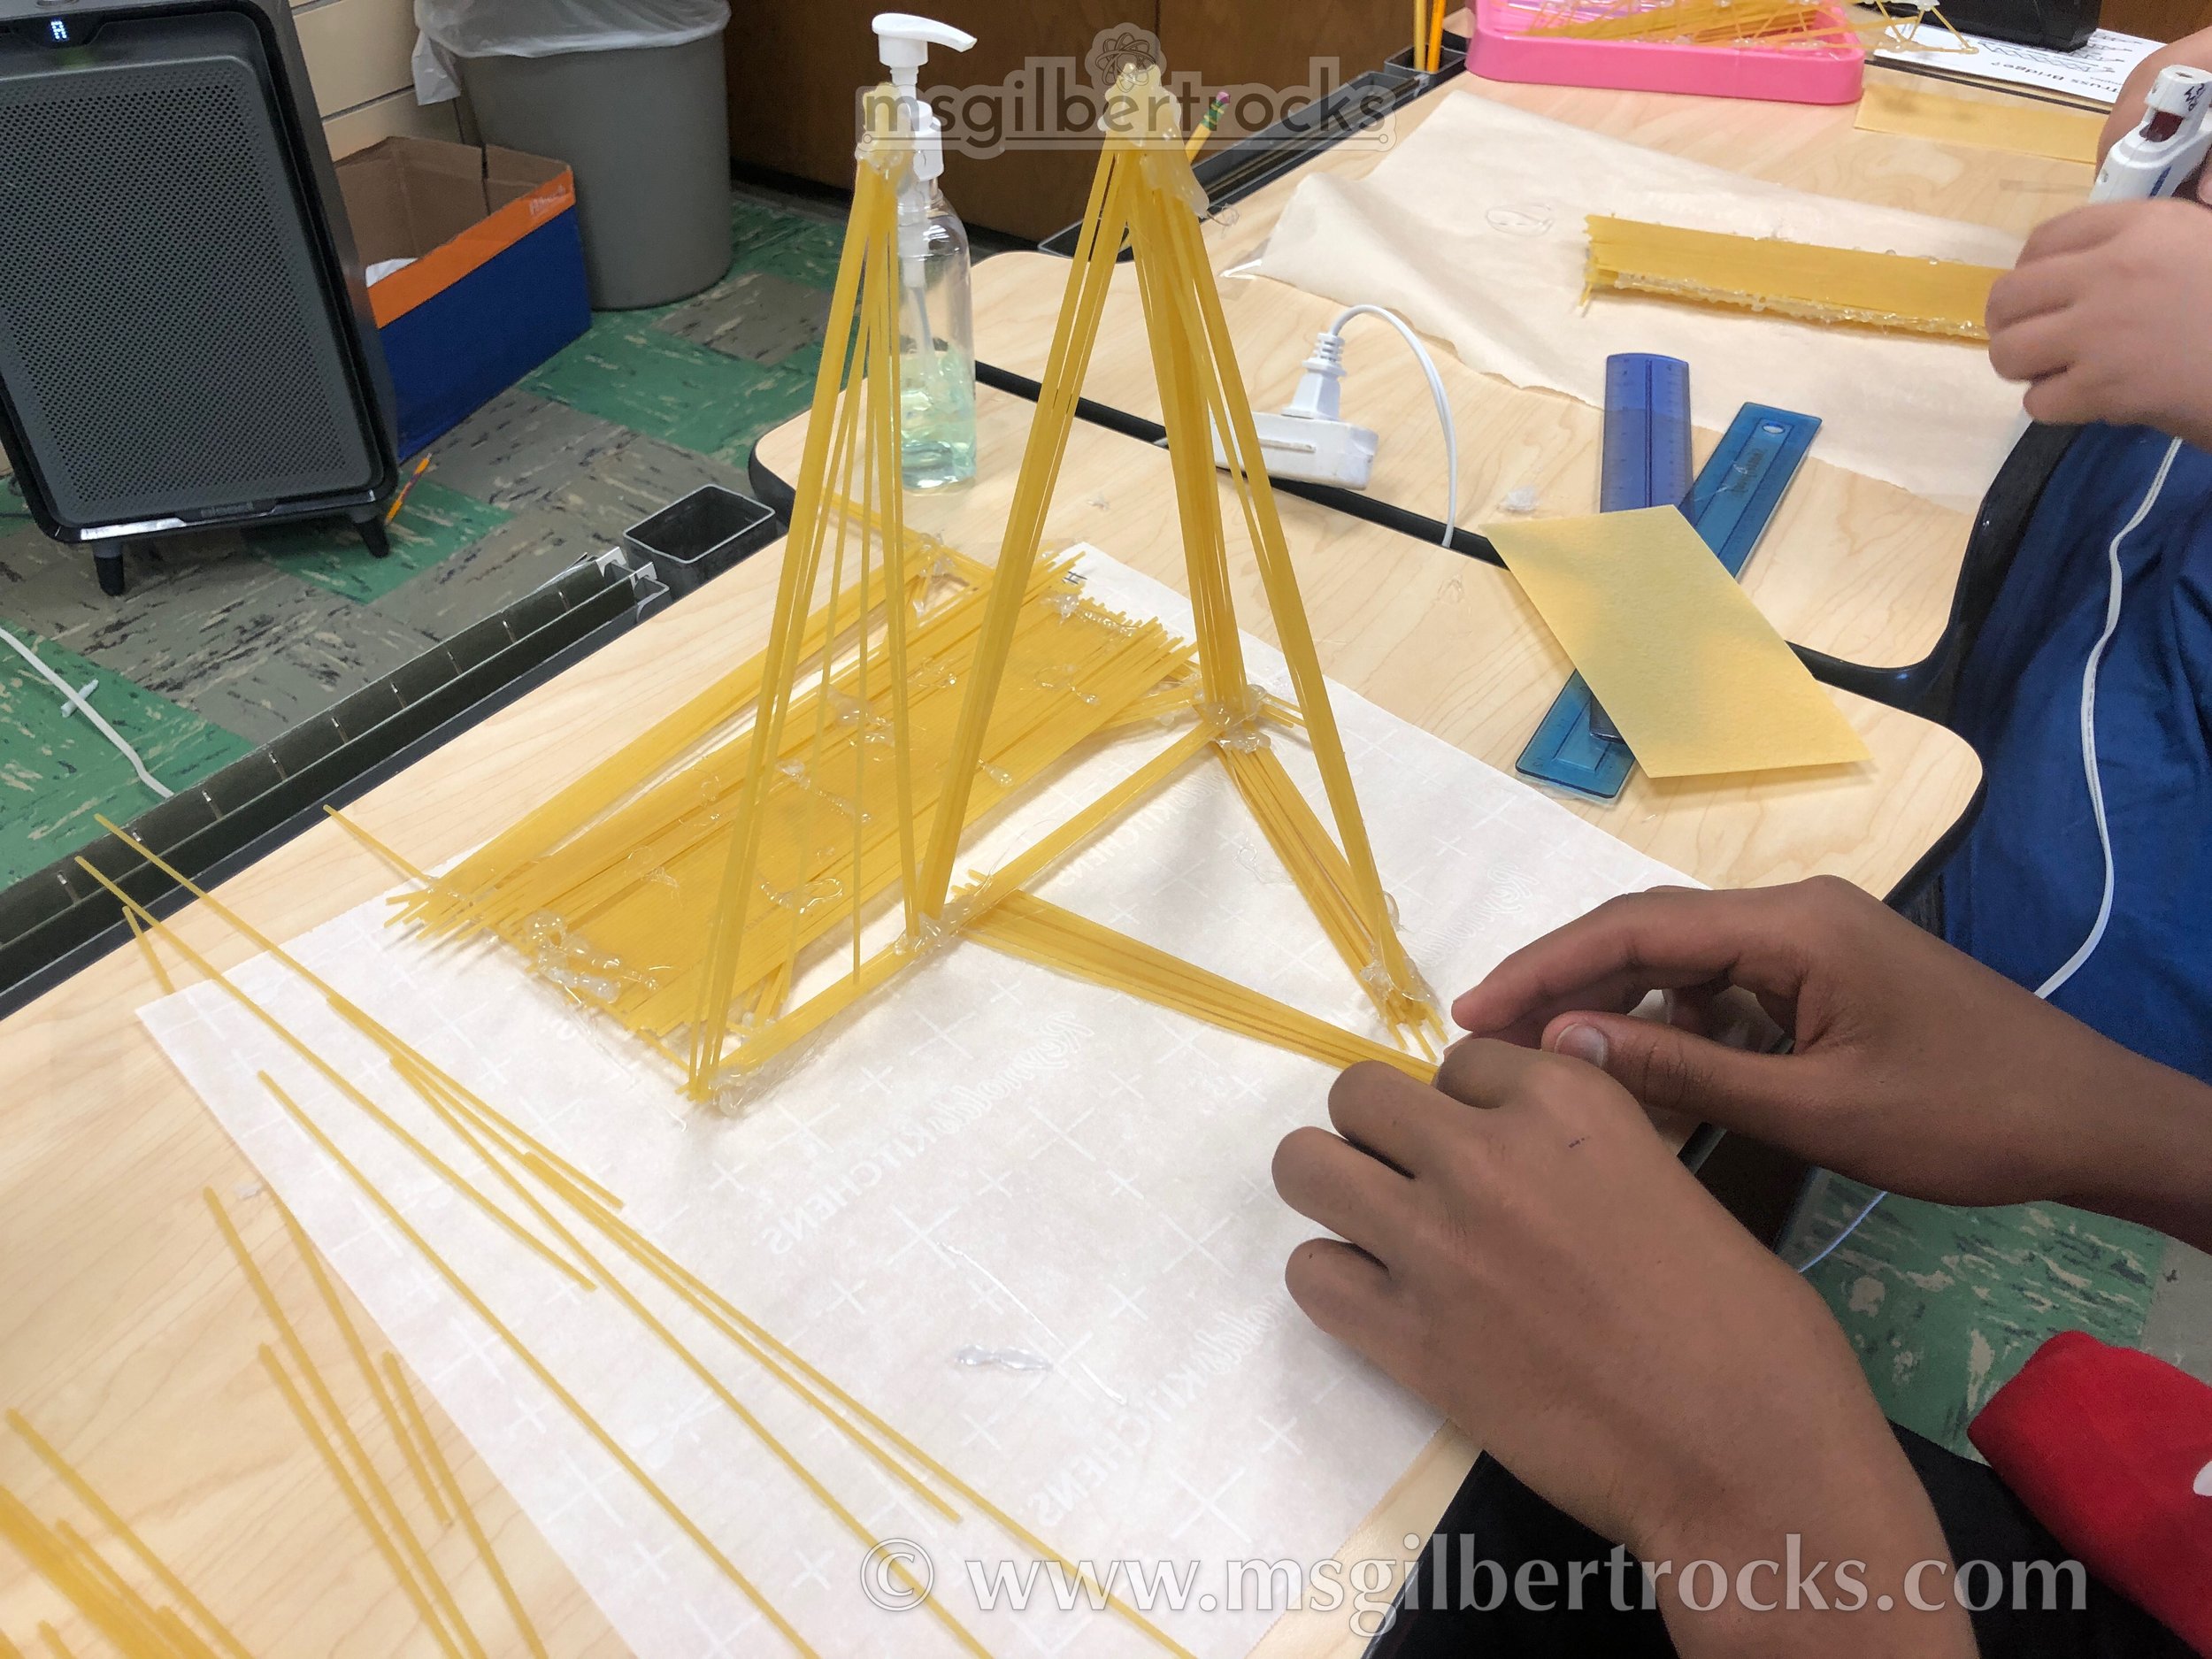
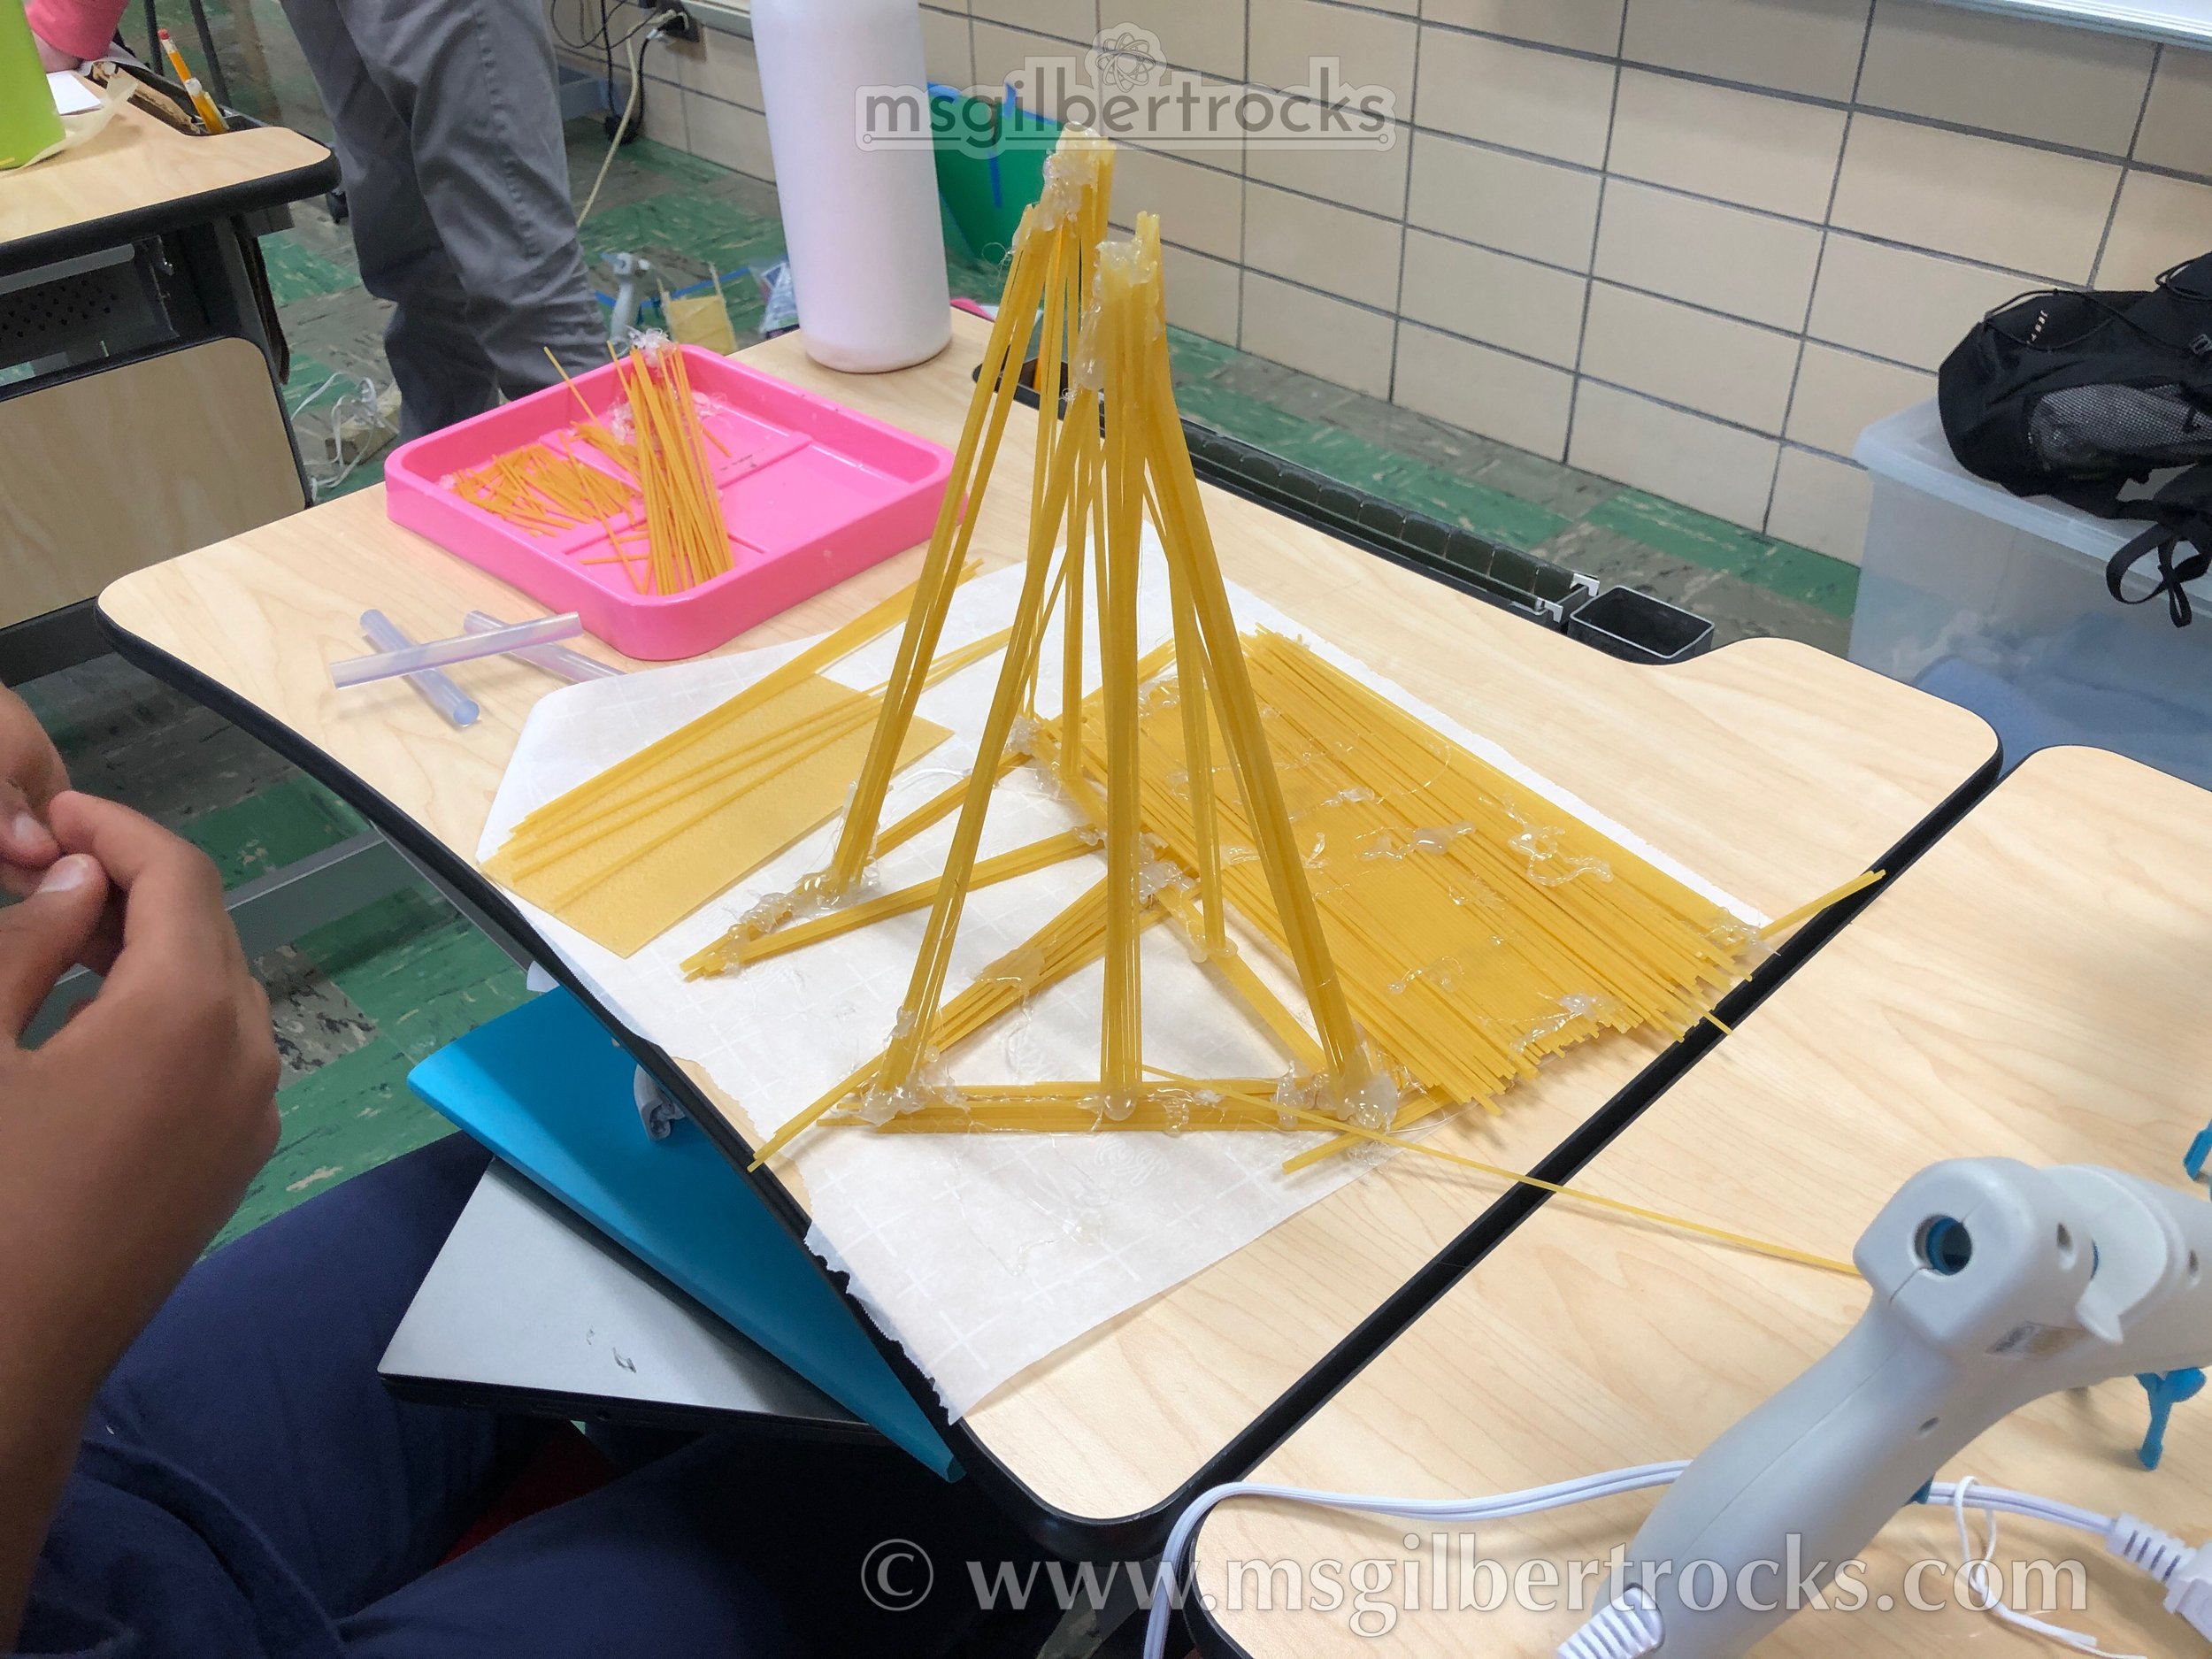
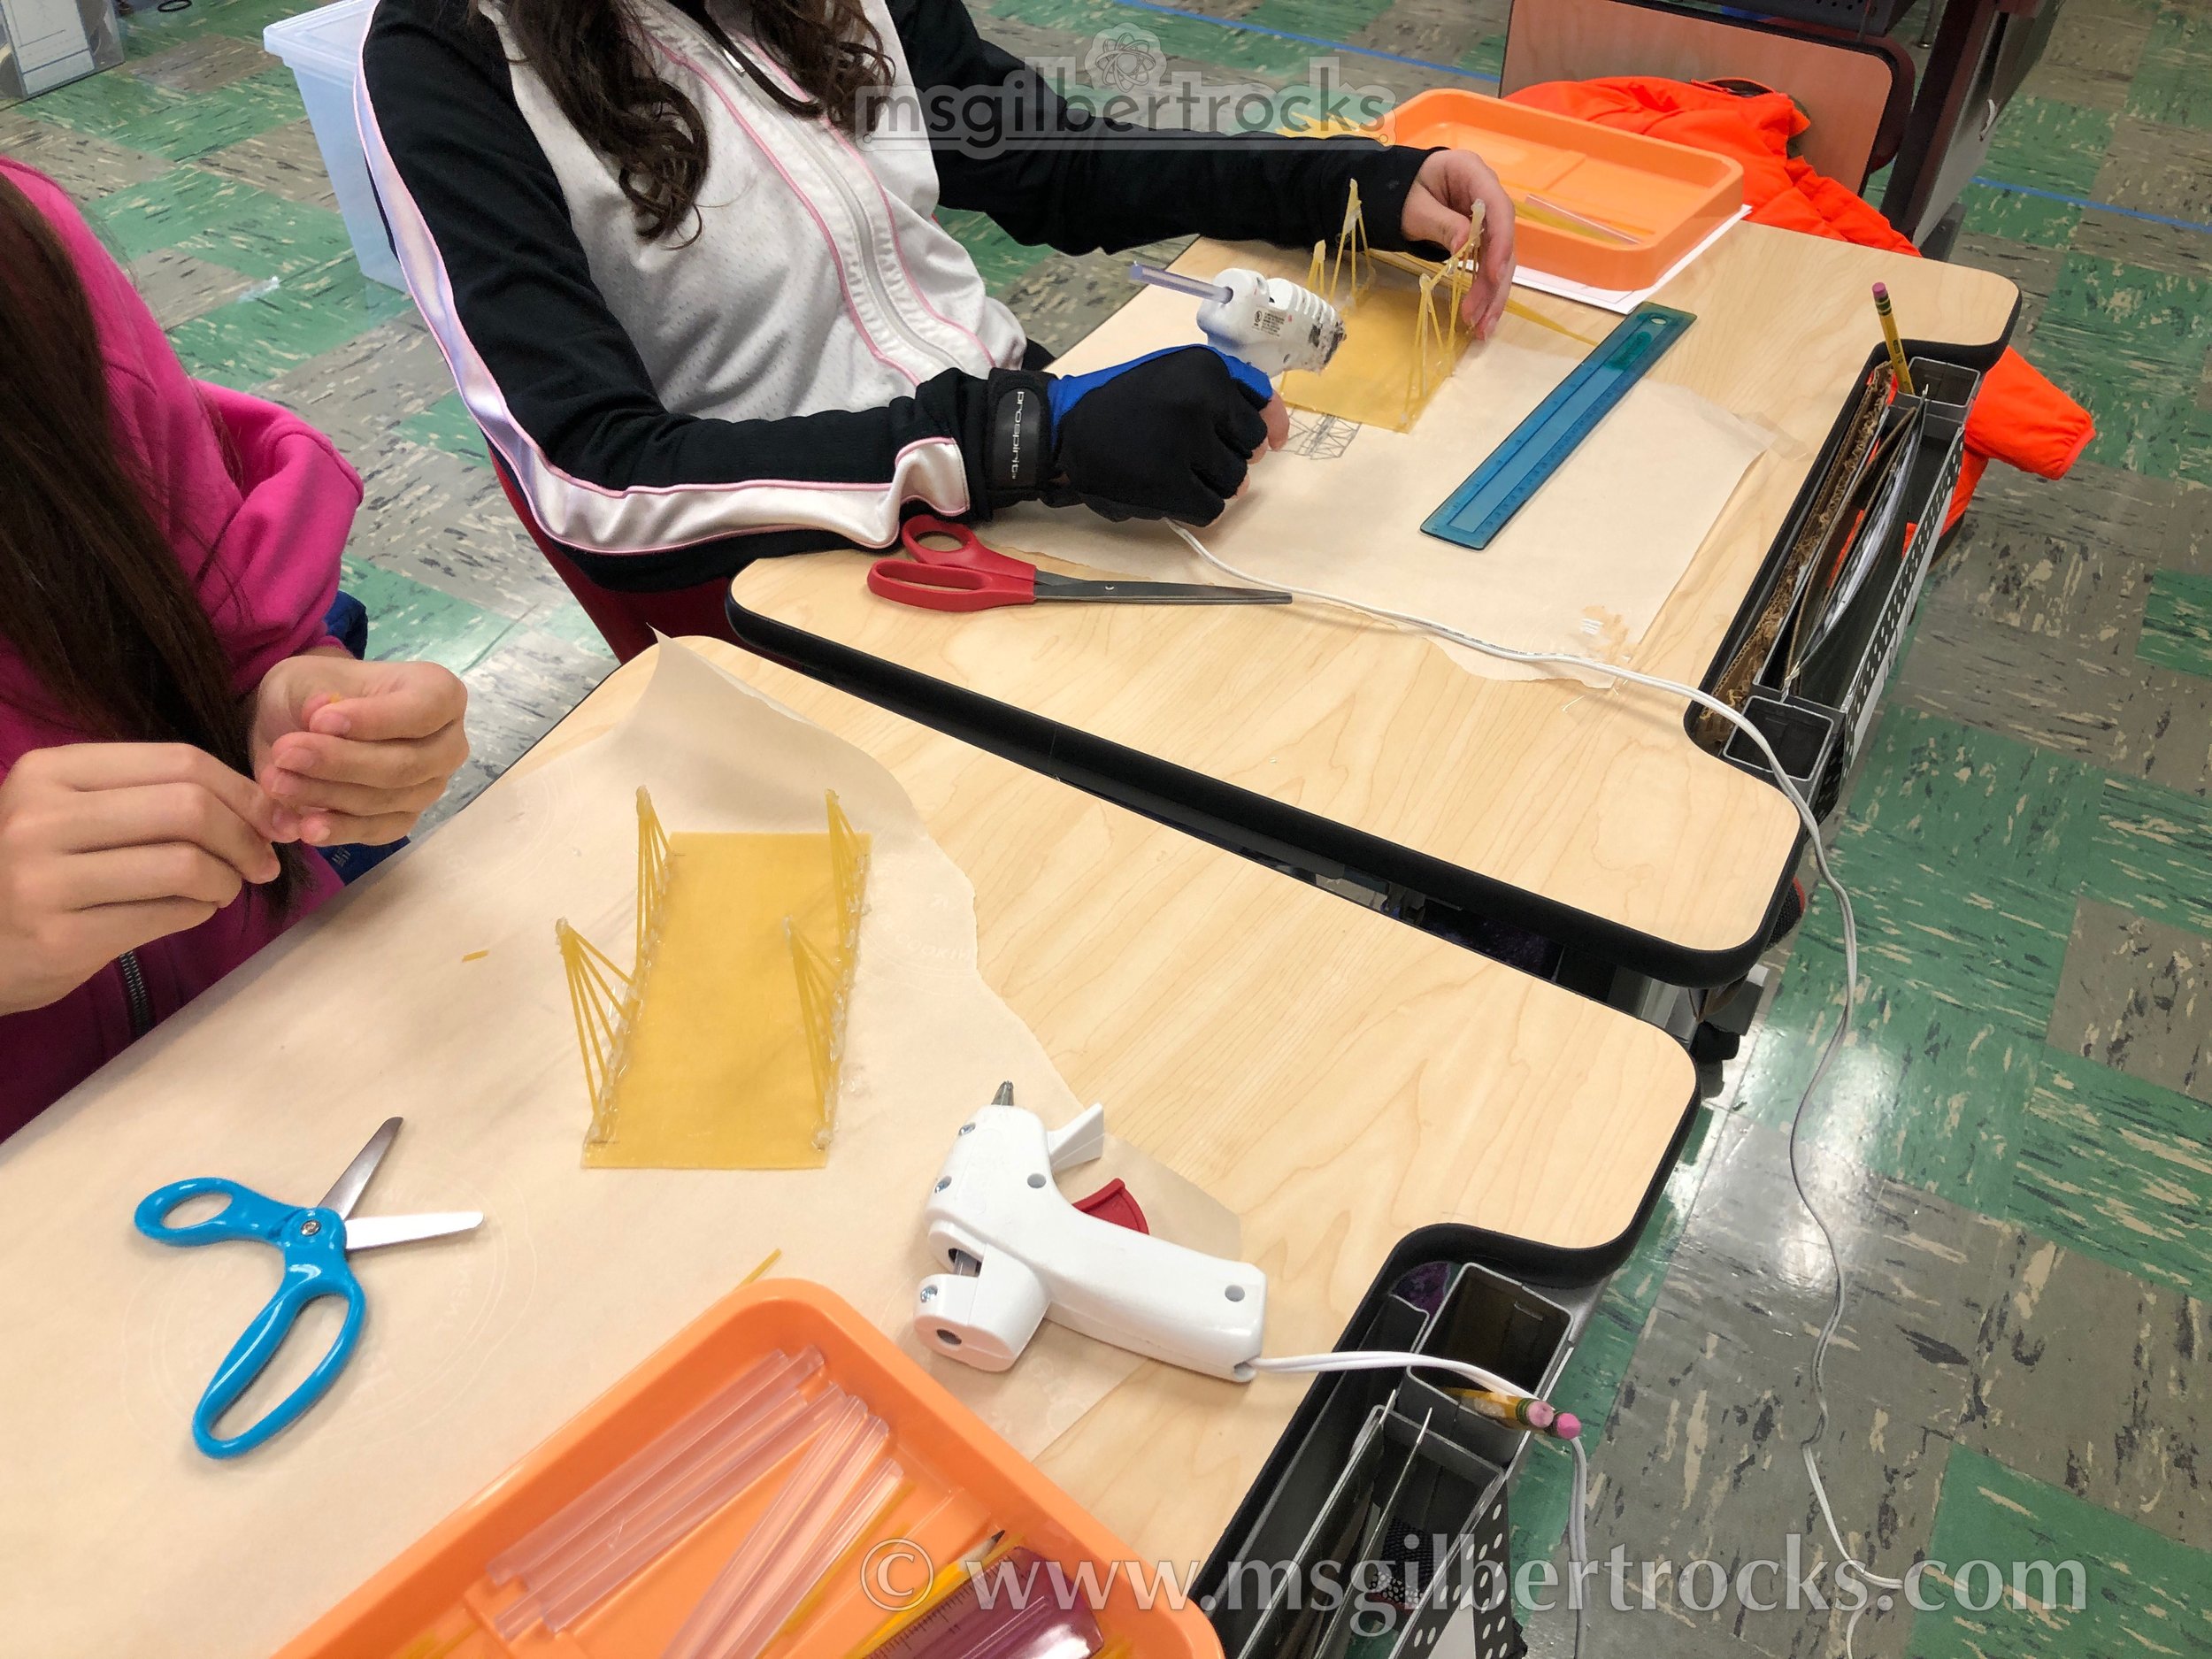
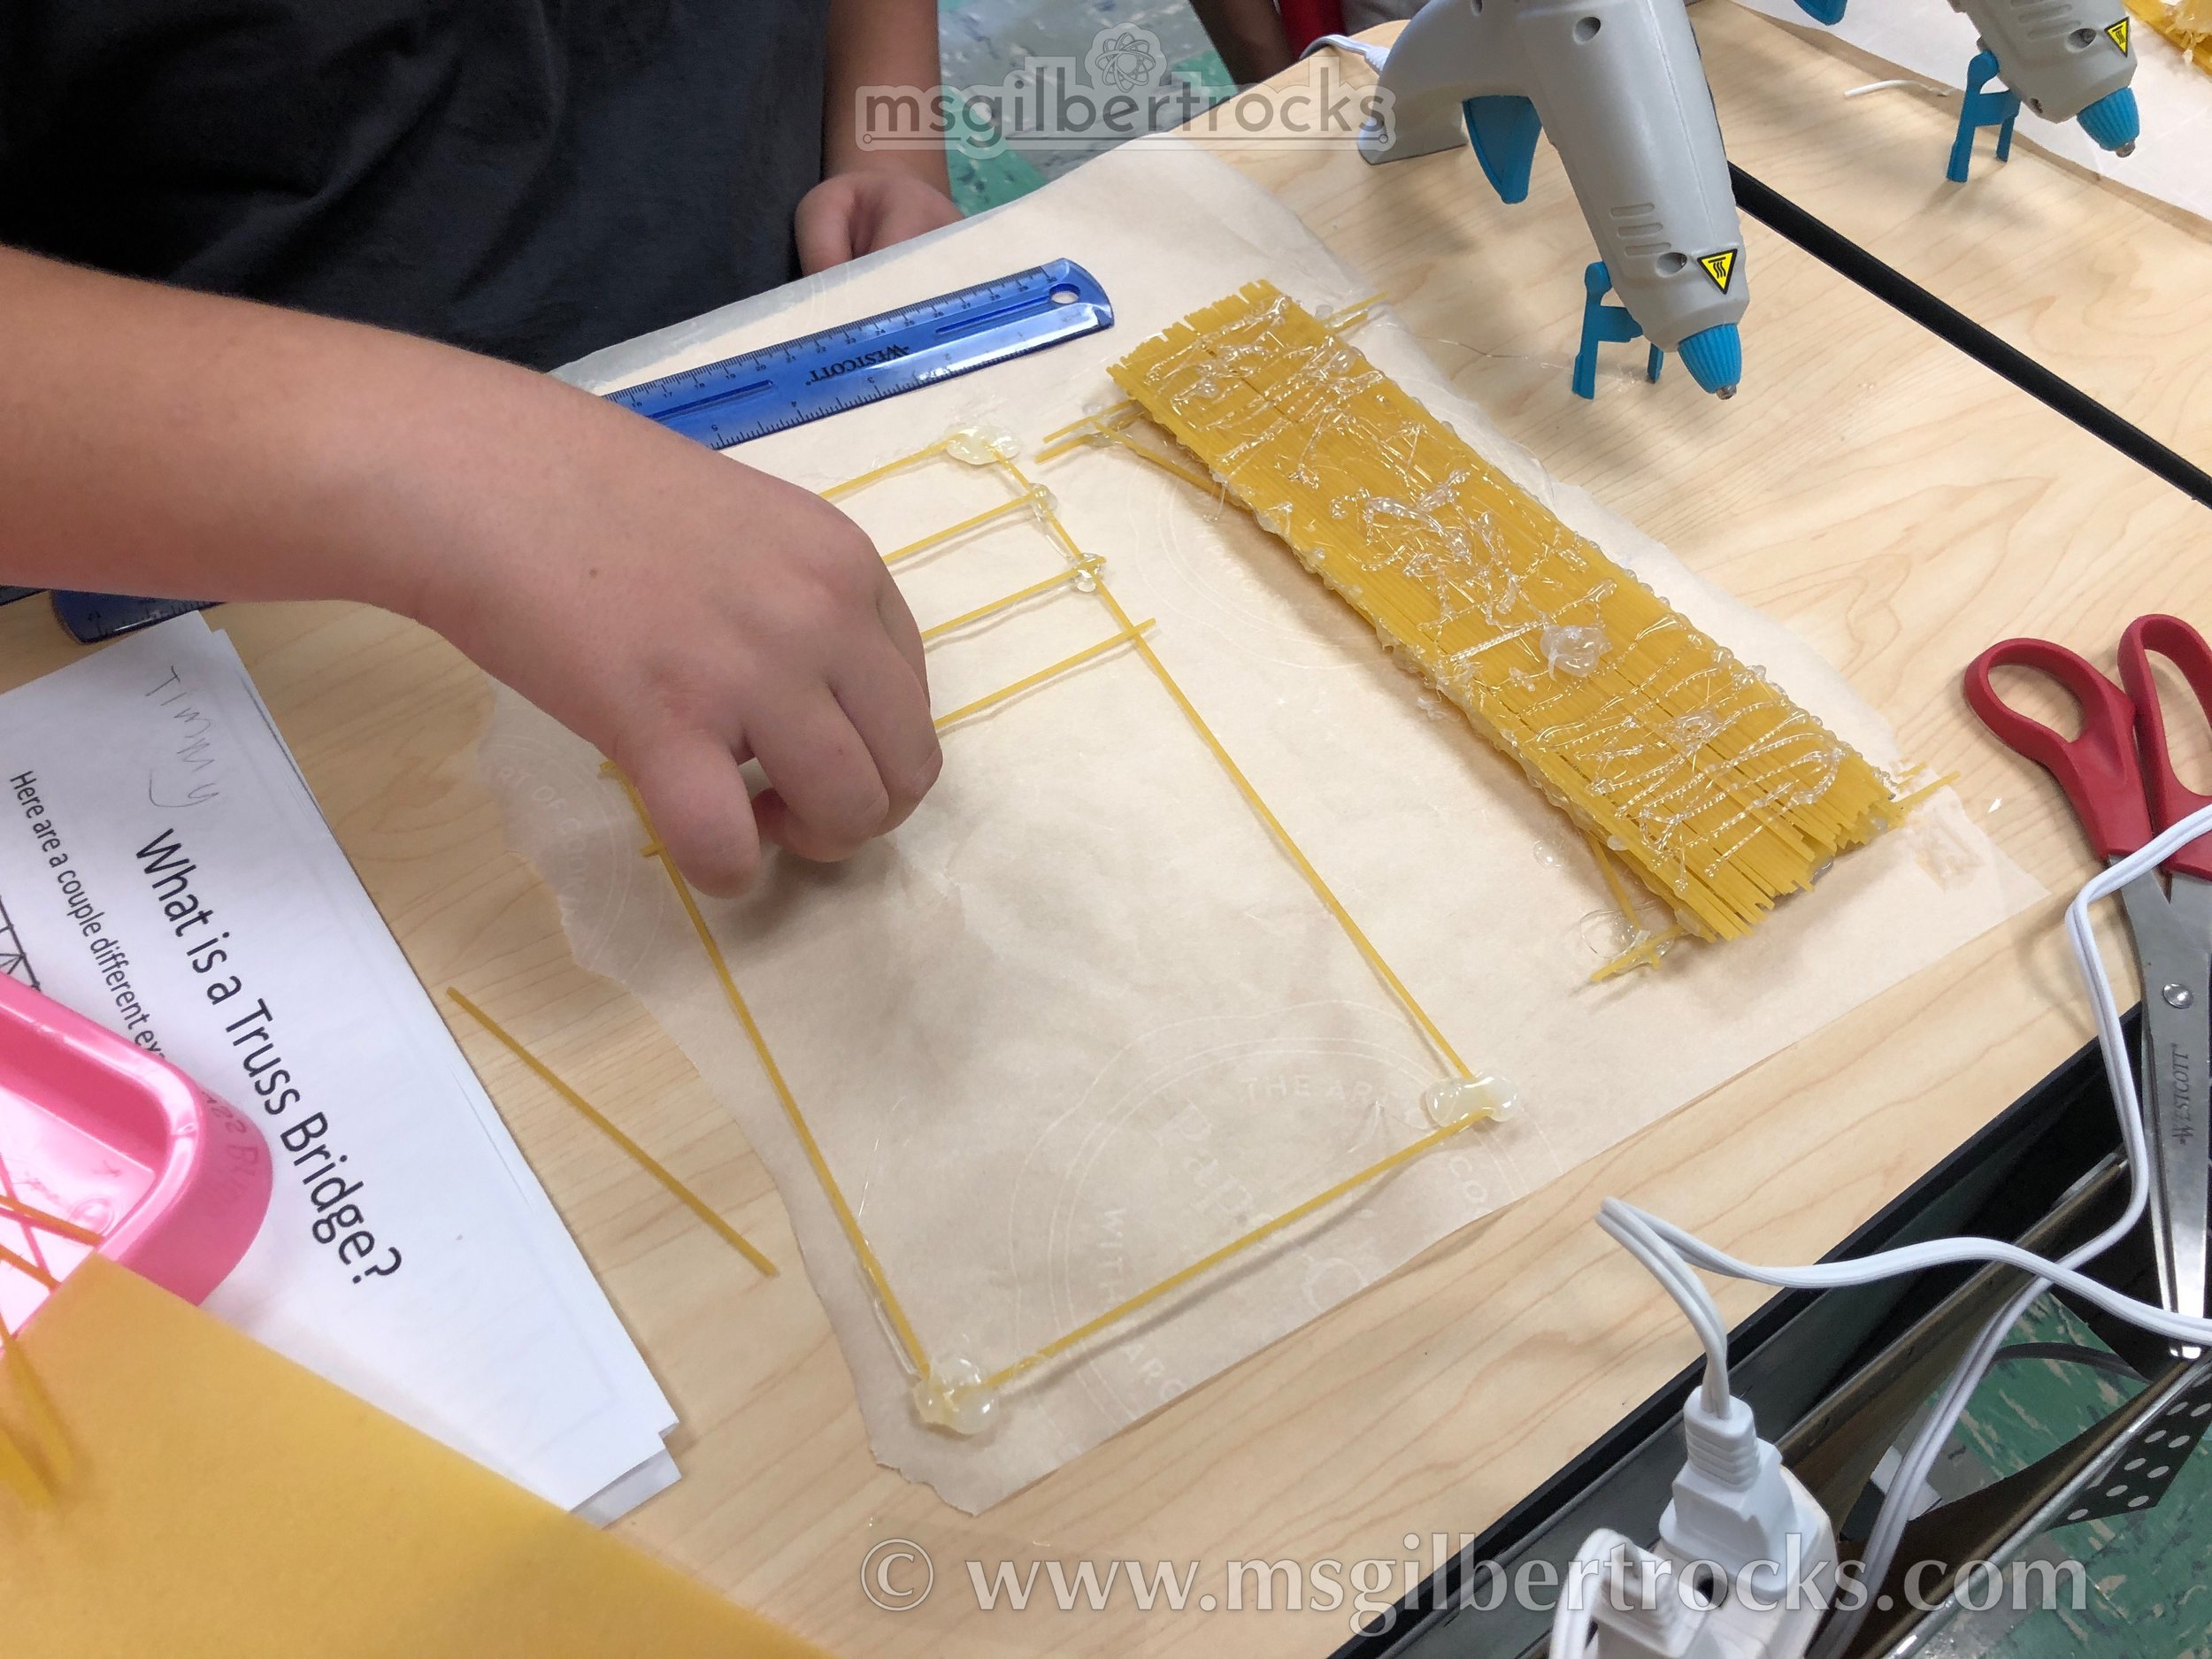
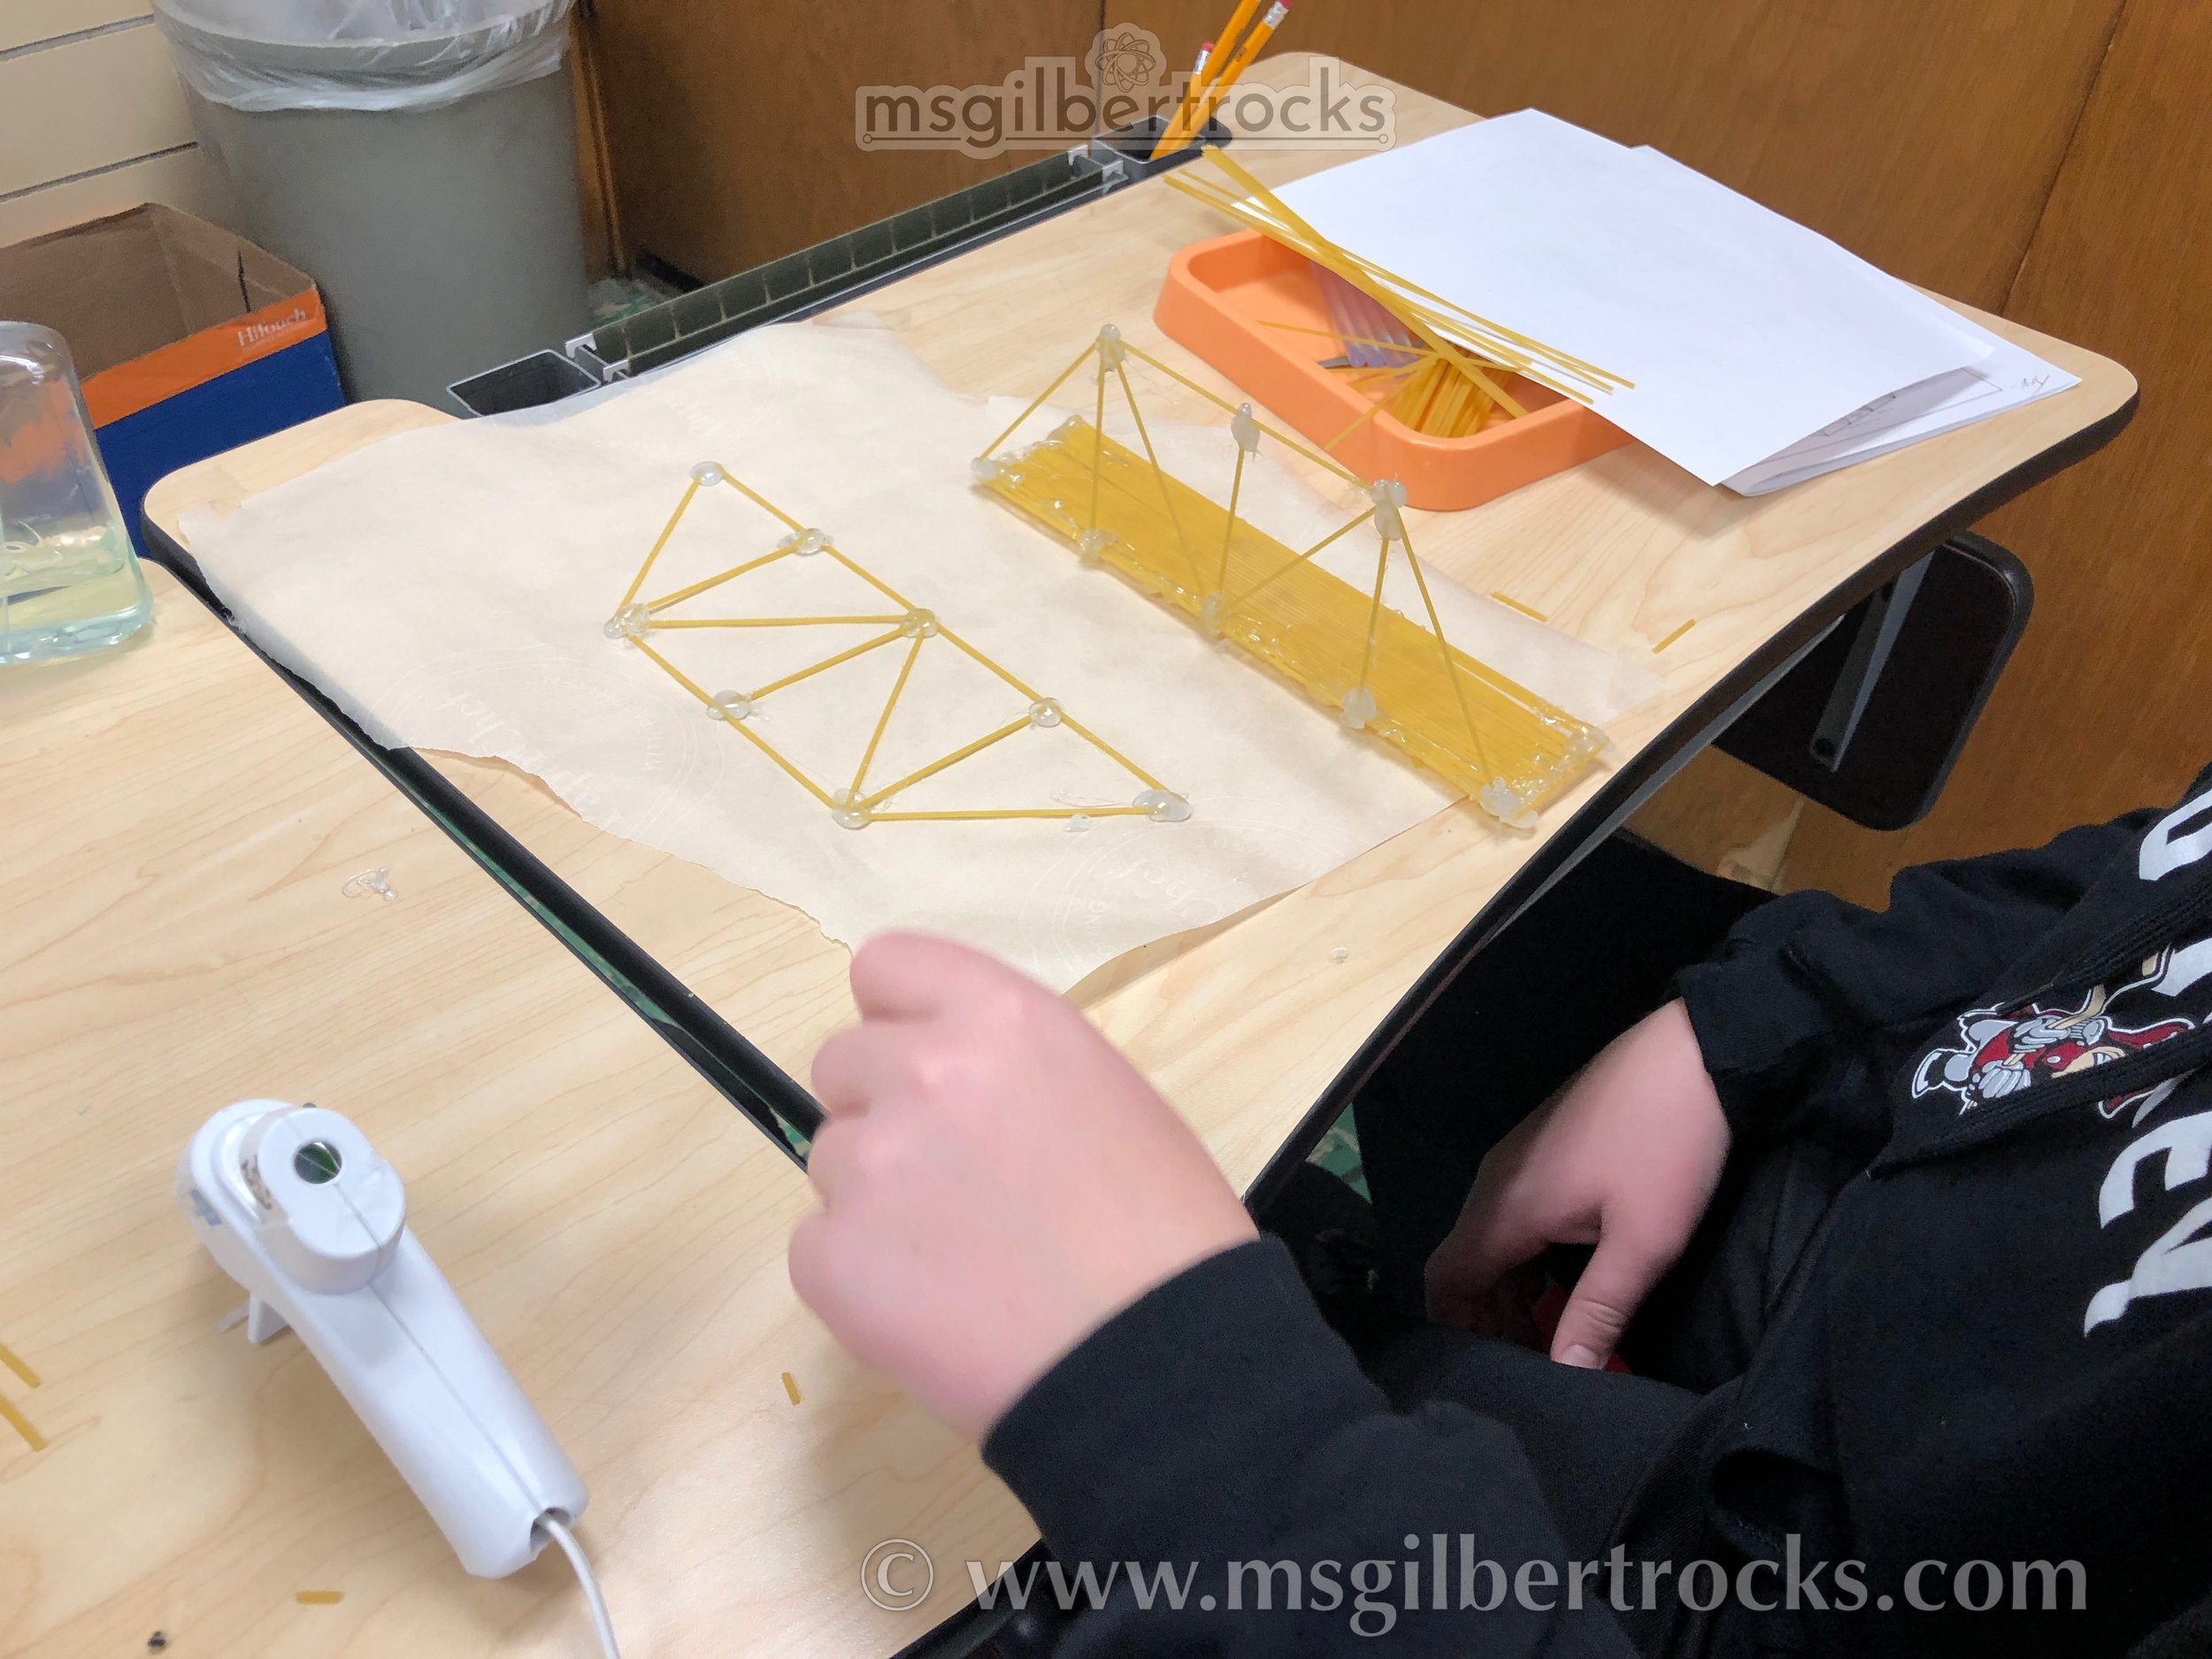
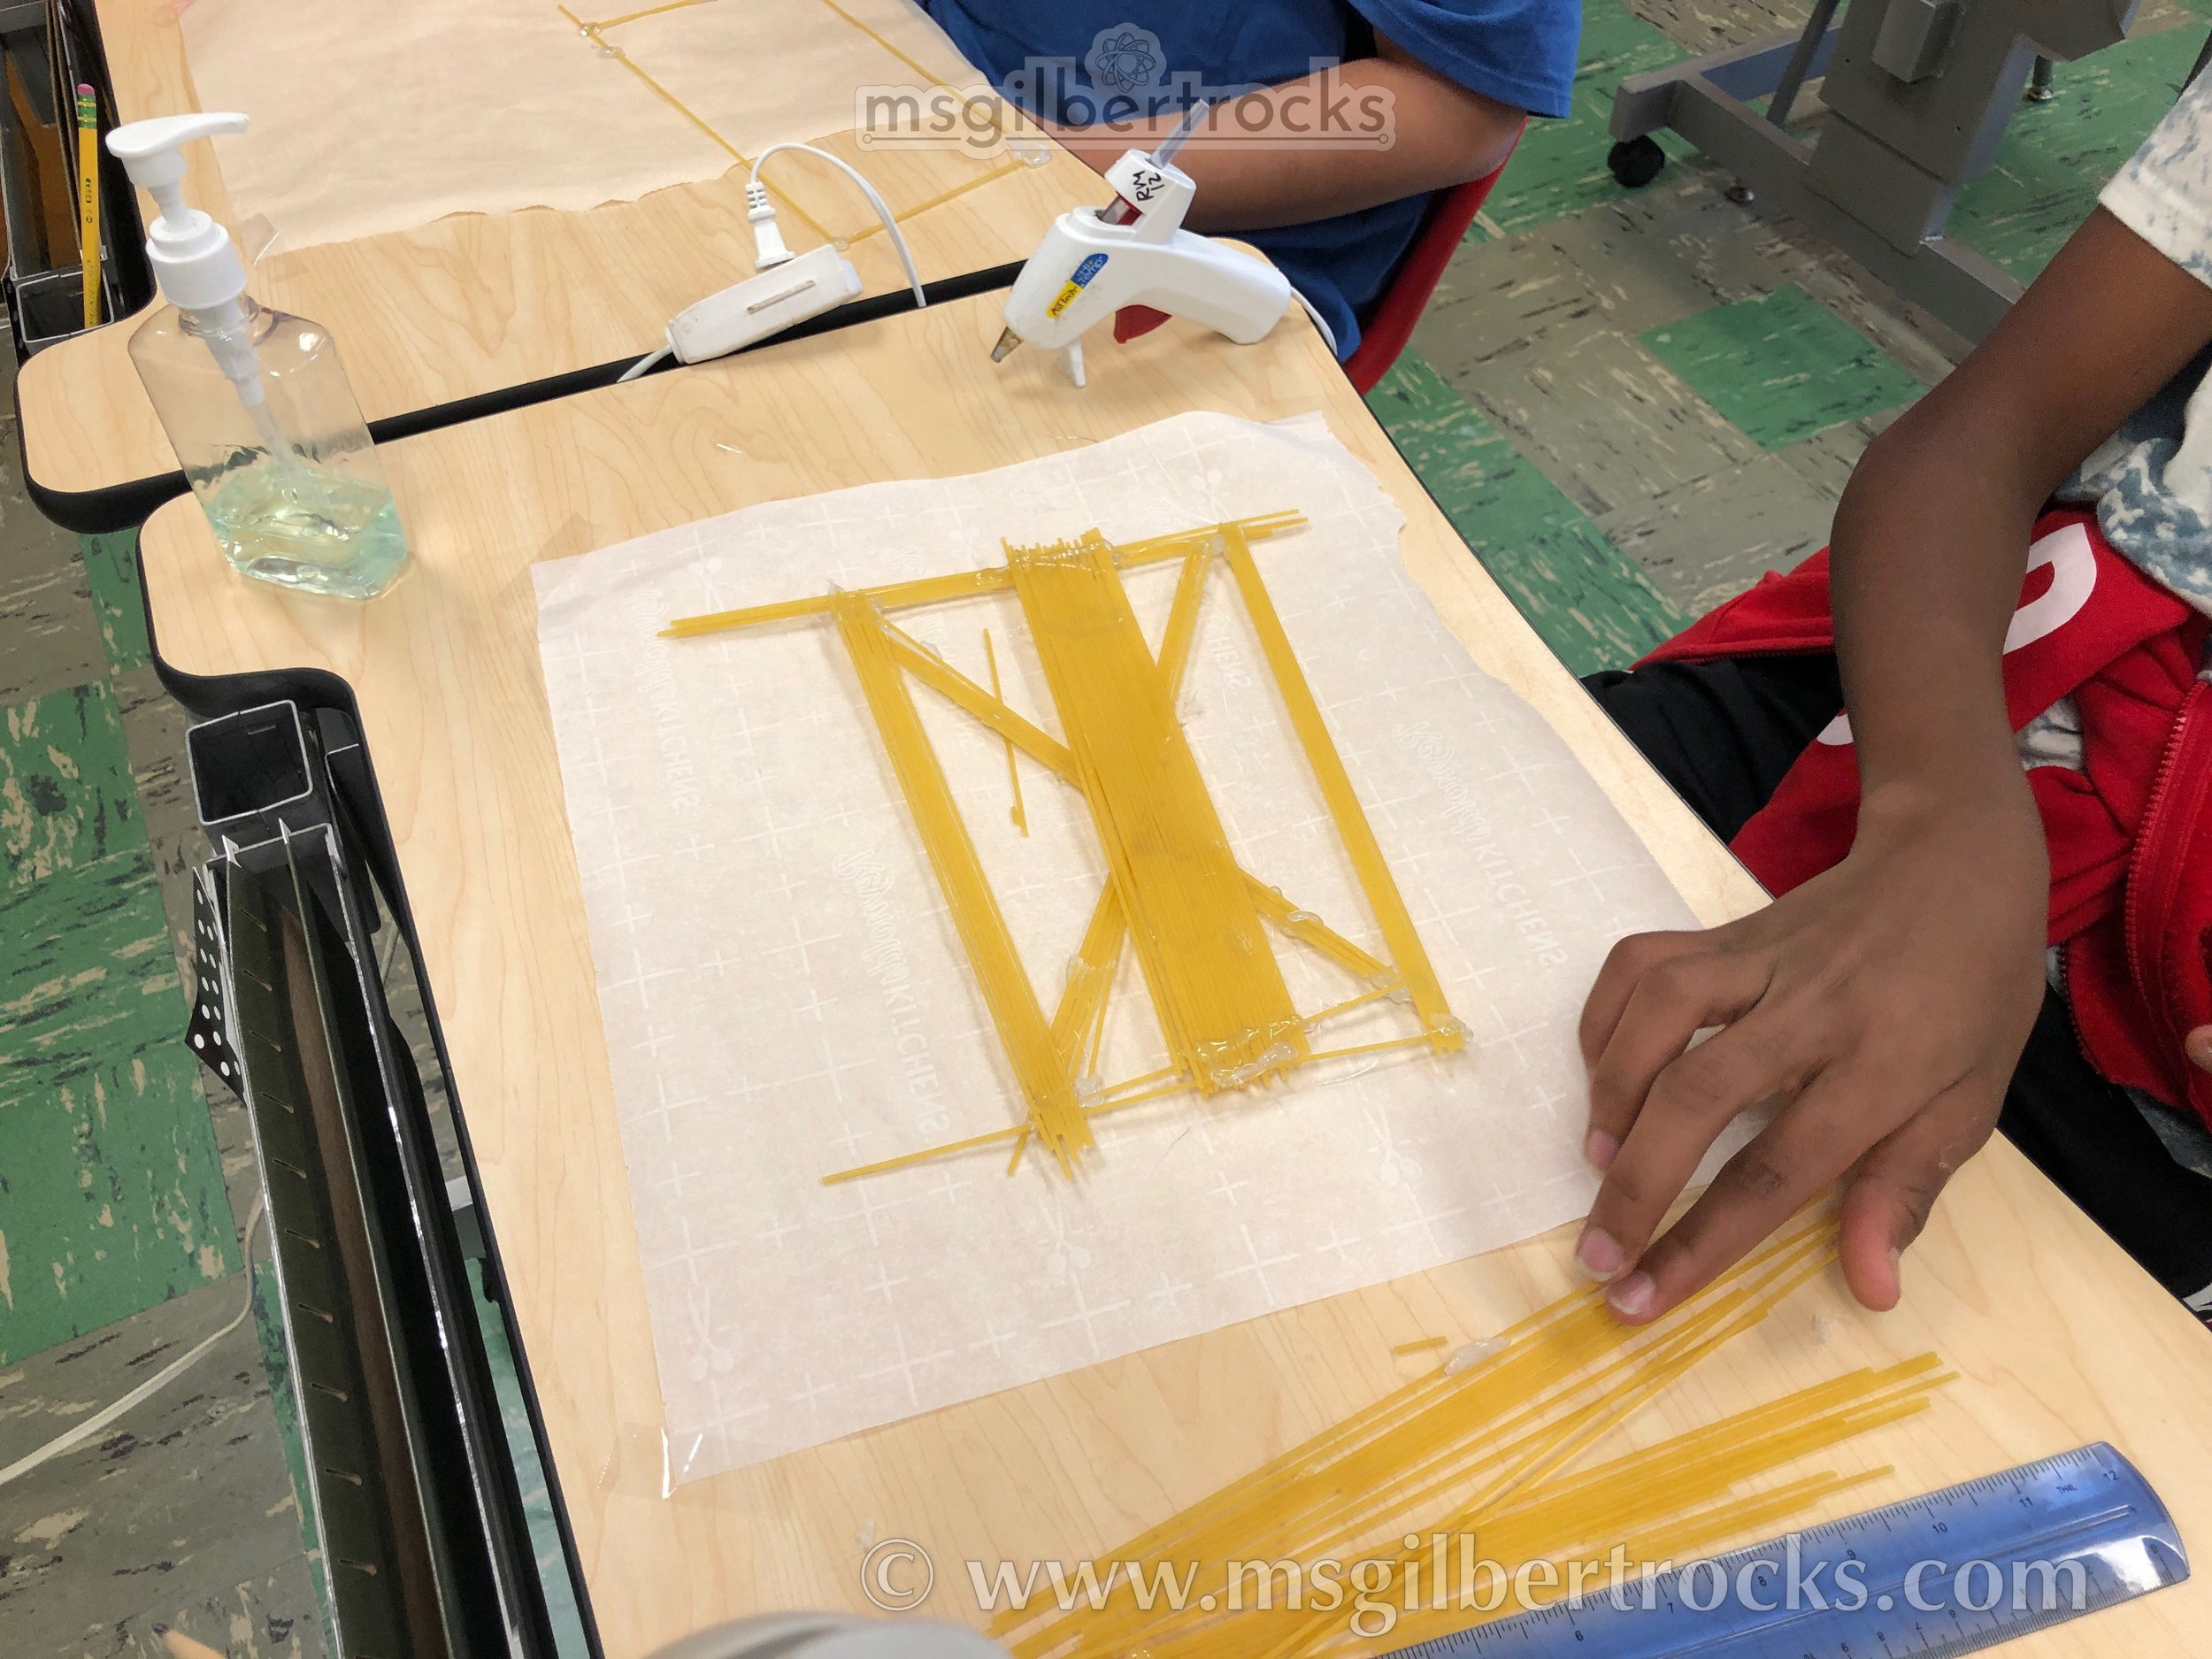
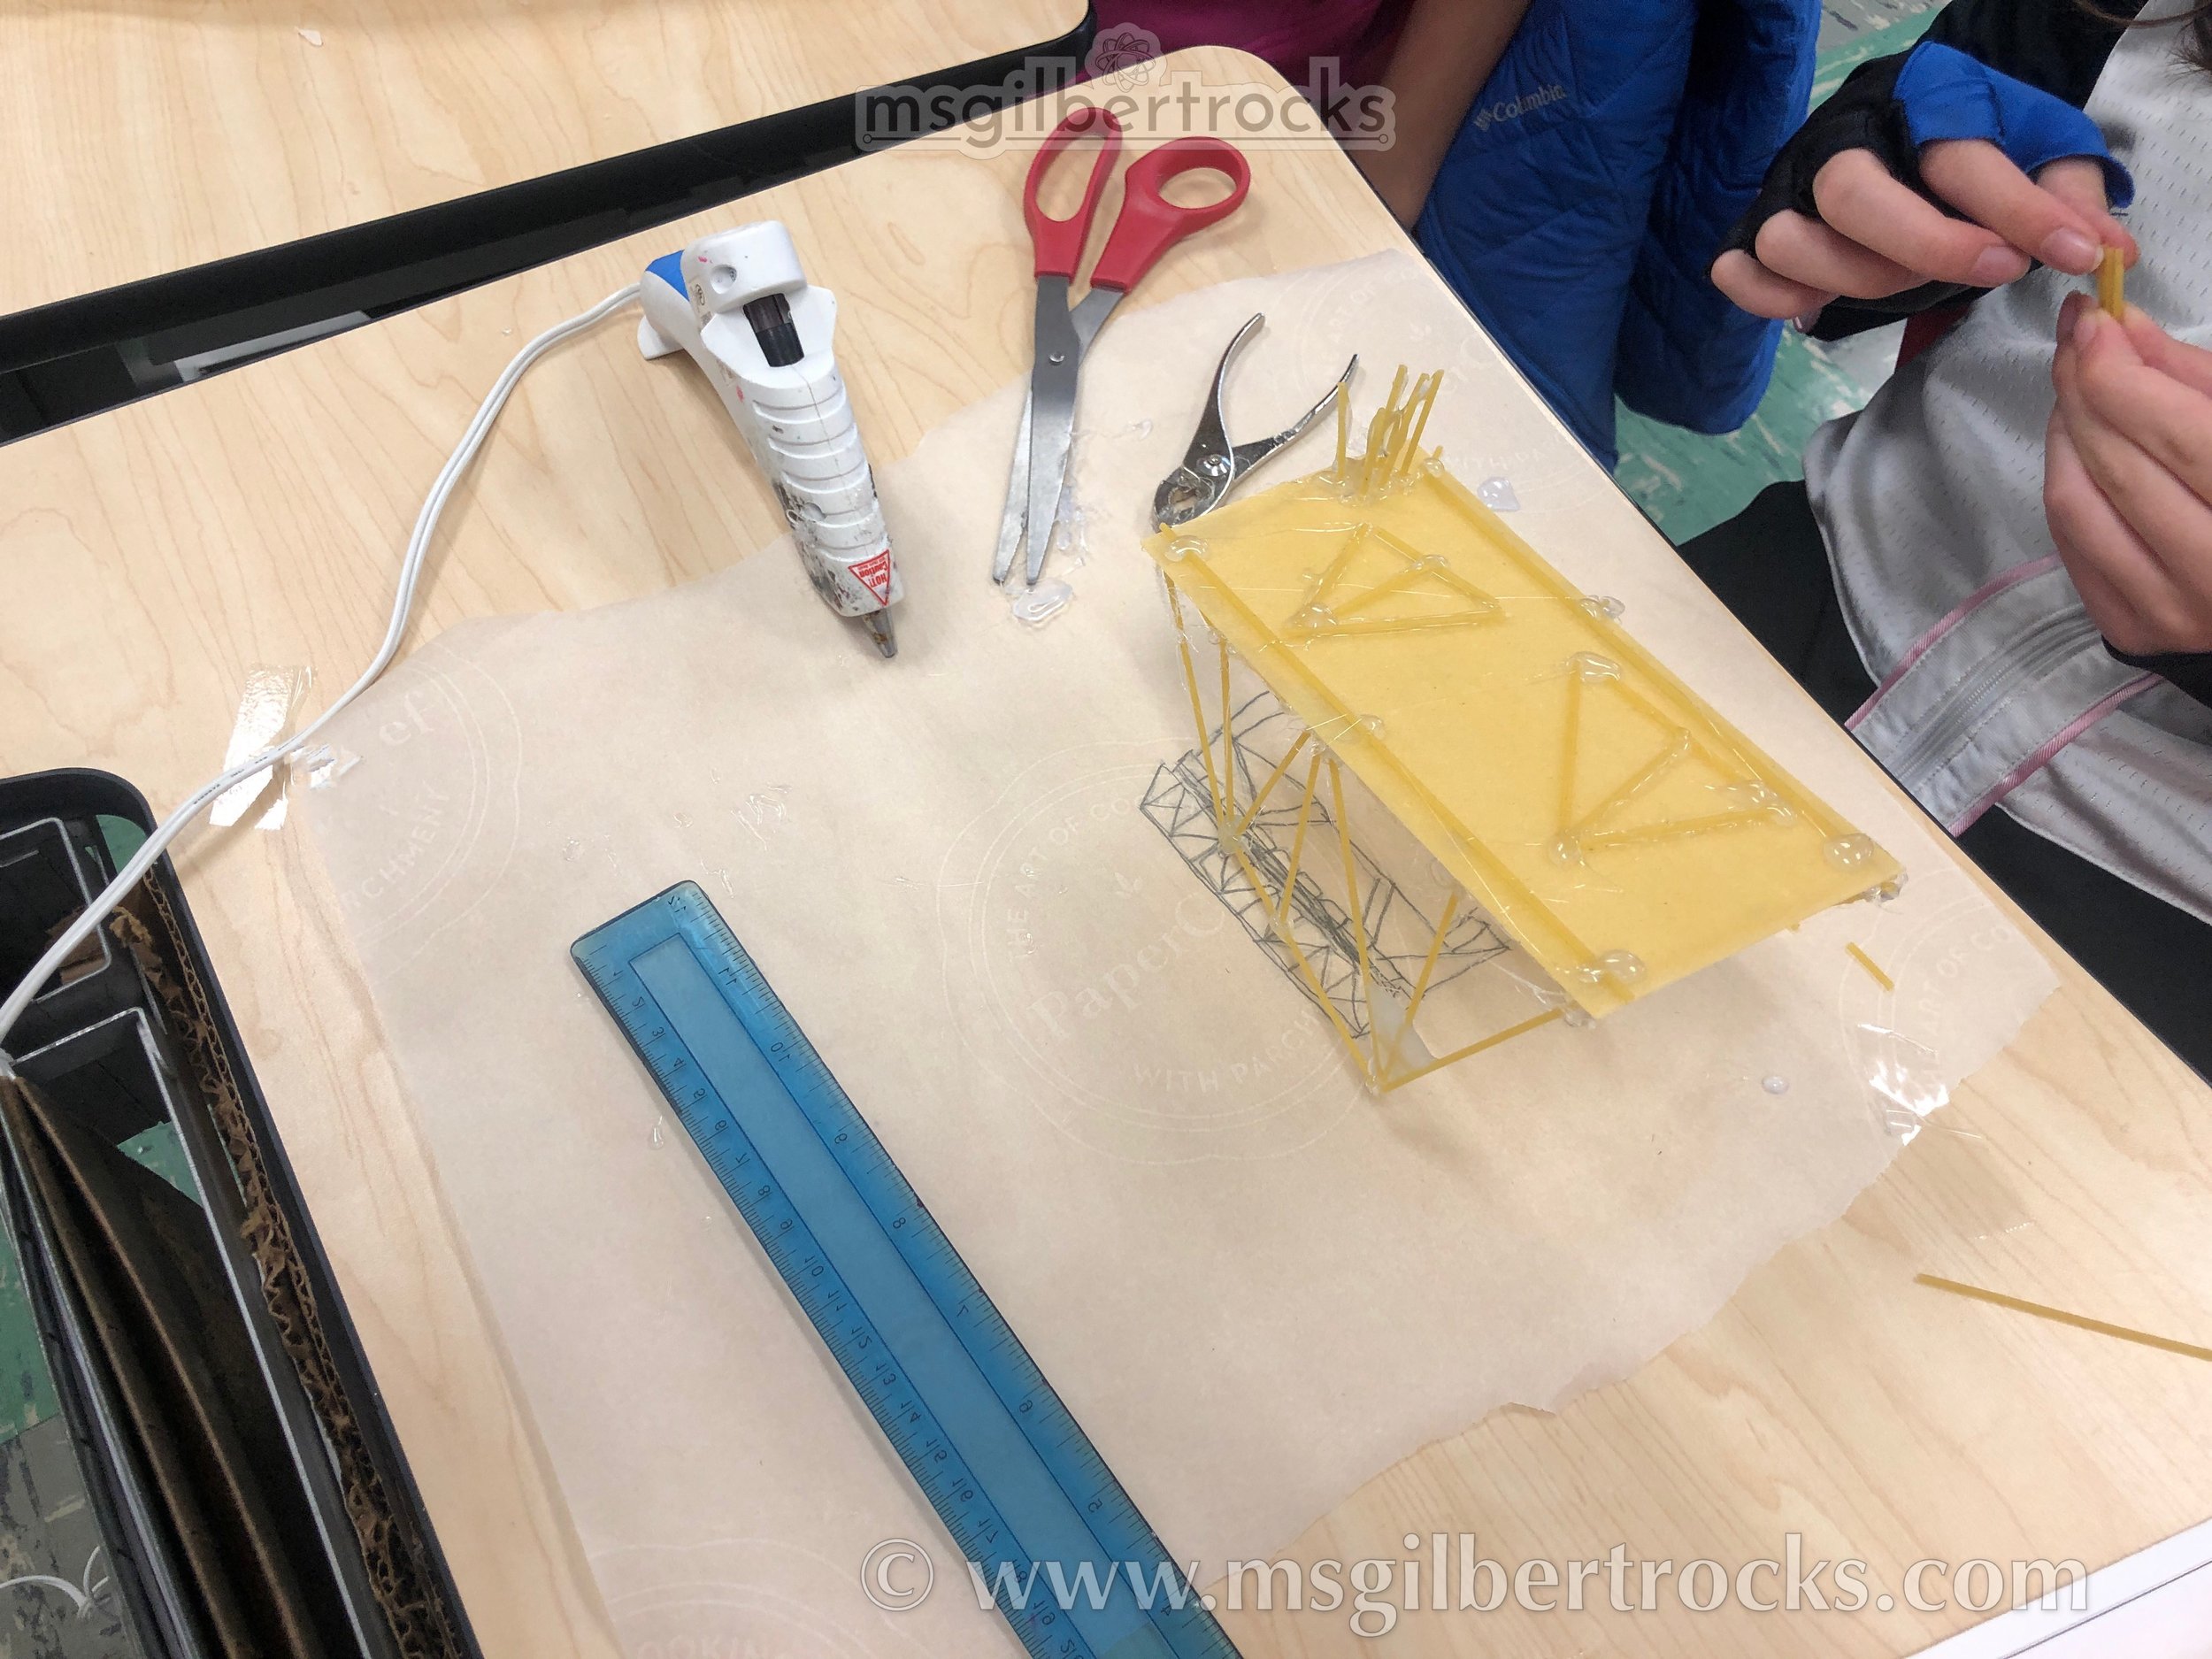
Once working, students have often transferred their design ideas (or used modified versions) right to the parchment paper so they can lay out the noodles and glue them more precisely. This varies greatly by student. Some like to have a “blueprint” type of design to follow on the parchment paper while others like to freestyle their build. On the introductory day we also prepare the rest of the materials (activity tray, piece of parchment paper, glue sticks for hot glue guns in the trays) so the students can grab everything and get started the next day. I write their name on the piece of parchment paper with a Sharpie. Depending on the brand, it may roll up between uses and need to be taped to the desktop surface to be most effective when building with pasta/hot glue. The only other materials we use are: thick spaghetti noodles (any brand should do!), scissors (optional), and new this year: a flat piece of lasagna for a road bed was provided as an option (many kids incorporated it into their build).
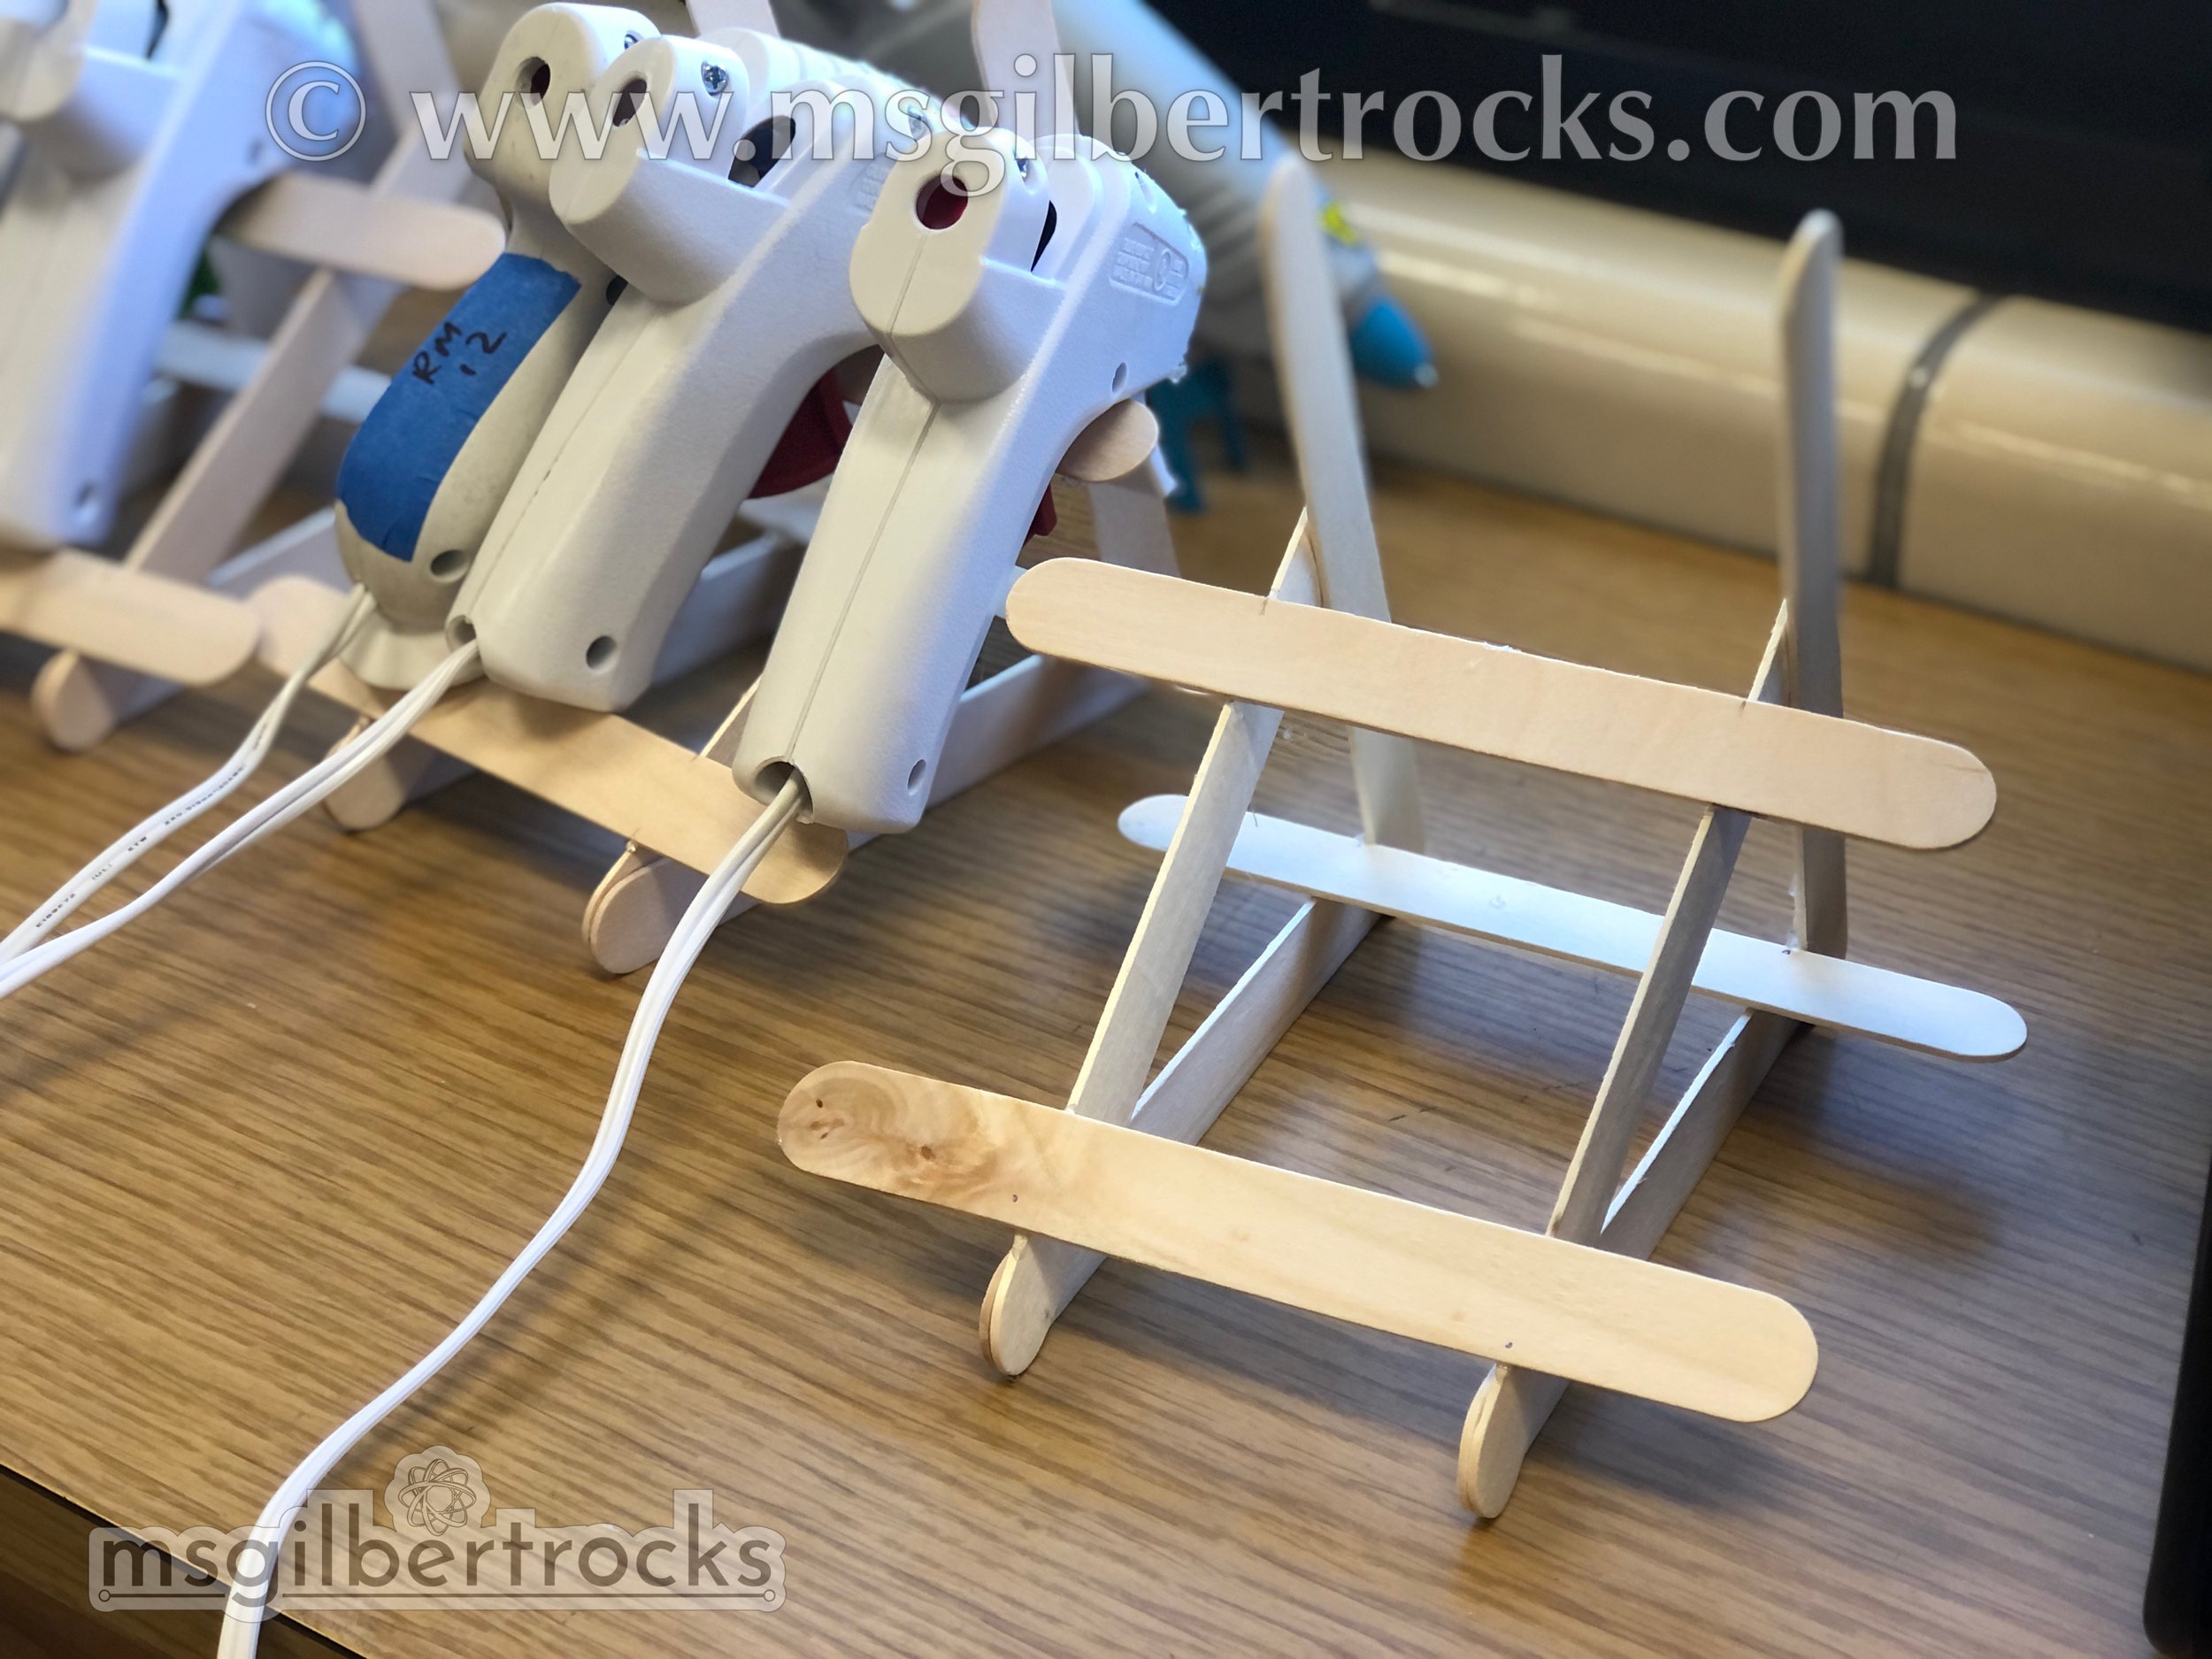
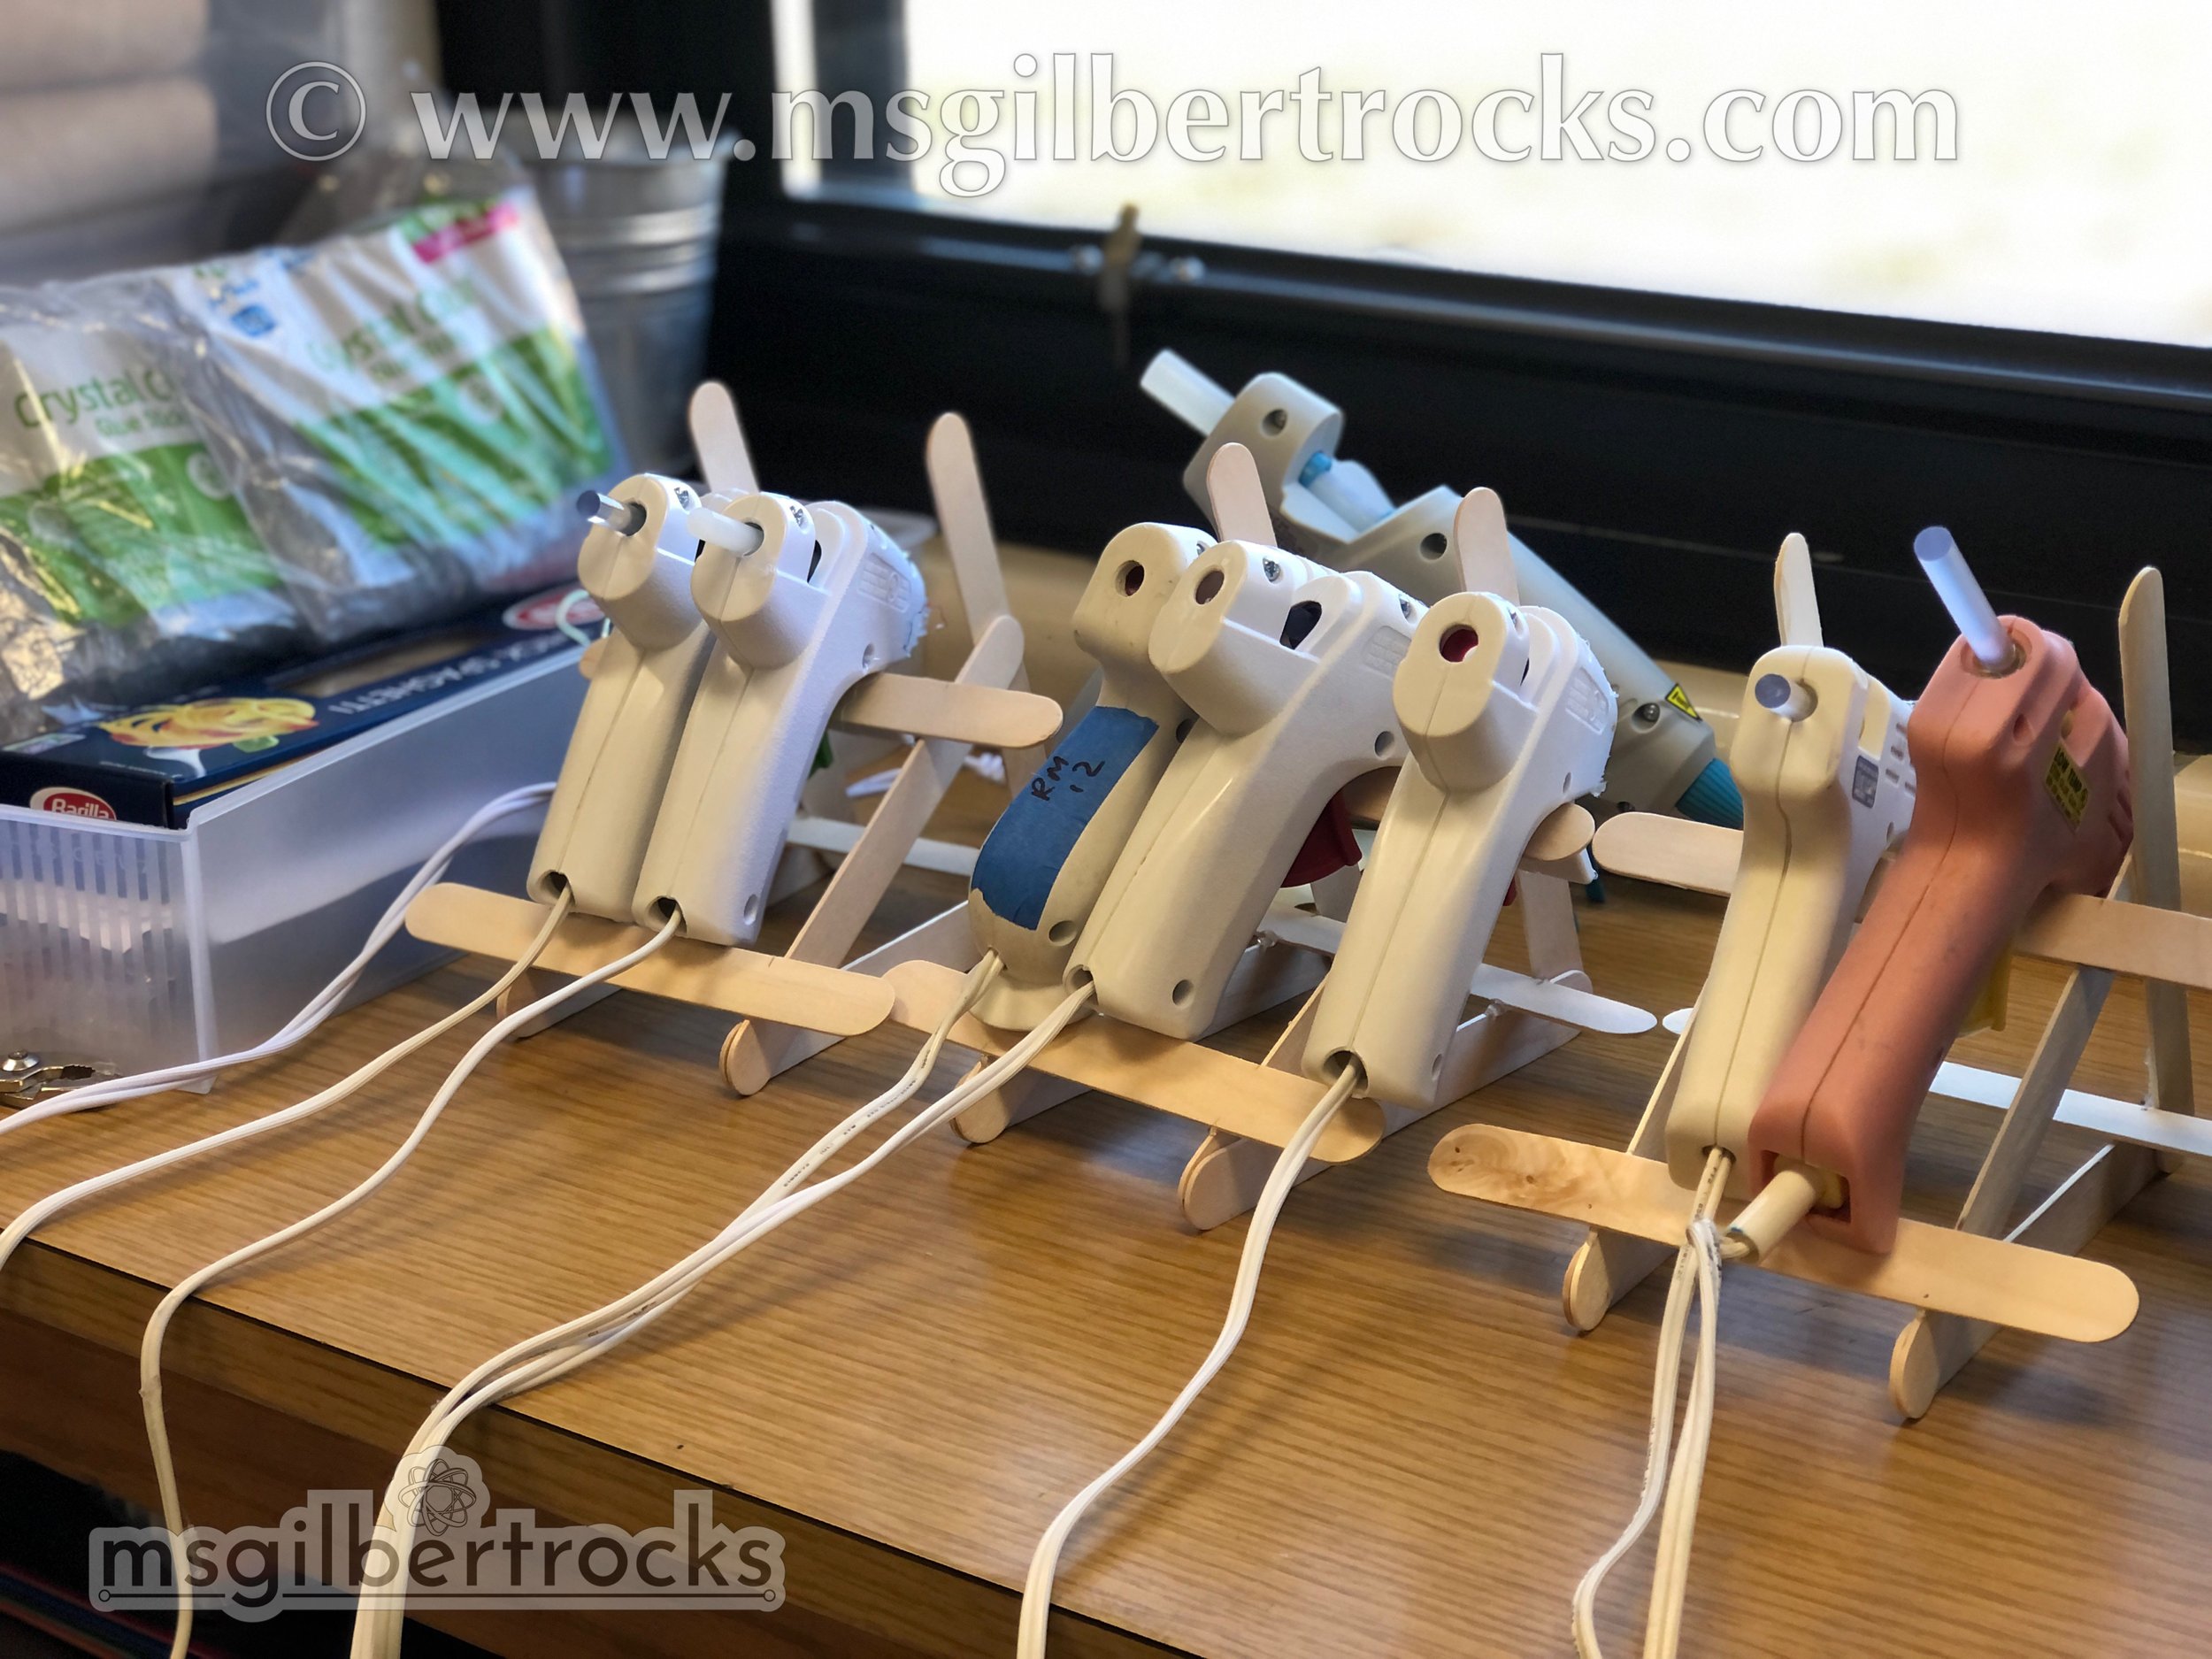
Hot Glue Gun cooling/storage rack
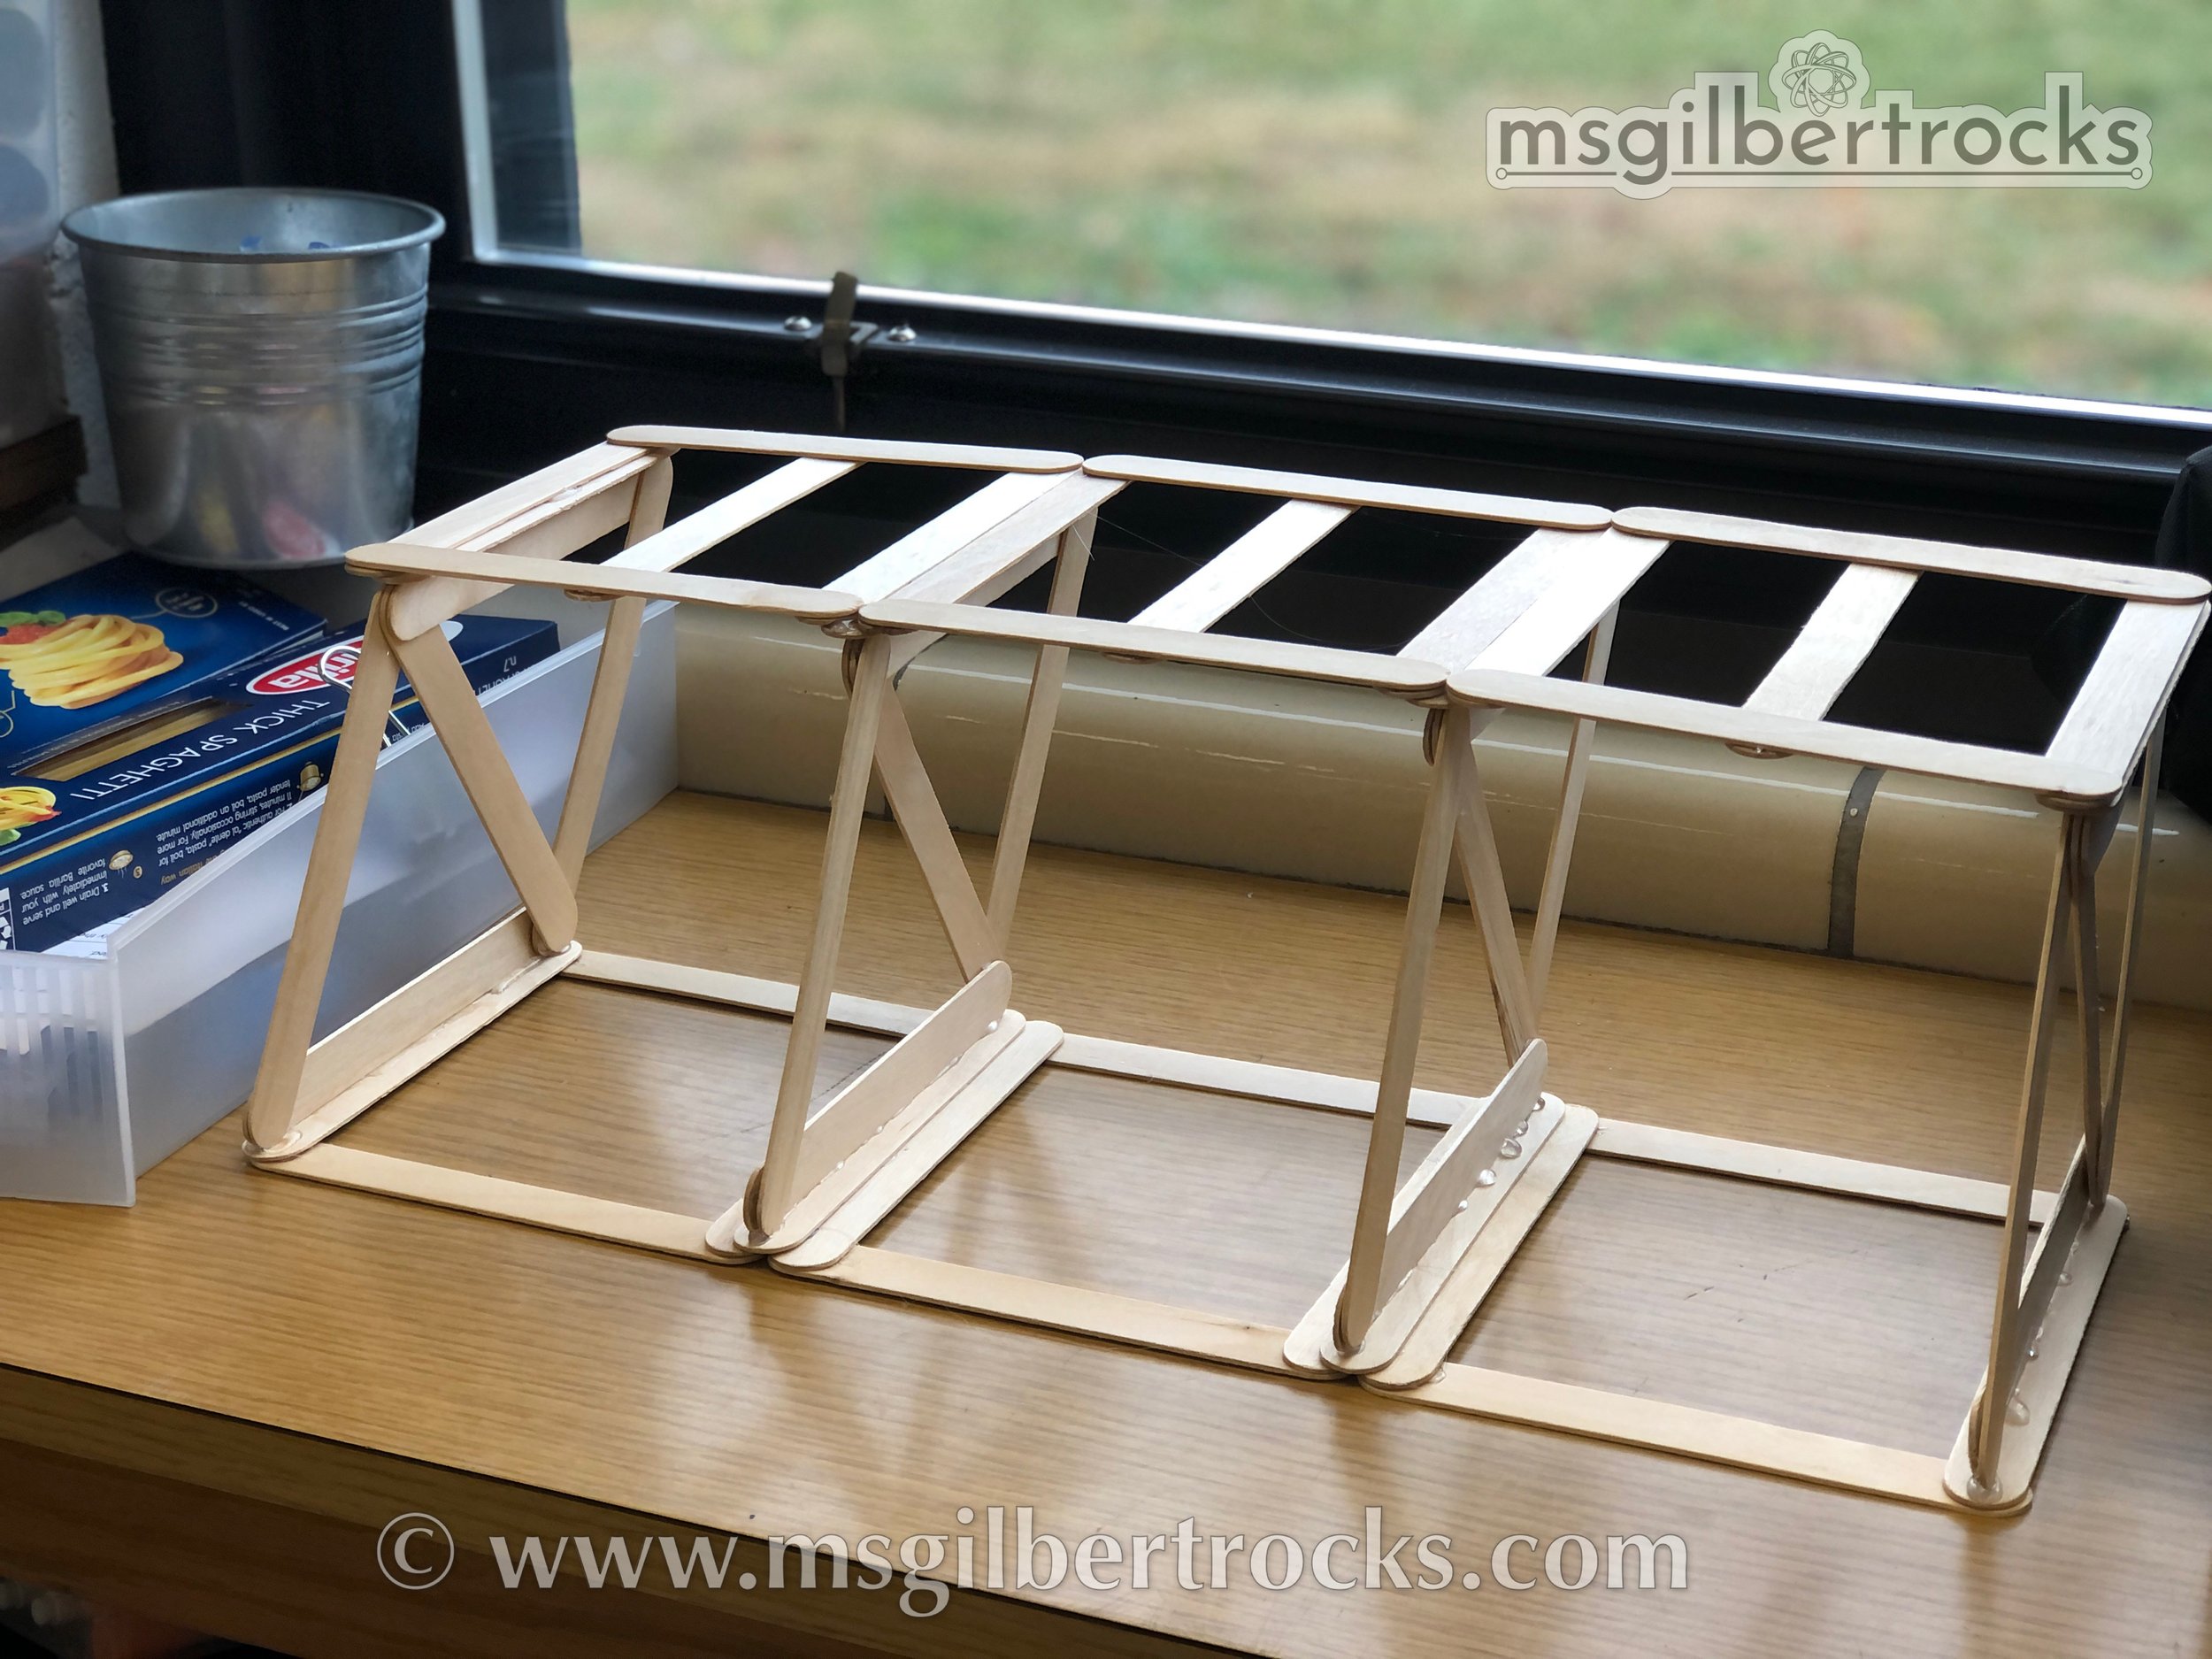
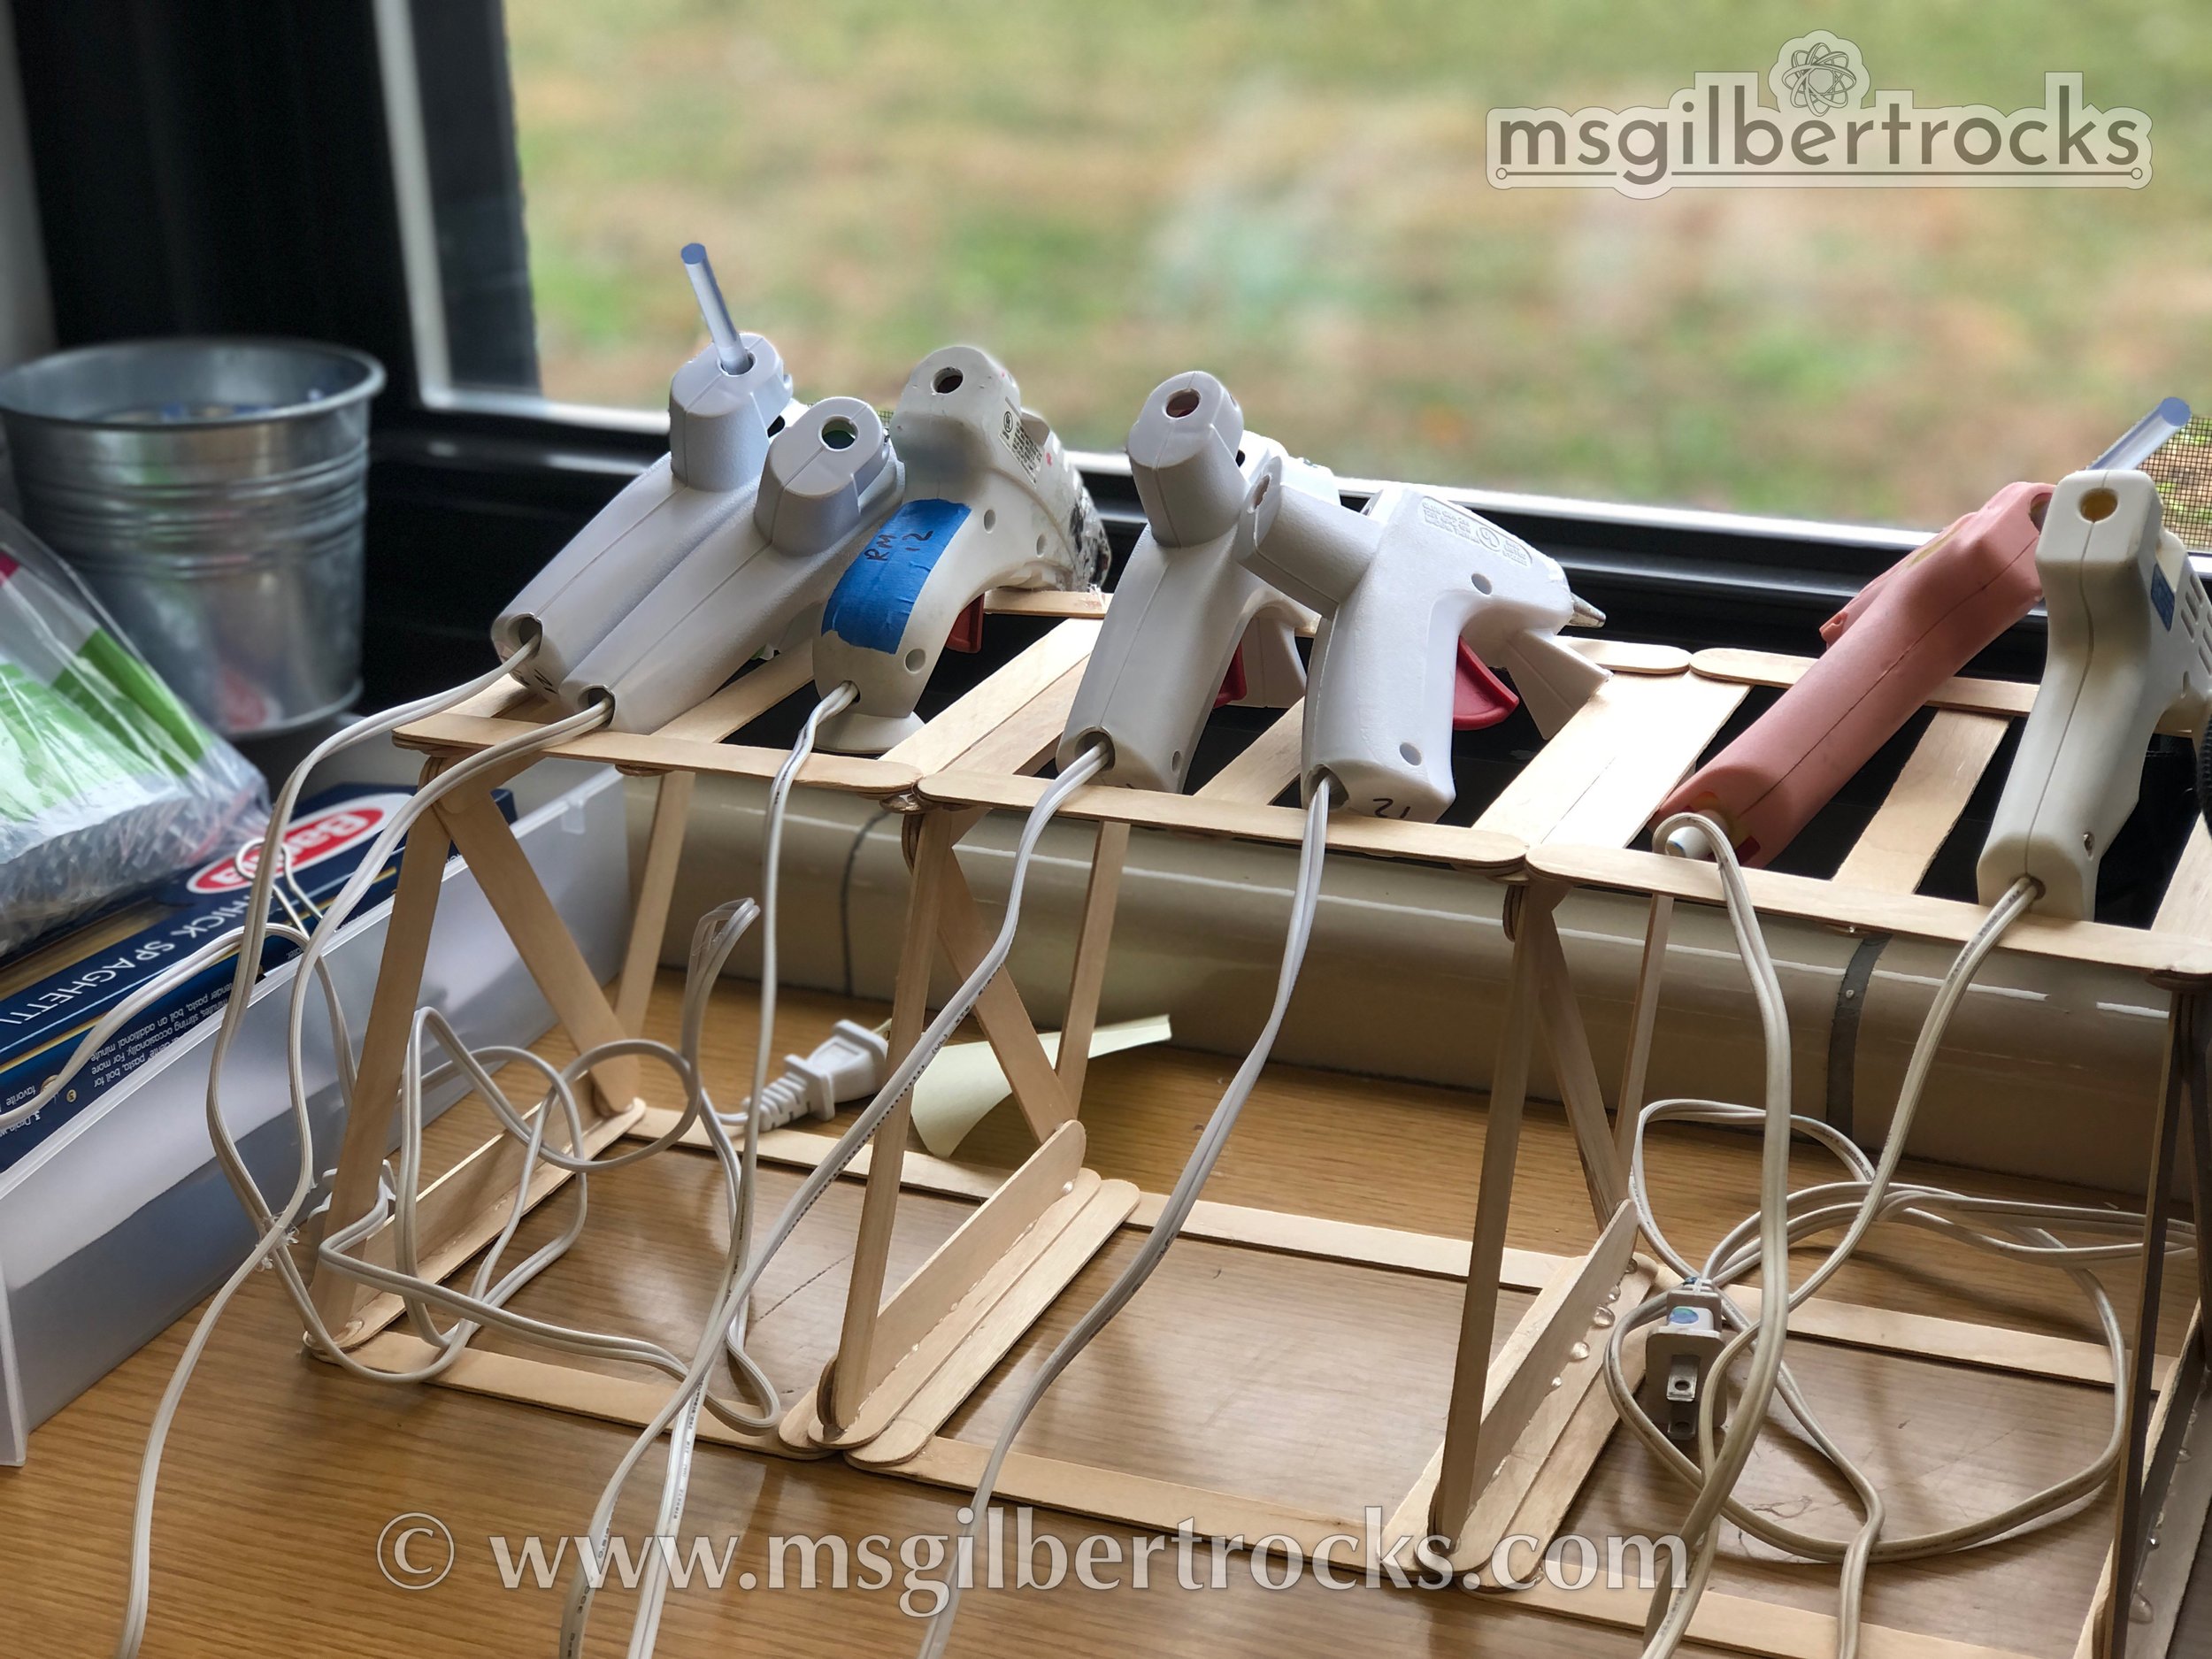
One of the challenges transitioning from rovers to bridges was finding a good place to set the hot glue guns at the end of class. They are quite hot and messy by the end of class, so they can melt things or stick to something if they are not propped up correctly. Unfortunately, the hot glue guns have seen better days and several do not have a stand to set them up on their own. When we added a second class (thanks to my work wife, Aimee Weiss, for joining with her class!) to work on the bridges, it became necessary to have a better solution for the hot glue guns. Using materials we had on hand (jumbo craft sticks and hot glue), I fabricated two different versions of a hot glue gun cooling/storage rack. You can see a number of photos of both versions to the right of this text. The first one is a contiguous design elevated at the same level. It functions better if you feed the hot glue gun up through the slot so the cord runs through the large opening (not pictured that way). The second version has two levels to replicate the position of a built in stand more. They are also all separate pieces in case we need them to be on a student desk as a holder when working with the hot glue guns. Keeping them separate added that versatility. They can hold several hot glue guns and are fairly sturdy.

building bridges

Other than the introductory activity and the materials logistics, the kids are off and running from day two on for about a week or two. Once we see students winding down on their builds, we plan for the big day to test them to failure (aka break bridges with weights). This year it was nice to have another adult to collaborate with since Aimee was able to circulate around and help both with actual building (sometimes you just need an extra hand to hold a spaghetti noodle in place) and just give the same good advice about supporting their structure based on what we learned about the design of truss-type bridges/triangles in design. I love the shift to the kids becoming more confident in their ability to design/build something and take charge of their own learning. The role of teacher as a “guide on the side” is extremely appealing for someone who values self-guided learning and using mistakes to grow and learn. Since we have desks that are on wheels, they can be rolled around the room so kids can work collaboratively with their desks next to each other. This helps them work together to have extra hands for those unwieldy spaghetti noodles and to share ideas. This works well since we also have limited outlets and needed to plan strategically for plugging in hot glue guns around the room. Additionally, we end up with a large area of empty space, perfect to inspire teacher dancing as the kids work. Every once in a while a student would join us if we broke into impromptu dancing, but Aimee and I were able to bust a few moves in between circulating to assist the kids and check on their design process.

Testing to failure
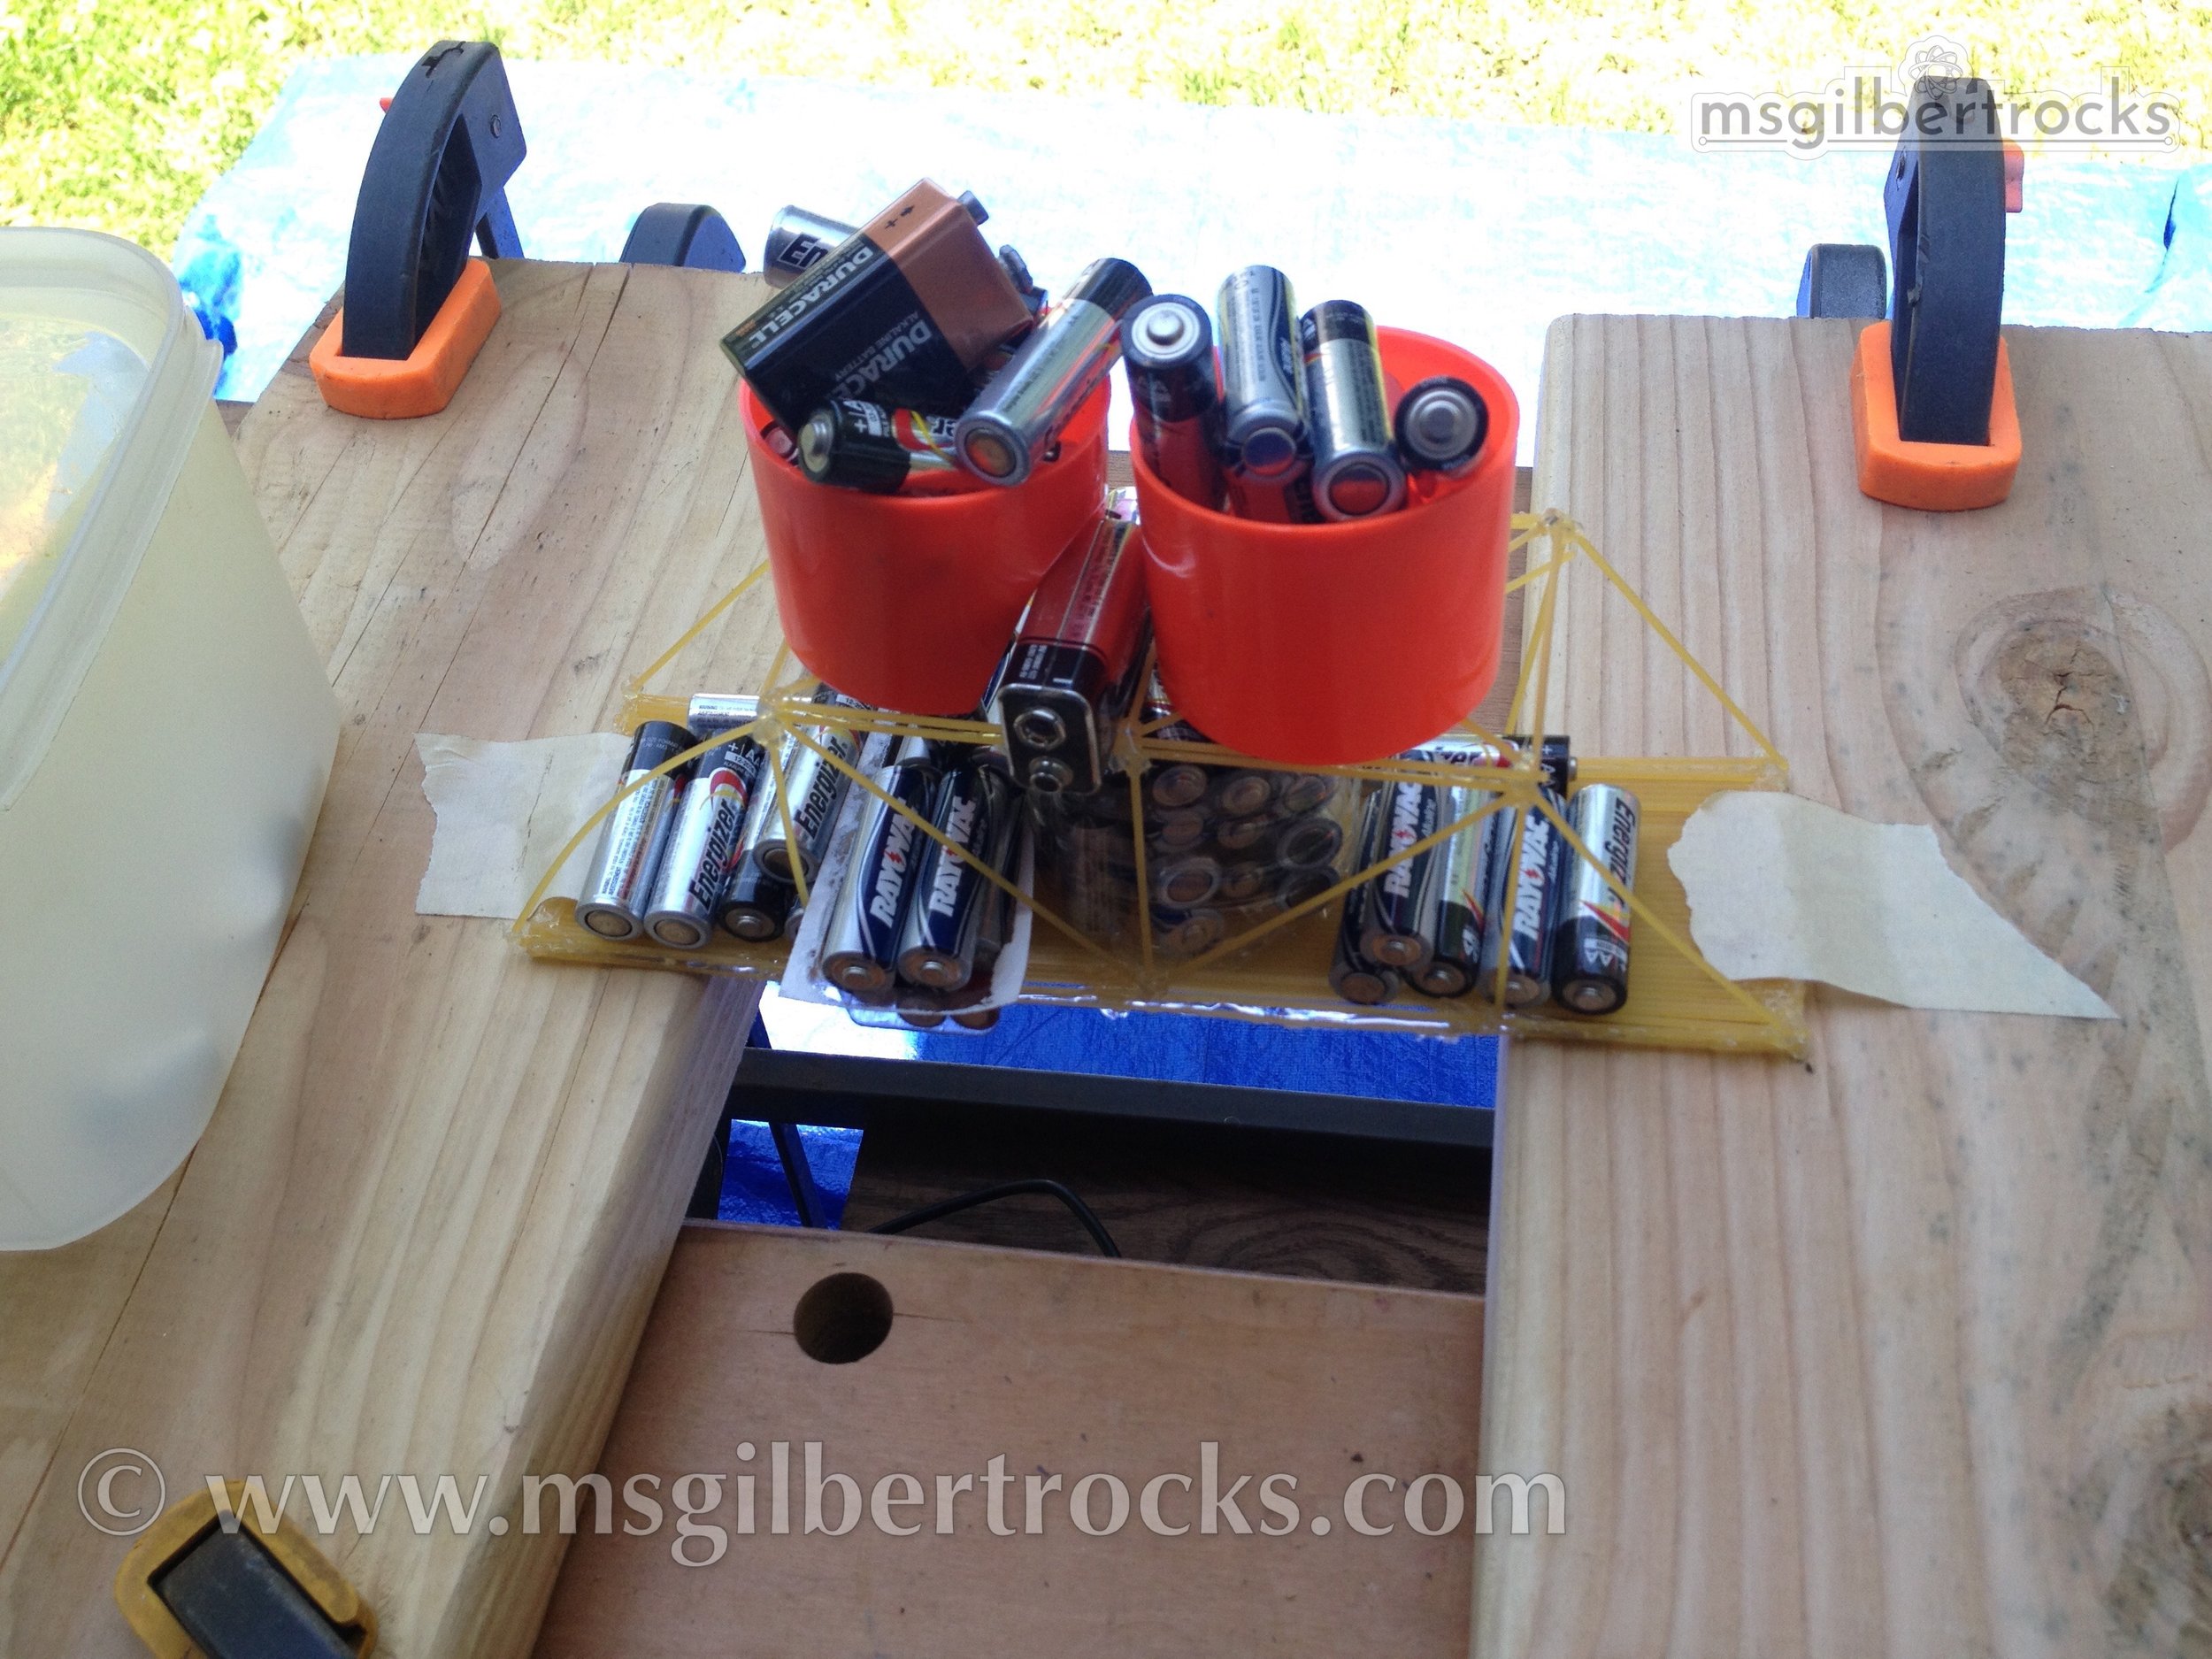
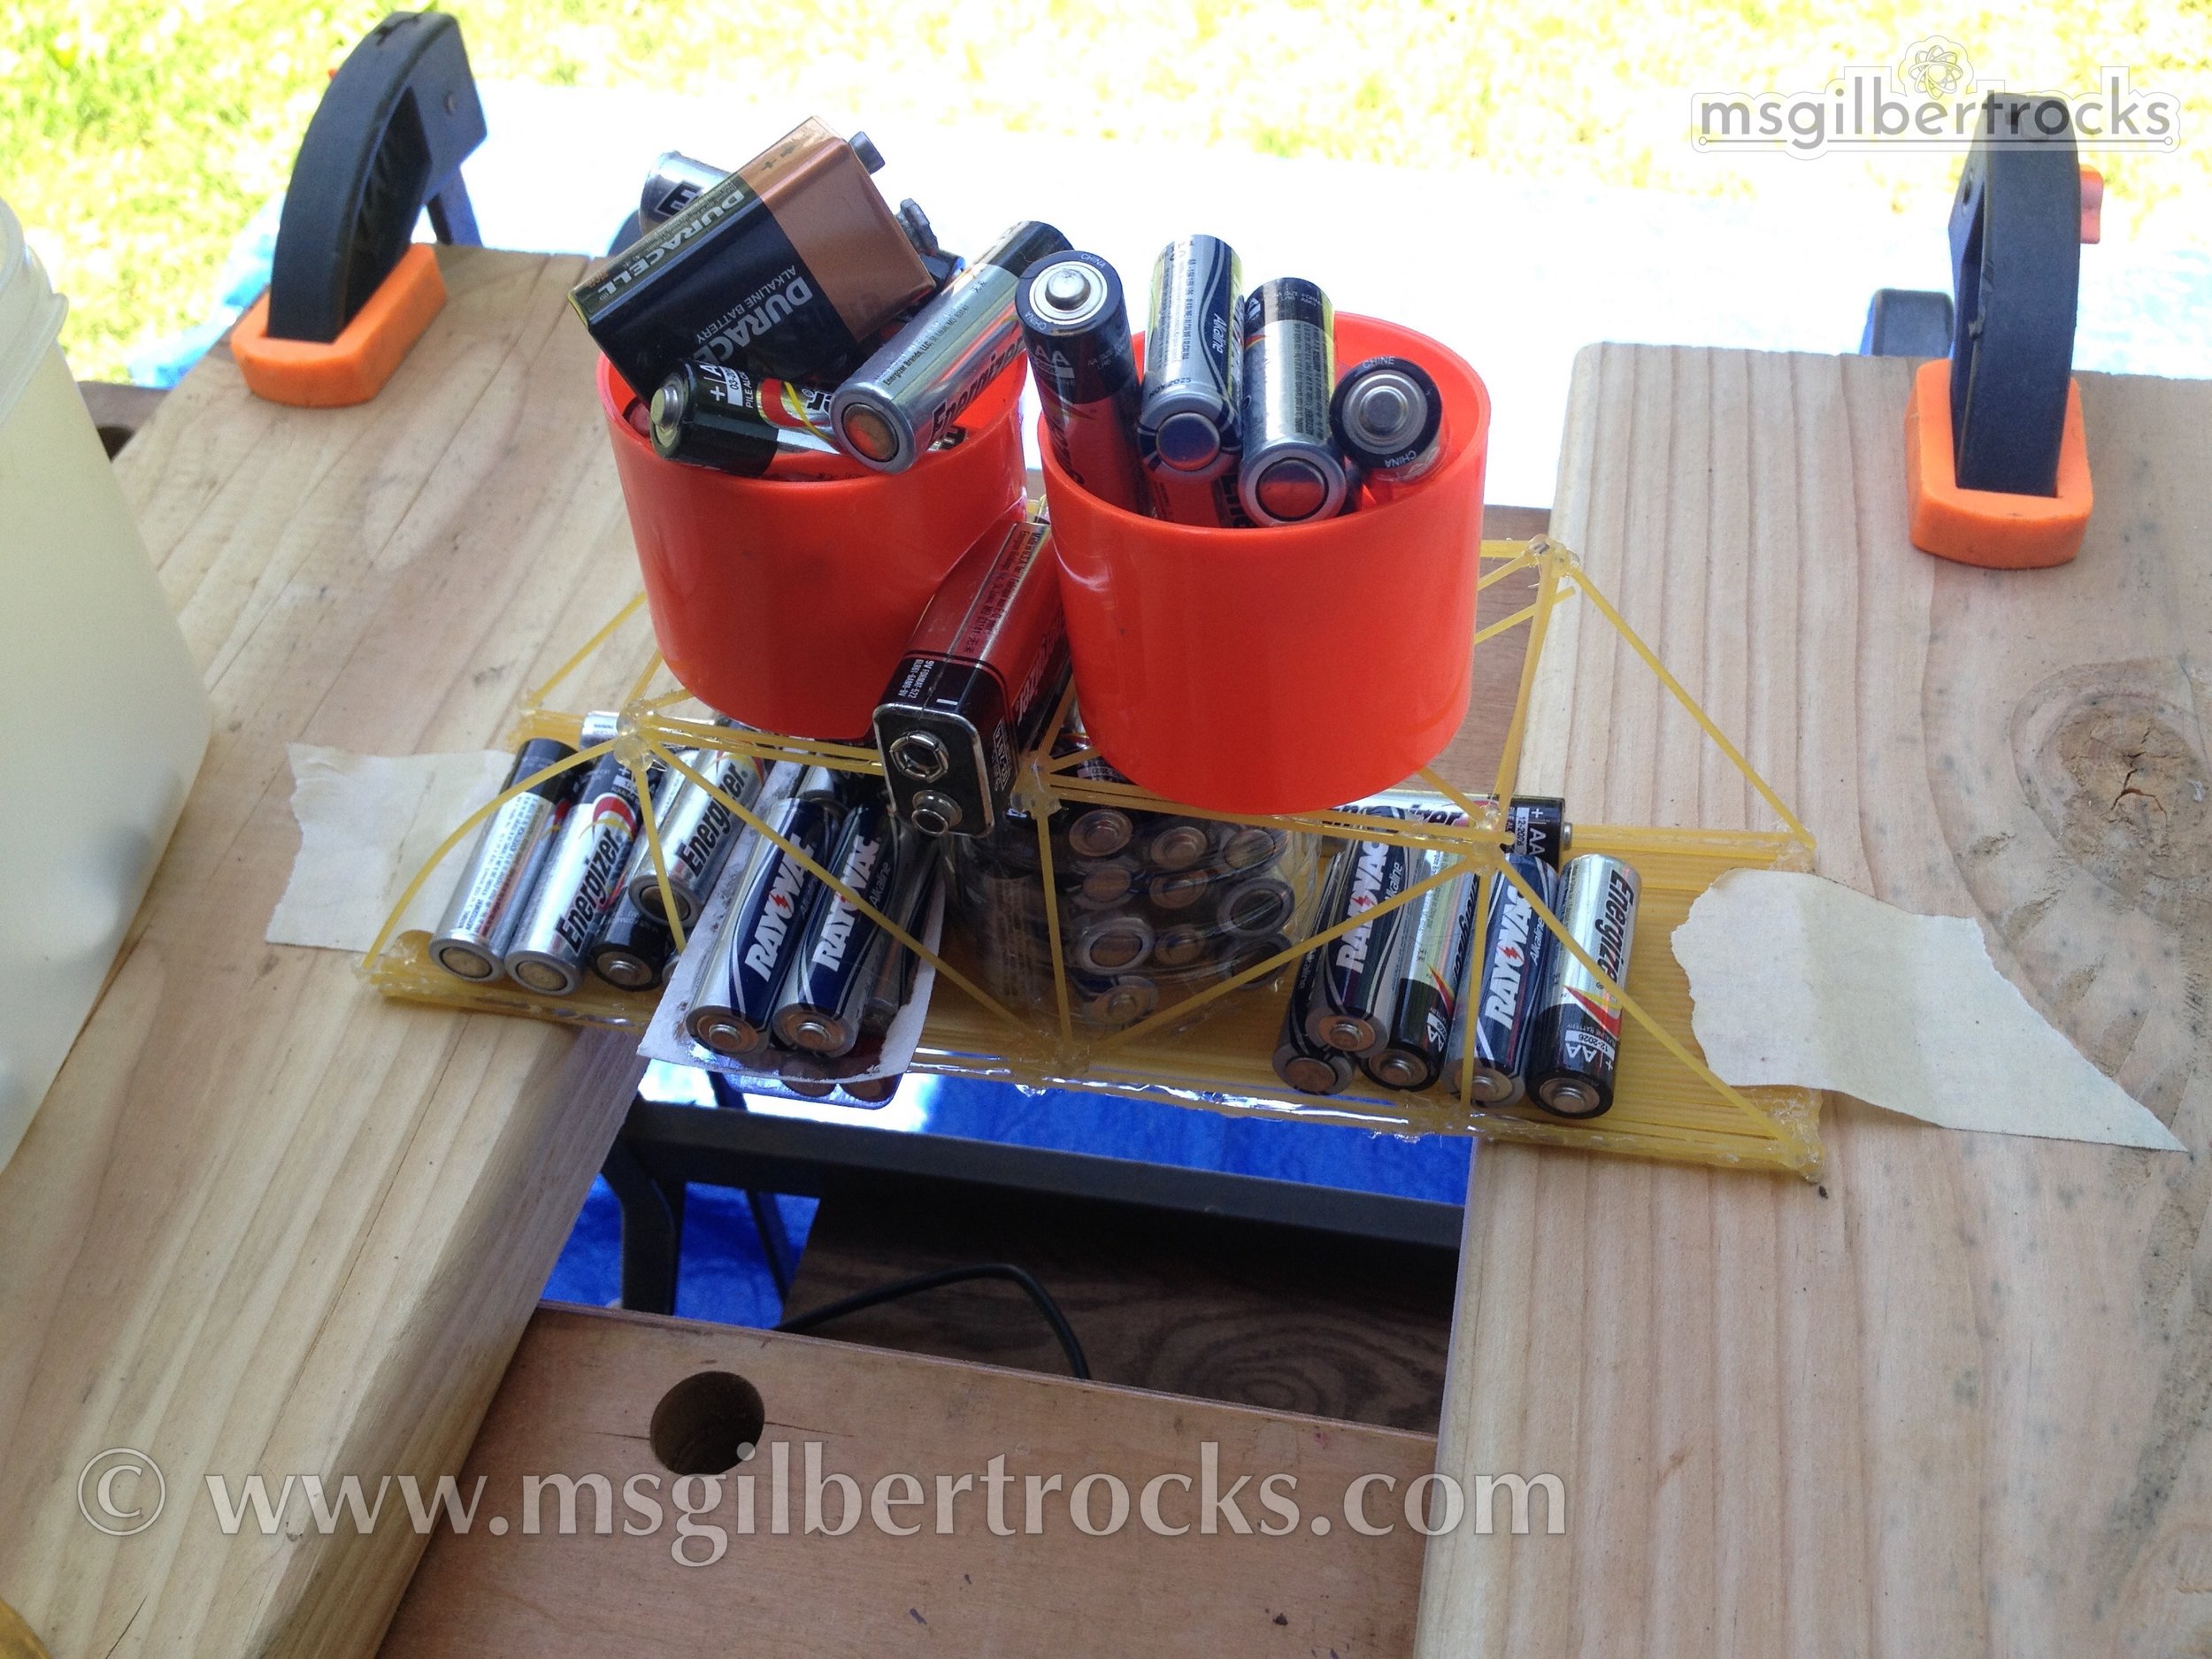
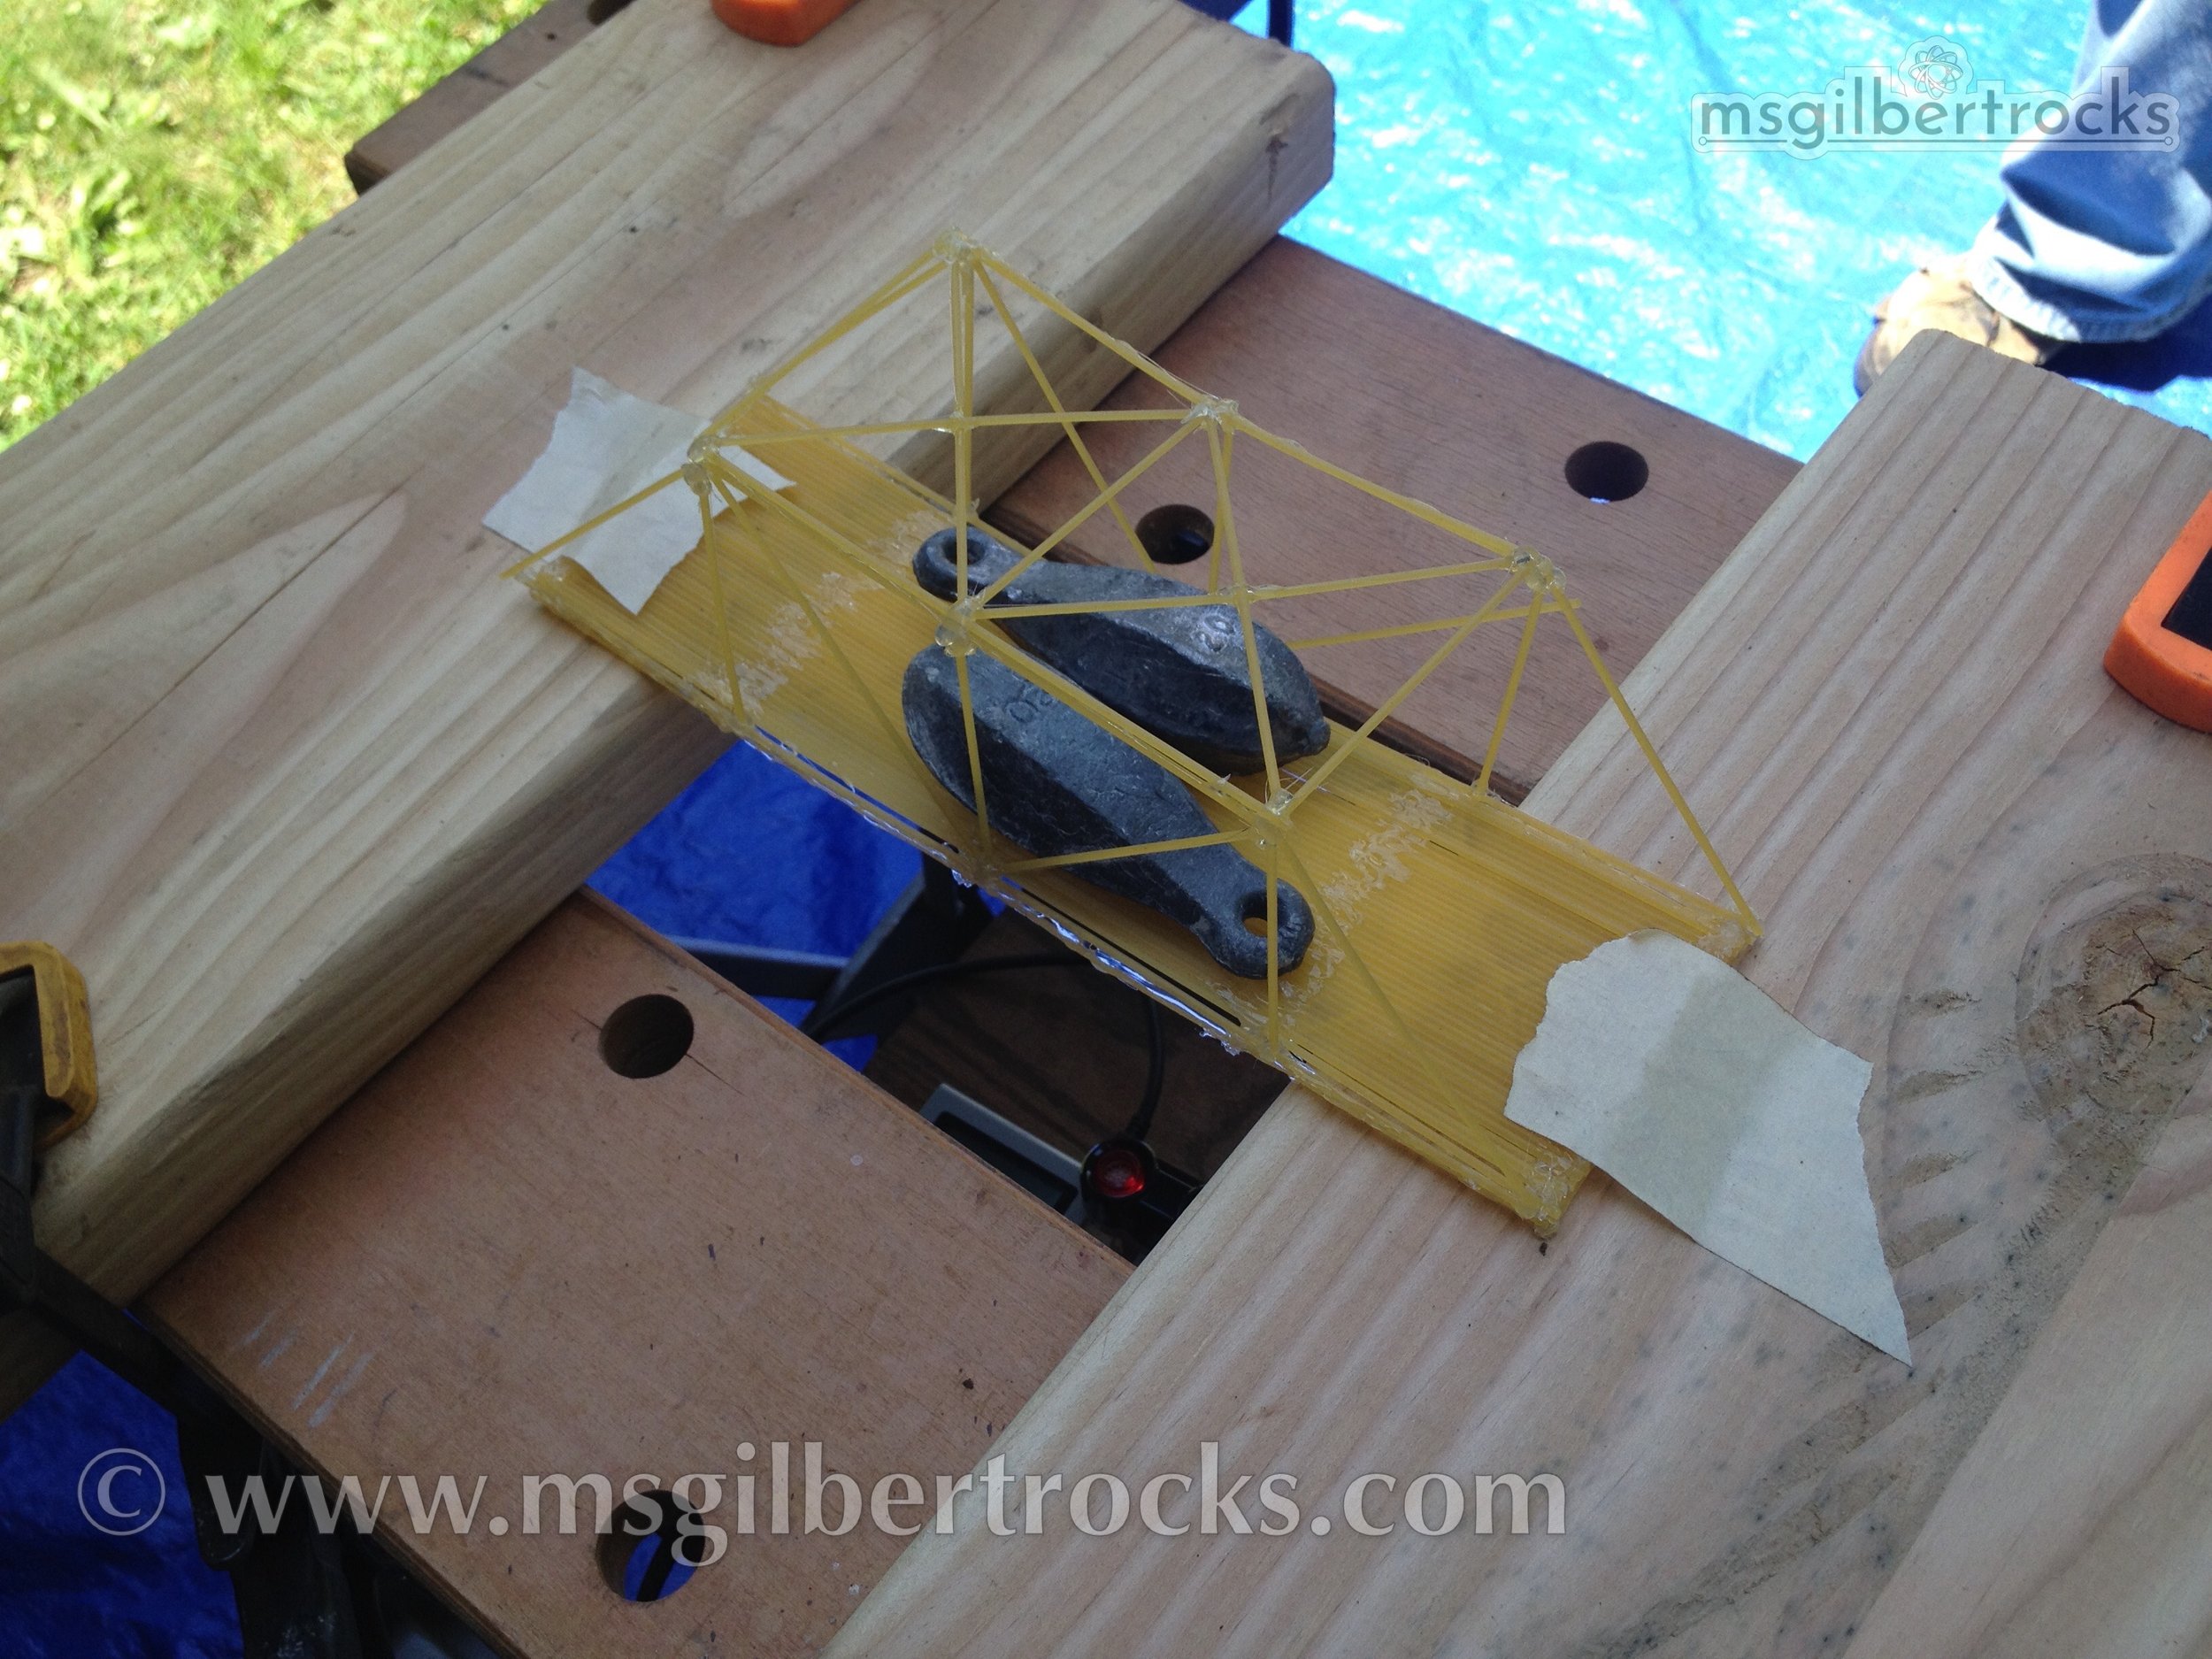
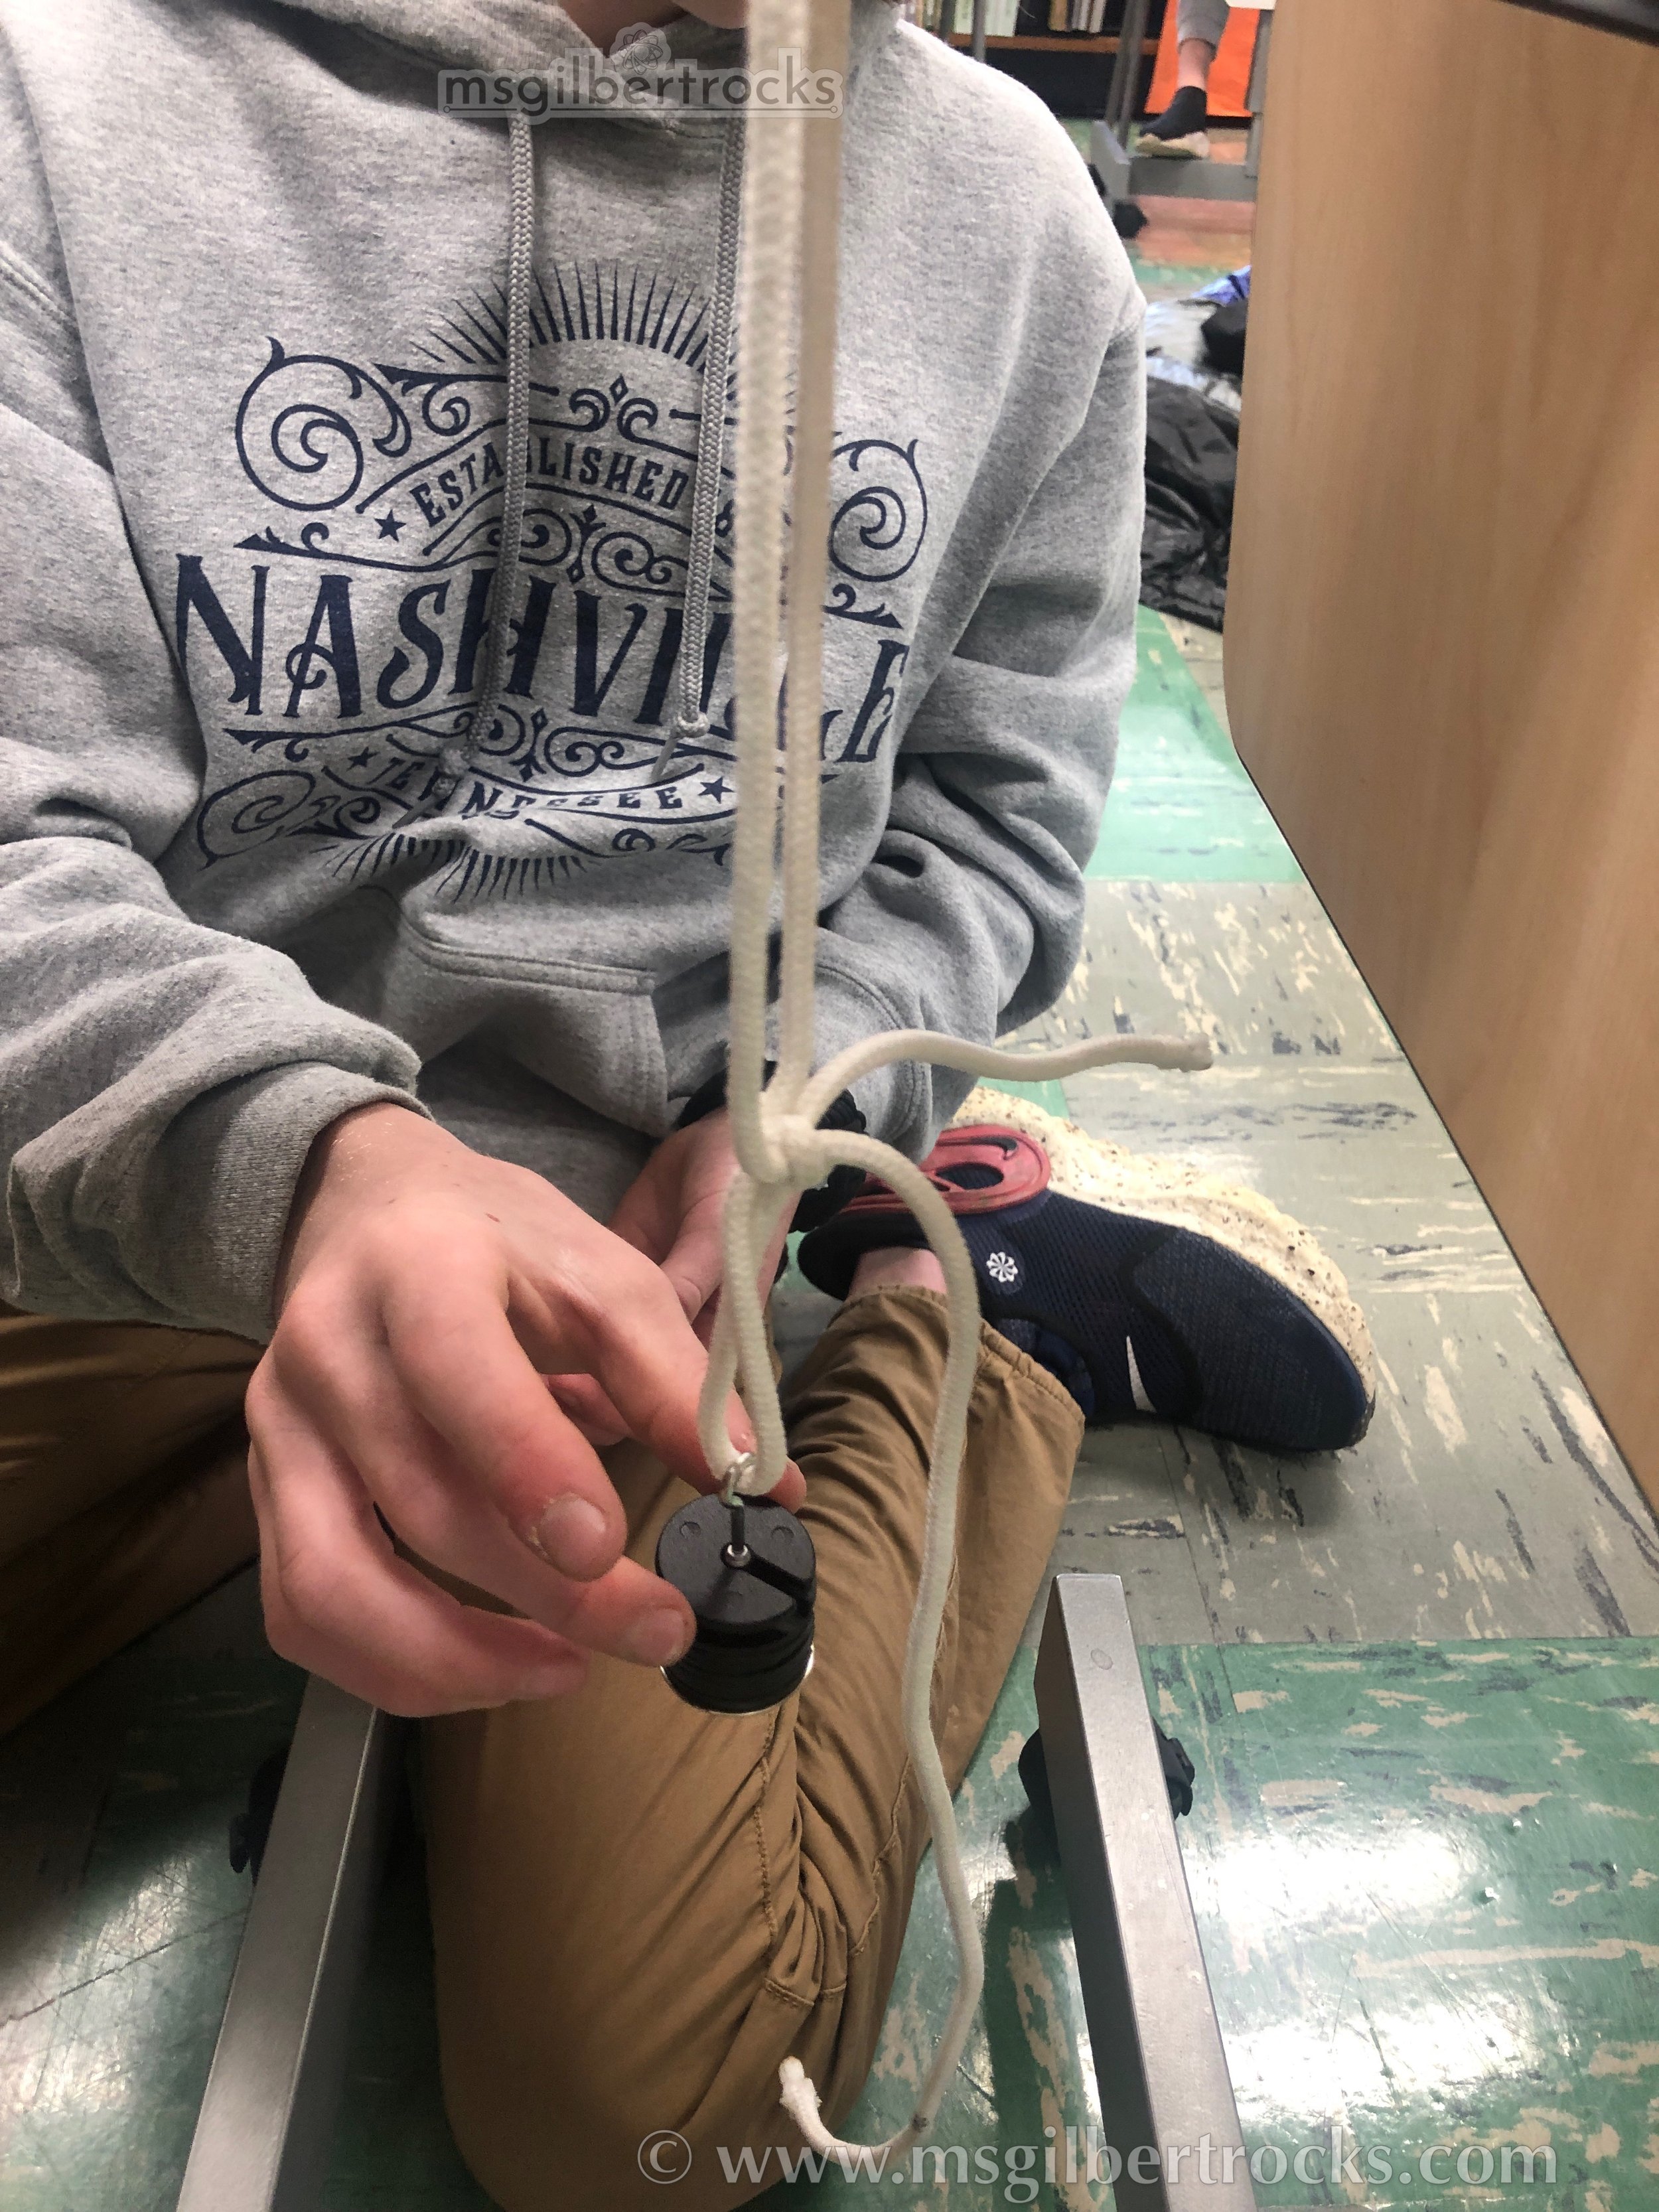
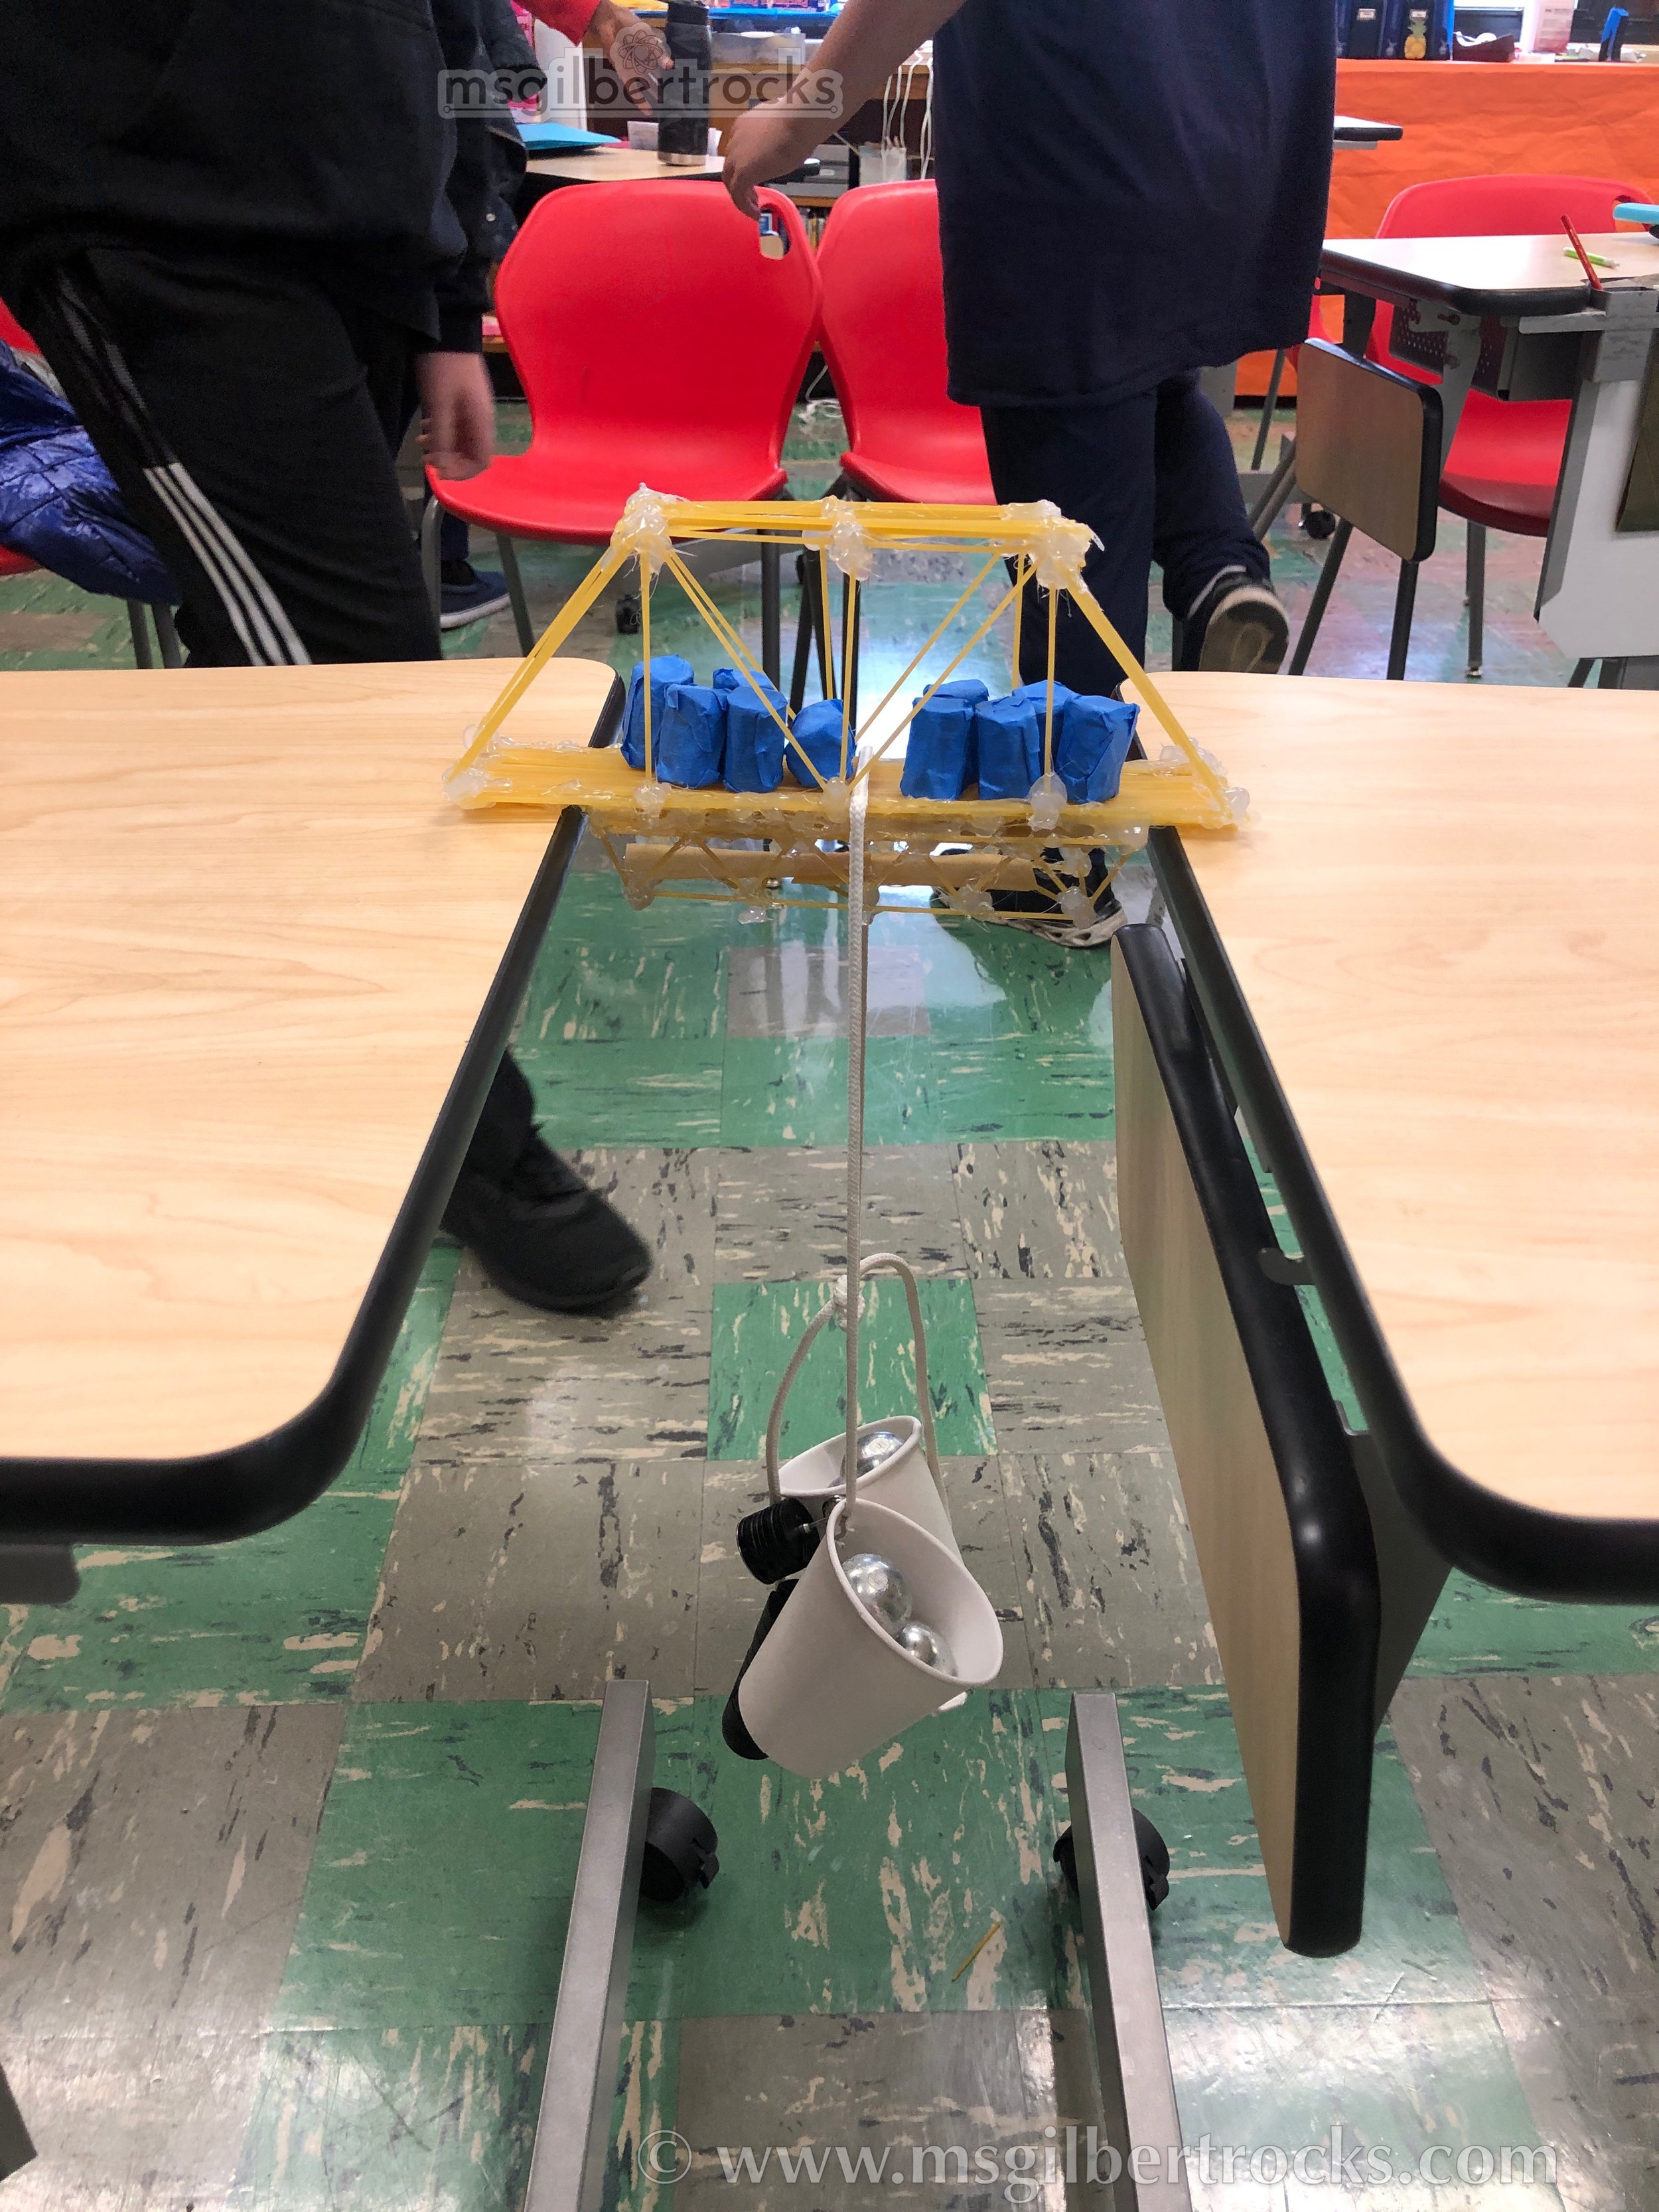
From the beginning, literally in the introduction, we explain that we want to test the bridges to failure by adding weights to break them. The goal is to see how much weight the bridges will hold and compare the different designs. Over the years, we have determined that we need more weights to get the bridges to failure. The kids keep coming up with new ways to reinforce their bridges, and this year was no exception. While we do have a tremendous amount of glue used, the structures are fairly sturdy by design as well. This year we added steel spheres from an old FOSS kit. Without the steel spheres, our total in grams for weights was as follows:
Slotted weight set (small): 10 grams each, quantity of 10 for a total of 100 grams
Slotted weight set (large): 50 grams each, quantity of 10 for a total of 500 grams
Teacher-created rolls of pennies: 55 grams each, quantity of 10 for a total of 550 grams
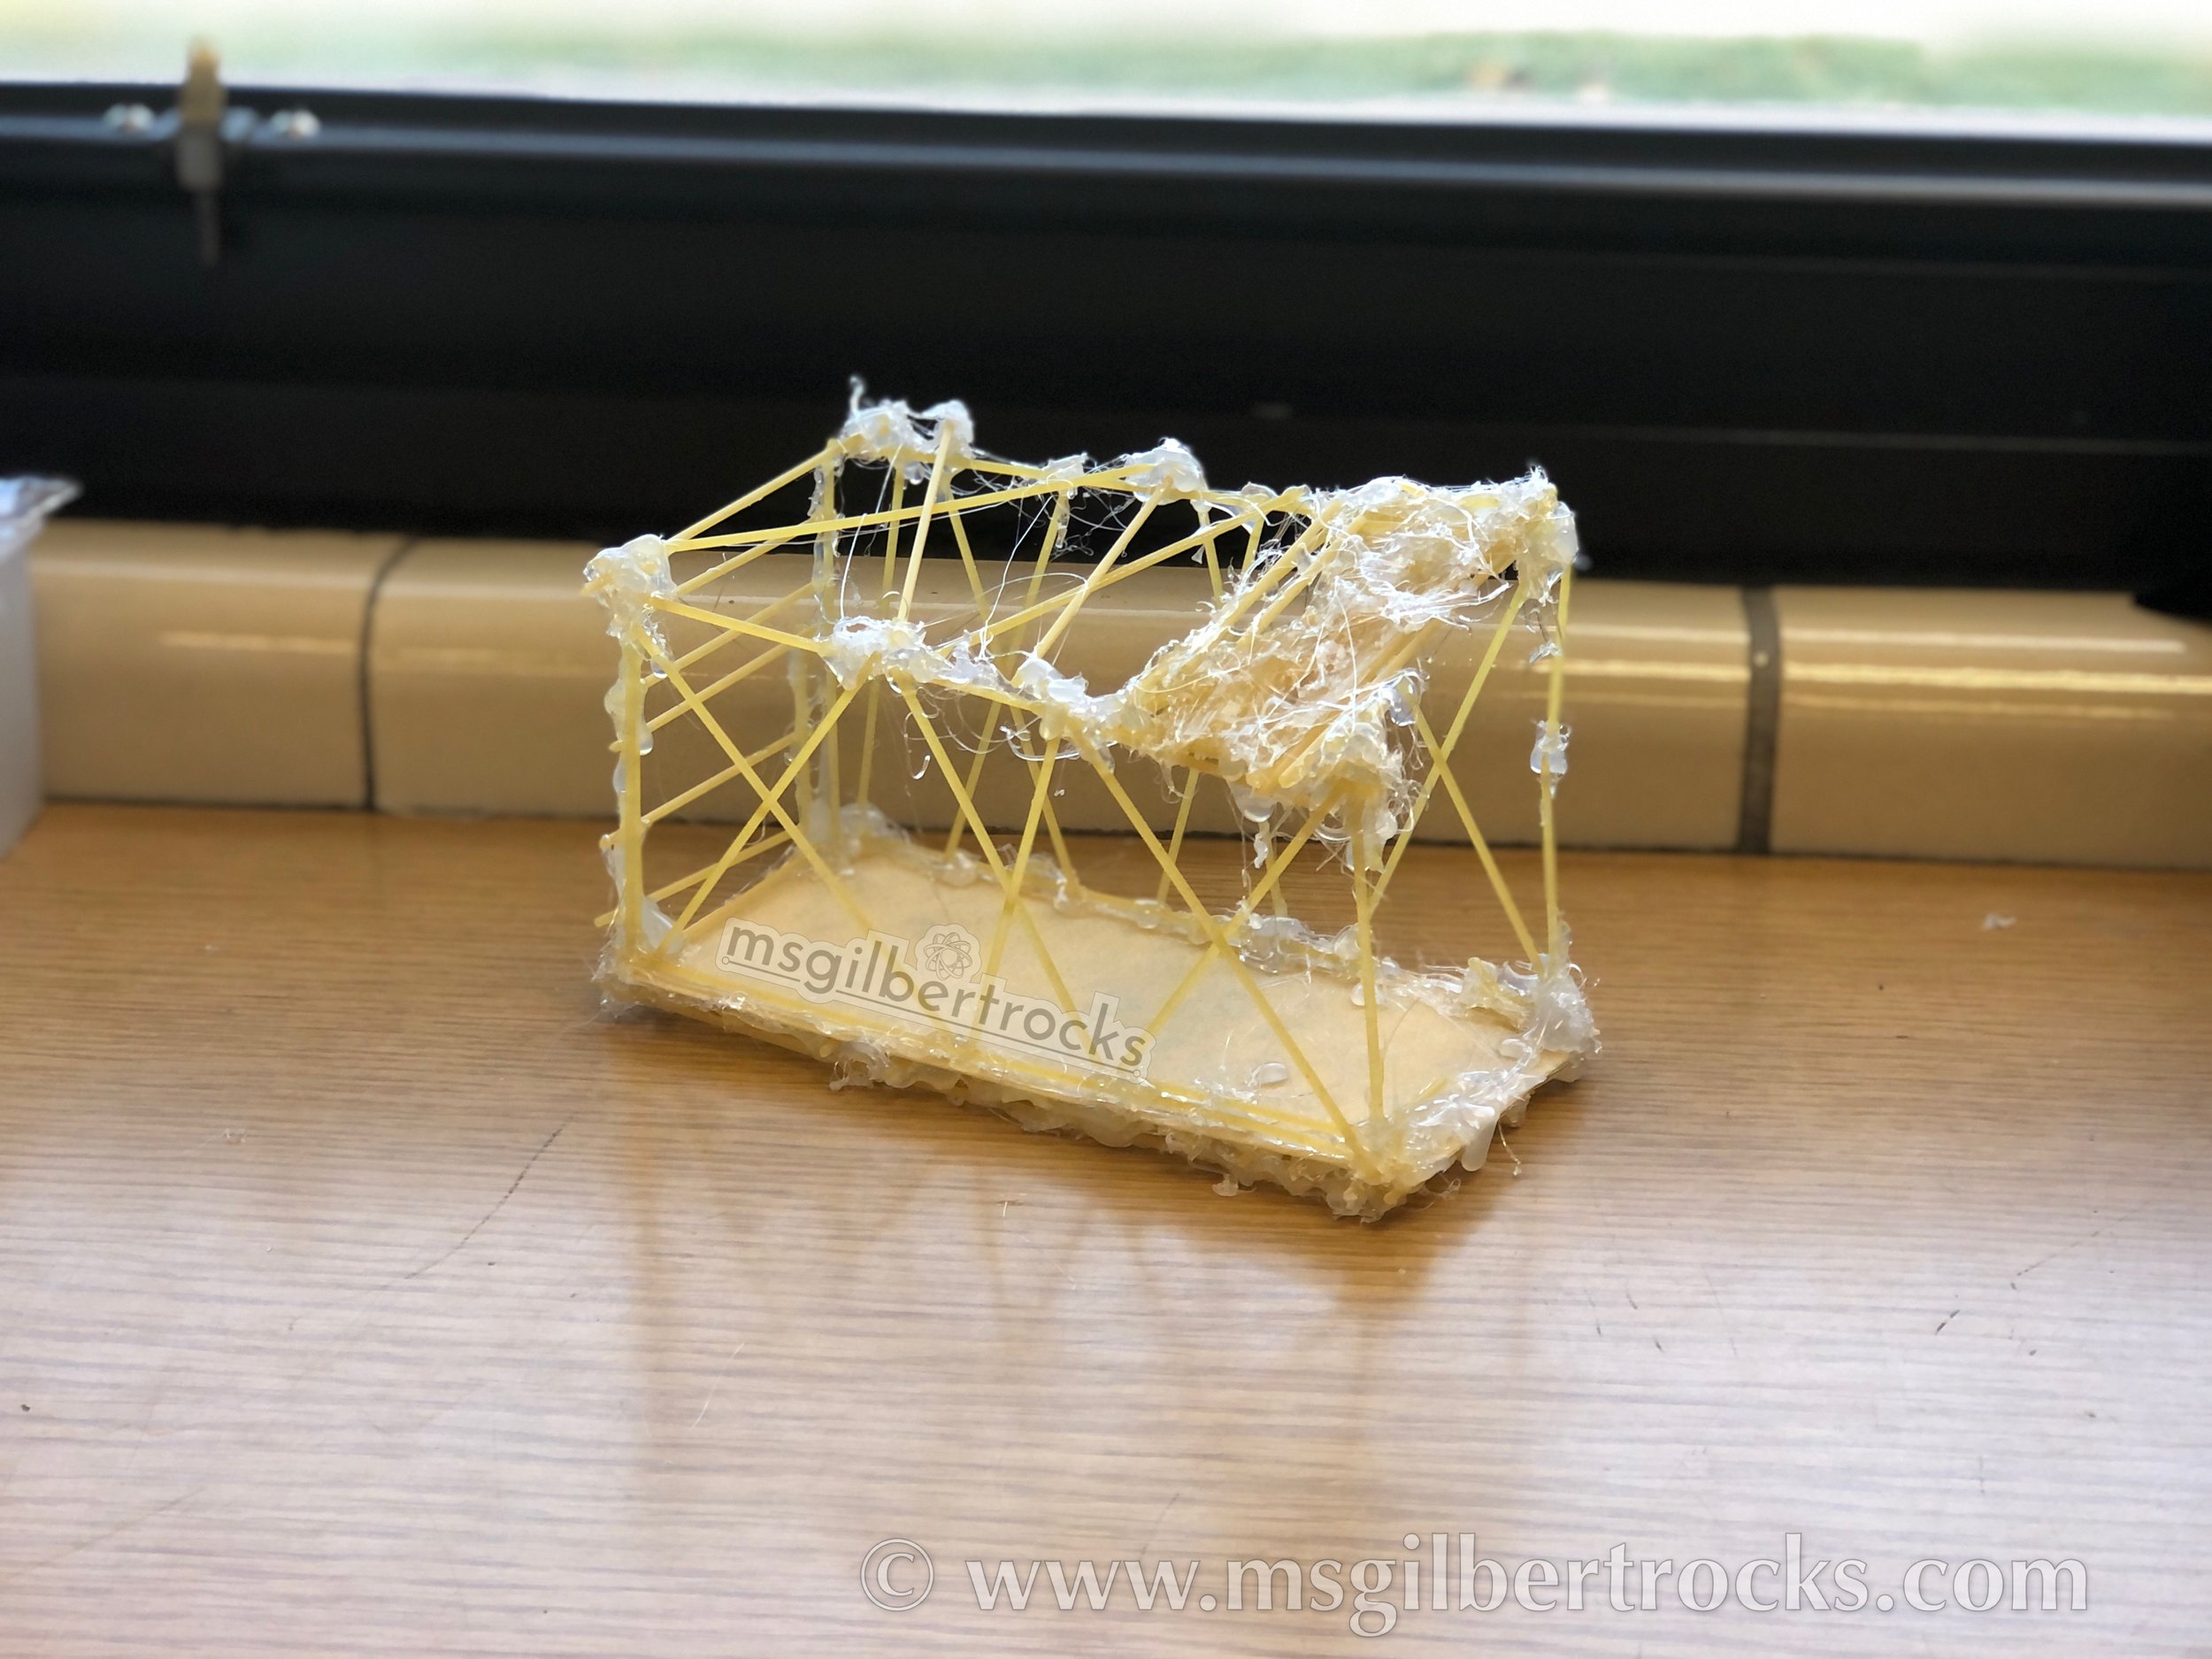
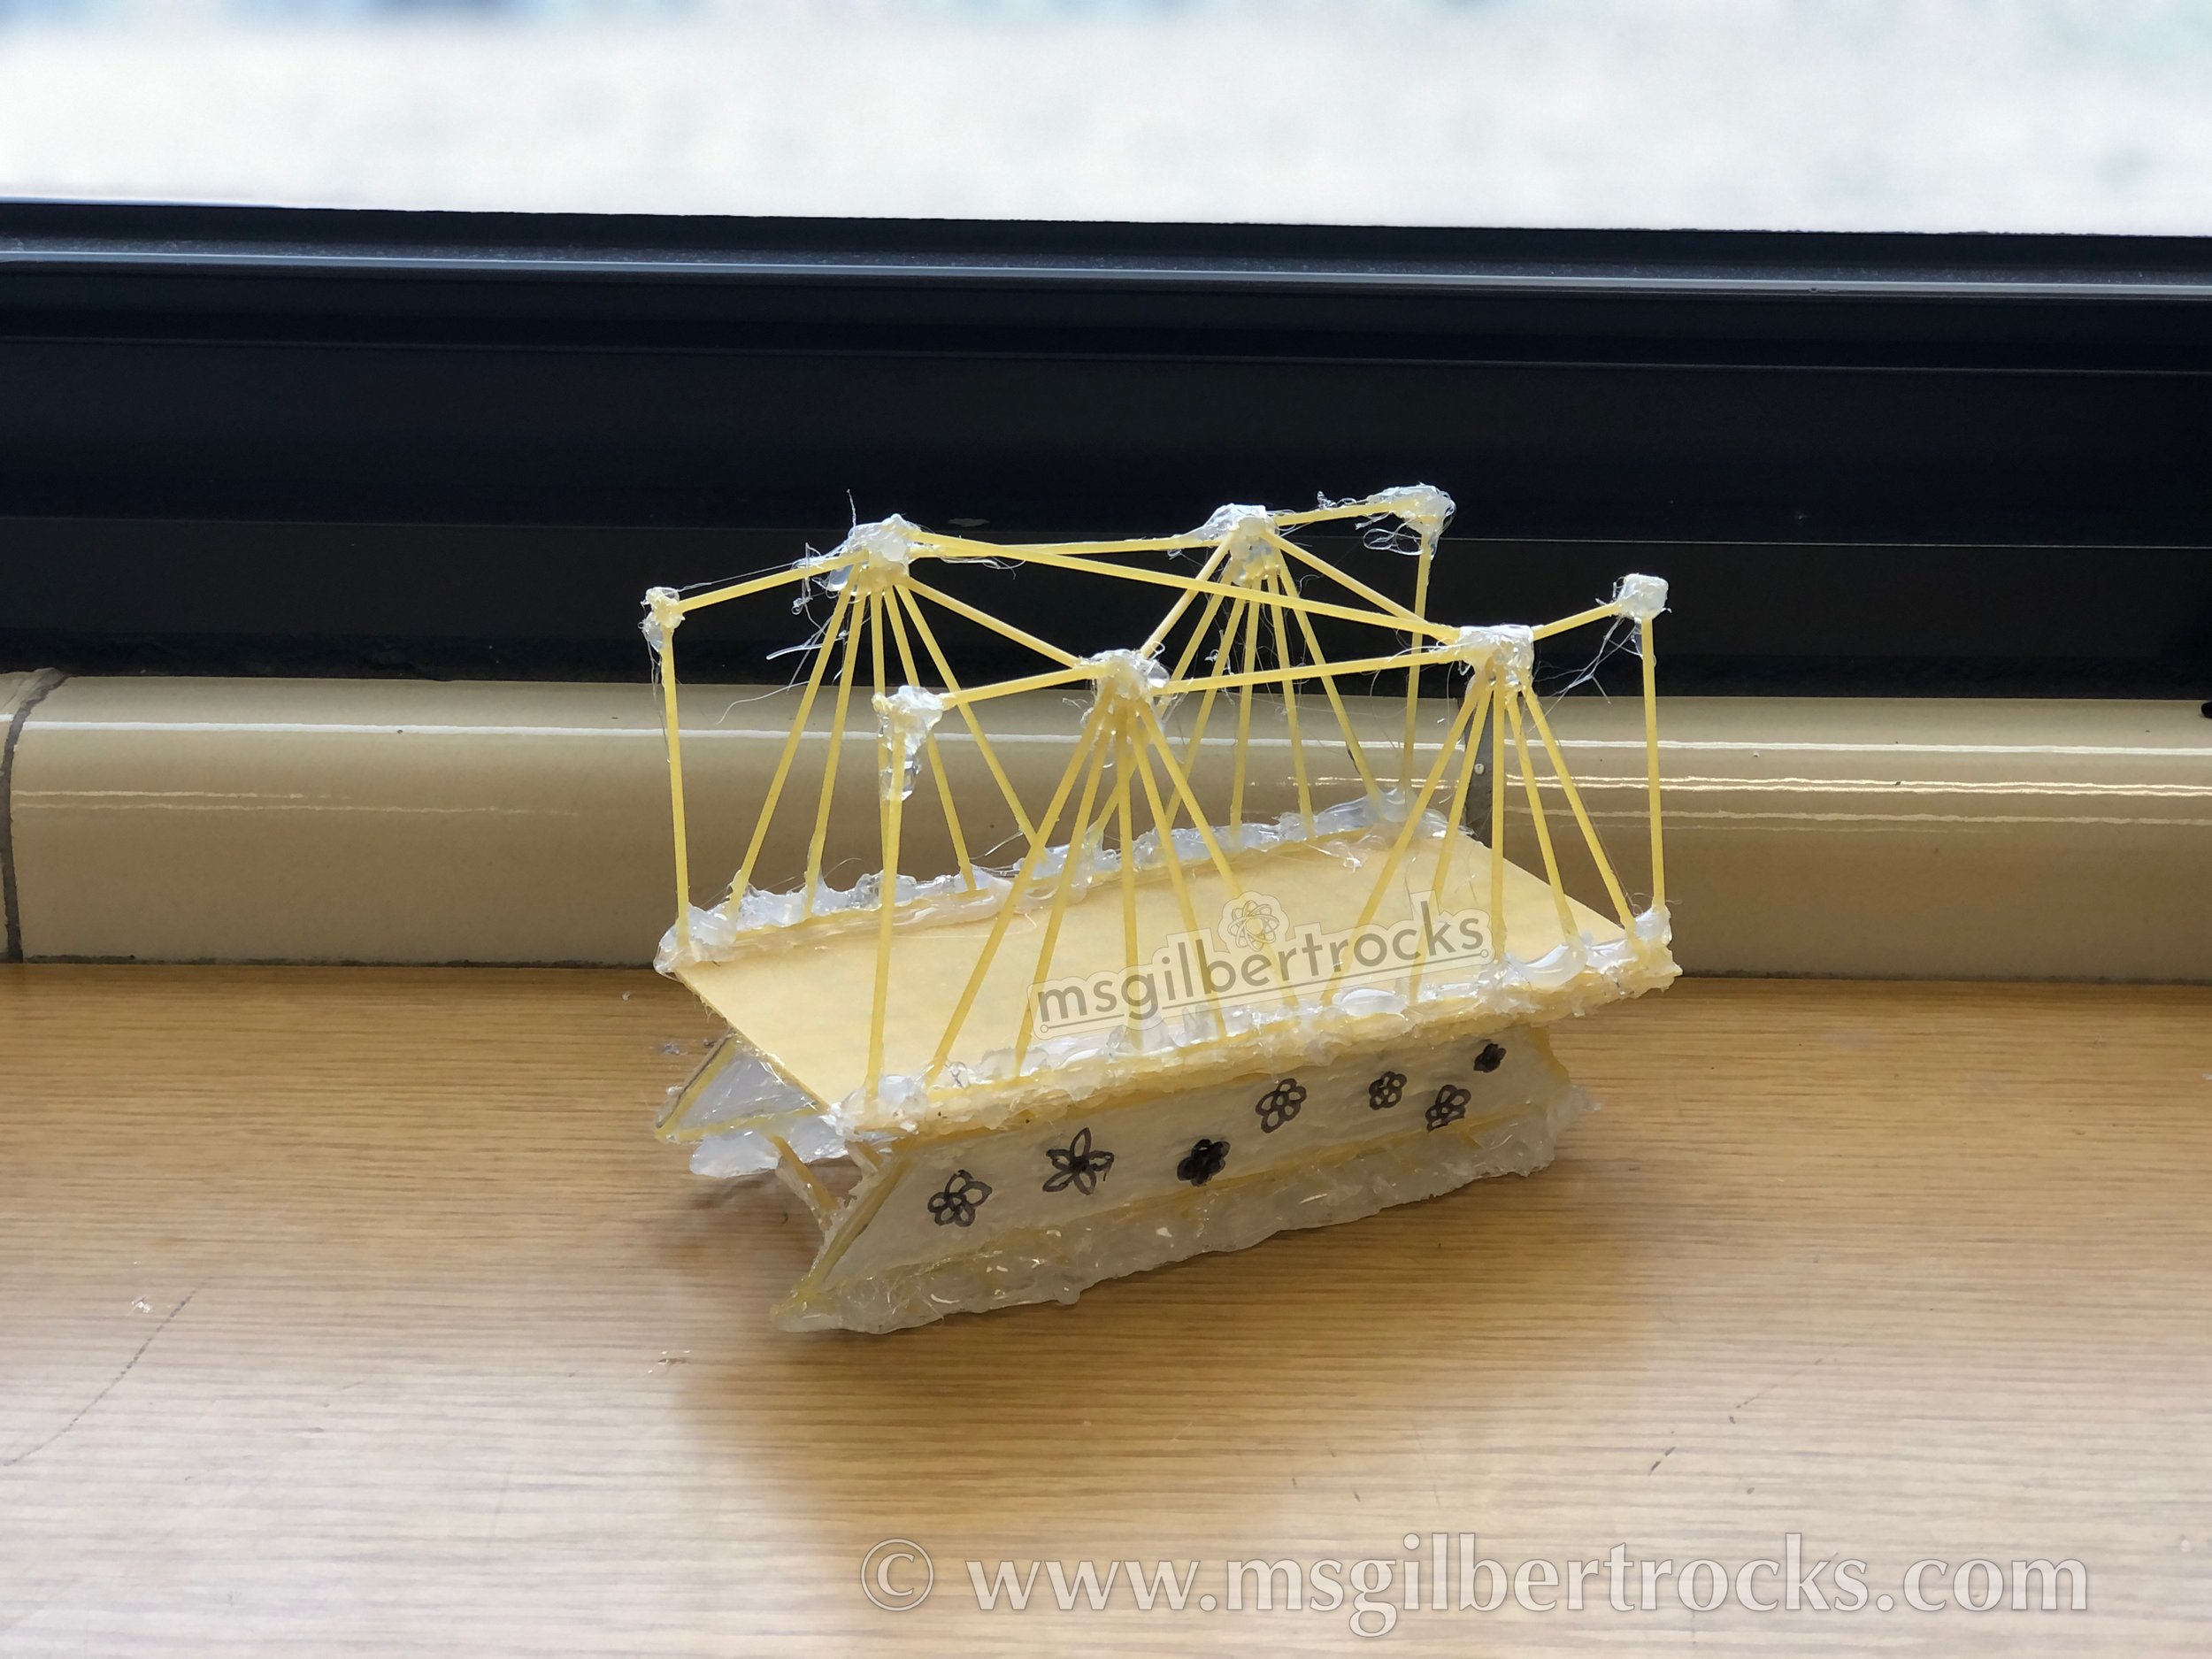
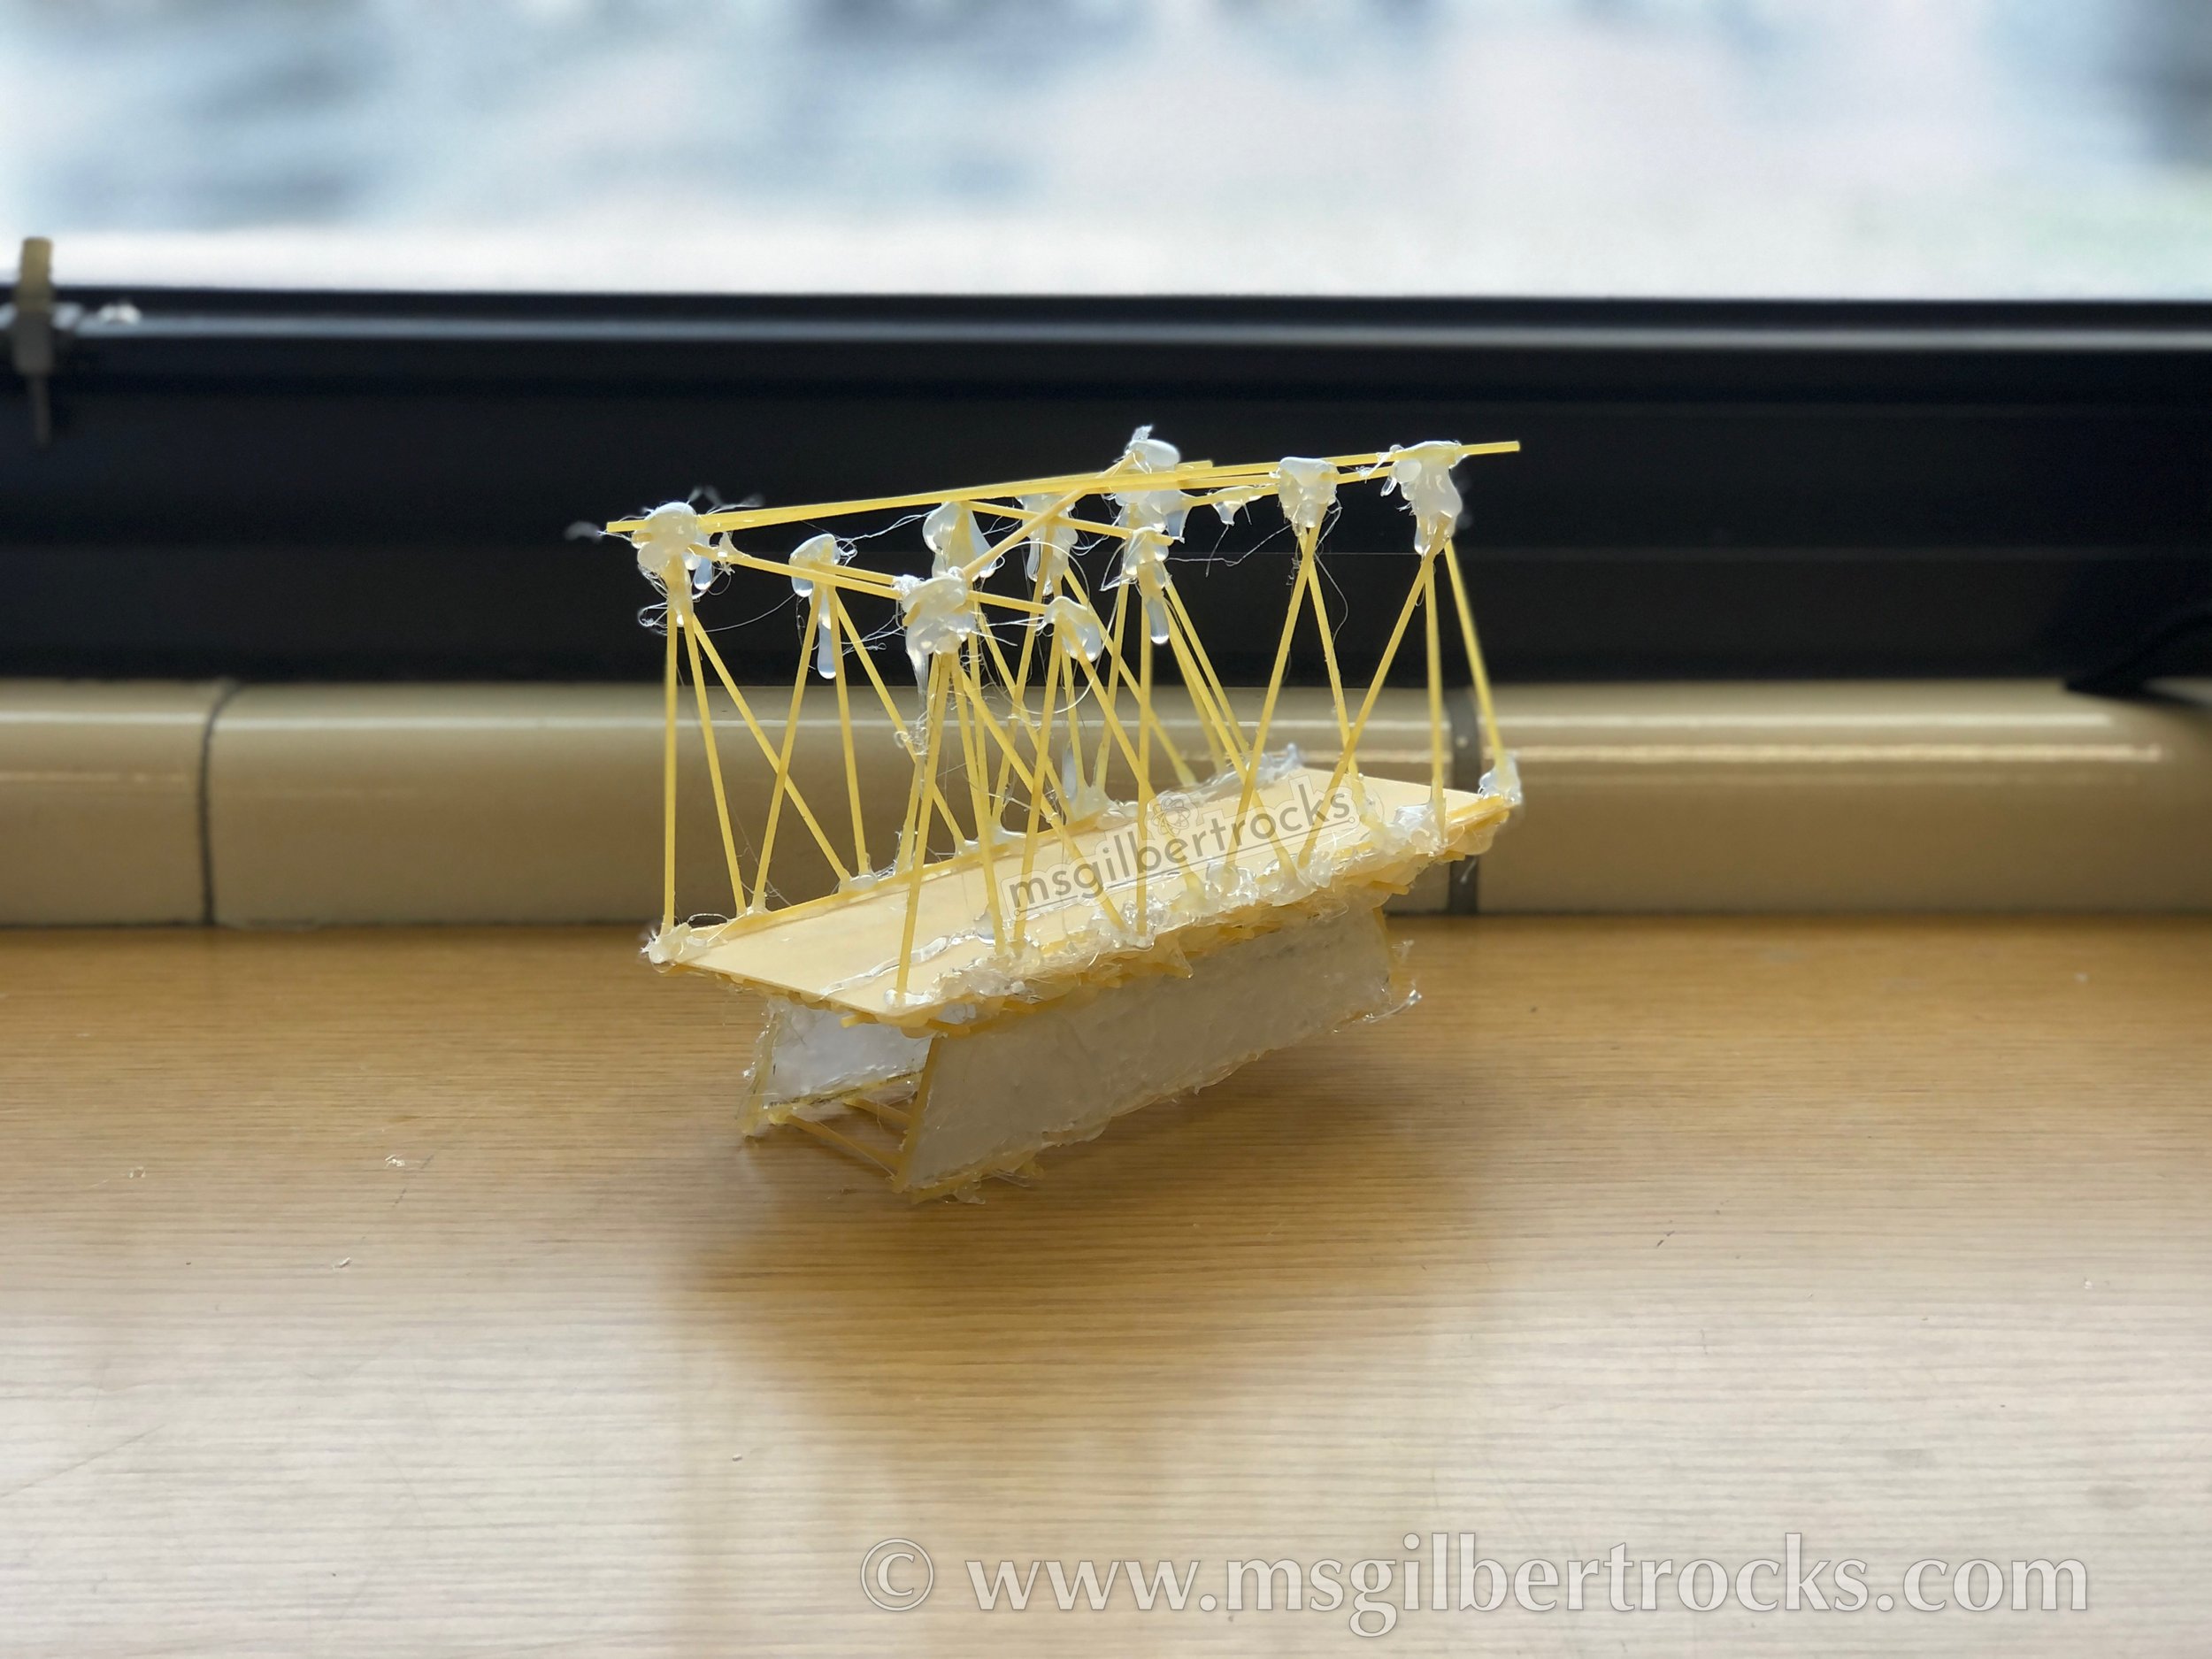
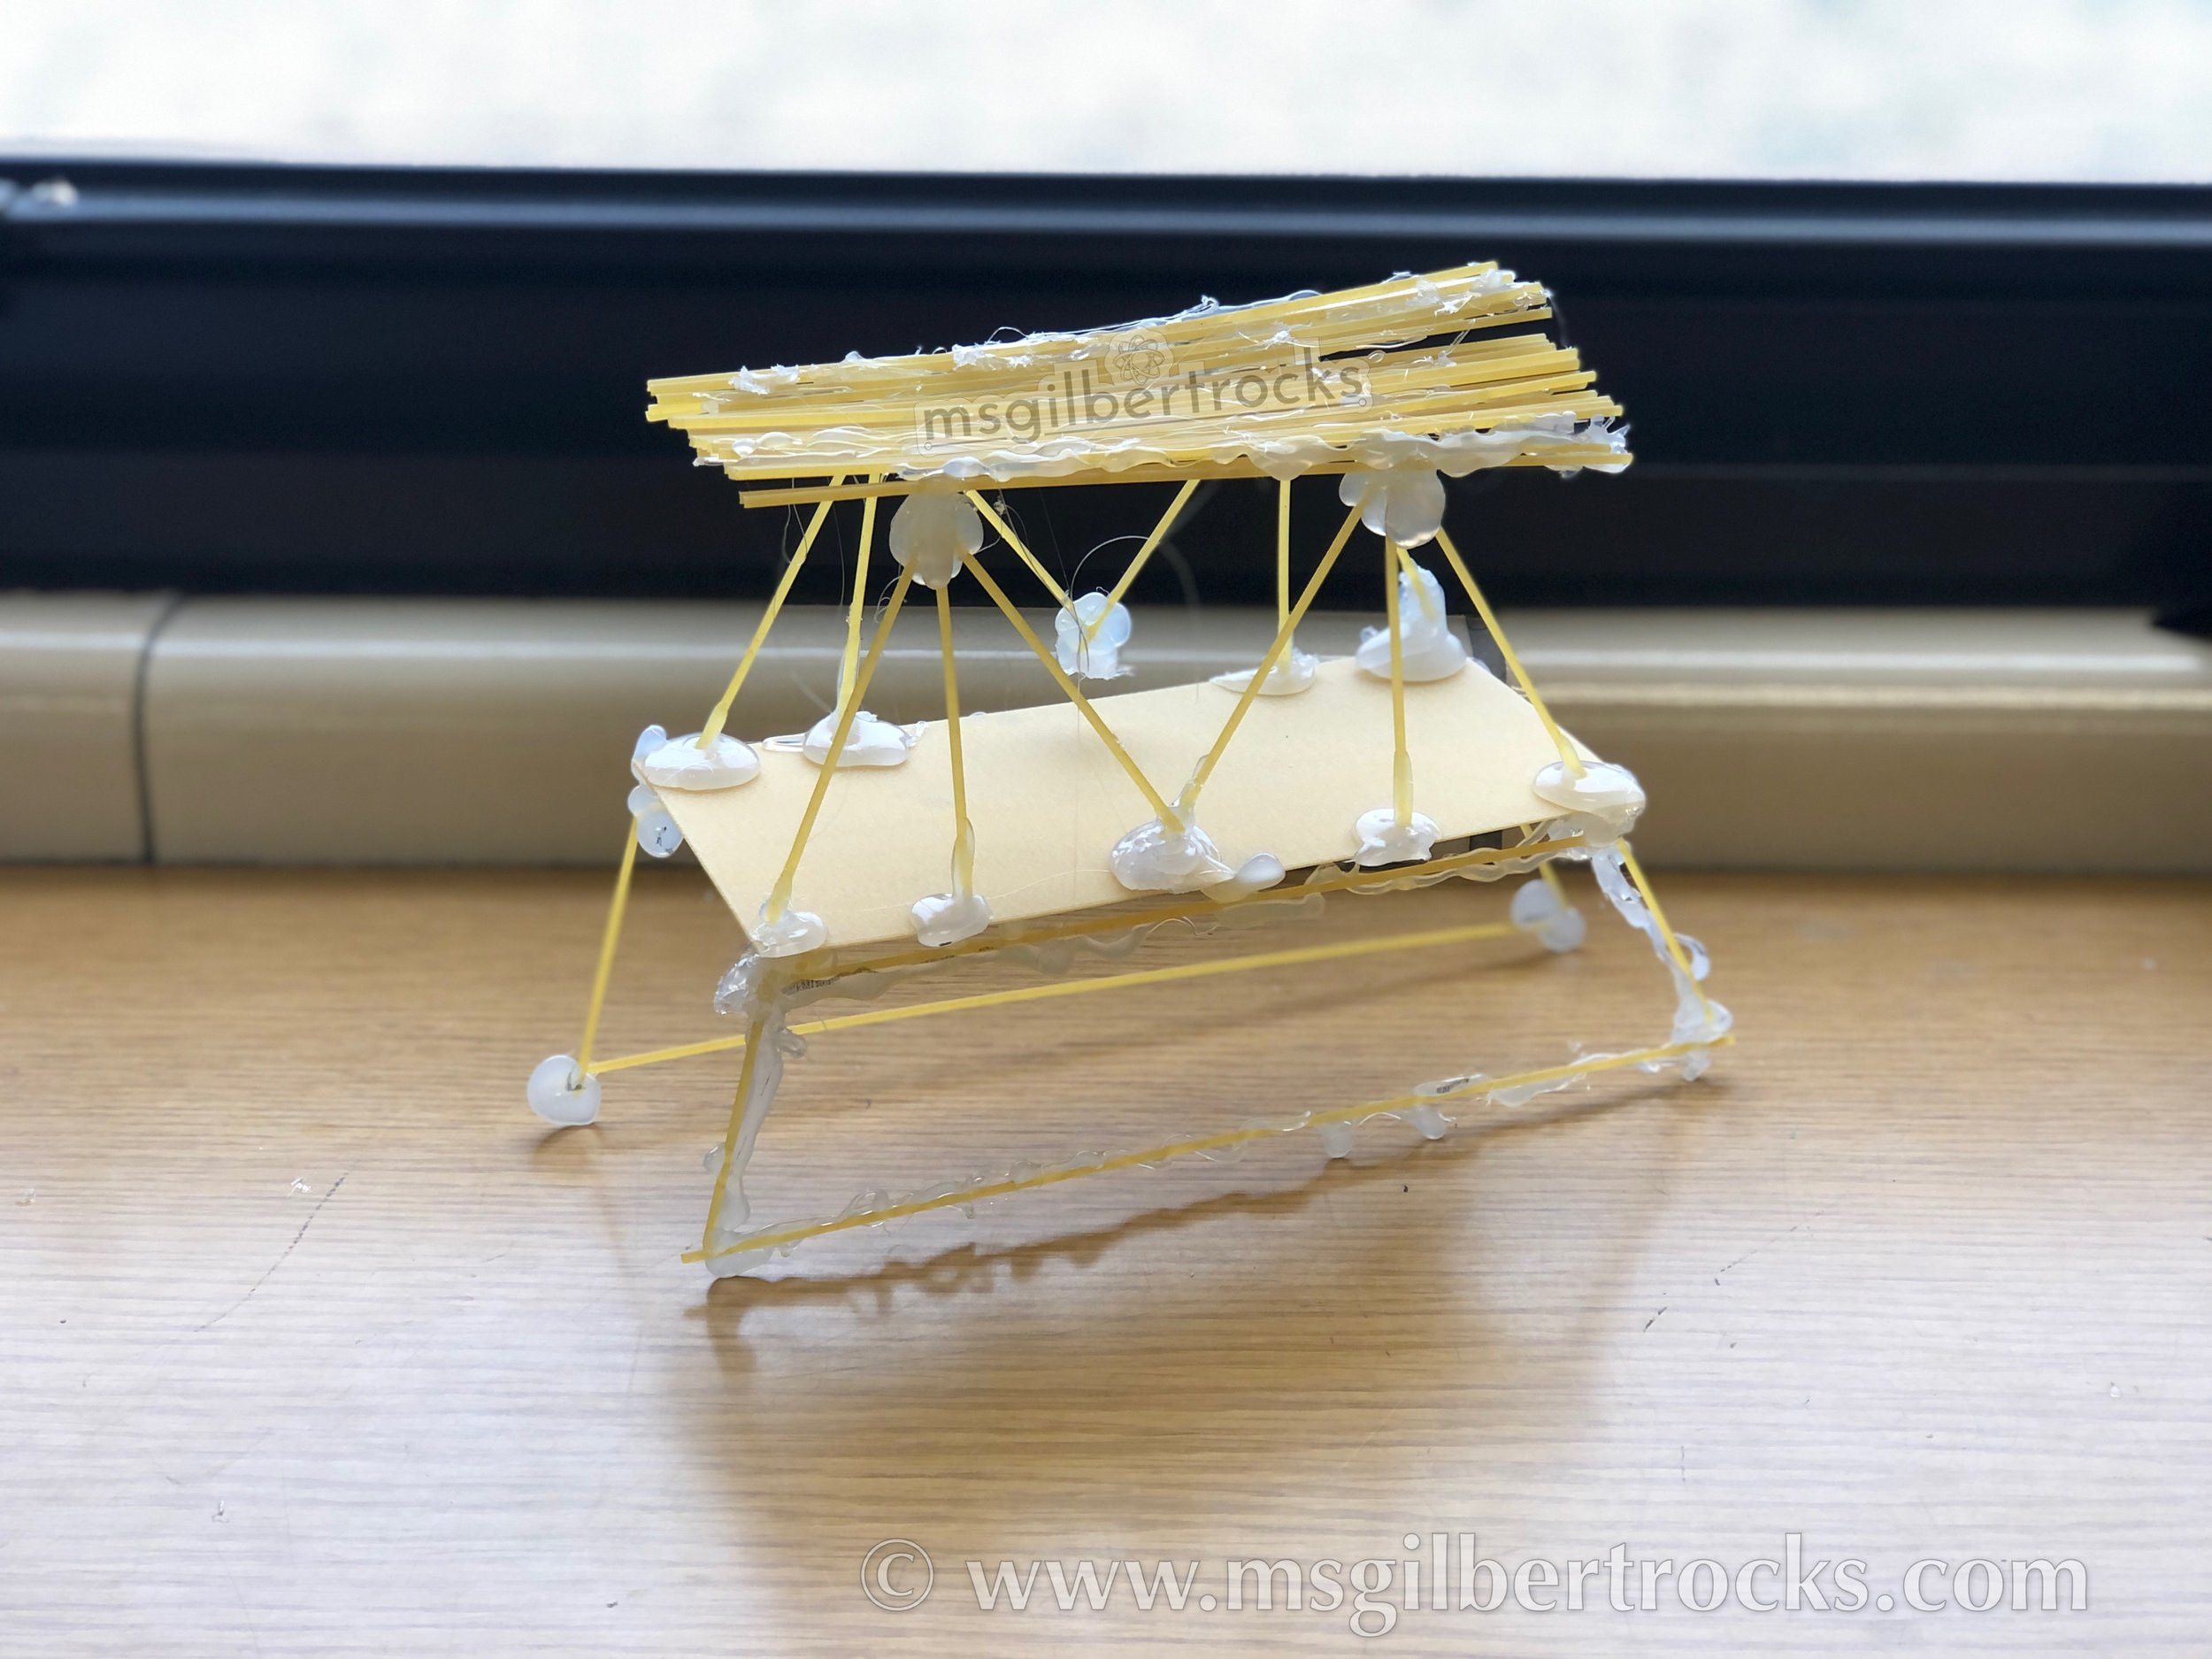
We add the weights in that order (starting with the smaller slotted weights) since the slotted weights come with hooks that attach to the rope we tie to each bridge. This brings the initial total to 1,150 grams (roughly two and a half pounds). We have learned to add cups since the bridges continue to perform better and better each year. These paper cups should be added to the rope when it is initially tied to the bridge so kids can add the slotted weights to the rope between them and then simply add the additional weight into the cups if their bridge is still holding up. This year was no exception as we learned that we needed to add TWO paper cups to have room for the penny rolls (can put them on the “road bed” as an alternative) and/or the steel spheres (4 in each cup). Speaking of the spheres, we needed them to increase the mass available for testing since the two and half pounds was nowhere enough for these bridges. With the bridges laughing in the face of that piddly amount of mass hanging from them, we sourced the spheres and they add an additional 238 grams per sphere. With 8 total spheres, we had an additional 1,904 grams for a whopping total of 3,054 grams or 6.73 pounds! Surprisingly, this was still not even enough mass to test these bridges to failure as only one of them actually did fail at 1,479 grams. This year I made it a priority to photograph all bridges in their glory before the testing began, so the kids would have a memory of them all in one piece. I hope they will continue to test their bridges once they take them home since they are almost all still in need of further testing to get to a failure, but I am glad we have such a nice bit of evidence of their designs to share. Please find pictures of their amazing bridges and photos of our breaking process with the rope/cups below. As always, please reach out if you have any questions…and if you try any of the activities, please share with me via email or on social media (@msgilbertrocks on Twitter and Instagram)!
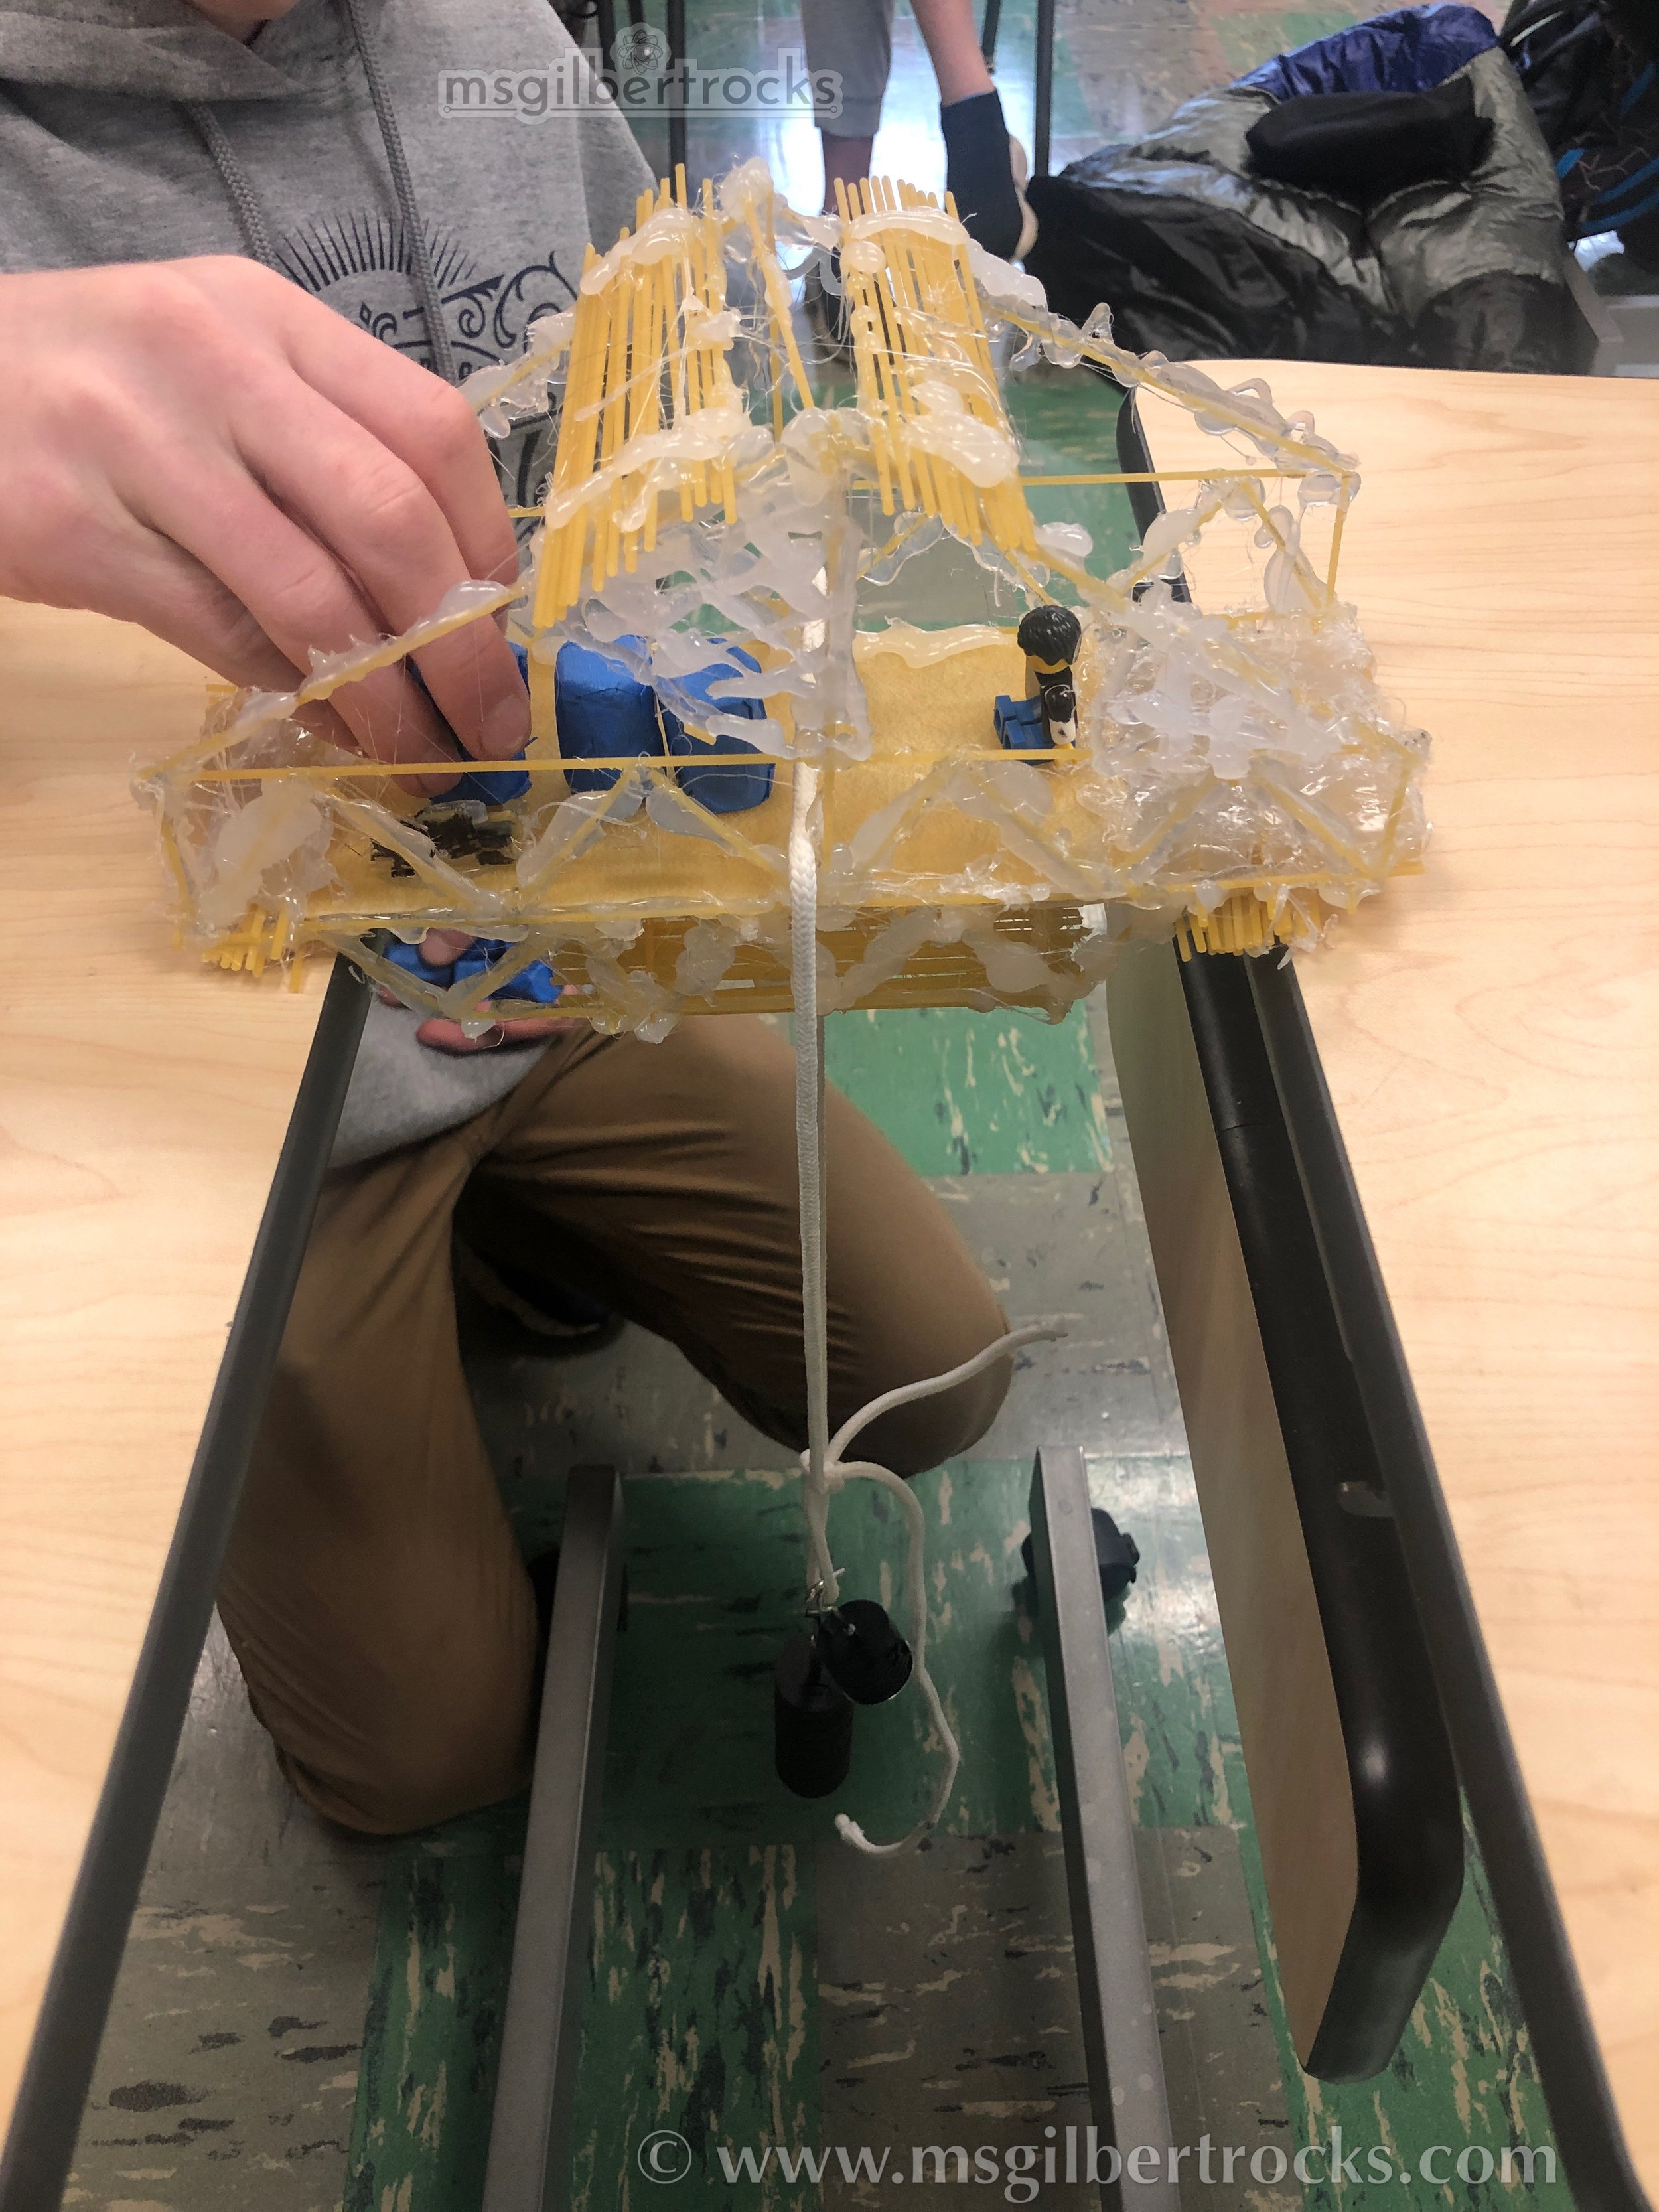
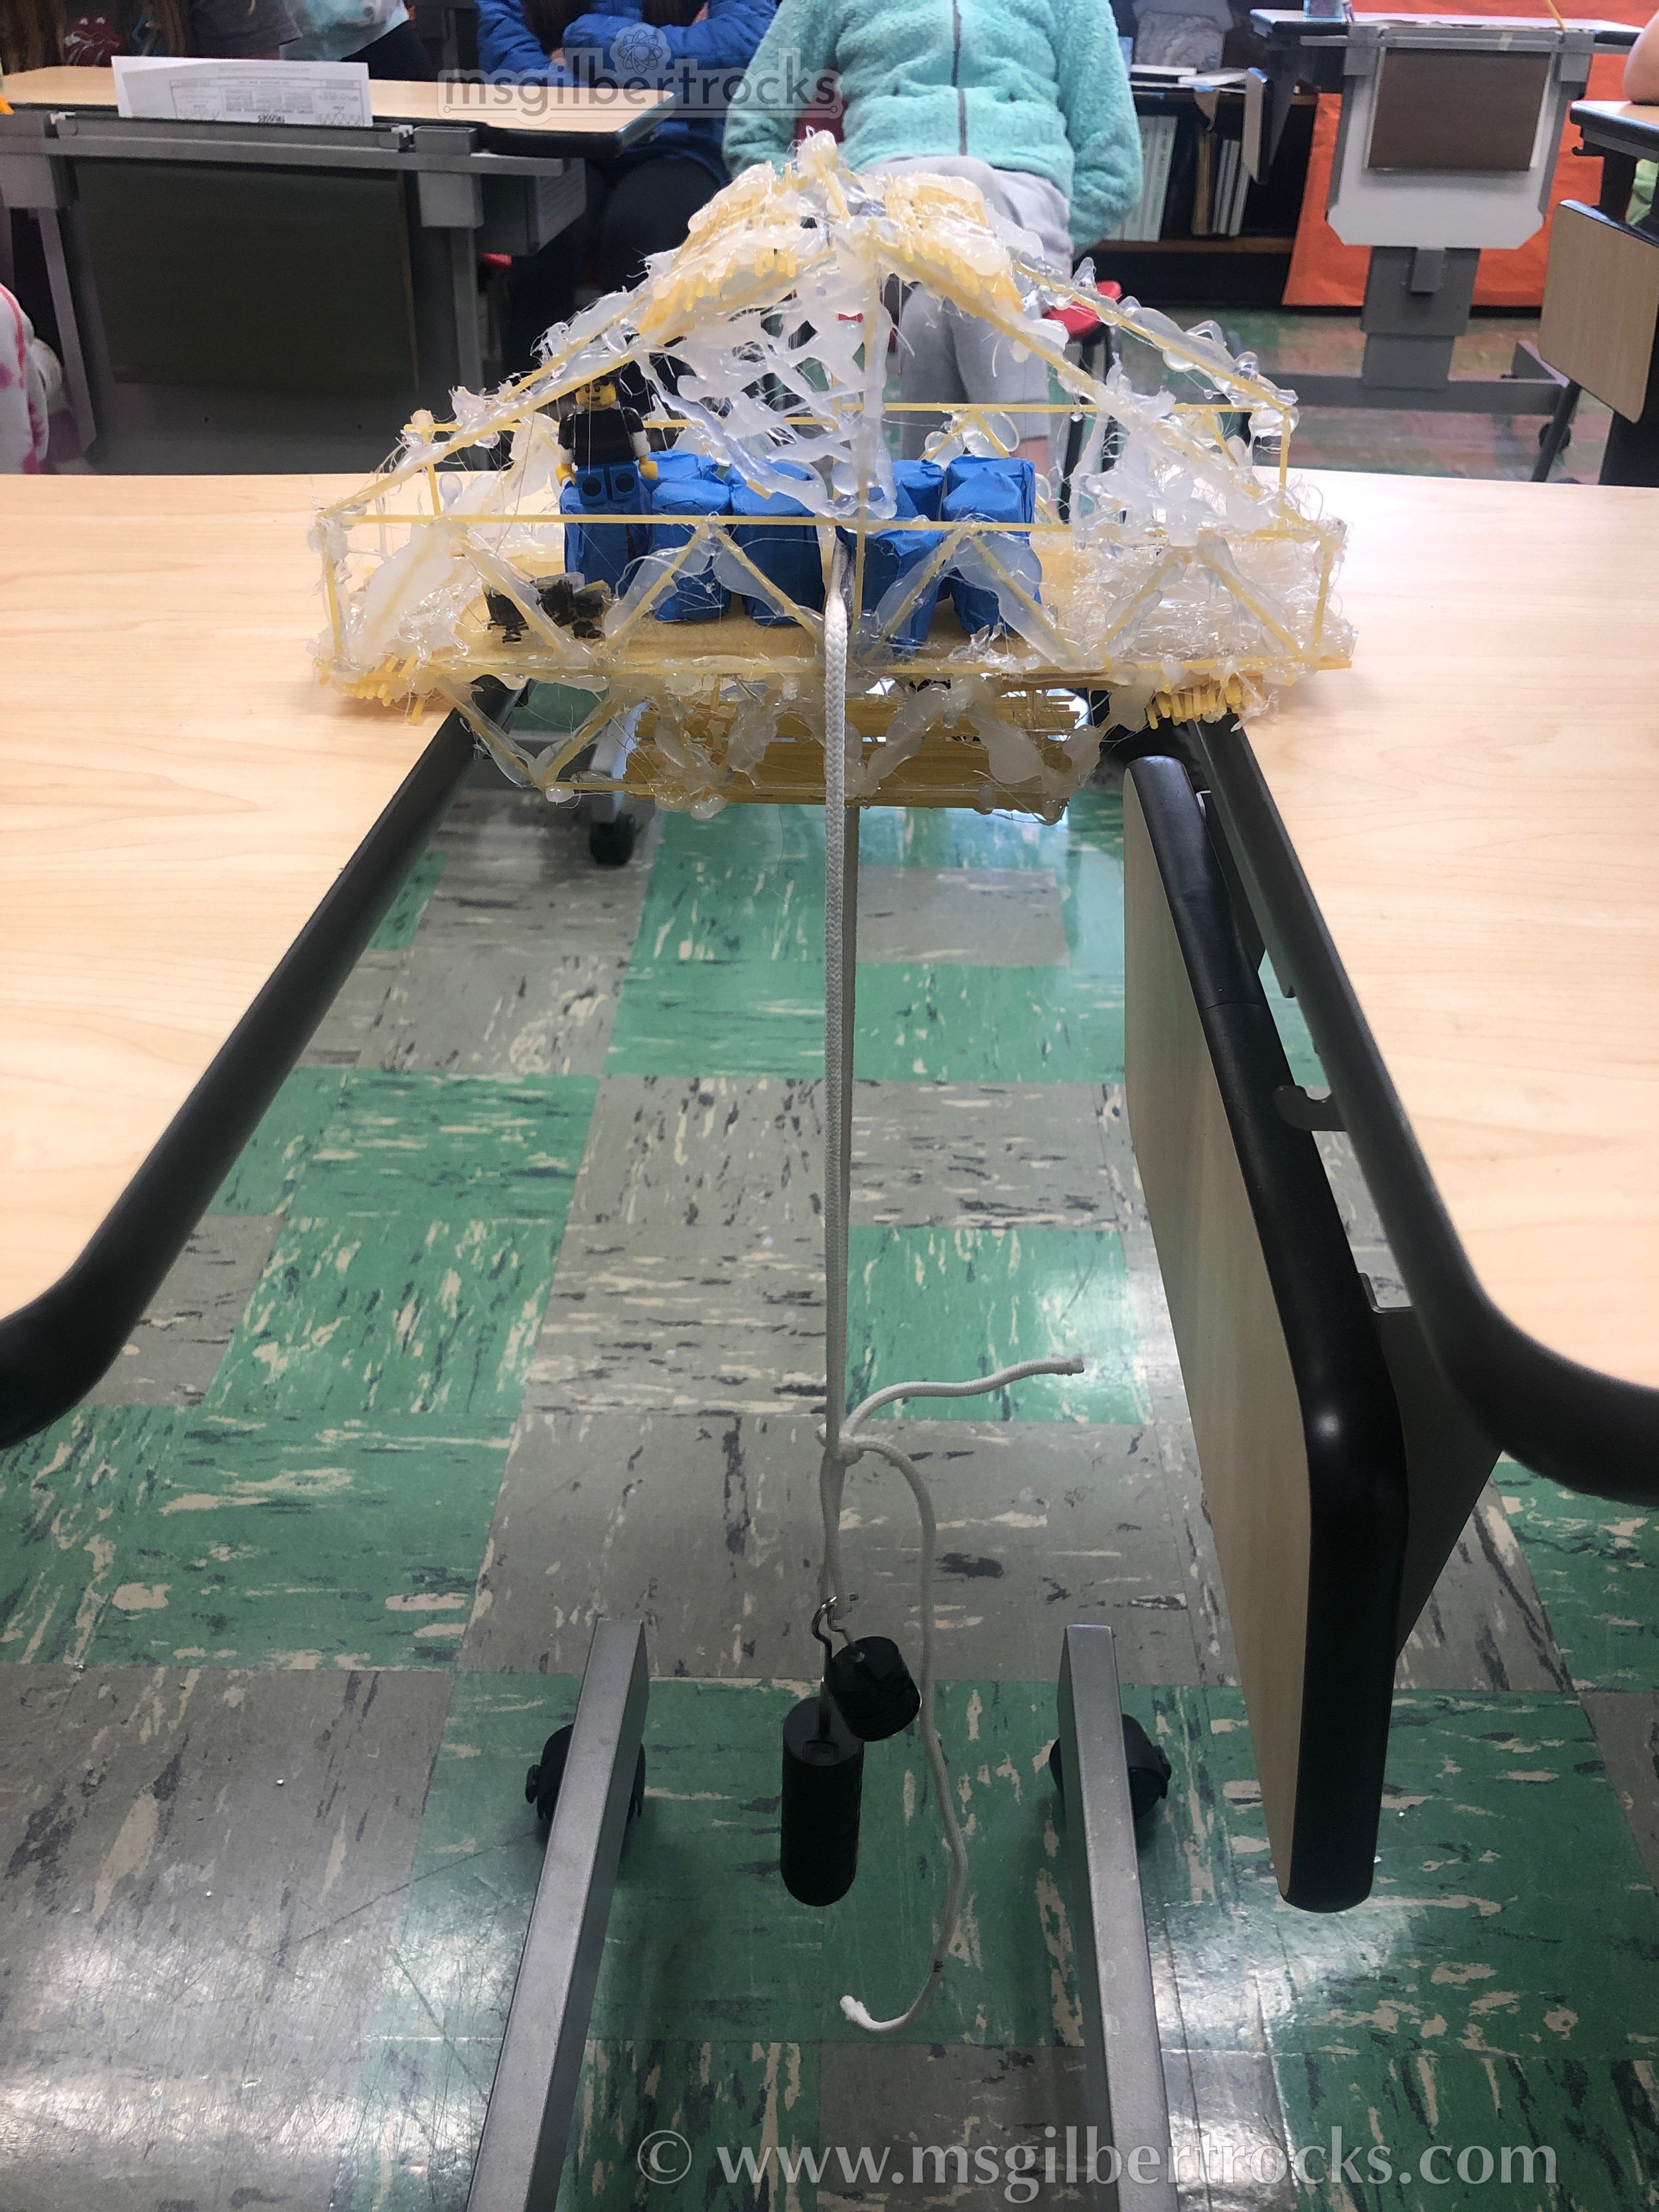
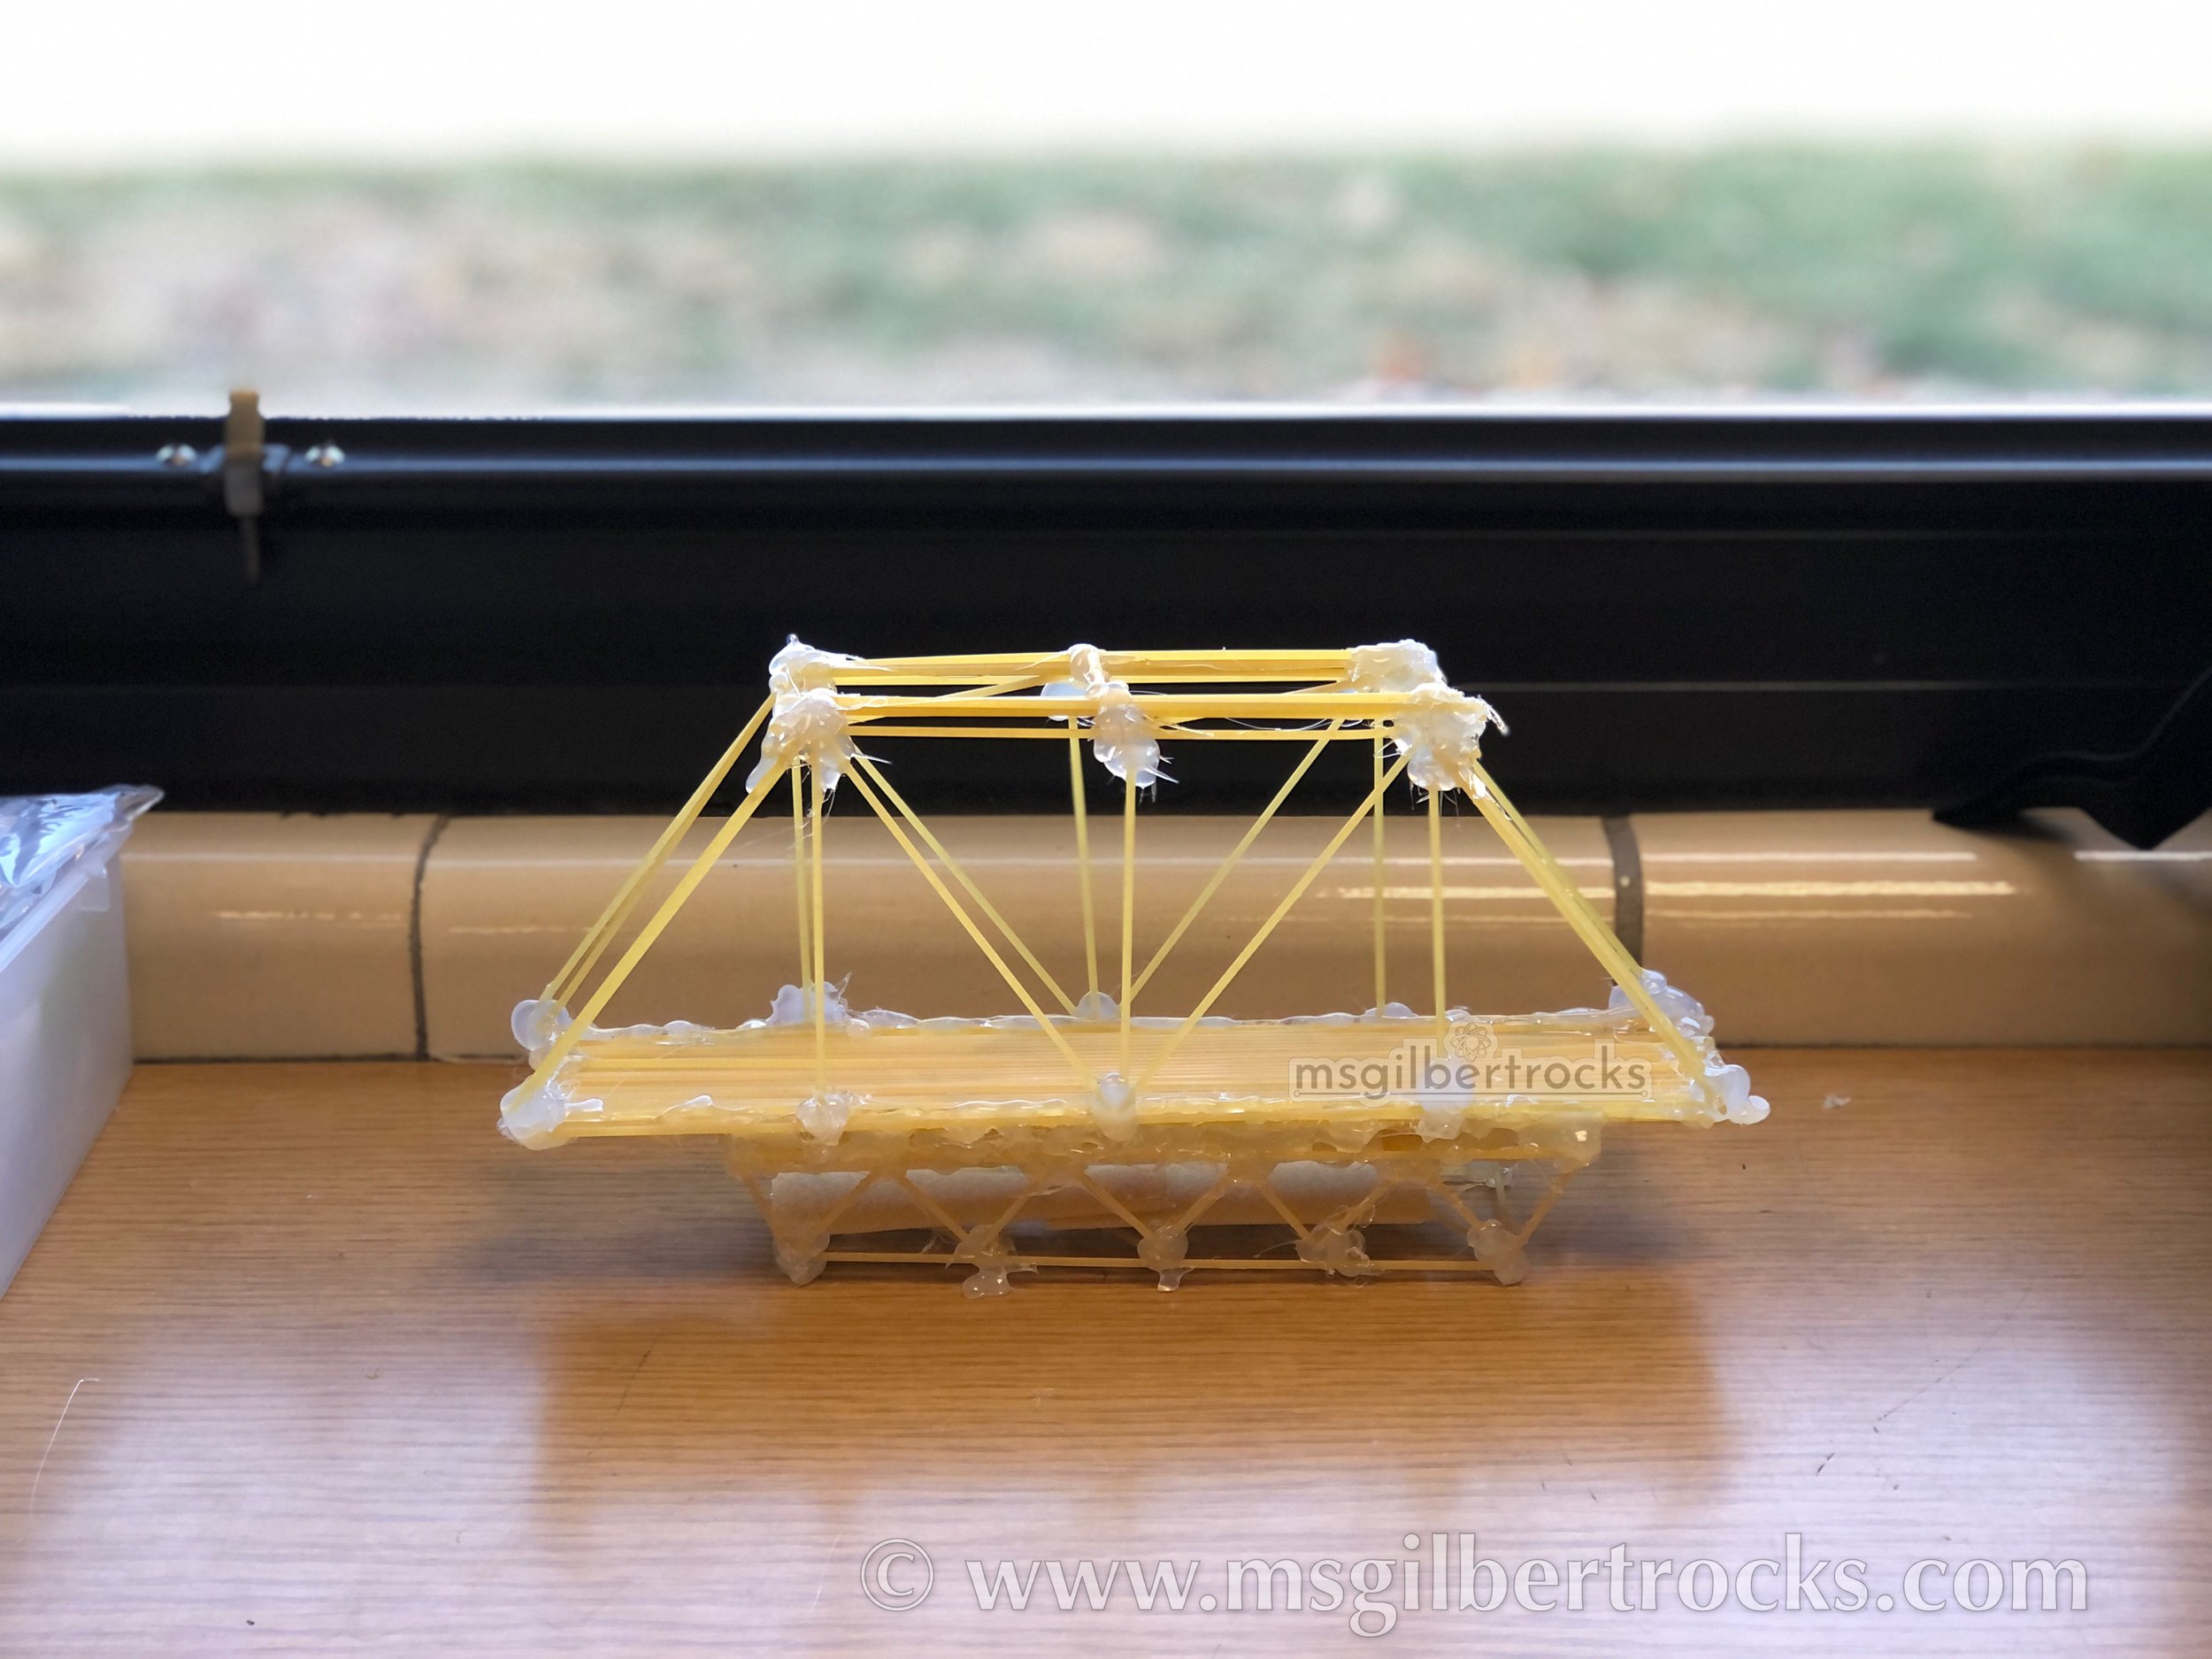
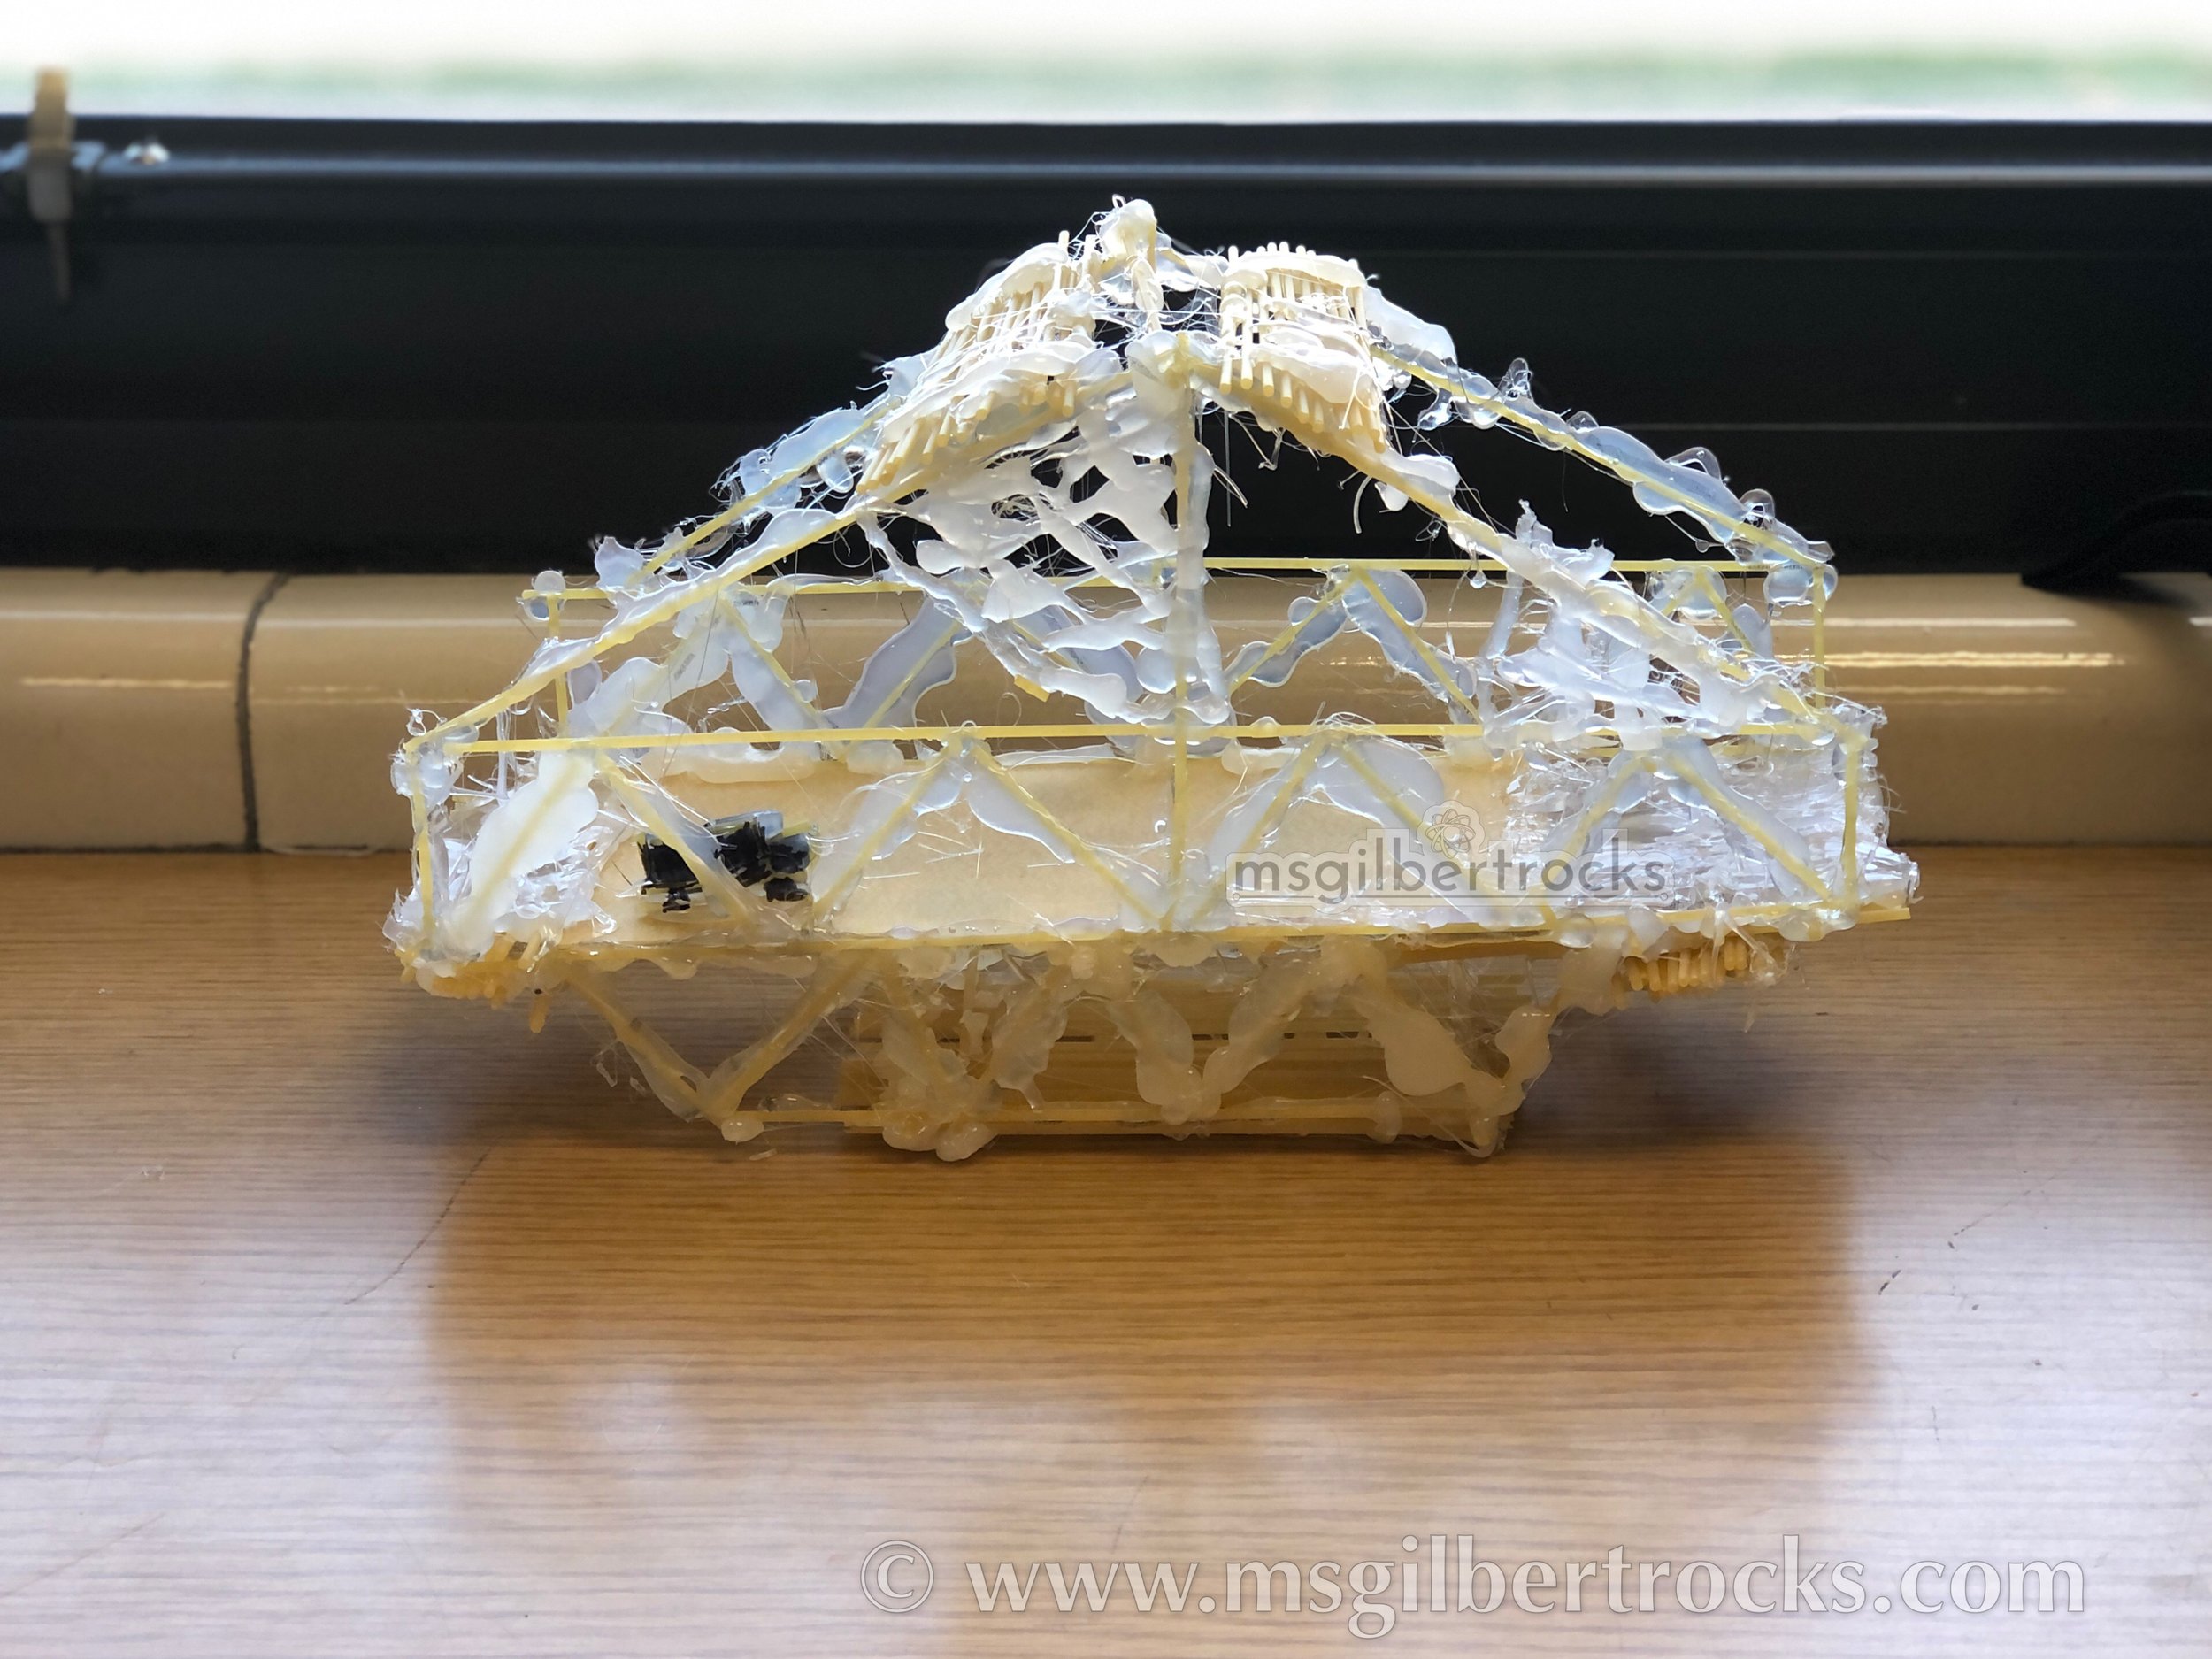
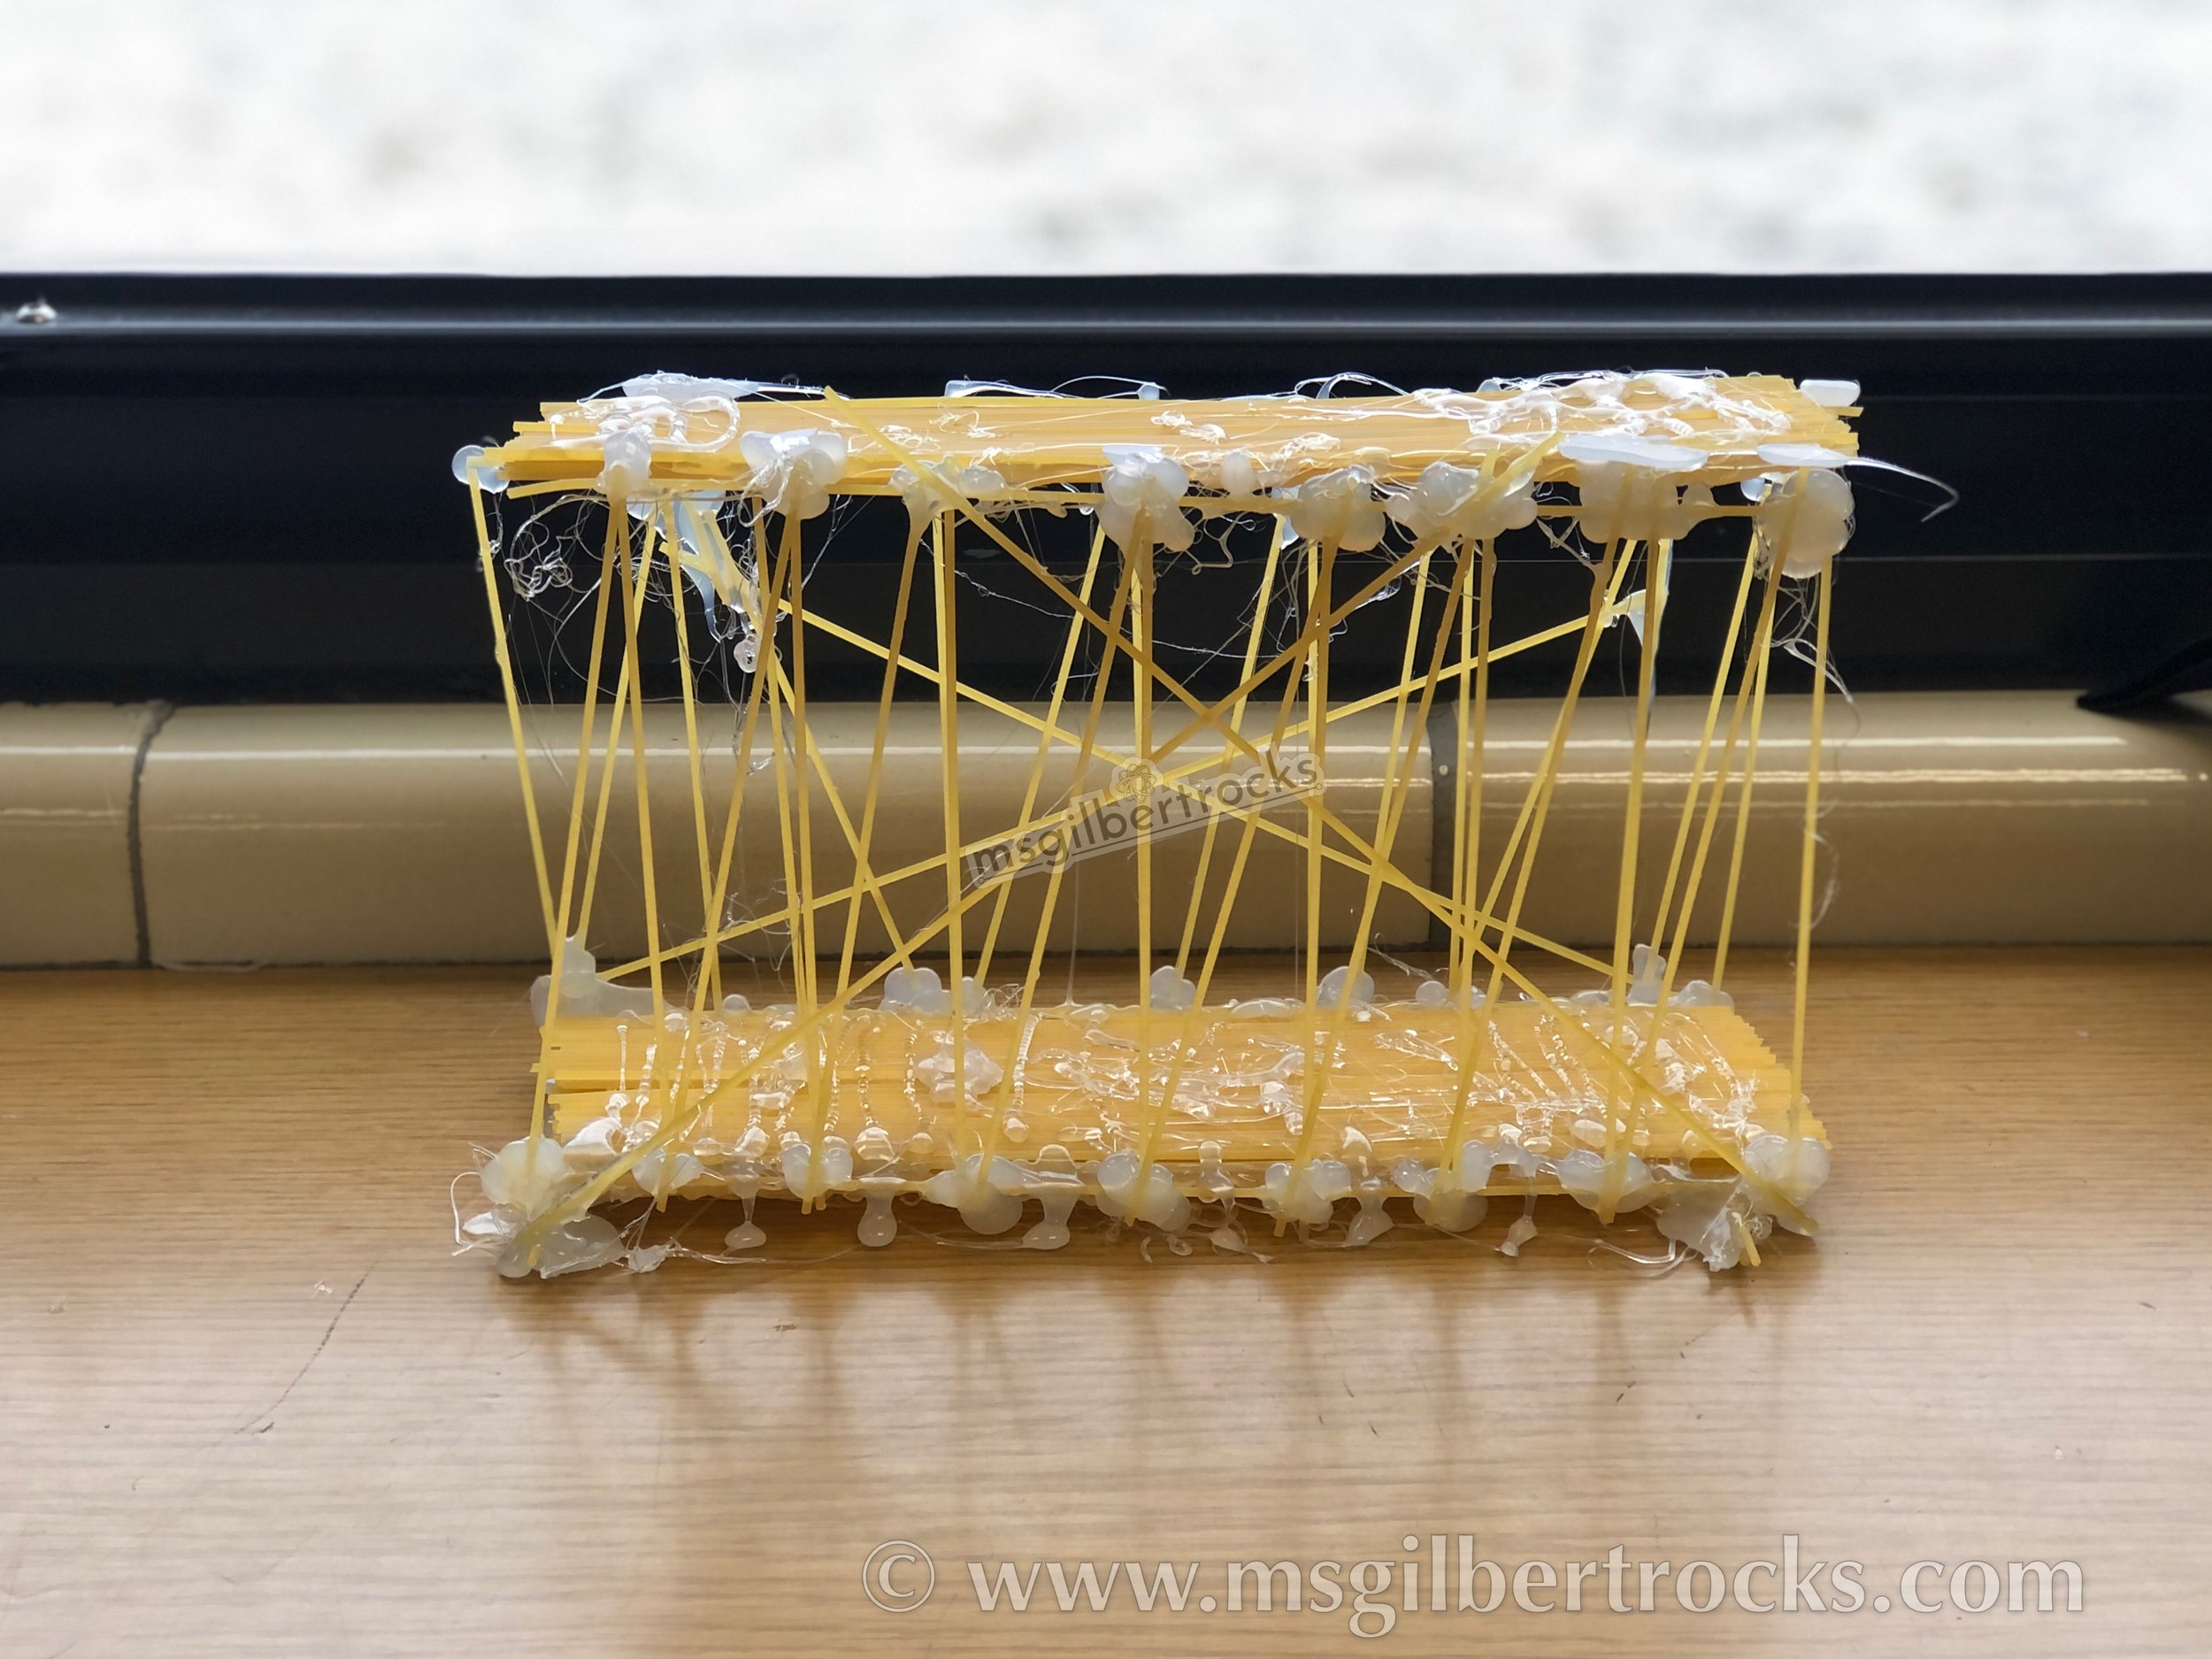
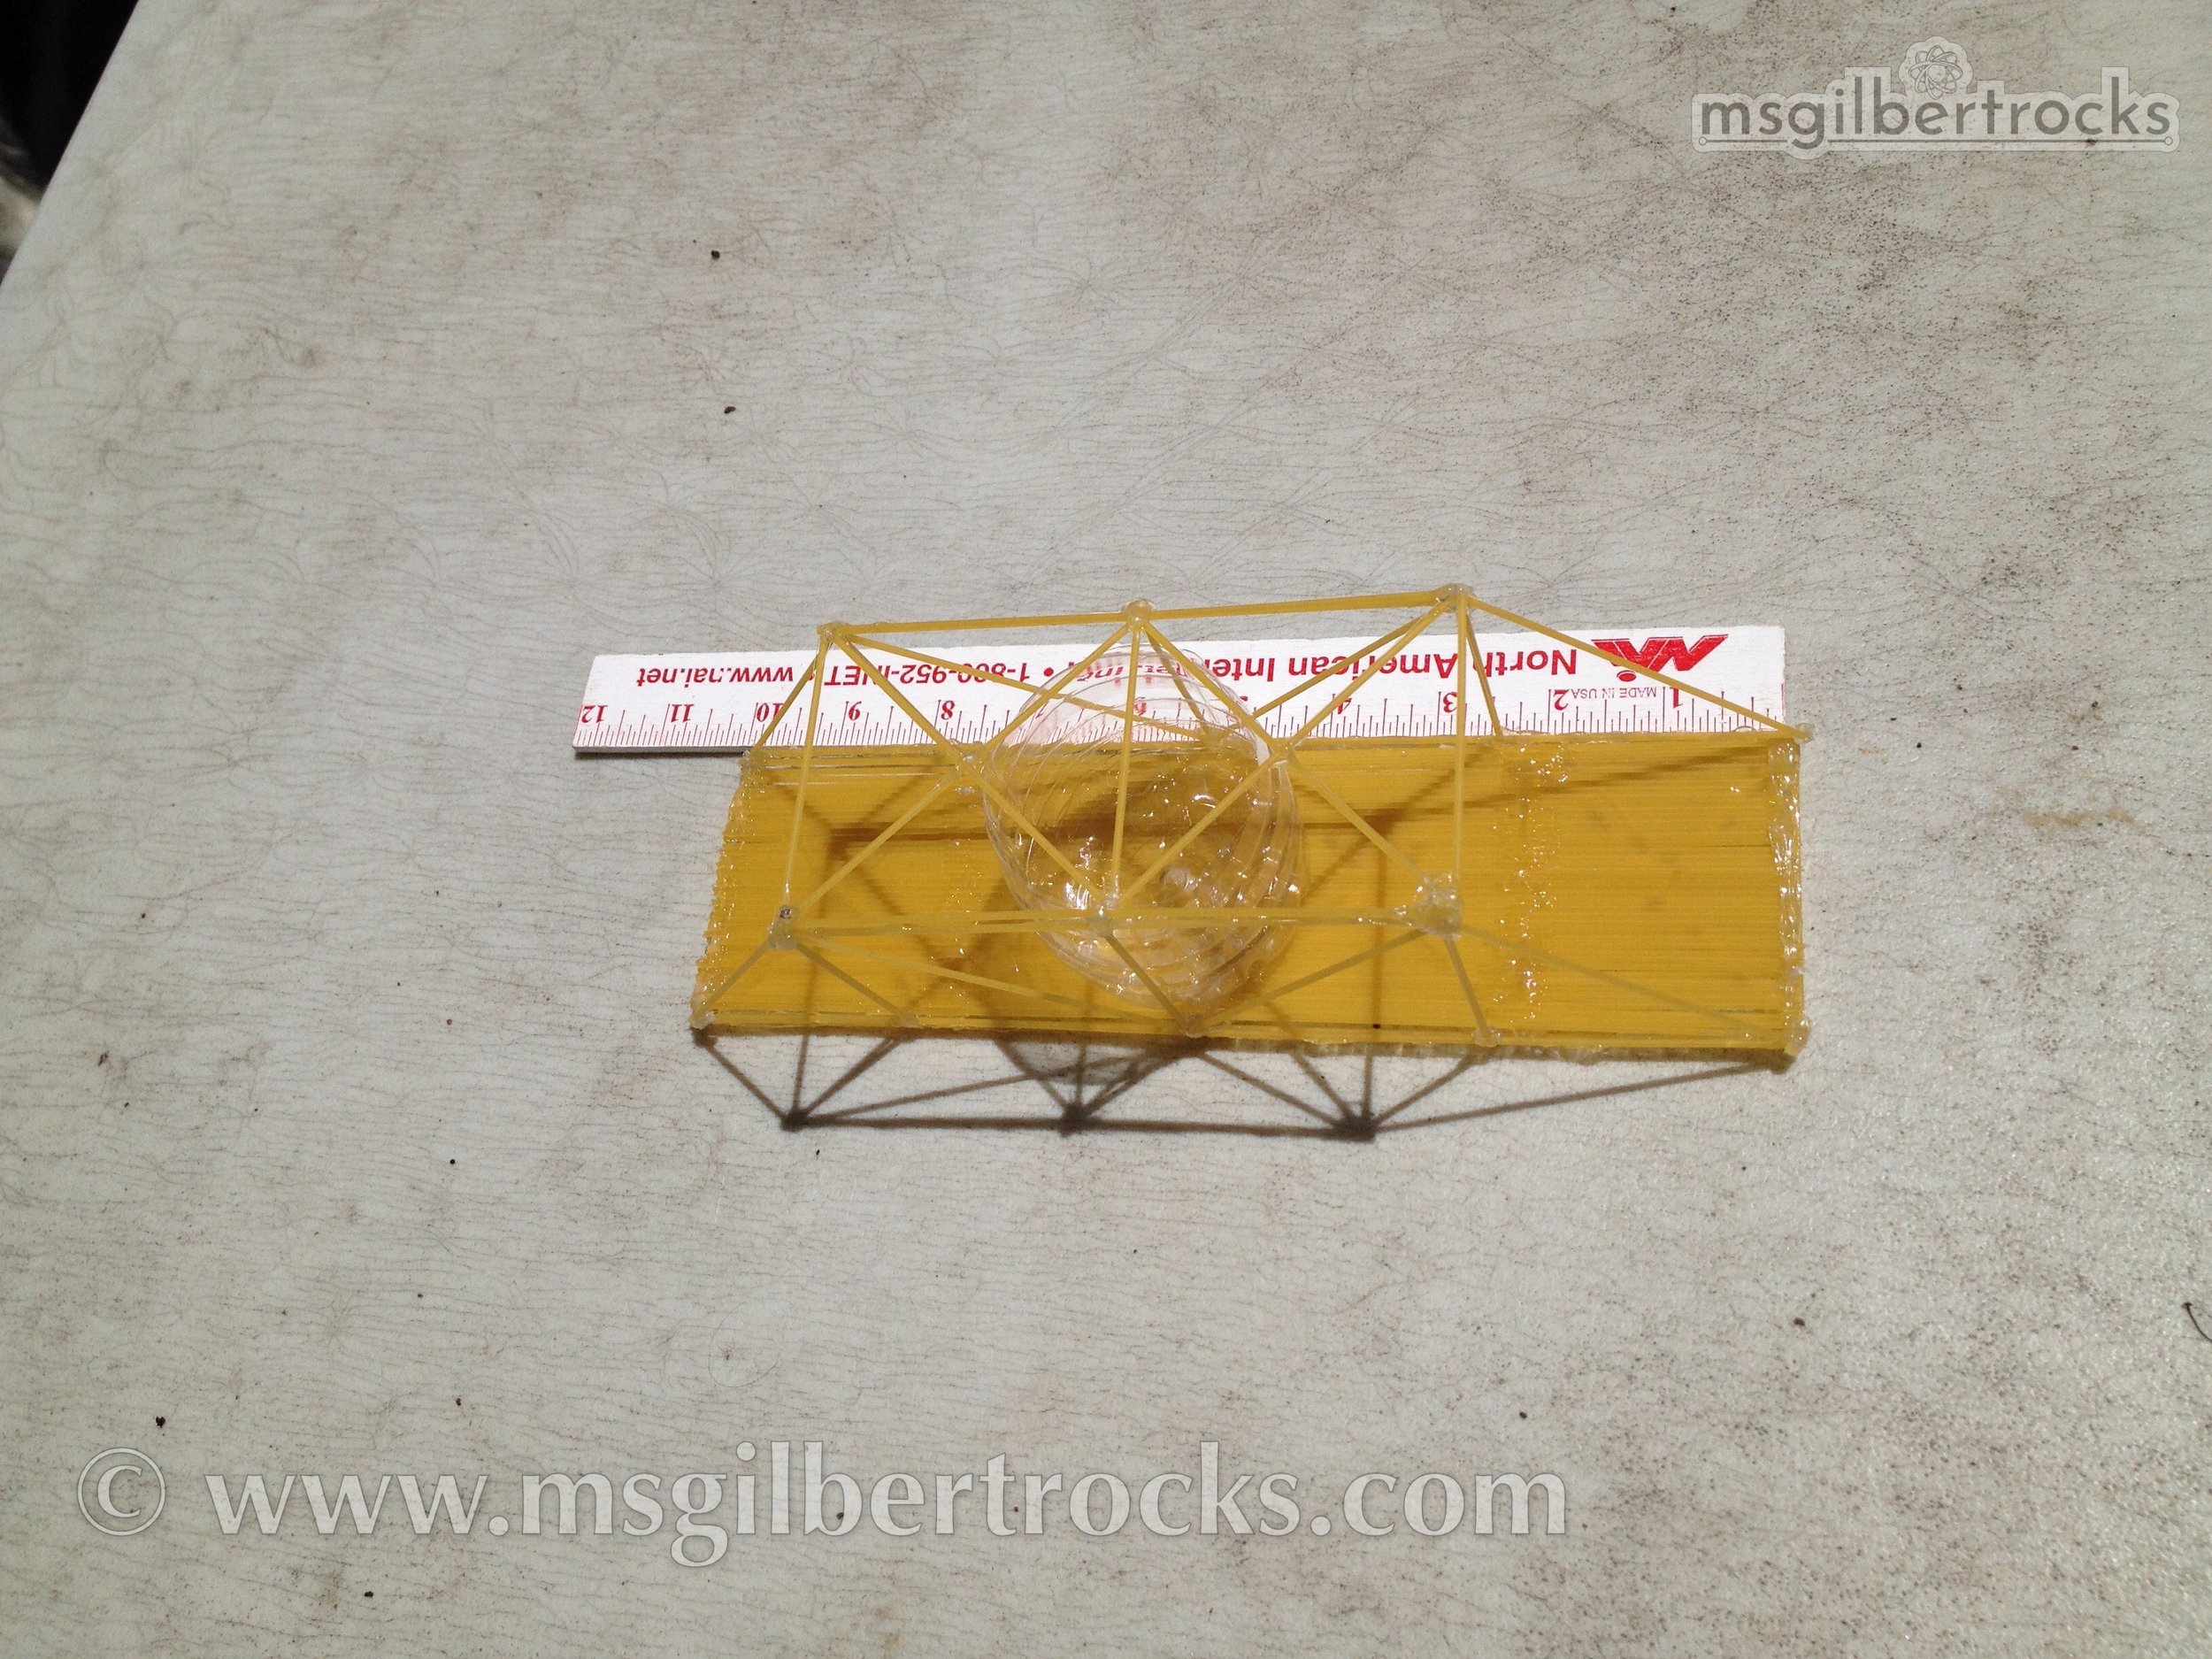
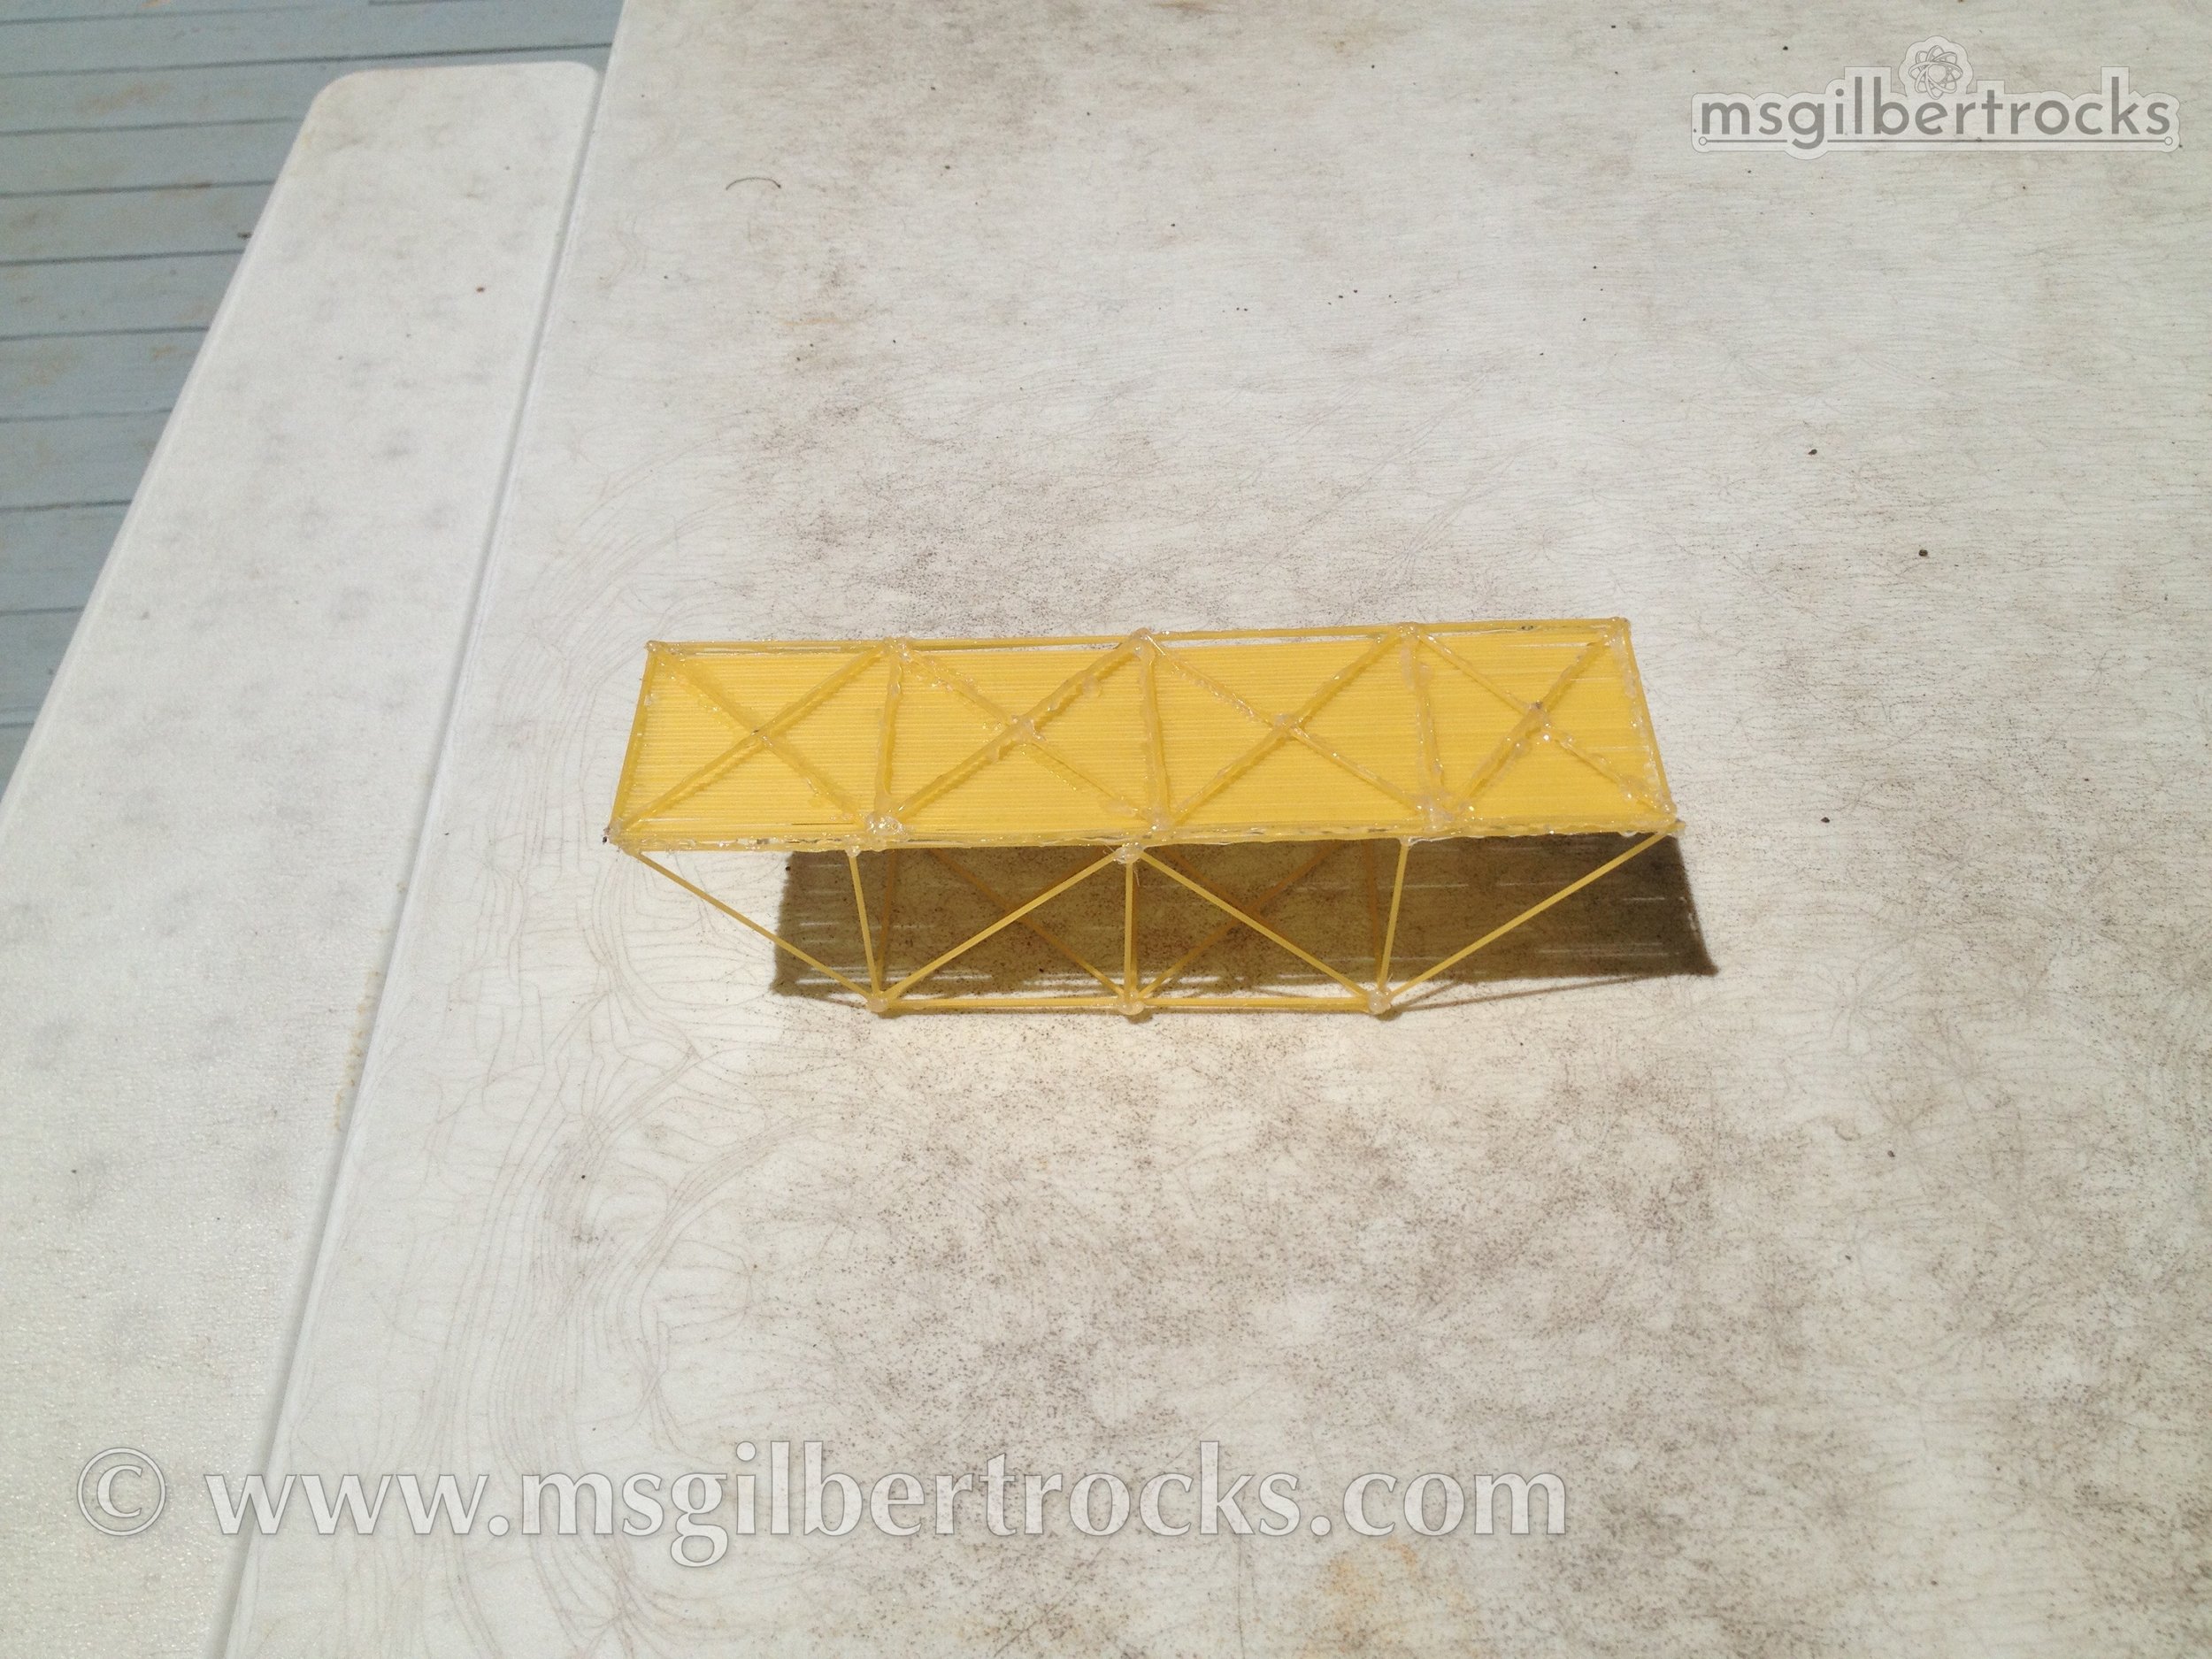
Final products (completed bridges, before testing)